State management is an integral part of React Native development.

A state is a JavaScript object used to handle mutable React Native data in a component.
In a React Native component, a state may be mutated across time, mostly as a result of user events.
A simple local state in React Native can be managed with the setState method or the useState hook.
However, as our app grows bigger, you may need a state management library because it becomes increasingly difficult to manage state shared across components.
So, state management is one of the common issues you can encounter when developing a React application. And it can be a difficult aspect to master because there are tons of state management libraries in React.
Below are some of the popular ones:
Data flows unilaterally in React, from top to bottom — parent component to child component. The Context API provides a way to pass data through the component tree without prop drilling.
Redux is a framework-agnostic state management layer. It is very powerful and great for big applications. You can use Redux with React, React Native, Vue, etc.
Redux offers a single global state object called the store, and it uses several concepts such as actions, action creators, and reducers. In most cases, you would be using Redux with a middleware such as Redux Thunk or Redux-Saga, and this introduces more complexity because you have more things to learn. However, Redux is great for client-side state management.
You can get a comprehensive guide to using Redux and React Native here.
This article is focused on state management in React Native using React Query, a technology that describes itself as the missing data-fetching library for React.
Let’s learn more about React Query in the next section.
React Query is a light caching layer that lives in our application. As a data-fetching library, it is agnostic to how we fetch our data. The only thing React Query needs to know is the promise returned by Axios or Fetch.
The two main concepts of React Query are queries and mutations. While queries deal with fetching data, mutations handle modifying data on the server.
React Query exports a useQuery hook for handling queries. The useQuery hook takes two parameters. The first parameter is a unique identifier to describe what we are fetching. And the second identifier is the fetcher function — an async function responsible for either getting your data or throwing an error.
Consider the code below:
import { useQuery } from 'react-query';
import axios from 'axios';

const fetchPosts = async () => {
    const { data } = await axios.get('https://jsonplaceholder.typicode.com/posts');
    return data;
};

const usePosts = () => useQuery('posts', fetchPosts);
The useQuery hook returns a query object and also handles all the lifecycle around our fetching so we don’t need to use useEffect.
The query object consists of some important states mentioned by React Query’s docs:
isLoading or status === 'loading' — The query has no data and is currently fetchingisError or status === 'error' — The query encountered an errorisSuccess or status === 'success' — The query was successful and data is availableisIdle or status === 'idle' — The query is currently disabled (you’ll learn more about this in a bit)A query can only be in one of these states. And beyond these primary states, it also contains more information such as:
error — If the query is in an isError state, the error is available via the error propertydata — If the query is in a success state, the data is available via the data propertyisFetching — In any state, if the query is fetching at any time (including background refetching), isFetching will be trueWithout React Query, each of these states might have been handled using a different useState hook. So we can see that React Query helps us reduce our boilerplate. This is a gain in developer experience — DX gain.
Also, React Query helps with caching out of the box. And this has a direct impact on our end users, since it makes our app feel faster and more responsive.
In this article, we would be looking at how to manage React Native state using React Query. Let’s get started with the prerequisites in the next section.
First, we create a new React Native application using Expo CLI as seen below:
npm i --global expo-cli

// bootstrap a new project
expo init <-- your app name -->
You will be prompted with a list of templates:

Choose the first one and change into your app directory by running:
cd <-- your app name -->
Next, install dependencies:
// install dependencies
npm i @react-navigation/native @react-navigation/stack axios
react-native-gesture-handler react-native-safe-area-context react-native-screens
react-query
Start the development server:
npm start
In the next section, we will delve into React Query by building a simple application using data from JSON Placeholder.
We will start by creating a constants folder with a color.js file inside it. Add the following code to the color.js file:
export default {
    primary: '#202c41',
    border: '#c6c6c6',
    white: '#fff',
    gray: '#9ca5ab'
};
This is used to style our app.
Next, we set up our navigation. Create a navigation folder with a Main.js file inside it.
Add the following code to the Main.js file:
import React from 'react';
import { createStackNavigator } from '@react-navigation/stack';
import { Posts } from '../screens/Posts';
import { Post } from '../screens/Post';
const MainStack = createStackNavigator();
export const Main = () => (
    <MainStack.Navigator>
        <MainStack.Screen name="Home" component={Posts} />
        <MainStack.Screen name="Post" component={Post} />
    </MainStack.Navigator>
);
In the code above, we have set up navigation for two screens, namely Home and Post.
We will create the Posts and Post components in a moment.
Now we have to set up React Query. Modify our App.js file as seen below:
import React from 'react';
import { StatusBar } from 'expo-status-bar';
import { NavigationContainer } from '@react-navigation/native';
import { QueryClient, QueryClientProvider } from 'react-query';
import { Main } from './navigation/Main';

const queryClient = new QueryClient();

export default function App() {
    return (
        <React.Fragment>
            <StatusBar style="auto" />
            <NavigationContainer>
                <QueryClientProvider client={queryClient}>
                    <Main />
                </QueryClientProvider>
            </NavigationContainer>
        </React.Fragment>
    );
}
In the code above, React Query uses the QueryClient to interact with a cache. And the QueryClientProvider component is used to connect and provide the QueryClient to our app.
Following this, let’s create reusable components for our screens. Create a components folder with a Text.js file inside it. Add the following code to the Text.js:
import React from 'react';
import { StyleSheet, Text as RNText } from 'react-native';
import colors from '../constants/colors';
const styles = StyleSheet.create({
    defaultText: {
        color: colors.primary,
        fontSize: 18
    }
});
export const Text = ({ children, style = {} }) => {
    const textStyles = [ styles.defaultText ];
    textStyles.push(style);
    return <RNText style={textStyles}>{children}</RNText>;
};
Above, we have a reusable Text component with default style. We will use this across our app to style our texts.
Before we can create the screens — the Post.js and Posts.js files — we need to set up our hooks for fetching data rendered by these screens.
The Posts.js file renders all the posts gotten from JSON Placeholder, and it serves as the home screen while the Post.js file handles the details of each post.
Create two folders, namely screens and hooks. In the hooks folder, create a usePosts.js file and add the following code:
import { useQuery } from 'react-query';
import axios from 'axios';

const fetchPosts = async () => {
    const { data } = await axios.get('https://jsonplaceholder.typicode.com/posts');
    return data;
};

const usePosts = () => useQuery('posts', fetchPosts);
export default usePosts;
Also, create a usePost.js file and the following code:
import { useQuery } from 'react-query';
import axios from 'axios';

const fetchPost = async (postId) => {
    const { data } = await axios.get(`https://jsonplaceholder.typicode.com/comments?postId=${postId}`);
    return data;
};

const usePost = (postId) => useQuery([ 'posts', postId ], () => fetchPost(postId));
export default usePost;
In the code examples above, useQuery takes a unique identifier named posts as its first argument and a fetcher function as its second argument. We can now import both usePosts and usePost for use in our screens.
In the screens folder, create two files, namely Posts.js and Post.js. Add the following code to the Posts.js file:
import React from 'react';
import { View, StyleSheet, FlatList, TouchableOpacity } from 'react-native';
import usePosts from '../hooks/usePosts';
import { Text } from '../components/Text';
import colors from '../constants/colors';

export const Posts = ({ navigation }) => {
    const { data, isLoading, isSuccess } = usePosts();
    return (
        <View style={styles.container}>
            {isLoading && (
                <React.Fragment>
                    <Text>Loading...</Text>
                </React.Fragment>
            )}

            {isSuccess && (
                <React.Fragment>
                    <Text style={styles.header}>all posts</Text>
                    <FlatList
                        data={data}
                        style={styles.wrapper}
                        keyExtractor={(item) => `${item.id}`}
                        renderItem={({ item }) => (
                            <TouchableOpacity
                                onPress={() =>
                                  navigation.push('Post', { post: item })}
                                style={styles.post}
                            >
                                <View style={styles.item}>
                                    <Text style={styles.postTitle}>
                                      {item.title}
                                    </Text>
                                </View>
                            </TouchableOpacity>
                        )}
                    />
                </React.Fragment>
            )}
        </View>
    );
};

const styles = StyleSheet.create({
    container: {
        flex: 1,
        backgroundColor: colors.white,
        padding: 10
    },
    wrapper: {
        flex: 1,
        paddingVertical: 30
    },
    item: {
        paddingVertical: 10,
        paddingHorizontal: 20
    },
    header: {
        textAlign: 'center',
        textTransform: 'capitalize',
        fontWeight: 'bold',
        fontSize: 30,
        color: colors.primary,
        paddingVertical: 10
    },
    post: {
        backgroundColor: colors.primary,
        padding: 15,
        borderRadius: 10,
        marginBottom: 20
    },
    postTitle: { color: colors.white, textTransform: 'capitalize' }
});
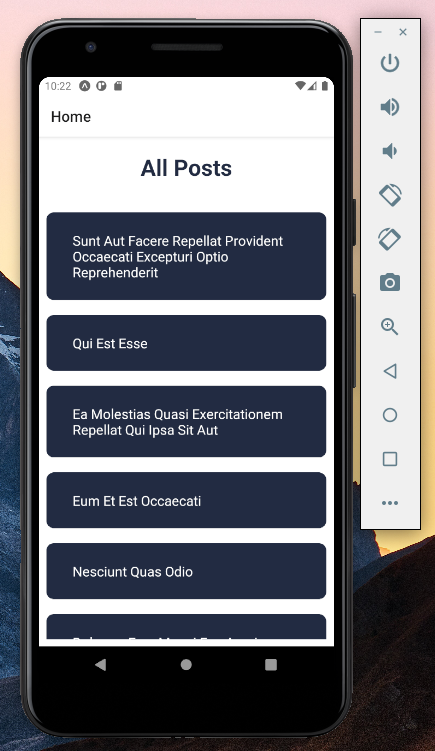
In the above code, we render a loading… text if isLoading is true. And we rendered our post list using FlatList if isSuccess is true.
Now we have:
Next, in the Post.js file, add the following code:
import React from 'react';
import { View, StyleSheet, ScrollView } from 'react-native';
import usePost from '../hooks/usePost';
import { Text } from '../components/Text';
import colors from '../constants/colors';

export const Post = ({ route }) => {
    const { post } = route && route.params;
    const { data: comments, isSuccess, isLoading } = usePost(post.id);
    return (
        <ScrollView style={styles.container}>
            <Text style={styles.header}>{post.title}</Text>
            <View style={styles.post}>
                <Text>{post.body}</Text>
            </View>
            {isLoading && <Text style={{ textAlign: 'center' }}>Loading...</Text>}

            {isSuccess && (
                <React.Fragment>
                    <Text style={styles.commentHeader}>Comments</Text>
                    {comments.map((comment) => (
                        <View key={comment.id} style={styles.post}>
                            <Text>{comment.body}</Text>
                            <Text>{comment.email}</Text>
                        </View>
                    ))}
                </React.Fragment>
            )}
        </ScrollView>
    );
};
const styles = StyleSheet.create({
    container: {
        flex: 1,
        backgroundColor: colors.white,
        padding: 30
    },
    header: {
        textAlign: 'center',
        textTransform: 'capitalize',
        fontWeight: 'bold',
        fontSize: 40,
        color: colors.primary,
        paddingVertical: 10
    },
    commentHeader: {
        textAlign: 'center',
        textTransform: 'capitalize',
        fontWeight: 'bold',
        fontSize: 30,
        color: colors.primary,
        paddingVertical: 30
    },
    post: {
        flex: 1,
        paddingVertical: 10,
        alignItems: 'center'
    }
});
In the code above, we received the post clicked on by the user as a route param and fetched its comment using its ID. Below is an example of a post screen:
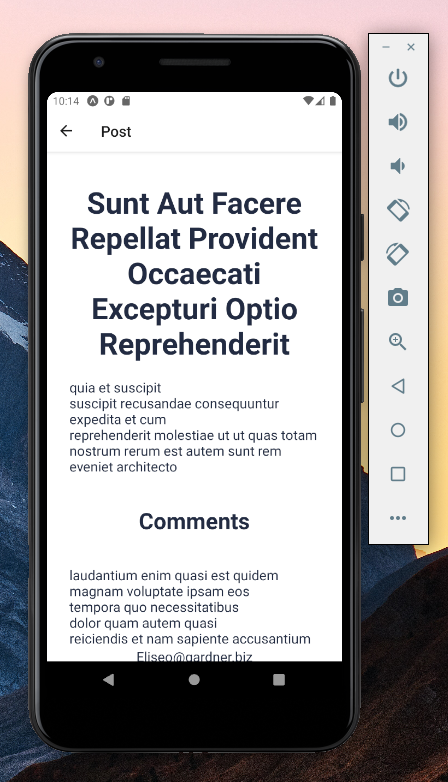
Also, on first load time, you would see the loading for the post and the comment, but after this when you navigate back and forth, you won’t see them again. This is because React Query caches our data under the hood, making subsequent load time “instant.”
React Query is a well-thought-out data-fetching library that comes with a lot of interesting features. As we have seen, it offers a gain in DX and UX and also boosts our app performance.
I do hope that after going through this article you have learned enough to give it a try in your next project.
Lastly, you can get the full app on GitHub.

LogRocket's Galileo AI watches sessions for you and and surfaces the technical and usability issues holding back your React Native apps.
LogRocket also helps you increase conversion rates and product usage by showing you exactly how users are interacting with your app. LogRocket's product analytics features surface the reasons why users don't complete a particular flow or don't adopt a new feature.
Start proactively monitoring your React Native apps — try LogRocket for free.
Would you be interested in joining LogRocket's developer community?
Join LogRocket’s Content Advisory Board. You’ll help inform the type of content we create and get access to exclusive meetups, social accreditation, and swag.
Sign up now
A breakdown of the wrapper and container CSS classes, how they’re used in real-world code, and when it makes sense to use one over the other.

This guide walks you through creating a web UI for an AI agent that browses, clicks, and extracts info from websites powered by Stagehand and Gemini.

This guide explores how to use Anthropic’s Claude 4 models, including Opus 4 and Sonnet 4, to build AI-powered applications.

Which AI frontend dev tool reigns supreme in July 2025? Check out our power rankings and use our interactive comparison tool to find out.


