React Native applications are built using components that manage state internally. React Native’s inbuilt state management works well for applications that have few components and no scope to scale in the future. However, for applications with a large number of components or for those with potential to increase scope in the future, sharing state among components becomes complex.

State management libraries like Redux exist to solve this issue. Redux provides a central location for all the states of an application where each component can access the values stored in the state. The “central place” is called a store in Redux terminology.
In this tutorial, we’ll look at how to manage state using Redux inside a React Native app. This article covers:
To understand these concepts, let’s create an example app where a list of movie items is fetched from The Movie Database (TMDB API). The source code for this project is available at this GitHub repository. An app user can favorite any movie item from the list and store it in the application’s state to view it from a separate screen.


Before you begin, please make sure to have the following installed on a local environment:
14.x.x installedreact-native-cli installed (or use npx)Once you have logged in to your TMDB account, get the API key by going to Settings > API section and looking for the key under the section API Key (v3 auth).

To demonstrate, I’ll be using an iOS simulator. If you prefer to use an Android device or an emulator, the code snippets shared in this post will run the same.
To get started creating a new React Native project, use React Native CLI and navigate inside the project directory. We’ll install some dependencies, including react-native-vector-icons and react-navigation/bottom-tabs to implement a bottom tab navigator, then we’ll create a Redux store.
To install the React Navigation library, see these instructions from the official documentation. These dependencies may change with time.
To set up react-native-vector-icons, follow these instructions.
Once you have these installed, open up a terminal window and run the following commands:
npx react-native init reduxExample
cd reduxExample
yarn add @react-navigation/native @react-navigation/bottom-tabs react-native-gesture-handler react-native-reanimated react-native-screens react-native-safe-area-context @react-native-community/masked-view react-native-vector-icons axios [email protected] [email protected] [email protected]
If you’re developing for iOS, you need to install the pods to complete the linking of these external libraries using CocoaPods:
npx pod-install ios
After the installation process, we’ll create a tab navigator that will be displayed at the bottom of the screen. The first tab will display a list of movies using data collected from the TMDB API endpoint. The second will display a list of movies that the app user has saved as favorites.
We’ll start by creating two mock screens. Create a new directory called screens/ and inside it create two new files:
Favorites.jsMovies.jsAdd the corresponding code snippet to each file:
// screens/Favorites.js
import React from 'react';
import {View, Text, StyleSheet} from 'react-native';
const Favorites = () => {
  return (
    <View style={styles.container}>
      <Text>Favorites</Text>
    </View>
  );
};
const styles = StyleSheet.create({
  container: {
    flex: 1,
    justifyContent: 'center',
    alignItems: 'center',
  },
});
export default Favorites;

// screens/Movies.js
import React from 'react';
import {View, Text, StyleSheet} from 'react-native';
const Movies = () => {
  return (
    <View style={styles.container}>
      <Text>Movies</Text>
    </View>
  );
};
const styles = StyleSheet.create({
  container: {
    flex: 1,
    justifyContent: 'center',
    alignItems: 'center',
  },
});
export default Movies;
Then create a directory called navigation and create a new file called RootNavigator.js inside it. Add the following code snippet to create a bottom tab:
import React from 'react';
import {NavigationContainer} from '@react-navigation/native';
import {createBottomTabNavigator} from '@react-navigation/bottom-tabs';
import MaterialIcons from 'react-native-vector-icons/MaterialIcons';
// import screens
import Movies from '../screens/Movies';
import Favorites from '../screens/Favorites';
const Tab = createBottomTabNavigator();
const tabBarOptions = {
  showLabel: false,
  activeTintColor: '#9381ff',
  style: {
    height: '10%',
  },
};
const RootNavigator = () => {
  return (
    <NavigationContainer>
      <Tab.Navigator tabBarOptions={tabBarOptions}>
        <Tab.Screen
          name="Movies"
          component={Movies}
          options={{
            tabBarIcon: ({color, size}) => (
              <MaterialIcons name="movie-filter" color={color} size={size} />
            ),
          }}
        />
        <Tab.Screen
          name="Favorites"
          component={Favorites}
          options={{
            tabBarIcon: ({color, size}) => (
              <MaterialIcons name="favorite" color={color} size={size} />
            ),
          }}
        />
      </Tab.Navigator>
    </NavigationContainer>
  );
};
export default RootNavigator;
Modify the App.js file to render the RootNavigator:
import React from 'react';
import RootNavigator from './navigation/RootNavigator';
const App = () => {
  return <RootNavigator />;
};
export default App;
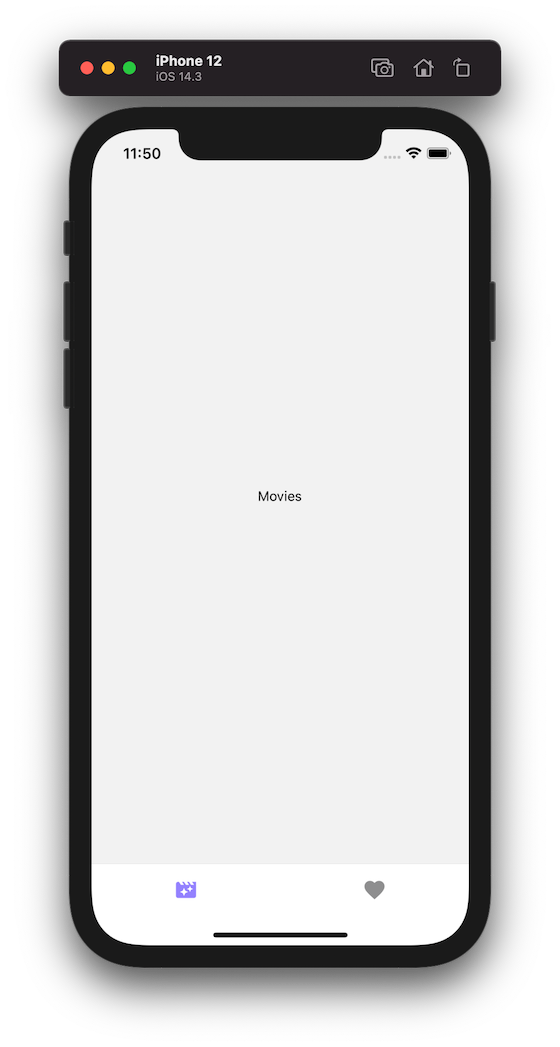
After this setup is complete, we’ll build the application and run it on an iOS simulator. To build the app for iOS, execute the command npx react-native run-ios. To run it on an Android emulator, execute npx react-native run-android.
Here is how the output on an iOS simulator is shown:
An action in Redux is a payload of information that is dispatched from the application to the store that triggers an event. When something happens that is directly related to the app’s state, it can be described as changing the state of the application.
The state in Redux is represented by a JavaScript object that can be thought of as a read-only object. It can only be changed using an action.
The first task in building the example app is to fetch the data from the API. We then add this data to the application’s state, which can then be used in a component screen to display a list of movie items.
An action is constructed of an object with two properties:
GET_MOVIESBegin by creating a new directory called redux and create a new file called actions.js inside it. Add the following action type:
export const GET_MOVIES = 'GET_MOVIES';
An action type is defined using a const variable in the above code snippet to keep things maintainable. In a real-world scenario, there can be various actions to trigger different events in a Redux application.
The action type GET_MOVIES is a kind of action that is responsible for making an HTTP request to fetch the data from an API endpoint. This is done by defining an action creator. In Redux, this is a term for a function that returns an action object.
An HTTP request is constructed of a BASE_URL and the API_KEY. For the example app, let’s fetch the list of popular movies. Add the following code to construct a BASE_URL and add the key from your account in place of API_KEY.
const API_URL = 'https://api.themoviedb.org/3/movie/popular';
const API_KEY = '<your-api-key>';
const PARAMS = 'page=1';
const BASE_URL = `${API_URL}?api_key=${API_KEY}&${PARAMS}`;
To fetch the data from the API, let’s use Axios. It has an API of methods like get and put to make the HTTP requests. Import the Axios at the top of the file and then define an action creator called getMovies.
export const getMovies = () => {
  try {
    return async dispatch => {
      const res = await axios.get(`${BASE_URL}`);
      if (res.data) {
        dispatch({
          type: GET_MOVIES,
          payload: res.data,
        });
      } else {
        console.log('Unable to fetch');
      }
    };
  } catch (error) {
    // Add custom logic to handle errors
  }
};
Actions on their own cannot update the state of the application. When a state changes, it is handled by a pure function called a reducer that calculates the updated state of the app based on the initial or the current state. Since reducers are pure functions, they always produce the same output if the state remains unchanged.
The reducer takes two arguments: the current state and an action. The general syntax of the reducer function can be described as:
function Reducer(currentState, action) {
  return newState;
}
Create a new file called reducers.js. Import the action GET_MOVIES from the actions.js file. Now, define an initial state object with two empty arrays. The first array represents the movie items fetched from the API endpoint, and the second array stores items that the app user favorited.
Next, define a moviesReducer function with arguments initialState and action. It uses a switch statement to switch between different action types. Each action type is defined by its own case. Currently, there is only one action type, and that is to fetch a list of movies. If the state remains unchanged, the default case returns the current state.
import {GET_MOVIES} from './actions';
const initialState = {
  movies: [],
  favorites: [],
};
function moviesReducer(state = initialState, action) {
  switch (action.type) {
    case GET_MOVIES:
      return {...state, movies: action.payload};
    default:
      return state;
  }
}
export default moviesReducer;
A store is an object that holds the application’s state at the global level instead of in individual components. It is defined by a function called createStore that takes the rootReducer as the first argument.
A rootReducer is an object of all reducers. An app whose state is managed by Redux may have more than one reducer. The Redux library offers a special function called combineReducers to combine all the reducers inside one object.
When creating a store, it is important to configure the redux-thunk library, which gives access to a middleware called thunk. It allows a Redux store to make asynchronous AJAX requests like fetching data from an API endpoint. By default, the nature of any action dispatched using Redux is synchronous.
A middleware function is passed as the second argument to createStore. To use a middleware, Redux provides a function called applyMiddleware. Each middleware function is passed as an argument to this function.
Create a new file called store.js and copy the following code snippet:
import {createStore, combineReducers, applyMiddleware} from 'redux';
import thunk from 'redux-thunk';
import moviesReducer from './reducers';
const rootReducer = combineReducers({
  moviesReducer,
});
export const store = createStore(rootReducer, applyMiddleware(thunk));
To use this store to manage the React Native app’s state, import it inside the App.js file. Also import the Provider component from the react-redux library. It wraps the root component of the React Native app and passes down the store to the rest of the app.
import React from 'react';
import {Provider} from 'react-redux';
import {store} from './redux/store';
import RootNavigator from './navigation/RootNavigator';
const App = () => {
  return (
    <Provider store={store}>
      <RootNavigator />
    </Provider>
  );
};
export default App;
Now, any React Native component that is a part of the RootNavigator can access the application’s state.
To display a list of movies fetched from the API endpoint, let’s display it inside the screen component Movies.js.
Start by importing the following statements:
import React, {useEffect} from 'react';
import {View, Text, FlatList, Image, TouchableOpacity} from 'react-native';
import {useSelector, useDispatch} from 'react-redux';
import MaterialIcons from 'react-native-vector-icons/MaterialIcons';
import {getMovies} from '../redux/actions';
In the above code snippet, we use the useSelector hook from Redux to access the movies array from the global state of the app.
This is similar to the older syntax of the mapStateToProps argument, passed inside the connect() HOC. The new syntax allows you to extract data from the Redux state by using a selector function.
Use the useDispatch hook to dispatch the action getMovies to get movie items from the Redux store. Modify the Movies component as below:
export default function BooksList() {
  const {movies} = useSelector(state => state.moviesReducer);
  const dispatch = useDispatch();
  const fetchMovies = () => dispatch(getMovies());
  useEffect(() => {
    fetchMovies();
  }, []);
  //...
}
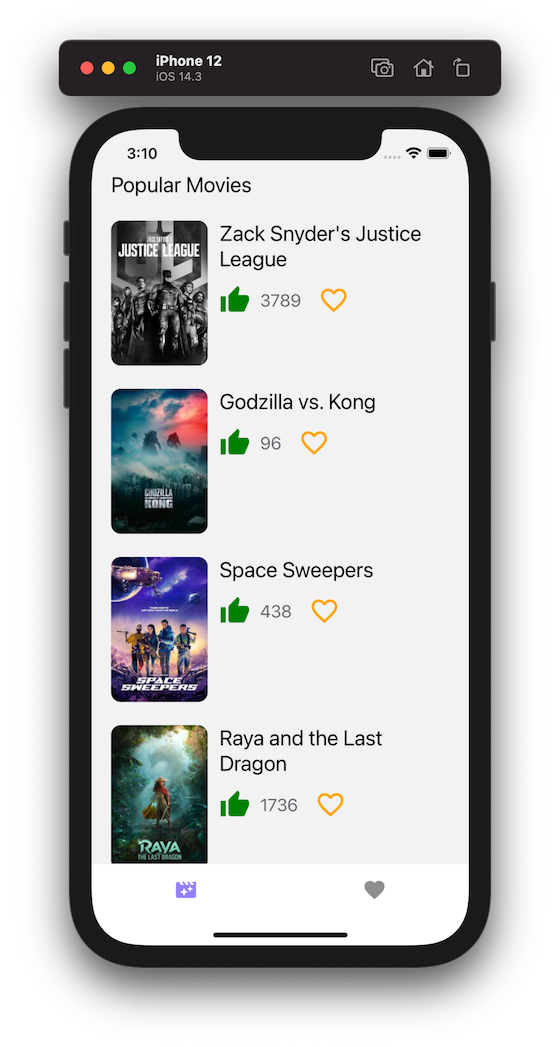
To render the movie items, we’ll use the FlatList component from React Native. It accepts the movies array as the value of the data prop, while the renderItem prop is used to display each movie item from the array.
Each movie item has a poster image that is displayed using an Image component and some meta information in the form of the movie’s title and vote count. Using the TouchableOpacity component, an “add to favorite” button is created. We will define logic to update the state of the movies reducer and display them in the “Favorites” tab later.
return (
  <View style={{flex: 1, marginTop: 44, paddingHorizontal: 20}}>
    <Text style={{fontSize: 22}}>Popular Movies</Text>
    <View style={{flex: 1, marginTop: 12}}>
      <FlatList
        data={movies}
        keyExtractor={item => item.id.toString()}
        renderItem={({item}) => {
          const IMAGE_URL =
            'https://image.tmdb.org/t/p/w185' + item.poster_path;
          return (
            <View style={{marginVertical: 12}}>
              <View style={{flexDirection: 'row', flex: 1}}>
                <Image
                  source={{
                    uri: IMAGE_URL,
                  }}
                  resizeMode="cover"
                  style={{width: 100, height: 150, borderRadius: 10}}
                />
                <View style={{flex: 1, marginLeft: 12}}>
                  <View>
                    <Text style={{fontSize: 22, paddingRight: 16}}>
                      {item.title}
                    </Text>
                  </View>
                  <View
                    style={{
                      flexDirection: 'row',
                      marginTop: 10,
                      alignItems: 'center',
                    }}>
                    <MaterialIcons color="green" name="thumb-up" size={32} />
                    <Text
                      style={{
                        fontSize: 18,
                        paddingLeft: 10,
                        color: '#64676D',
                      }}>
                      {item.vote_count}
                    </Text>
                    <TouchableOpacity
                      onPress={() => console.log('Added!')}
                      activeOpacity={0.7}
                      style={{
                        marginLeft: 14,
                        flexDirection: 'row',
                        padding: 2,
                        borderRadius: 20,
                        alignItems: 'center',
                        justifyContent: 'center',
                        height: 40,
                        width: 40,
                      }}>
                      <MaterialIcons
                        color="orange"
                        size={32}
                        name="favorite-outline"
                      />
                    </TouchableOpacity>
                  </View>
                </View>
              </View>
            </View>
          );
        }}
        showsVerticalScrollIndicator={false}
      />
    </View>
  </View>
);
Here is the output you are going to get after this step:
In the actions.js file, we’ll create two more action types and their creators. Both of these action types will allow an app user to either add or remove a movie item from the favorites list.
export const ADD_FAVORITE_ITEM = 'ADD_FAVORITE_ITEM';
export const REMOVE_FAVORITE_ITEM = 'REMOVE_FAVORITE_ITEM';
Next, define the action creators for each of the above action types.
export const addFavorite = movie => dispatch => {
  dispatch({
    type: ADD_FAVORITE_ITEM,
    payload: movie,
  });
};
export const removeFavorite = movie => dispatch => {
  dispatch({
    type: REMOVE_FAVORITE_ITEM,
    payload: movie,
  });
};
Now, update moviesReducer in the reducers.js file.
import {GET_MOVIES, ADD_FAVORITE_ITEM, REMOVE_FAVORITE_ITEM} from './actions';
const initialState = {
  movies: [],
  favorites: [],
};
function moviesReducer(state = initialState, action) {
  switch (action.type) {
    case GET_MOVIES:
      return {...state, movies: action.payload};
    case ADD_FAVORITE_ITEM:
      return {...state, favorites: [...state.favorites, action.payload]};
    case REMOVE_FAVORITE_ITEM:
      return {
        ...state,
        favorites: state.favorites.filter(
          movie => movie.id !== action.payload.id,
        ),
      };
    default:
      return state;
  }
}
export default moviesReducer;
In the Movies.js file, each movie item has a button that toggles between adding the item to favorite or removing it. Let’s import both of the action creators:
// Update the following line
import {getMovies, addFavorite, removeFavorite} from '../redux/actions';
Update the following line to access the favorites state:
const {movies, favorites} = useSelector(state => state.moviesReducer);
Dispatch the following actions to add or remove an item from the list of favorites. The favorites list here is represented by the favorites array in the state:
//  after fetch movies dispatch function, add:
const addToFavorites = movie => dispatch(addFavorite(movie));
const removeFromFavorites = movie => dispatch(removeFavorite(movie));
const handleAddFavorite = movie => {
  addToFavorites(movie);
};
const handleRemoveFavorite = movie => {
  removeFromFavorites(movie);
};
Let’s create another handler method to dynamically change the UI based on the above triggered actions. This method is going to check whether a movie item exists in the favorites array and will trigger the UI change based on the value. The UI change we want to make is to use a solid favorite button when a user adds it to the favorites list instead of an outline.
const exists = movie => {
  if (favorites.filter(item => item.id === movie.id).length > 0) {
    return true;
  }
  return false;
};
Modify the TouchableOpacity button:
<TouchableOpacity
  onPress={() =>
    exists(item) ? handleRemoveFavorite(item) : handleAddFavorite(item)
  }
  // other props remain the same
>
  <MaterialIcons
    color="orange"
    size={32}
    name={exists(item) ? 'favorite' : 'favorite-outline'}
  />
</TouchableOpacity>
Any movie item that is added to the list of favorite items will also be displayed in the Favorites tab. To implement this, open the Favorites.js file and start by importing the following statements:
import React from 'react';
import {Text, View, FlatList, TouchableOpacity, Image} from 'react-native';
import {useSelector, useDispatch} from 'react-redux';
import MaterialIcons from 'react-native-vector-icons/MaterialIcons';
import {removeFavorite} from '../redux/actions';
Since the Favorites screen is only going to show the list of items that are added, let’s fetch the favorites array from the state using the useSelector hook.
Using the useDispatch hook will trigger the action to remove an item from the list. Once an item is removed from the favorites list, it is no longer shown on this particular screen.
When there are no items to display, or, in other terms, when the favorites array from the state is empty, we can display a placeholder message.
Add the following code snippet to Favorites component:
const Favorites = () => {
  const {favorites} = useSelector(state => state.moviesReducer);
  const dispatch = useDispatch();
  const removeFromFavorites = movie => dispatch(removeFavorite(movie));
  const handleRemoveFavorite = movie => {
    removeFromFavorites(movie);
  };
  return (
    <View style={{flex: 1, marginTop: 44, paddingHorizontal: 20}}>
      <Text style={{fontSize: 22}}>Favorites</Text>
      <View style={{flex: 1, marginTop: 8}}>
        {favorites.length === 0 ? (
          <Text style={{color: '#010101', fontSize: 18}}>
            Add a movie to the list.
          </Text>
        ) : (
          <FlatList
            data={favorites}
            keyExtractor={item => item.id.toString()}
            showsVerticalScrollIndicator={false}
            renderItem={({item}) => {
              const IMAGE_URL =
                'https://image.tmdb.org/t/p/w185' + item.poster_path;
              return (
                <View style={{marginVertical: 12}}>
                  <View style={{flexDirection: 'row', flex: 1}}>
                    <Image
                      source={{
                        uri: IMAGE_URL,
                      }}
                      resizeMode="cover"
                      style={{width: 100, height: 150, borderRadius: 10}}
                    />
                    <View style={{flex: 1, marginLeft: 12}}>
                      <View>
                        <Text style={{fontSize: 22, paddingRight: 16}}>
                          {item.title}
                        </Text>
                      </View>
                      <View
                        style={{
                          flexDirection: 'row',
                          marginTop: 10,
                          alignItems: 'center',
                        }}>
                        <MaterialIcons
                          color="green"
                          name="thumb-up"
                          size={32}
                        />
                        <Text
                          style={{
                            fontSize: 18,
                            paddingLeft: 10,
                            color: '#64676D',
                          }}>
                          {item.vote_count}
                        </Text>
                        <TouchableOpacity
                          onPress={() => handleRemoveFavorite(item)}
                          activeOpacity={0.7}
                          style={{
                            marginLeft: 14,
                            flexDirection: 'row',
                            padding: 2,
                            borderRadius: 20,
                            alignItems: 'center',
                            justifyContent: 'center',
                            height: 40,
                            width: 40,
                          }}>
                          <MaterialIcons
                            color="orange"
                            size={32}
                            name="favorite"
                          />
                        </TouchableOpacity>
                      </View>
                    </View>
                  </View>
                </View>
              );
            }}
          />
        )}
      </View>
    </View>
  );
};
export default Favorites;
The UI components are the same as the Movies screen. Here is the final output after this step:
Using the store mechanism in Redux to save all of your application’s state in a global object could lead to performance issues when using many components. That said, there isn’t a universal solution in the React Native world to solve all these problems. It comes down to what state a component should keep local and what aspects of the app’s state should be shared among components. Using hooks with Redux makes it simple to understand and use state in a function component.
To learn more about advanced Redux, check out the official documentation here.

LogRocket is a React Native monitoring solution that helps you reproduce issues instantly, prioritize bugs, and understand performance in your React Native apps.
LogRocket also helps you increase conversion rates and product usage by showing you exactly how users are interacting with your app. LogRocket's product analytics features surface the reasons why users don't complete a particular flow or don't adopt a new feature.
Start proactively monitoring your React Native apps — try LogRocket for free.
Hey there, want to help make our blog better?
Join LogRocket’s Content Advisory Board. You’ll help inform the type of content we create and get access to exclusive meetups, social accreditation, and swag.
Sign up now
Get to know RxJS features, benefits, and more to help you understand what it is, how it works, and why you should use it.

Explore how to effectively break down a monolithic application into microservices using feature flags and Flagsmith.

Native dialog and popover elements have their own well-defined roles in modern-day frontend web development. Dialog elements are known to […]

LlamaIndex provides tools for ingesting, processing, and implementing complex query workflows that combine data access with LLM prompting.


3 Replies to "Comprehensive guide to using Redux in React Native"
In the FlatList you have to specify data as data={movies.results} otherwise there will not get any movies displayed.
Finally a tutorial without huge gaps! I got it to work and pretty much understand how it works, thank you so much. This is literally the 4th blog post and all the others had missing import statements, didn’t tell you which file they want this or that code in, so frustrating. BTW you did miss the import statement for axios, but i’d used it before so nbd. Thanks for writing this, it was very helpful.
im getting error => [AxiosError: Request failed with status code 401] and did not get any result in my phone