Editor’s note: This article was updated on 17 March 2022 to include the most recent changes to Firebase.
Firebase is a company that Google acquired in 2014. Since then, Google has made several enhancements to the platform to the point that it now pitches Firebase as its one-stop backend-as-a-service solution for mobile apps.
Among several Google solutions like centralized authentication, real-time databases, and cloud functions (Google’s equivalent of AWS Lambda) that are part of the Firebase umbrella, there is one that stands out as a go-to solution for managing app notifications: Firebase Cloud Messaging (FCM), formerly Google Cloud Messaging (GCM).
In today’s article, we will explore how to enable push notifications in a frontend React application.
For the purposes of this article, we will be using a skeleton React app created with Create React App.
So, let’s create a folder named firebase-notifications and, inside of it, run the following command (make sure you have npm and npx installed):
npx create-react-app fire_client
This creates a basic React app. To run the app, lets cd into the folder and run npm run start so that the app starts on localhost and we get this familiar page:
Now, let’s add the dependencies for integrating the client-side functionality of Firebase Cloud Messaging and react-bootstrap for getting a few Bootstrap-based React UI components:
npm install --save firebase react-bootstrap bootstrap
Once that’s done, let’s change the src/App.js file like so:
import logo from './logo.svg';
import './App.css';
import {useState} from 'react';
import {Button, Row, Col, Toast} from 'react-bootstrap';
import 'bootstrap/dist/css/bootstrap.min.css';

function App() {

  const [show, setShow] = useState(false);
  return (
    <div className="App">
        <Toast onClose={() => setShow(false)} show={show} delay={3000} autohide animation style={{
          position: 'absolute',
          top: 20,
          right: 20,
        }}>
          <Toast.Header>
            <img
              src="holder.js/20x20?text=%20"
              className="rounded mr-2"
              alt=""
            />
            <strong className="mr-auto">Notification</strong>
            <small>12 mins ago</small>
          </Toast.Header>
          <Toast.Body>There are some new updates that you might love!</Toast.Body>
        </Toast>
      <header className="App-header">
        <img src={logo} className="App-logo" alt="logo" />
        <Button onClick={() => setShow(true)}>Show Toast</Button>
      </header>
    </div>
We’ve imported the Bootstrap CSS into App.js with a Show Toast button, which brings up a toast notification that auto-hides after 3s. Here’s how that looks:
With this in place, we can now move to the Firebase setup.
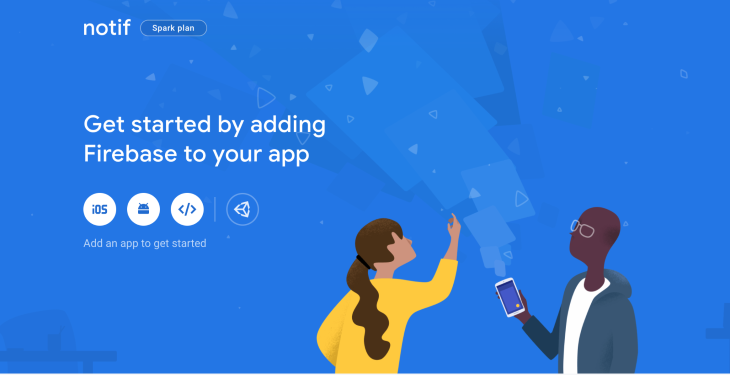
Log in or sign up in the Firebase console and click on Add Project. Follow these steps to add the project:
Once done, redirect to the project home screen, which should look something like this:
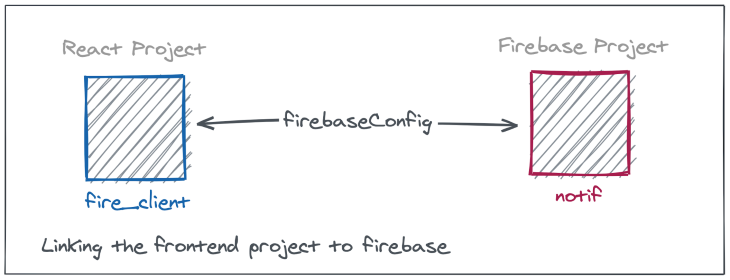
Now we need to create a link between the Firebase project and the React app that we created earlier with the Firebase project config. Out of the iOS, Android, and web options that are visible in the previous screenshot, click on the web icon.
This takes us to the Register app UI:
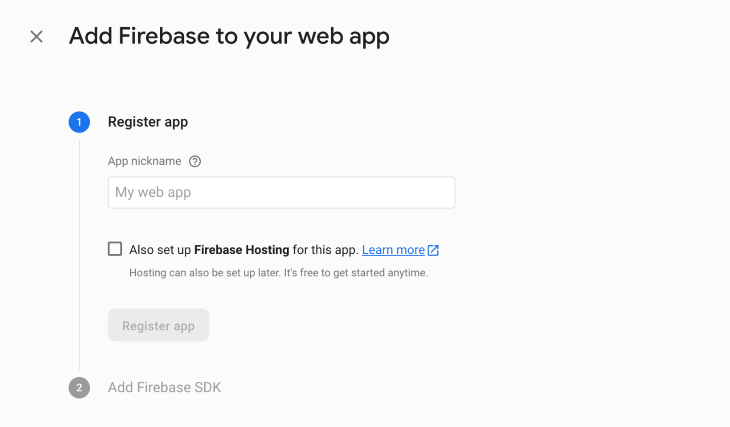
Assign a nickname to the React app that we created earlier and click on the Register app button. Wait for a while as the screen generates a config, which we will be soon integrating in the React app.
This is what the final generated config should look like:
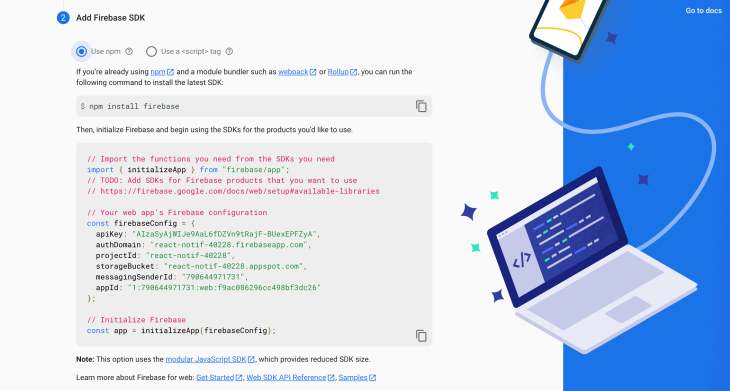
The firebaseConfig object will be integrated into our React app, which will link it to this particular Firebase project.
Let’s create a new file called firebase.js in our React codebase and add these lines of code:
import { initializeApp } from 'firebase/app';
var firebaseConfig = {
  apiKey: "YOUR_API_KEY",
  authDomain: "YOUR_AUTH_DOMAIN",
  projectId: "YOUR_PROJECT_ID",
  storageBucket: "YOUR_STORAGE_BUCKET",
  messagingSenderId: "YOUR_MESSAGING_SENDER_ID",
  appId: "YOUR_APP_ID"
};

initializeApp(firebaseConfig);
Make sure to replace the firebaseConfig with the one generated in the previous step. Importing the firebase.js file in App.js now links both the projects together.
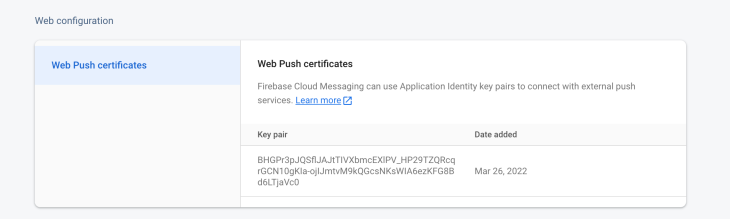
Next, we need to generate a web push certificate key. Navigate to the cloud messaging tab for your project and scroll to the Web configuration section.
Under Web Push certificates, click on Generate key pair. Note the key that gets generated.
Back in the firebase.js file, we now need to enable messaging. Add this line to the imports:
import { getMessaging, getToken, onMessage } from "firebase/messaging";
Then, we can access the messaging object from the firebase object like so:
const firebaseApp = initializeApp(firebaseConfig);
const messaging = getMessaging(firebaseApp);
In order to send push notifications to the browser, we first need to get permission from the user. When we do that, it opens the “Enable notifications?” popup that you may have seen on other websites.
The way to initiate that request is by calling the getToken method Firebase provides. Before that, let’s add a variable to the state of the App.js file, which will keep track of whether we have access to the notifications:
const [isTokenFound, setTokenFound] = useState(false);
getToken(setTokenFound);

// inside the jsx being returned:
{isTokenFound &&
 Notification permission enabled 👍🏻
}
{!isTokenFound &&
 Need notification permission ❗️
}
Now, add the getToken function to firebase.js:
export const getToken = (setTokenFound) => {
  return getToken(messaging, {vapidKey: 'GENERATED_MESSAGING_KEY'}).then((currentToken) => {
    if (currentToken) {
      console.log('current token for client: ', currentToken);
      setTokenFound(true);
      // Track the token -> client mapping, by sending to backend server
      // show on the UI that permission is secured
    } else {
      console.log('No registration token available. Request permission to generate one.');
      setTokenFound(false);
      // shows on the UI that permission is required
    }
  }).catch((err) => {
    console.log('An error occurred while retrieving token. ', err);
    // catch error while creating client token
  });
}
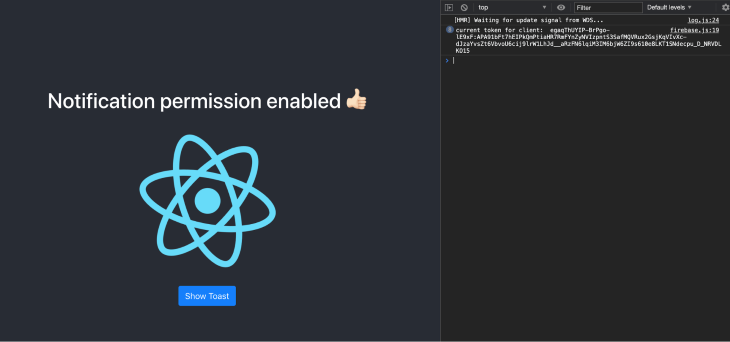
Notice how we are passing the setTokenFound function to the getToken function. This is so we can keep a track of whether we got the client token (i.e., whether notification permission was provided). When we save and execute the code now, we get a popup requesting notifications:
The getToken method, when supplied with the messaging object, displays the UI for the notification, waits for user input, and, upon allowing, assigns a unique token to the client that can be seen in the console:
Now that we have notification permissions and a reference to the client token on the browser side, the next step is to add a listener to the incoming push notification that is directed towards the client.
We do that by adding a firebase-messaging-sw.js service worker file in the public folder in our React app, then adding the following code:
// Scripts for firebase and firebase messaging
importScripts('https://www.gstatic.com/firebasejs/9.0.0/firebase-app-compat.js');
importScripts('https://www.gstatic.com/firebasejs/9.0.0/firebase-messaging-compat.js');

// Initialize the Firebase app in the service worker by passing the generated config
var firebaseConfig = {
  apiKey: "YOUR_API_KEY",
  authDomain: "YOUR_AUTH_DOMAIN",
  projectId: "YOUR_PROJECT_ID",
  storageBucket: "YOUR_STORAGE_BUCKET",
  messagingSenderId: "YOUR_MESSAGING_SENDER_ID",
  appId: "YOUR_APP_ID"
};

firebase.initializeApp(firebaseConfig);

// Retrieve firebase messaging
const messaging = firebase.messaging();

messaging.onBackgroundMessage(function(payload) {
  console.log('Received background message ', payload);

  const notificationTitle = payload.notification.title;
  const notificationOptions = {
    body: payload.notification.body,
  };

  self.registration.showNotification(notificationTitle,
    notificationOptions);
});
Notice how we are using the compat versions of the scripts with importScripts. That is because we are getting the Firebase v8-compatible service worker scripts. If we get the v9 scripts, we need an additional compilation step, because they would not work with ES modules. This is the same reason why we are keeping the code inside of the service worker to Firebase v8 style and not changing it to v9.
This code will handle all the notifications that reach the application when it’s not in the foreground.
To take care of cases in which the app is active in foreground, we need to add this code to the firebase.js file:
export const onMessageListener = () =>
  new Promise((resolve) => {
    onMessage(messaging, (payload) => {
      resolve(payload);
    });
});
We also need to import this in App.js and add logic to create the notification out of the parsed payload, which looks something like this:
function App() {

  const [show, setShow] = useState(false);
  const [notification, setNotification] = useState({title: '', body: ''});
  const [isTokenFound, setTokenFound] = useState(false);
  getToken(setTokenFound);

  onMessageListener().then(payload => {
    setShow(true);
    setNotification({title: payload.notification.title, body: payload.notification.body})
    console.log(payload);
  }).catch(err => console.log('failed: ', err));

  return (
    <div className="App">
        <Toast onClose={() => setShow(false)} show={show} delay={3000} autohide animation style={{
          position: 'absolute',
          top: 20,
          right: 20,
          minWidth: 200
        }}>
          <Toast.Header>
            <img
              src="holder.js/20x20?text=%20"
              className="rounded mr-2"
              alt=""
            />
            <strong className="mr-auto">{notification.title}</strong>
            <small>just now</small>
          </Toast.Header>
          <Toast.Body>{notification.body}</Toast.Body>
        </Toast>
      <header className="App-header">
        {isTokenFound && <h1> Notification permission enabled 👍🏻 </h1>}
        {!isTokenFound && <h1> Need notification permission ❗️ </h1>}
        <img src={logo} className="App-logo" alt="logo" />
        <Button onClick={() => setShow(true)}>Show Toast</Button>
      </header>


    </div>
  );
}
Now, we’re all set to receive both foreground and background notifications in our React app!
We can now test whether our notifications are functional by visiting the cloud messaging section of our app and triggering a test notification.
On the home page, click on Send your first message. Enter the Notification title and Notification text. Then, under the Device preview section, click on Send test message.
In the popup that opens, enter the client token that is logged in the console as the FCM registration token and press the + button. Make sure the FCM token is checked, then click on Test.
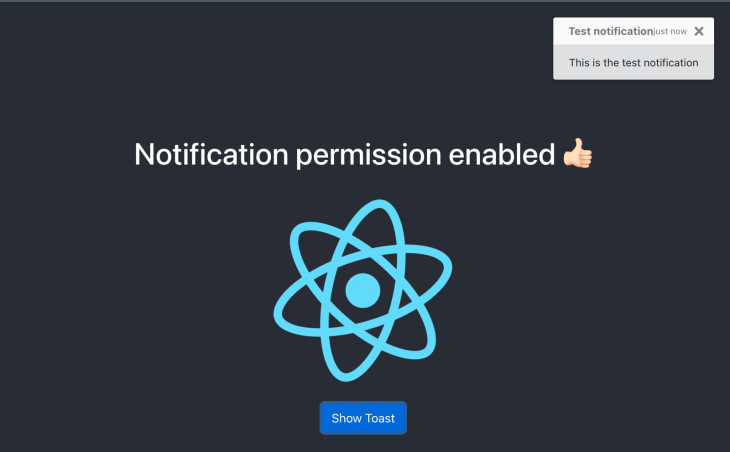
If the React app is open in a foreground browser tab, you should see the message pop up with the contents that were just filled, like this:
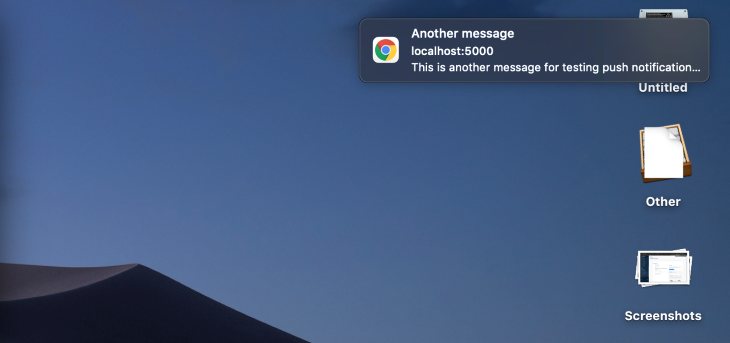
In case the tab was in background, you should see an operating system default notification, which looks something like this, thanks to the listener configured in the worker:
Once this testing is done and the message appears as per your liking, you can continue with the process of configuring the push notification by selecting the app and creating a campaign. In that case, all the users of that app would receive a push notification similar to the one tested just now.
We have covered the steps involved in integrating Firebase into a React app and configuring both foreground and background messages. In this flow, we are triggering the notifications via the cloud messaging panel in Firebase.
An alternate method would be to store client-to-token mapping in a backend server, then later trigger the notification using the firebase-admin library by targeting those particular tokens. That would allow for a more fine-grained control over notifications.
But as far as sending push notifications to client side devices (iOS, Android, or web) is concerned, using the Firebase platform is preferred.
Do give it a try the next time you come across such a requirement in your project. Find the full code on this GitHub repository.
Install LogRocket via npm or script tag. LogRocket.init() must be called client-side, not
server-side
$ npm i --save logrocket

// Code:

import LogRocket from 'logrocket';
LogRocket.init('app/id');
// Add to your HTML:

<script src="https://cdn.lr-ingest.com/LogRocket.min.js"></script>
<script>window.LogRocket && window.LogRocket.init('app/id');</script>

Learn how to detect unused and ghost dependencies in JavaScript projects using Knip, a project-level linter that keeps your dependency graph accurate.

Learn how Storybook MCP enables AI agents to understand your component library, generate accurate UI, and validate code using documentation, stories, and automated tests.

Debug RSC hydration mismatches in production with Next.js instrumentation, Suspense isolation, HTML diffing, and CI smoke tests.

Explore why npm dependencies are a major supply chain security risk and how to protect JavaScript apps from compromised packages and transitive threats.
Would you be interested in joining LogRocket's developer community?
Join LogRocket’s Content Advisory Board. You’ll help inform the type of content we create and get access to exclusive meetups, social accreditation, and swag.
Sign up now

