
Nx is an open source build system that can be used to build applications and increase developer productivity. In this guide, we’ll go over its features, use cases, alternatives, and more to help you assess whether Nx is the right tool for your needs.

The Replay is a weekly newsletter for dev and engineering leaders.
Delivered once a week, it's your curated guide to the most important conversations around frontend dev, emerging AI tools, and the state of modern software.
Nx was built by Nrwl, a very active company in the open source community and a maintainer of Lerna, a monorepo manager tool. Started roughly around 2019, Nx was originally focused on Angular development, but expanded to include full-stack development and integrations with frontend libraries like React.
From the beginning, Nx has had CLI commands as well as a visual integrations with popular IDE’s like VSCode. Nx commands include everything from generating code to building and even deploying projects. Nx can be used for standalone projects as well as monorepos for development.
Nx starts as an npm package that can be added to a project or run globally. If you install the Nx package globally, it gives you access to the Nx CLI, which you can use to run Nx commands. You can also use npx commands to generate a workspace in which you can run Nx commands.
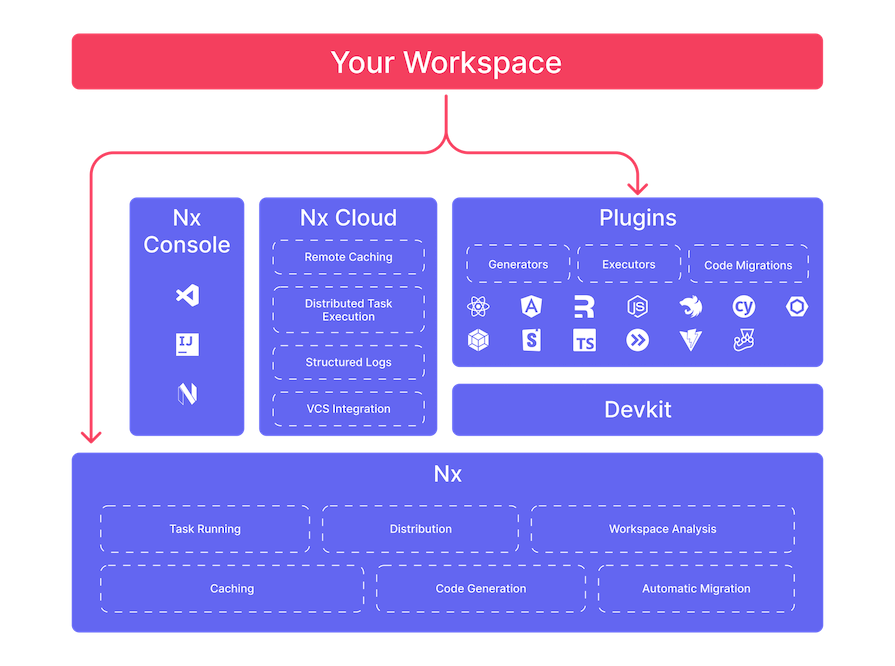
Nx as a whole is composed of the following high level parts:
This visual from the Nx documentation helps explain its high-level architecture:
If you wanted to install Nx to use in an existing project, there is also an npx command that allows you to install it as a project dependency:
npx nx@latest init
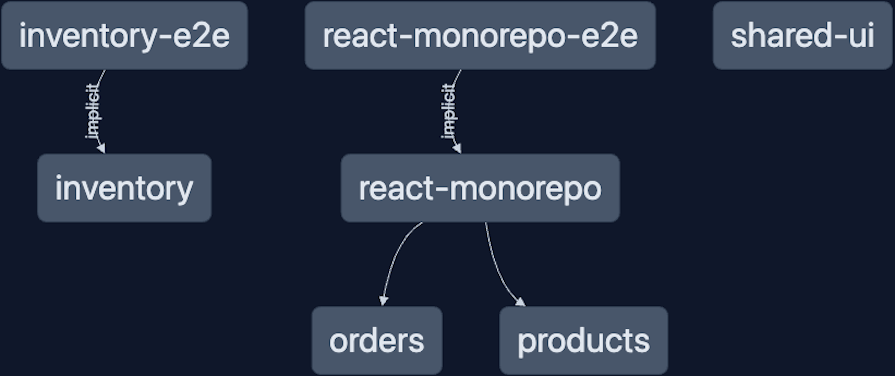
Nx also provides an analysis of your projects and dependencies. This analysis is a great Nx feature as it allows you to visualize how the parts of your project are interconnected:
In addition to all of these features, another great aspect of Nx is that the maintainers have provided a great set of documentation and tutorials to help you get started. The documentation allows you to “learn by doing,” which really helps when learning and adopting Nx for projects.
Nx provides solutions to many common challenges facing developers today. In particular, Nx can help enhance:
All of these features really sell Nx for new projects. However, if you have an existing project, many people question the logic of switching to Nx tooling.
Fortunately, Nx has a command to add the Nx package to your existing project and make it available for use:
npx nx@latest init
Once added, it’s up to you to decide which features of Nx you want to use. Nx also provides several adoption guides to help you integrate it with an existing project.
The main goal of Nx is to make developers’ lives easier so they can spend less time on tooling and more time on actually writing code. To achieve this goal, Nx offers many features, but some highlights include:
nx migrate command, Nx will attempt to upgrade packages in your project to either the latest version or a specific version. The result is a migrations.json file that you can use to understand what Nx did. When running this command, Nx will attempt to update your source code according to the newer versions of the packages. Then, it’s up to you to review the changes before committingnx release command that you can use to do a code release in your project. Nx offers a full API with different variations of releases and features like a change log that you can use for your teamNx appeals to both large and small teams. The goal in both cases is to improve developer productivity and automate whenever possible.
Nx can help a small team of developers to get started with shared tooling and an initial setup for a project. This is particularly helpful with setting up things like linting or build rules.
Larger teams can add Nx to an existing project and still be able to use the same suite of tools that smaller teams use at scale. The only thing that is required is to add Nx as a dependency to a project. From there, all of the Nx commands are at your disposal.
Nx allows you to create both monorepos and standalone projects. In the next few sections we’ll create a React monorepo as an example of how you can get started. I encourage you to check the many tutorials that are available on the Nx site.
First, go to a terminal and navigate to a folder you want to work in. Then, run the following:
npx create-nx-workspace@latest react-monorepo --preset=react-monorepo
Let’s look at that command:
npx create-nx-workspace@latest is the npx command to generate a workspace or work area that your projects will livereact-monorepo is the name of your project--preset=react-monorepo is the settings or overrides applicable to the projectTypically, any Nx command that you run will have the above three pieces. When you run the command above, you’ll first be asked a set of questions:

Once you’ve answered the questions, this is what that initial project structure should look like:
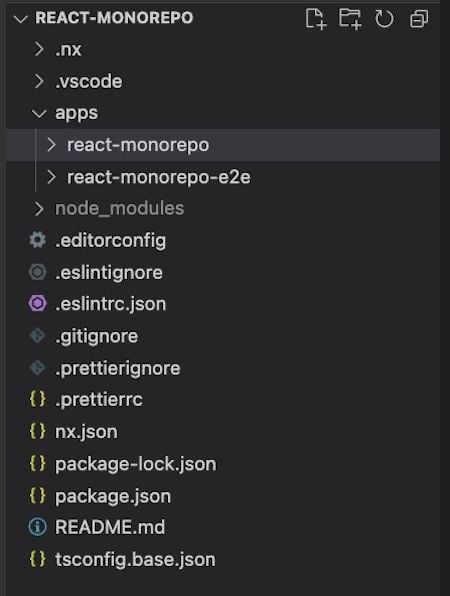
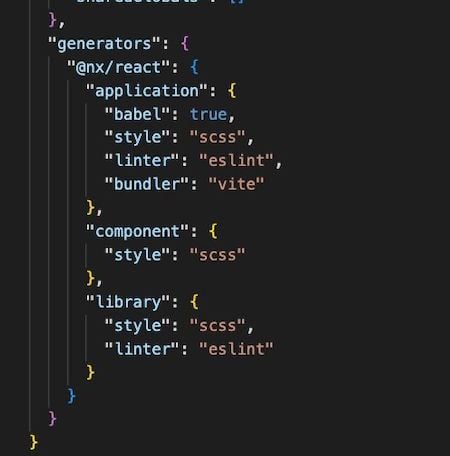
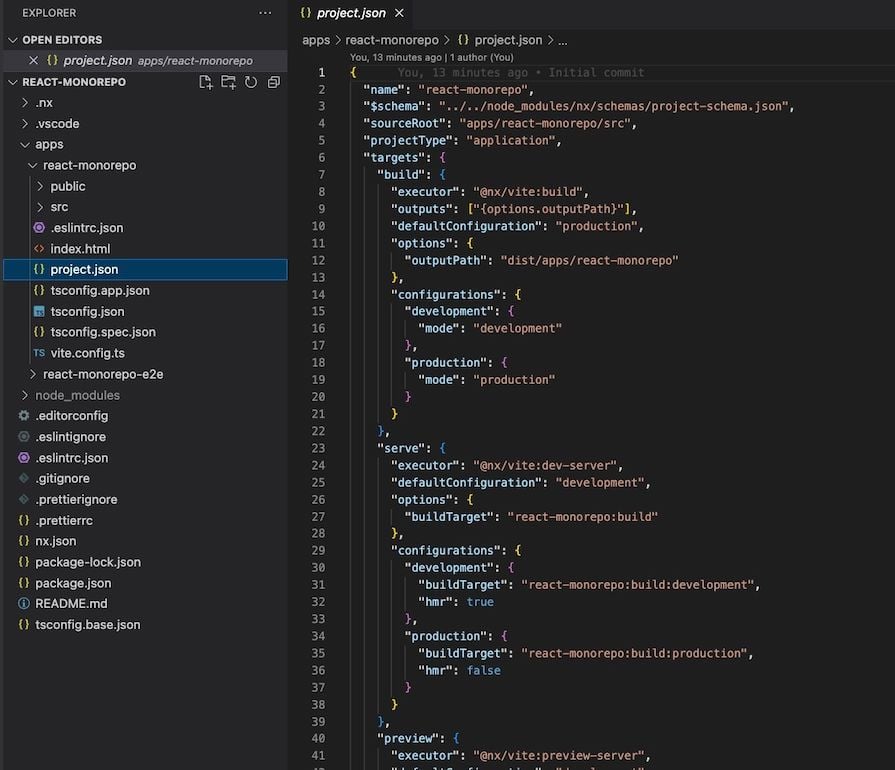
You may have noticed there is an apps folder as well as a nx.json and package.json folder at the root. The package.json file is what you would normally see in any JavaScript application with the project dependencies. The nx.json file has the information about what builders and generators are used by Nx:
The apps folder has two projects:
react-monorepo: The main React applicationreact-monorepo-e2e: The end-to-end tests for the React applicationYou may have noticed that in the base of the project, there is already an eslintrc.json file as well as a prettierrc.json file. The created project is already wired up for linting with ESLint and Prettier.
Within the react-monorepo project, there is also a project.json file which shows what the various Nx commands like serve, build, and preview will do:
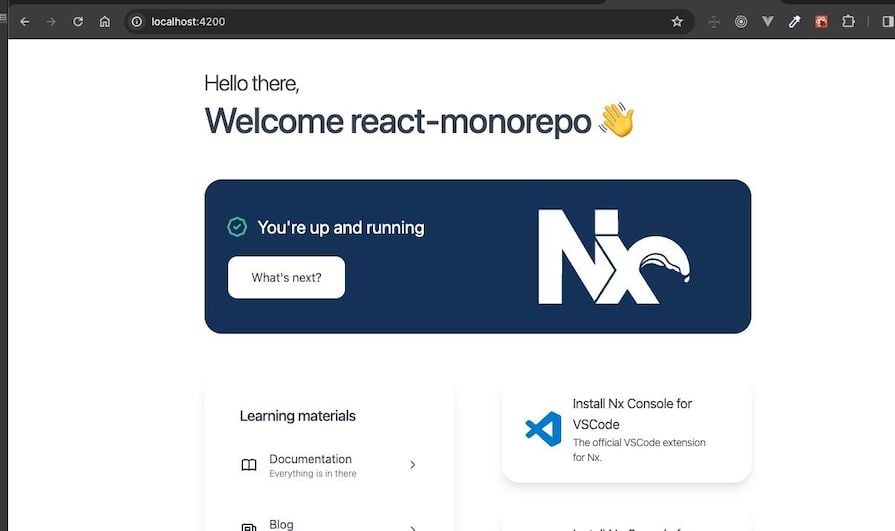
If you run the nx serve react-monorepo command, the project will be served locally:
Now, let’s add another project to this new monorepo. One of Nx’s greatest assets is the amount of documentation and help that the CLI provides in general development. Watch what happens if you just run this command:
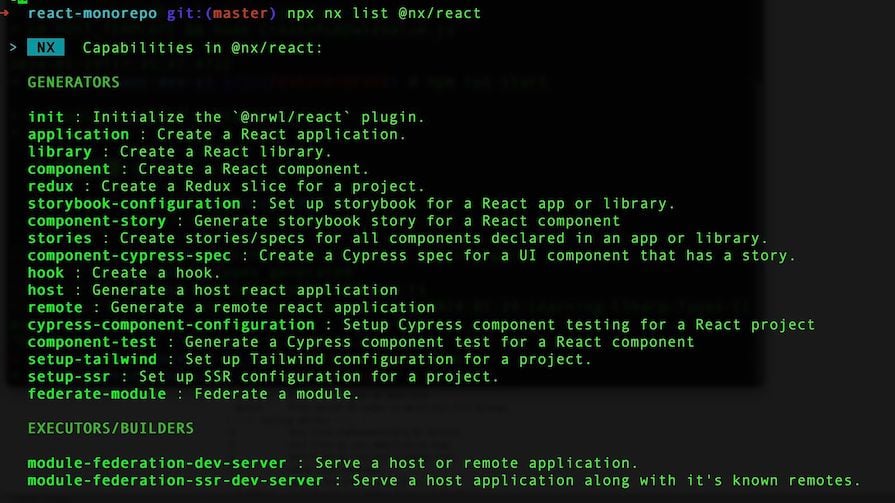
npx nx list @nx/react
This provides a list of the generators specific to React. You now can see the different commands that you could potentially run to generate pieces of a React project:
Let’s go ahead and add a secondary application to the main project with the following:
npx nx g @nx/react:app inventory --directory=apps/inventory
Note that if you added --dry-run to this command, it would show you what would be generated without creating anything. This is another great aspect of the Nx CLI, as it allows developers to see what will be created before doing anything.
When it runs, you should see a few quick questions and output similar to the following:
➜  react-monorepo git:(master) npx nx g @nx/react:app inventory --directory=apps/inventory

>  NX  Generating @nx/react:application

✔ Would you like to add React Router to this application? (y/N) · true
✔ Which E2E test runner would you like to use? · cypress
✔ What should be the project name and where should it be generated? · inventory @ apps/inventory
CREATE apps/inventory/index.html
CREATE apps/inventory/public/favicon.ico
CREATE apps/inventory/src/app/app.spec.tsx
CREATE apps/inventory/src/assets/.gitkeep
CREATE apps/inventory/src/main.tsx
CREATE apps/inventory/tsconfig.app.json
CREATE apps/inventory/src/app/nx-welcome.tsx
CREATE apps/inventory/src/app/app.module.scss
CREATE apps/inventory/src/app/app.tsx
CREATE apps/inventory/src/styles.scss
CREATE apps/inventory/tsconfig.json
CREATE apps/inventory/project.json
UPDATE nx.json
CREATE apps/inventory/tsconfig.spec.json
CREATE apps/inventory/vite.config.ts
CREATE apps/inventory/.eslintrc.json
CREATE apps/inventory-e2e/project.json
UPDATE package.json
CREATE apps/inventory-e2e/src/e2e/app.cy.ts
CREATE apps/inventory-e2e/src/support/app.po.ts
CREATE apps/inventory-e2e/src/support/e2e.ts
CREATE apps/inventory-e2e/src/fixtures/example.json
CREATE apps/inventory-e2e/src/support/commands.ts
CREATE apps/inventory-e2e/cypress.config.ts
CREATE apps/inventory-e2e/tsconfig.json
CREATE apps/inventory-e2e/.eslintrc.json

added 93 packages, and audited 989 packages in 18s

227 packages are looking for funding
  run `npm fund` for details

found 0 vulnerabilities
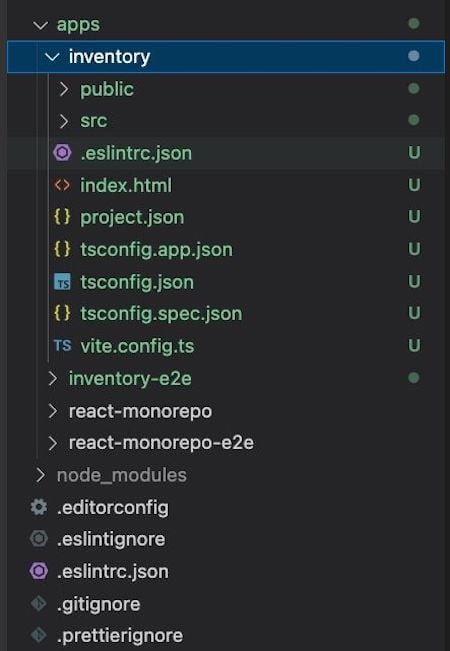
Looking back at our project, you’ll now see inventory and inventory-e2e projects alongside our react-monorepo and react-monorepo-e2e projects:
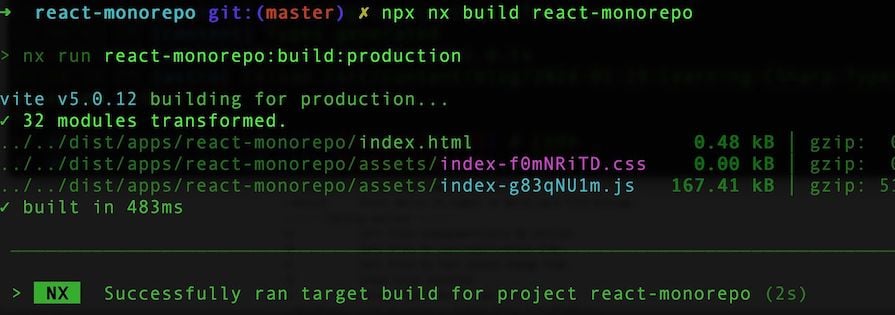
With the project built above, we can go ahead and run a build of the main react-monorepo project:
Now, let’s do the same for the inventory project:
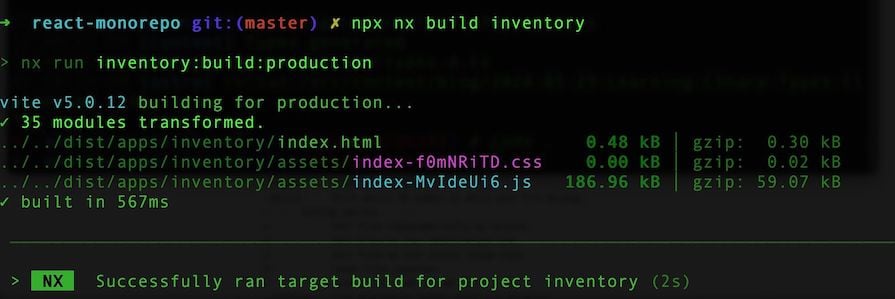
This is pretty standard for the process, but what if we want to run them together? Run nx run-many -t build:

Notice that unlike the original build commands, these builds only took one second and were cached. This is one of many optimizations that Nx provides for the regular development process. There are many more that are outlined in their docs as well as a the React monorepo tutorial.
In addition to the local commands, I should also mention that Nx has a Nx Cloud that allows you to distribute builds and tasks into the cloud. This is a really powerful optimization because it enables multiple individuals working on the same project share things like test results and dependencies.
I encourage you to watch this video tutorial by the Nx team to see Nx Cloud in action:
Deploying any project can be difficult, but Nx has multiple integrations that help you in the form of executors as well as CI options with Nx Cloud.
Executors allow you to dictate how Nx will run tasks, and in the case of deployment, bundle results. There are supported executors within Nx for TypeScript and JavaScript. There is also a way you can build your own executor for your deployment.
Here is an example from the official Nx documentation of a custom executor:
// example copied from the official Nx Documentation at
// https://nx.dev/ci/recipes/other/ci-deployment

import { createPackageJson, createLockFile } from '@nx/devkit';
import { writeFileSync } from 'fs';

export default async function buildExecutor(
  options: Schema,
  context: ExecutorContext
) {
  // ...your executor code

  const packageJson = createPackageJson(
    context.projectName,
    context.projectGraph,
    {
      root: context.root,
      isProduction: true, // We want to strip any non-prod dependencies
    }
  );

  // do any additional manipulations to "package.json" here

  const lockFile = createLockFile(packageJson);
  writeJsonFile(`${options.outputPath}/package.json`, builtPackageJson);
  writeFileSync(`${options.outputPath}/${packageLockFileName}}`, lockFile, {
    encoding: 'utf-8',
  });

  // any subsequent executor code
}
Note how you can use the createPackageJson to dicate how your package.json file is generated for output as well as where to store your lockfile when the dependencies are installed.
With Nx Cloud, you can make use of several optimizations, including:
And many more.
Alternatives to Nx include Rush Stack, Lerna, Turborepo, and Yarn Workspaces:
| Tool | Purpose | Managing team | Target platform | Features |
|---|---|---|---|---|
| Rush Stack | A collection of tools for Node.js applications that can be used to manage monorepos; built to work with Rush, a monorepo building tool | Backed by Microsoft | Web applications (JavaScript and TypeScript projects) | Monorepo scaffolding, API documentation generation, ESLint integration, and much more |
| Lerna | A monorepo package manager; also does many of the same things Nx does with task management and caching | Was taken over by Nrwl in recent years, so it integrates well with Nx | Node.js apps | A great tool if you have multiple appls in a monorepo and want to optimize things like build times and caching |
| Turborepo | A monorepo management tool that aims to maximize running speed for tasks and build times in your web projects | Was acquired by Vercel in recent years | Web applications | A highly efficient caching mechanism that it uses when running tasks; CI integrations; multiple ways to optimize your project’s builds and caching |
| Yarn Workspaces | A package management tool that helps you optimize the ways packages are installed and shared in a monorepo project | Web applications | Doesn’t have the higher level tools like Rush Stack or Nx, but provides a common set of commands that allow you to efficiently manage package installations and dependencies in your web projects |
All four of these options are great tools by themselves that offer much more beyond what’s covered above. However, they are also focused on their specific use cases, whereas Nx offers a wide range of services and configurations that can be applied to a large variety of projects.
The tools listed above are great for specific needs, but if you’re looking for a more robust set of features, then Nx will likely be your tool of choice. Nonetheless, the tools listed here offer great features for any project and should still be utilized if your team needs more intentional tooling.
In this post, I have walked through Nx and provided details on how you could adopt it in your projects.
I included a high level overview of the features, solid use cases, and a getting-started section that covers how you could build a project with Nx. I also included a comparative section where I covered some other tools that do similar things to what Nx does.
I encourage you to review the Nx documentation and try out their tools with a new project or add to an existing one. This post covered several features at a high level, but there are even more specifics offered for projects.
It will be exciting to see the development of Nx in the future as these features continue to grow and develop.
Install LogRocket via npm or script tag. LogRocket.init() must be called client-side, not
server-side
$ npm i --save logrocket

// Code:

import LogRocket from 'logrocket';
LogRocket.init('app/id');
// Add to your HTML:

<script src="https://cdn.lr-ingest.com/LogRocket.min.js"></script>
<script>window.LogRocket && window.LogRocket.init('app/id');</script>

React Server Components and the Next.js App Router enable streaming and smaller client bundles, but only when used correctly. This article explores six common mistakes that block streaming, bloat hydration, and create stale UI in production.

Gil Fink (SparXis CEO) joins PodRocket to break down today’s most common web rendering patterns: SSR, CSR, static rednering, and islands/resumability.

@container scroll-state: Replace JS scroll listeners nowCSS @container scroll-state lets you build sticky headers, snapping carousels, and scroll indicators without JavaScript. Here’s how to replace scroll listeners with clean, declarative state queries.

Explore 10 Web APIs that replace common JavaScript libraries and reduce npm dependencies, bundle size, and performance overhead.
Hey there, want to help make our blog better?
Join LogRocket’s Content Advisory Board. You’ll help inform the type of content we create and get access to exclusive meetups, social accreditation, and swag.
Sign up now