Editor’s note: This post was updated by Yan Sun on 21 April 2023 to include information about semantic versioning, as well as alternatives to Lerna, which has been taken over by Nrwl. For more information about TypeScript monorepos, check out Building a TypeScript app with Turborepo.
It is often quite useful to use a single repository to maintain an entire project with all of the packages in it. Companies like Google and Facebook have used a single repository internally for most of their projects. This solution can be useful when a company uses a similar technology and when all projects share a common set of dependencies and files.
In this article, we will build a TypeScript monorepo with Lerna to showcase an effective approach for organizing and maintaining multiple related projects in one place.
Jump ahead:
A TypeScript monorepo refers to a codebase that contains multiple TypeScript projects, all managed within a single Git repository. Within a TypeScript monorepo, an individual project can have its own dependencies, build processes, and tests, while also being able to share common code and dependencies with other packages.
The monorepo approach has become popular in recent years because it has several advantages:
Lerna is a popular and widely used tool written in JavaScript for setting and managing multi-package repositories for Node.js projects with npm and Git.
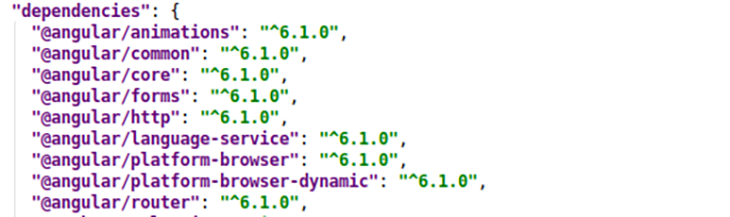
Lerna has two modes: fixed and independent. The fixed mode keeps all versions of packages at the same level. This approach is quite popular; you may have seen it in Angular:
The independent mode allows us to have different versions per package. If you have a large or complex project, using a single repository for all its packages can help with organization and maintenance. Thankfully, this is quite easy with Lerna.
Before getting started, make sure you have npm and GitHub accounts because we’ll be using those to host our project. Also, create an npm organization so that you can publish the project with scoped packages once we’re done.
With this done, install Lerna as a global dependency:
npm install -g lerna
We’ll build a simple project. Ours will consist of multiple packages for our project, which we’ll call hospital-sdk.
Create a folder named hospital and initialize Lerna inside the folder:
lerna init && npm install
This command will create a lerna.json file with a default folder structure in it:
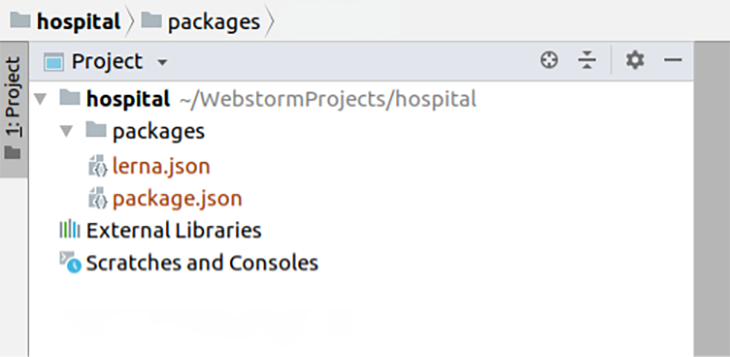
/packages is a placeholder for our shared packages, and lerna.json is a Lerna configuration file. package.json is our usual manifest file:
{
  "packages": [
    "packages/*"
  ],
  "version": "0.0.0"
}
Lerna doesn’t create a .gitignore file, so we will create one with this content:
node_modules/
lerna-debug.log
npm-debug.log
packages/*/lib
.idea
We will use TypeScript in our project, but as we mentioned before, Lerna doesn’t support TypeScript, so we’ll treat it as a shared dependency. Add it on the top level of your package.json with:
npm install typescript @types/node — save-dev
This is the recommended approach because we want to use the same tooling across our packages.
Alongside TypeScript, we will also install type declarations for Node.js. As Lerna is intended to be used with Node.js, not TypeScript, we will need to add some configuration to make it work.
We’ll have one common tsconfig.json file defined in the root of our project. Our tsconfig.json will look like this:
{
 "compilerOptions": {
   "module": "commonjs",
   "declaration": true,
   "noImplicitAny": false,
   "removeComments": true,
   "noLib": false,
   "emitDecoratorMetadata": true,
   "experimentalDecorators": true,
   "target": "es6",
   "sourceMap": true,
   "lib": [
     "es6"
   ]
 },
 "exclude": [
   "node_modules",
   "**/*.spec.ts"
 ]
}
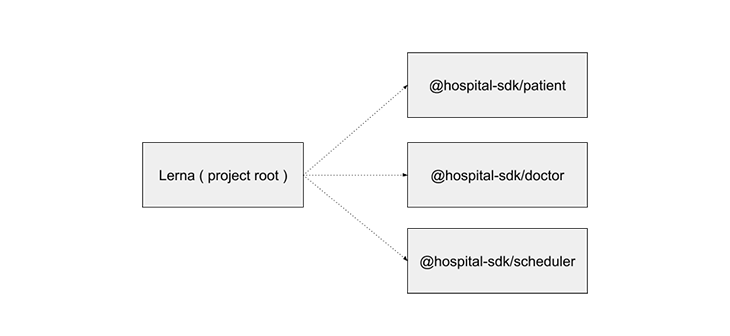
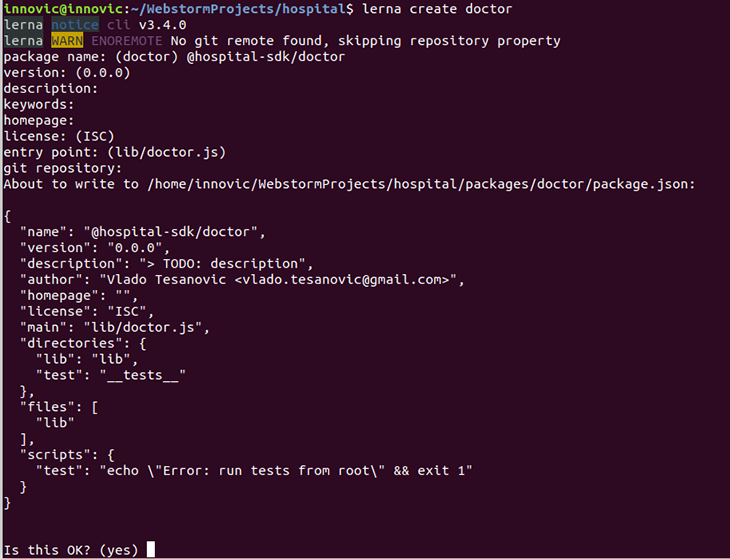
lerna createAs this is a demo project, we’ll assume that we’ll have a few modules: patient, doctor, and scheduler. To create the packages, we’ll use the lerna create command from the root of our project.
The lerna create command will guide us through the creation of a new package. It requires your new package’s name to be passed as an argument. In this case, it’s doctor, resulting in the full name being @hospital-sdk/doctor:
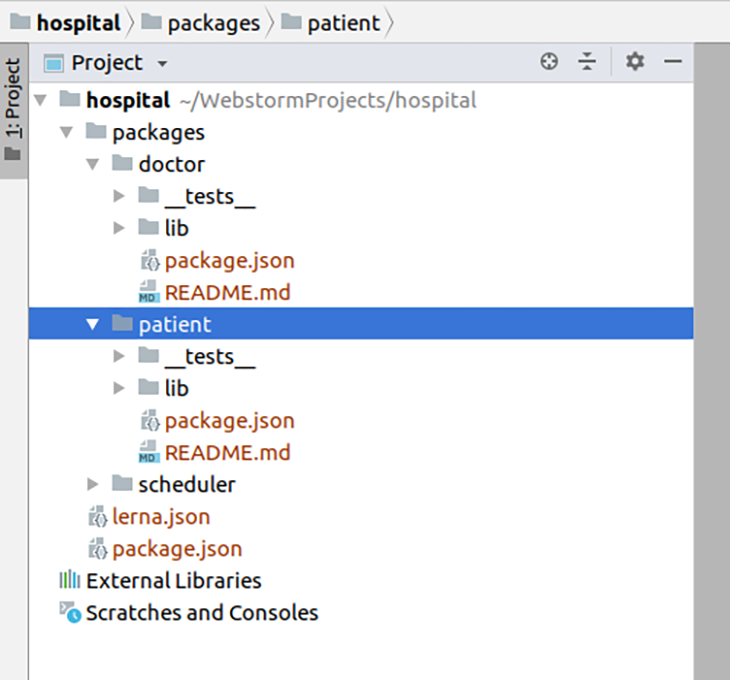
We will repeat the same process for the patient and scheduler packages. The resulting folder structure should now be:
Each individual package requires its own tsconfig.json file for correct relative paths. Other options can be extended from the tsconfig.json at the root of the project:
{
 "extends": "../../tsconfig.json",
 "compilerOptions": {
   "outDir": "./lib"
 },
 "include": [
   "./src"
 ]
}
After we add a tsconfig.json to each package, we will create an src folder inside each package with a TypeScript file for that package. For example, a doctor.ts file is added to the src folder for the doctor package:
// doctor.ts
export class Doctor {
    get(id) {
        return {};
    }
}
We also need to register a tsc script in each individual package.json. The result should be:
{
  "name": "@hospital-sdk/doctor",
  "version": "0.0.0",
  "description": "> TODO: description",
  "author": "Vlado Tesanovic <[email protected]>",
  "homepage": "",
  "license": "ISC",
  "main": "lib/doctor.js",
  "typings": "lib/doctor.d.ts",
  "directories": {
    "lib": "lib",
    "test": "__tests__"
  },
  "files": ["lib"],
  "publishConfig": {
    "access": "public"
  },
  "scripts": {
    "tsc": "tsc",
    "test": "echo \"Error: run tests from root\" && exit 1"
  }
}
We added simple logic in each .ts file. We can test our setup by running this:
lerna run tsc
The command above will run the tsc script in all created packages:
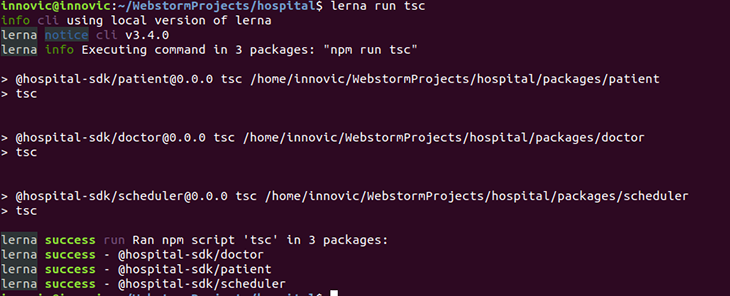
If all goes well, we will compile TypeScript files from the src folder into the lib folder in each package.
Take a look at the package.json for any package in our project and you’ll see attributes like directories, files, typings, publishConfig, and main:
{
  "name": "@hospital-sdk/doctor",
  "version": "0.0.0",
  "description": "> TODO: description",
  "author": "Vlado Tesanovic <[email protected]>",
  "homepage": "",
  "license": "ISC",
  "main": "lib/doctor.js",
  "typings": "lib/doctor.d.ts",
  "directories": {
    "lib": "lib",
    "test": "__tests__"
  },
  "files": ["lib"],
  "publishConfig": {
    "access": "public"
  },
  "scripts": {
    "tsc": "tsc",
    "test": "echo \"Error: run tests from root\" && exit 1"
  }
}
The packages and doctor folders, as well as the package.json file are very important because they control what will be pushed to npm, and will serve as the entry point for our library (main and typings attributes).
We will create a GitHub repository for this project and push all of the code there.
With TypeScript compiled, let’s create a test integration package to see how Lerna handles linking packages:
cd packages
mkdir integration
cd integration
npm init -y
cd ../..
To install necessary dependencies from npm, or link ones from the monorepo, use the lerna add command from the root of the project. In case of any naming conflicts, local packages will always take precedence over remote ones:
lerna add @hospital-sdk/doctor --scope=integration
The --scope parameter specifies which module to add the package to. The unfortunate limitation of the lerna add command is that it can only add one package at a time. So, if you need to install more dependencies at once, you can just add them to the package.json and then run the lerna bootstrap command:
{
  "name": "integration",
  "version": "1.0.0",
  "description": "",
  "main": "index.js",
  "scripts": {
    "start": "ts-node src/index.ts",
    "test": "echo \"Error: no test specified\" && exit 1"
  },
  "keywords": [],
  "author": "",
  "license": "ISC",
  "dependencies": {
    "ts-node": "^7.0.1",
    "@hospital-sdk/doctor": "^0.0.4",
    "@hospital-sdk/patient": "^0.0.4",
    "@hospital-sdk/scheduler": "^0.0.4"
  }
}
lerna bootstrap installs and links all dependencies, both local and remote. When using lerna add, the lerna bootstrap command is called automatically when adding any new packages.
To see whether packages were linked successfully, create an integration/src/index.ts file with the following contents:
import { Doctor } from "@hospital-sdk/doctor";
import { Patient } from "@hospital-sdk/patient";
import { Scheduler } from "@hospital-sdk/scheduler";

console.log(new Doctor());
console.log(new Scheduler());
console.log(new Patient());
Then, add the start script in integration/package.json:
{
  "scripts": {
   "start": "ts-node src/index.ts"
  }
}
Running the script from the terminal should produce the following output:
Doctor {}
Scheduler {}
Patient {}
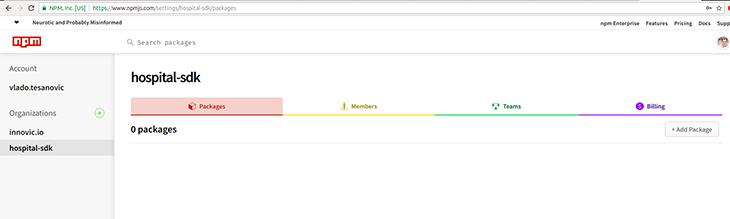
Our goal is to publish all packages under the same npm scope, or organization. npm organizations can be private, as well; in that case, you can control who is going to see and use your packages.
Earlier, we created a free, public organization at npmjs.org:
Log in to that organization from the terminal:

At this moment, we have our organization and build scripts ready. Let’s glue it all together under one npm script from the root package.json:
{
 "scripts": {
   "publish": "lerna run tsc && lerna publish"
 }
}
From the terminal, run the following command:
npm run publish
Lerna will guide us through the publishing process. We will need to choose a package version and push tags to GitHub. If all goes well, we will see this message at the end: lerna success published 3 packages:
npm run publish
> publish
> lerna run tsc && lerna publish
lerna notice cli v3.4.0
lerna info Executing command in 3 packages: "npm run tsc"
> @hospital-sdk/[email protected] tsc
> tsc

> @hospital-sdk/[email protected] tsc
> tsc

> @hospital-sdk/[email protected] tsc
> tsc
lerna success run Ran npm script 'tsc' in 3 packages:
lerna success - @hospital-sdk/doctor
lerna success - @hospital-sdk/patient
lerna success - @hospital-sdk/scheduler
lerna notice cli v3.4.0
lerna info Verifying npm credentials
lerna info current version 0.0.3
lerna info Looking for changed packages since v0.0.3
? Select a new version (currently 0.0.3) Patch (0.0.4)
Changes:
 - @hospital-sdk/doctor: 0.0.3 => 0.0.4
 - @hospital-sdk/patient: 0.0.3 => 0.0.4
 - @hospital-sdk/scheduler: 0.0.3 => 0.0.4
? Are you sure you want to publish these packages? Yes
lerna info git Pushing tags...
lerna info publish Publishing packages to npm...
lerna notice
...
lerna notice
lerna info published @hospital-sdk/doctor 0.0.4
lerna info published @hospital-sdk/patient 0.0.4
lerna info published @hospital-sdk/scheduler 0.0.4
Successfully published:
 - @hospital-sdk/[email protected]
 - @hospital-sdk/[email protected]
 - @hospital-sdk/[email protected]
lerna success published 3 packages
In the previous publish example, Lerna detected the current version, proposed a few options, and asked you to choose one as the following:
? Select a new version (currently 0.0.3) (Use arrow keys)
❯ Patch (0.0.4)
  Minor (0.1.0)
  Major (1.0.0)
  Prepatch (0.0.4-alpha.0)
  Preminor (0.1.0-alpha.0)
  Premajor (1.0.0-alpha.0)
  Custom Prerelease
Semantic versioning (often abbreviated as “semver”) is a convention used for software versioning in a standardized way. Using semantic versioning, each version number is comprised of three parts: major, minor, and patch, which are incremented when:
Here, semantic versioning is used to allow the manual selection of version numbers. However, Lerna also provides the option to automate the semantic version bump using conventional commits.
Conventional commits is a formatting convention that provides a set of rules to formulate a consistent commit message. It specifies that each commit message should consist of a header, which includes a type, an optional scope and a description, an optional body, and a footer. Below is an example message with a description and breaking change footer:
feat: allow provided config object to extend other configs
BREAKING CHANGE: `extends` key in config file is now used for extending other config files
Lerna is able to detect which package has been changed, and infer the automatic semantic version bump if the commit message types fall into one of the following:
fix, the patch version will be incrementedfeat, the minor version will be incrementedBREAKING CHANGE or ! after the type CHANGE, the major version will be incrementedTo set up the conventionalCommits in Lerna, we need to add the following to the lerna.json config file:
  "command": {
    "publish": {
      "conventionalCommits": true
       }
    }
In addition to the auto version increment, Lerna will also create tags and generate changeLog to reflect the changes made in that version.
Lerna is one of the most popular and earliest tools in the monorepo ecosystem, but since April 2022, it is no longer being actively maintained. In May 2022, Nrwl announced that they will take over the maintenance of Lerna, ensuring this popular tool will continue to be supported by the Nx team.
Nrwl has stated that they will keep improving Lerna, including bug fixes, security updates, adding new features, and making it more compatible with Nx tools. In other words, Lerna is in good hands now, and it will co-exist in the Nx family.
If you are starting a new TypeScript monorepo project, and looking for an alternative tool to Lerna, here are some options:
Setting up Lerna for TypeScript takes some configuration, but in the long run, it will help you increase the maintainability of your packages, both public and private. You can find the source code for this project at my GitHub, and learn more about Lerna in their docs.

LogRocket lets you replay user sessions, eliminating guesswork by showing exactly what users experienced. It captures console logs, errors, network requests, and pixel-perfect DOM recordings — compatible with all frameworks, and with plugins to log additional context from Redux, Vuex, and @ngrx/store.
With Galileo AI, you can instantly identify and explain user struggles with automated monitoring of your entire product experience.
Modernize how you understand your web and mobile apps — start monitoring for free.
 Monitor failed and slow network requests in production
Deploying a Node-based web app or website is the easy part. Making sure your Node instance continues to serve resources to your app is where things get tougher. If you’re interested in ensuring requests to the backend or third-party services are successful, try LogRocket.

LogRocket lets you replay user sessions, eliminating guesswork around why bugs happen by showing exactly what users experienced. It captures console logs, errors, network requests, and pixel-perfect DOM recordings — compatible with all frameworks.
LogRocket's Galileo AI watches sessions for you, instantly identifying and explaining user struggles with automated monitoring of your entire product experience.
LogRocket instruments your app to record baseline performance timings such as page load time, time to first byte, slow network requests, and also logs Redux, NgRx, and Vuex actions/state. Start monitoring for free.

Explore why npm dependencies are a major supply chain security risk and how to protect JavaScript apps from compromised packages and transitive threats.

Enabled React Compiler v1.0 on a production Next.js app. Here’s every warning, breakage, and silent opt-out I documented — and what actually worked.

We built the same app in TanStack Start RSC and Next.js RSC. TanStack shipped 40% less JS and built 4x faster — but Next.js is still the safer production bet.

From RSC vulnerabilities and the Vercel breach to TypeScript 7.0 Beta and AI agents — the nine frontend storylines that defined H1 2026, ranked.
Would you be interested in joining LogRocket's developer community?
Join LogRocket’s Content Advisory Board. You’ll help inform the type of content we create and get access to exclusive meetups, social accreditation, and swag.
Sign up now

