localStorageIn this article, we’ll learn how to create a notes app in React and integrate the app with localStorage. The main functions of our app will include creating a note, setting a character limit, deleting notes, and saving them in localStorage. Let’s get started!

localStorageTo get started, we need to create a blank React app for our project. Use the following commands to create a React app from scratch:
npx create-react-app my-app
cd my-app
npm start
Next, delete all of the content from the App.js file so that it is blank. We’ll add all of our components here.
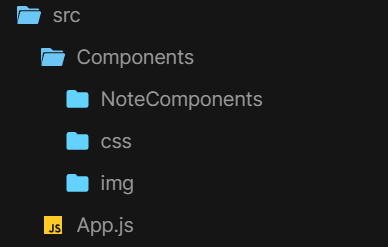
Since we’ll have many files for our app, file structure is important. First, create a Components folder in the src folder. Within the Components folder, create three more folders called NoteComponents, css, and img.
Your directory may look like the following:
Next, create a new file called App.css within the CSS folder and add the following code to your App.js file:
import { React } from "react";
import "./Components/css/App.css";
function App() {
  return (
    <div className="main">
    </div>
  );
}
export default App;
In the App.css file, we need to style the page and the main div. In addition to that, we’ll use CSS Grid to create a three column grid of notes and make it responsive. Therefore, on tablets, we’ll have two columns, and on mobile devices, we’ll have a single column.
I’ve also added a background image, but you can replace it with any image of your choice. The image is saved in the img folder that we created previously.
@import url('https://fonts.googleapis.com/css2?family=Montserrat:wght@400;800&display=swap');
body {
    background-image: url("../img/background.jpg");
    background-repeat: no-repeat;
    background-size: cover;
    font-family: "Montserrat";
}
.main {
    max-width: 960px;
    margin: 0px auto;
    padding: 0px 15px;
    min-height: 100vh;
}
.header {
    display: flex;
    width: 100%;
    justify-content: space-between;
    align-items: center;
    margin: 10px 0px;
}
.notes__title {
    color: #fff;
    font-size: 38px;
    font-family: "Montserrat";
    font-weight: 400;
}
.notes {
    max-width: 1200px;
    margin: 0 auto;
    display: grid;
    grid-gap: 1rem;
    grid-template-columns: repeat(3, minmax(300px, 1fr));
}
@media screen and (max-width: 900px) {
    .notes {
        grid-template-columns: repeat(2, minmax(300px, 1fr));
    }
}
@media screen and (max-width: 500px) {
    .notes {
        grid-template-columns: repeat(1, minmax(300px, 1fr));
    }
}
Now, we need to create a file called Header.js inside the NoteComponents folder. Header.js will contain the page title, so it is entirely optional:
import React from "react";
function Header() {
  return (
    <div className="header">
      <h1 className="notes__title">Notes</h1>
    </div>
  );
}
export default Header;
Let’s create the following basic layout and template for a single note that we’ll use later:
Additionally, the footer will have an add button and a character counter. Now, create a new file called Note.js and add the following code:
import React from "react";
import DeleteForeverOutlinedIcon from "@mui/icons-material/DeleteForeverOutlined";
function Note() {
  return (
    <div className="note">
      <div className="note__body"></div>
      <div className="note__footer" style={{ justifyContent: "flex-end" }}>
        <DeleteForeverOutlinedIcon
          className="note__delete"
          aria-hidden="true"
        ></DeleteForeverOutlinedIcon>
      </div>
    </div>
  );
}
export default Note;
The delete icon is imported from MUI icons. You can install MUI icons with the following command:
npm install @mui/icons-material
Next, create a new CSS file called Note.css, which will contain the styles for the notes. We’ll use glassmorphism to improve the look of the note. Glassmorphism is a UI design trend that imitates the look of frosted glass. It is achieved by using semi-transparent backgrounds and blur effects.
The CSS code below also contains the styles for the Note Form that we’ll create later. Add the following code to Note.css:
.note {
    background: rgba(255, 255, 255, 0.1);
    backdrop-filter: blur(5px);
    box-shadow: inset -6px -4px 2px rgba(255, 255, 255, 0.03);
    border-radius: 15px;
    border: 1.5px solid rgba(255, 255, 255, 0.326);
    color: #fff;
    padding: 15px;
    min-height: 140px;
    display: flex;
    flex-direction: column;
    justify-content: space-between;
    word-wrap: break-word;
}
.note__footer {
    display: flex;
    align-items: center;
    justify-content: space-between;
    margin-bottom: 15px;
}
.note textarea {
    white-space: pre-wrap;
    background: transparent;
    border: none;
    color: #fff;
    resize: none;
    font-size: 18px;
}
.note textarea:focus {
    outline: none;
}
.note textarea::placeholder {
    color: #fff;
}
.note__save {
    background: transparent;
    transition: 0.1s ease-in-out;
    border: 1.5px solid #fff;
    border-radius: 10px;
    color: #fff;
    padding: 4px 10px;
    font-size: 13px;
    cursor: pointer;
}
.note__save:hover {
    background: #fff;
    border: 1.5px solid #fff;
    color: #4b1589;
}
.note__delete {
    cursor: pointer;
}
.note__delete:hover {
    transform: scale(1.1);
}
.char__progress {
    background-color: #fff!important;
}
Now, we’ll create a new file called Notes.js within the NoteComponents folder. Notes.js will contain all the states and functions, and it will link together all the components. Inside Notes.js, we will first import the Note component that we just created as well as the Note.css file:
import { React, useState, useEffect } from "react";
import "../css/Note.css";
import Note from "./Note"
function Notes() {
  return (
    <div className="notes">
      <Note />
      <Note />
      <Note />
    </div>
  );
}
export default Notes;
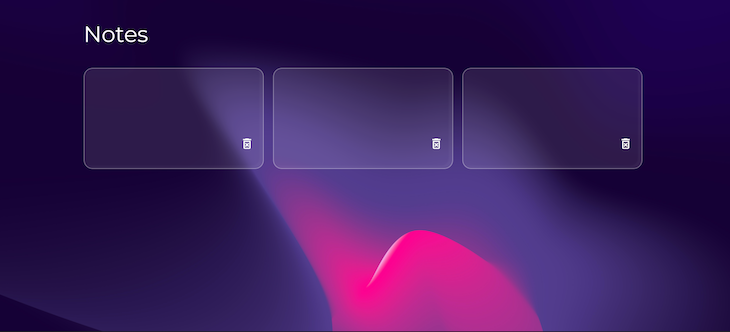
In the code above, I am rendering a few example notes to see what our app looks like. Remember to import the Header.js and the Notes.js files into App.js. So far, your App.js file should look like the following:
import { React } from "react";
import "./Components/css/App.css";
import Header from "./Components/NoteComponents/Header";
import Notes from "./Components/NoteComponents/Notes";
function App() {
  return (
    <div className="main">
      <Header />
      <Notes />
    </div>
  );
}
export default App;
At this point, your app should look like the following image:
Now, we’ll create two states inside of Notes.js. The first will store all our notes as an array, and the second one will store the input text:
//states
const [notes, setNotes] = useState([]);
const [inputText, setInputText] = useState("");
Now, we’ll create a fixed note that will be used as a form. It will have a similar look to a regular note, but instead of a delete icon, it will have a save button and a character counter with a progress bar. Within the fixed note, the user will enter the text in the texarea, and they can create a new note by clicking the save button.
Create a new file called CreateNote.js, then add the following code to it:
import { React } from "react";
function CreateNote() {
  return (
    <div className="note" style={{ background: "rgba(255, 255, 255, 0)" }}>
      <textarea
        cols="10"
        rows="5"
        placeholder="Type...."
        maxLength="100"
      ></textarea>
      <div className="note__footer">
        <span className="label"> left</span>
        <button className="note__save">Save</button>
      </div>
    </div>
  );
}
export default CreateNote;
You may notice the maxLength attribute on the texarea. This limits the number of characters a user can enter to a specified value, 100 in our case. This is necessary, otherwise, a user could enter as many characters as they want, causing issues with the states and the UI. Go ahead and import the CreateNote component:
import CreateNote from "./CreateNote";
Now, call it within the Notes.js file:
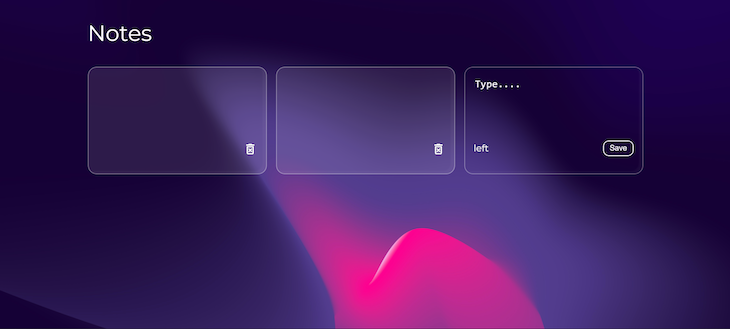
<div className="notes">
  <Note />
  <Note />
  <CreateNote />
</div>
Your page should look like the following:
At this point, we’ve basically created the main components for our example application. Now, we need to create a few functions that will take the user input from the form, save it in the input state, and then use that to generate a new note each time the user clicks the save button.
All of these functions will be added in the Notes.js file, which is the main file that connects each individual note and the form.
The input text function will take the user input and set it to the input state. Later, we’ll call this in the note form as a prop:
// get text and store in state
const textHandler = (e) => {
  setInputText(e.target.value);
};
The save note function will run when the user clicks the save button on the form. We will also call this in the note form later as a prop.
Firstly, the save note function will create a new note in the note state. It will take the user input from the input state and, along with a unique ID, create an object within the array. Secondly, it will clear the text area so that after submitting, the box is empty.
uuid v4 will create the unique ID, which will also be used as a key mapping out the notes. You can install uuid v4 using the following command:
npm install uuidv4
Use it as follows:
import { v4 as uuid } from "uuid";
Below is the complete code for the save button function:
// add new note to the state array
const saveHandler = () => {
  setNotes((prevState) => [
    ...prevState,
    {
      id: uuid(),
      text: inputText,
    },
  ]);
  //clear the textarea
  setInputText("");
};
When the user clicks on the delete icon, we will run the delete note function, which will remove the note from the array by filtering it out. The ID parameter will be the unique ID of the note being clicked:
//delete note function
const deleteNote = (id) => {
  const filteredNotes = notes.filter((note) => note.id !== id);
  setNotes(filteredNotes);
};
Now that we’ve created our functions, we need to pass them to our note form. We’ll use props for this. To pass the props to the CreateNote component, make the following changes in the Notes.js file:
<CreateNote
  textHandler={textHandler}
  saveHandler={saveHandler}
  inputText={inputText}
/>
Now, the save and text functions, along with the input state, are passed to the CreateNote component. Next, within the CreateNote.js file, call the props as follows:
function CreateNote({ textHandler, saveHandler, inputText })
We will use these in three places:
textarea to inputTexttextHandler function when any change happens to the textarea using onChangesaveHandler function onClick on the save buttonYour CreateNote.js file should now look like the following code:
import { React } from "react";
function CreateNote({ textHandler, saveHandler, inputText }) {
  return (
    <div className="note" style={{ background: "rgba(255, 255, 255, 0)" }}>
      <textarea
        cols="10"
        rows="5"
        value={inputText}
        placeholder="Type...."
        onChange={textHandler}
        maxLength="100"
      ></textarea>
      <div className="note__footer">
        <span className="label"> left</span>
        <button className="note__save" onClick={saveHandler}>
          Save
        </button>
      </div>
    </div>
  );
}
export default CreateNote;
A few sections back, we rendered a few Note components to see how they look for testing purposes only. To make the application dynamic, we’ll map out the notes from the notes array. The map() function creates a new array by calling a function for every array element, which is the notes array in our case.
We’ve added the map() function inside the return function within the Notes.js file:
return (
  <div className="notes">
    {notes.map((note) => (
      <Note
        key={note.id}
        id={note.id}
        text={note.text}
        deleteNote={deleteNote}
      />
    ))}
    <CreateNote
      textHandler={textHandler}
      saveHandler={saveHandler}
      inputText={inputText}
    />
  </div>
);
The code above goes through each element in the notes array. Then, it creates a new note using the user input and the unique ID that we created. The ID will be used for the parameter of the delete function
A key is a special string attribute that you need to include when creating lists of elements, like notes in our case.
As you can see in the code above, we are passing the delete function and the text to the Note component as a prop. Now, inside the Note.js file, we can add the text and the delete function to the note body and the delete icon, respectively:
function Note({ id, text, deleteNote }) {
  return (
    <div className="note">
      <div className="note__body">{text}</div>
      <div className="note__footer" style={{ justifyContent: "flex-end" }}>
        <DeleteForeverOutlinedIcon
          className="note__delete"
          onClick={() => deleteNote(id)}
          aria-hidden="true"
        ></DeleteForeverOutlinedIcon>
      </div>
    </div>
  );
}
Now, our notes app is fully functional!
We’ve already added a character limit to the textarea when we were creating the note form, as well as a label that will show us the remaining characters.
Now, let’s calculate how many characters are left out of 100 and display it in our app.
In the CreateNote.js file, add the following code before the return statement:
//character limit
const charLimit = 100;
const charLeft = charLimit - inputText.length;
The code above calculates the characters left by subtracting the current input length, which we have received as a prop, from 100. As the user is typing, this value will keep on decreasing.
We can simply call it within the span tag:
<span className="label">{charLeft} left</span>
We can further improve the form by adding a linear progress bar to mirror the character count. The linear progress bar will be used from MUI, which has many prebuilt progress bars. You can install MUI with the following command:
npm install @mui/material
Import it in the CreateNote.js file like this:
import LinearProgress from "@mui/material/LinearProgress";
To match our requirements, we will set its variant to discriminant and its value to the charLeft that we already calculated.
Your complete CreateNote.js file will look like the following code:
import { React } from "react";
import LinearProgress from "@mui/material/LinearProgress";
function CreateNote({ textHandler, saveHandler, inputText }) {
  //character limit
  const charLimit = 100;
  const charLeft = charLimit - inputText.length;
  return (
    <div className="note" style={{ background: "rgba(255, 255, 255, 0)" }}>
      <textarea
        cols="10"
        rows="5"
        value={inputText}
        placeholder="Type...."
        onChange={textHandler}
        maxLength="100"
      ></textarea>
      <div className="note__footer">
        <span className="label">{charLeft} left</span>
        <button className="note__save" onClick={saveHandler}>
          Save
        </button>
      </div>
      <LinearProgress
        className="char__progress"
        variant="determinate"
        value={charLeft}
      />
    </div>
  );
}
export default CreateNote;
localStorageFinally, we need to save the notes to our browser localStorage so that our data is not lost when we refresh the page or close it and then open it.
In the Notes.js file, we will create two functions: one to save the data and one to read it. We will run the code to save the data inside useEffect and add the notes state as a second argument so that we save the data each time it is changed:
//saving data to local storage
useEffect(() => {
  localStorage.setItem("Notes", JSON.stringify(notes));
}, [notes]);
We are using JSON.stringify to convert the object to a string so that it can be stored. Similarly, to read the data, we will also use the useEffect Hook. However, this time, the second argument will be an empty array because we only want to get data once on page load:
//get the saved notes and add them to the array
useEffect(() => {
  const data = JSON.parse(localStorage.getItem("Notes"));
  if (data) {
    setNotes(data);
  }
}, []);
And we’re done! You can find the complete code on CodeSandbox.
In this article, we built a notes app from scratch using React and localStorage. Our app has all the required functionalities, for example, storing a user input, saving it, and deleting it. We used localStorage to persist the data to our browser. Therefore, it is not lost when we refresh the page. We even went a step further to add a character count and a progress bar so the user knows how much space they have left to type.
I hope you enjoyed this article, and be sure to leave a comment if you have any questions. Thank you for reading!
Install LogRocket via npm or script tag. LogRocket.init() must be called client-side, not
server-side
$ npm i --save logrocket

// Code:

import LogRocket from 'logrocket';
LogRocket.init('app/id');
// Add to your HTML:

<script src="https://cdn.lr-ingest.com/LogRocket.min.js"></script>
<script>window.LogRocket && window.LogRocket.init('app/id');</script>

Learn how to set up Meilisearch, index documents, and build keyword, semantic, and hybrid search with AI-powered retrieval.

Compare pnpm and npm across security defaults, disk usage, dependency strictness, and workspace policy to decide which package manager fits your project.

I migrated 20 production-style components from Tailwind to StyleX. Here’s what the data showed about LOC, CSS bundle size, build time, and type safety.

A guide for using JWT authentication to prevent basic security issues while understanding the shortcomings of JWTs.
Hey there, want to help make our blog better?
Join LogRocket’s Content Advisory Board. You’ll help inform the type of content we create and get access to exclusive meetups, social accreditation, and swag.
Sign up now

