Editor’s note: This article was updated on 30 March 2023 to include information on FOIT (flash of invisible text), reusing fonts, and relevant details (pertaining to Google Fonts) on improving privacy for sites subject to GDPR.

How we load fonts in our web project can make or break the user’s experience. With system fonts, we are guaranteed that text will render at the earliest possible time. But we may not desire these font types, and more importantly, they are not consistent between operating systems.
Web fonts, on the other hand, allow us to maintain a consistent look. Adding web fonts can be a simple task. However, it can also become tedious if we care about performance optimization.
One issue associated with web fonts that are hosted with font delivery services like Google Fonts is the cost of external network requests. While we can greatly reduce this incurred cost by self-hosting the fonts, we also have the issue of layout shift to deal with.
Next.js v13 introduced a font system called next/font to help abstract the complexity of optimizing fonts. This article covers how to use this font system to add custom fonts and Google Fonts in a Next.js project as well as to optimize the font loading experience.
Jump ahead:
next/font system helps with font optimization in Next.jsnext/font
See the demo project here. You can interact with the project to see how page elements render different fonts. Here is the project source code.
Now, let’s dive in.
The Replay is a weekly newsletter for dev and engineering leaders.
Delivered once a week, it's your curated guide to the most important conversations around frontend dev, emerging AI tools, and the state of modern software.
Adding web fonts like Google Fonts in a Next.js application can be as simple as embedding <link> tags generated from the font delivery service into the Headcomponent of the pages/_document.js file.
If you don’t have a Next.js project, start by creating one with the following command:
npx create-next-app@latest nextjs-fonts
cd nextjs-fonts
Then, run your build process with npm run dev.
Now, add the following Home component in the pages/index.js file:
export default function Home() {
  return (
    <div>
      <h1>Home page</h1>
    </div>
  );
}
Let’s implement a variable font called “Dancing Script” from Google Fonts by adding <link> tags provided by the font delivery service into the Headcomponent of the pages/_document.js file, like so:
<Head>
  {/* preconnect scripts... */}
  <link
    href="https://fonts.googleapis.com/css2?family=Dancing+Script:[email protected]&display=swap"
    rel="stylesheet"
  />
</Head>
After that, we will update the font family in the styles/globals.css file:
body {
  /* ... */
  font-family: 'Dancing Script', 'Helvetica Neue', cursive;
}
The output looks like this:
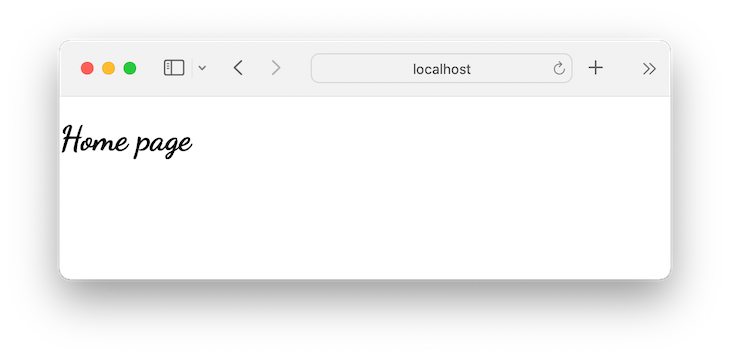
That is easy, right? Let’s see the problem with this implementation in the next section.
Ideally, when a web font is applied to a web document, the browser will start downloading the font after parsing the HTML. This happens right before the text is rendered.
While we expect the font to load and render quickly, that is not always the case. It may take some extra seconds for the fonts to load, especially when it involves an external request, as is the case with Google Fonts.
See the request URL below:

So, pending the completion of the downloading font, we need to tell the browser how to behave with regard to the text content using the font-display CSS descriptor.
By providing a value of swap, as we have seen with Google Fonts (the display=swap parameter in the URL will trigger a font-display: swap), we instruct the browser to render the page immediately with a fallback font and then swap the font with the web font after it has completely loaded.
This however triggers a flash of unstyled text, otherwise called FOUT. That switching moment can cause a shift in the text layout when the font is changed. If we simulate a font request on a slower connection, the FOUT will behave like so:

Apart from the value of swap, other possible values for font-display include auto, block, fallback, and optional. With a value of block, we tell the browser to hide the text until the web font is fully loaded. This will trigger a flash of invisible text, otherwise called FOIT, like that shown in the example below:

Here, the browser delays rendering the text until the font is loaded. We’ve added a background color to the page so we know when the page is rendered while waiting to display the text.
Meanwhile, a default value of auto tells the browser to apply its default font rendering. This implementation differs across browsers.
For use cases where “content is king”, we usually prefer FOUT over FOIT so that users can read content as soon as possible.
Now that we know some of the issues with fonts loading, we can improve the loading experience using three strategies:
size-adjust property to reduce layout shifts when switching between fontsWe can manually implement these optimization strategies, but let’s take a look at how Next.js 13 makes the process easier with the next/font system.
next/font system helps with font optimization in Next.jsThe next/font system is one of many powerful features introduced in Next.js 13. This font system significantly simplifies font optimization. It automatically self-hosts any Google Fonts by including them in deployment alongside other web components like HTML and CSS files.
Since no external request is involved by the browser, this implementation not only results in a faster load time, it also ensures we’re not violating the European Union’s General Data Protection Regulation (GDPR) by not transferring the user’s personal data to a third-party system like Google.
That is not the case when we embed the web font into the <head> as we’ve seen earlier.
In addition, the next/font system implements a strategy that prevents layout shift or significantly reduces the impact using the CSS size-adjust property.
next/fontWeb fonts, including those from Google Fonts, can either be variable fonts or non-variable fonts. A variable font has the advantage of integrating many variations of a typeface into a single file. Next.js recommends this type of font over the non-variable type. So, let’s start with that.
Dancing Script from Google Fonts is a type of variable font. If you added this font to your project earlier when we covered the <link> tags method, make sure you remove it before proceeding.
Now, let’s load Dancing Script using the next/font system. In the pages/index.js file, let’s import the font from next/font/google as a function and create a new instance of it:
import { Dancing_Script } from 'next/font/google';
const dancingScript = Dancing_Script({ subsets: ['latin'] });

console.log(dancingScript);

export default function Home() {
  return (
    // ...
  );
}
N.B., if a font name includes a space (for instance, “Dancing Script”), we must replace the space with an underscore (i.e *Dancing_Script*)
In the code above, we assign the font instance to a dancingScript variable and log it to see what it returns. If we save the file and reload the page, we should see the returned object in the browser developer tools panel as well as in the terminal:

The font loader returns an object containing options that we can use to apply the font style.
For optimization purposes, we subset the font to Latin. This strips out unrequired languages from the web font. Doing this ensures a preload link for the required font language is also added in the <head> element:
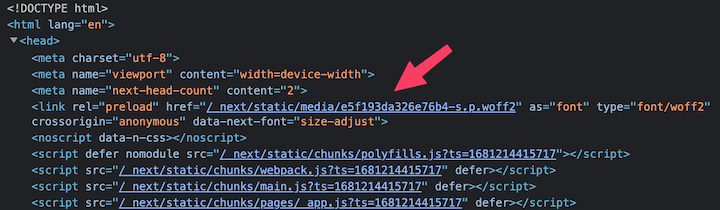
The preload suggests to the browser that it should schedule the font for early download.
If we recall, every font has a font-display property applied to it. By default, the value applied to fonts from the next/font system is font-display:swap. By combining the display implementation together with preloading the font and then the underlying CSS size-adjust property used by the Next.js font system, we’ll get the most effective result.
As we saw earlier, the returned object contains the className property and a style object that we can use to apply the font. Using the className, we can apply a font to an element like so:
export default function Home() {
  return (
    <div>
      <h1 className={dancingScript.className}>Home page</h1>
    </div>
  );
}
Now, we can save the file and restart the dev server.
If we check the frontend, we should see the font applied. Even if the font request is slower than expected, we will not experience a layout shift or a FOUT.
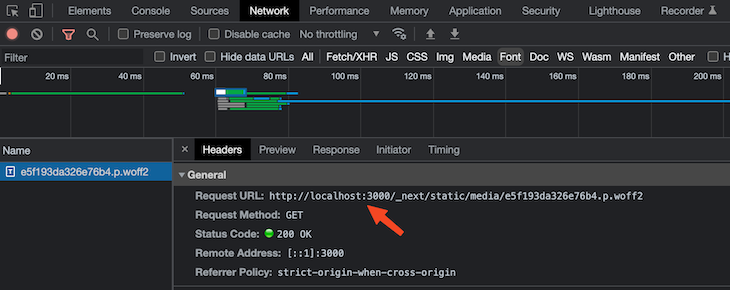
The browser developer tools shows that the request is within our infrastructure and not from a delivery service:
If we want to use the “Dancing Script” font again in another file, say pages/about.js, we could call the font function in that file and use it as we did before. However, loading the same font function in multiple files is not advisable because:
In this scenario, the recommendation is to create a separate file where we load the font. Then, we can import the font in each file that requires it.
So, let’s create a utils/fonts.js file and export the “Dancing Script” font as a constant:
import { Dancing_Script } from 'next/font/google';
export const dancingScript = Dancing_Script({ subsets: ['latin'] });
Save the file.
Now, we can reference the font from the pages/index.js and pages/about.js files:
import { dancingScript } from '../utils/fonts';
Adding multiple Next.js fonts using next/font is as simple as defining multiple font instances and applying the auto-generated classes to the document element.
In the utils/fonts.js file, let’s also import an Oswald variable font from Google and export it so we can use it in another file:
import { Dancing_Script, Oswald } from 'next/font/google';

export const dancingScript = Dancing_Script({ subsets: ['latin'] });
export const oswald = Oswald({ subsets: ['latin'] });
Save the file and import the font in the pages/index.js file so we have the following:
import { dancingScript, oswald } from '../utils/fonts';

export default function Home() {
  return (
    <div className={oswald.className}>
      <h1 className={dancingScript.className}>Home page</h1>
      <p>This paragraph uses another font</p>
    </div>
  );
}
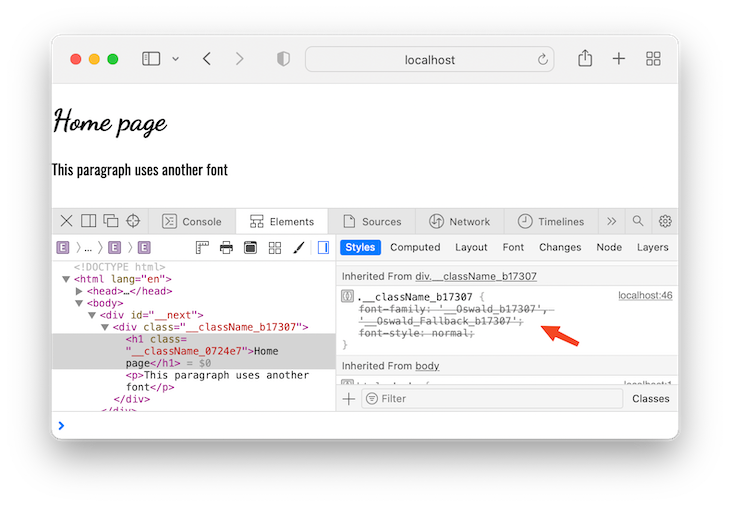
In the above code, we applied the Oswald variable font to the wrapper element to make it available for the child elements. The paragraph within the wrapper will inherit the font. Meanwhile, the font on theelement will override the wrapper font.
See the output below:
style propWe can also use the style option returned from the font loader to apply font via the style attribute. The following code uses the style option to apply a font to the wrapper element:
export default function Home() {
  return (
    <div style={oswald.style}>
      <h1 className={dancingScript.className}>Home page</h1>
      <p>This paragraph uses another font</p>
    </div>
  );
}
The above code will give us the same result as before.
Unlike their variable counterparts, a non-variable font will require a weight option. The weight can be a string or an array of values.
An example of a non-variable font is Merriweather, which is also available through Google Fonts. Let’s open the utils/fonts.js file and import it from next/font/google so that we can export an instance of it from the file:
import {
  Dancing_Script,
  Oswald,
  Merriweather,
} from 'next/font/google';

// ...

export const merriweather = Merriweather({
  weight: ['300', '400', '700'],
  style: ['normal', 'italic'],
  subsets: ['latin'],
});
We added a required weight option and some optional style values in the font instance. If we save the file, we can now apply the generated class to a document element. Let’s do that in the pages/index.js file:
import {
  // ...
  merriweather
} from '../utils/fonts';

export default function Home() {
  return (
   // ...
      <p className={merriweather.className}>
        This text uses a non variable font
      </p>
    // ...
    </div>
  );
}
If we save the file, the font should apply.
To apply a font throughout the entire web document, we will import the font in the pages/_app.js file and pass the generated class to the Component wrapper element, like so:
import { Raleway } from 'next/font/google';
const raleway = Raleway({ subsets: ['latin'] });

function MyApp({ Component, pageProps }) {
  return (
    <div className={raleway.className}>
      <Component {...pageProps} />
    </div>
  );
}

export default MyApp;
In the code above, we imported a Raleway font, which is also a variable font. So, adding a weight option in the configuration is optional.
<head>Another way to apply font across the document is by injecting the font in the <head>. In the pages/_app.js file, we can use the <style> tag before the Component to apply a global font:
function MyApp({ Component, pageProps }) {
  return (
    <>
      <style jsx global>{`
        html {
          font-family: ${raleway.style.fontFamily};
        }
      `}</style>
      <Component {...pageProps} />
    </>
  );
}

export default MyApp;
Remember, we have access to the font family from the style object.
The syntax for CSS variables provides the flexibility of declaring multiple fonts in a stylesheet. The following code imports two different fonts in the pages/_app.js file, which we then used to declare global CSS variables:
import { Raleway, IBM_Plex_Sans } from 'next/font/google';

const raleway = Raleway({ subsets: ['latin'] });
const ibmSans = IBM_Plex_Sans({
  weight: '700',
  subsets: ['latin'],
});

function MyApp({ Component, pageProps }) {
  return (
    <>
      <style jsx global>{`
        :root {
          --raleway-font: ${raleway.style.fontFamily};
          --ibmSans-font: ${ibmSans.style.fontFamily};
        }
      `}</style>
      <Component {...pageProps} />
    </>
  );
}

export default MyApp;
The :root pseudo-class in the code will select the root element — i.e., the <html>.
Now, we can apply the CSS variables in a CSS file. The below code applies the variables in a styles/globals.css file:
body {
  font-family: var(--raleway-font);
}

h1, h2, h3 {
  font-family: var(--ibmSans-font);
}
variable key optionWhile creating a font instance, we can also add a variable key that lets us declare a CSS variable. This option lets us easily use fonts with Tailwind CSS and CSS modules without using the global <style> syntax.
The following code declares a CSS variable called --antonio-font via the variable key option:
const antonio = Antonio({
  subsets: ['latin'],
  variable: '--antonio-font',
});
If we log the result, we should see the returned object containing a variable property that will let us access the font:
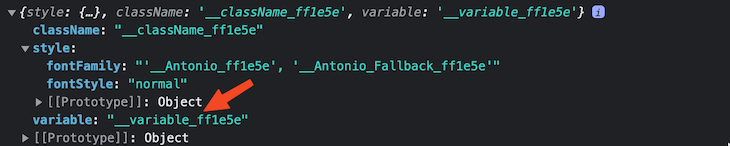
We can now apply the variable name via a className attribute on a container element. If we declare a global font in the pages/_app.js file, the Componentwrapper should look like this:
<div className={antonio.variable}>
  <Component {...pageProps} />
</div>
From here, we can use the font with Tailwind CSS — as you will see later in this article — or with CSS modules. For CSS modules, let’s say we have an About page component that uses this module, like so:
import styles from './About.module.css';

const About = () => {
  return (
    <div>
      <h1>About page</h1>
      <p className={styles.text}>This is about page content</p>
    </div>
  );
};

export default About;
We can use the CSS variable that we declared earlier to access the font in the About.module.css file, like so:
.text {
  font-family: var(--antonio-font);
  font-style: italic;
}
In some scenarios, the font we want to use in Next.js may not be from Google Fonts. Instead, it could be a custom font that we created, a font that we bought, or one that we downloaded from another font site.
We can use any of these fonts locally by configuring them using the next/font/local. We will demonstrate how to do so by downloading a font called Cooper Hewitt from Font Squirrel.
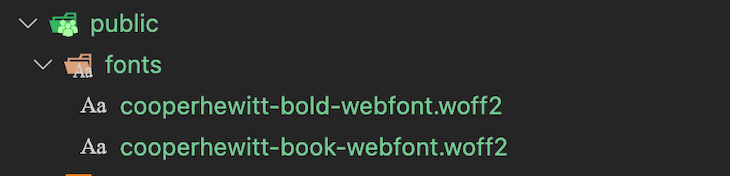
The Cooper Hewitt font doesn’t come in the more modern and well-compressed .woff2 format. As a result, our first step is to convert it using the Font SquirrelWebfont Generator. Then, we will add the bold and normal weight variations of the font to our project’s [public/fonts](https://github.com/Ibaslogic/Next.js-fonts-optimization/tree/main/public/fonts) folder:
Similar to using Google Fonts with Next.js, we can load the local fonts across the entire document or use them for a specific page. To load the local fonts sitewide, we will import the font loader from next/font/local in the pages/_app.js file:
import localFont from 'next/font/local';
Next, we will define a new instance where we specify the src of the local font files as an array of objects:
const cooper = localFont({
  src: [
    {
      path: '../public/fonts/cooperhewitt-book-webfont.woff2',
      weight: '400',
    },
    {
      path: '../public/fonts/cooperhewitt-bold-webfont.woff2',
      weight: '700',
    },
  ],
});
Each of the objects represents the font for a specific weight. If we use a variable font, we can instead specify the src as a string, like so:
const variableFont = localFont({ src: '../public/fonts/my-variable-font.woff2' });
From this point, how we apply the font styles is the same as the method used for Google Fonts that we covered earlier. We can use either the className syntax, style, or CSS variables.
Let’s declare a CSS variable for the local font globally with the <style> syntax:
function MyApp({ Component, pageProps }) {
  return (
    <>
      <style jsx global>{`
        :root {
          /* ... */
          --cooper-font: ${cooper.style.fontFamily};
        }
      `}</style>
      <Component {...pageProps} />
    </>
  );
}
We can now use the --cooper-font CSS variable in the components stylesheet. Let’s say we have a Contact page component, like so:
import styles from './Contact.module.css';

const contact = () => {
  return (
    <div className={styles.contact}>
      <h1>Contact page</h1>
      <p>This is contact content uses a local font</p>
    </div>
  );
};

export default contact;
We can use the CSS variable to access the font in the Contact.module.css file:
.contact > *{
  font-family: var(--cooper-font);
}
To use the next/font package with Tailwind CSS, we will use the CSS variable syntax. Fortunately, we have already declared a couple of CSS variables in the pages/_app.js file.
Recall how earlier, we injected the following in the <head>:
<style jsx global>{`
  :root {
    --raleway-font: ${raleway.style.fontFamily};
    --ibmSans-font: ${ibmSans.style.fontFamily};
    --cooper-font: ${cooper.style.fontFamily};
  }
`}</style>
We also defined a CSS variable name with the variable option:
const antonio = Antonio({
  subsets: ['latin'],
  variable: '--antonio-font',
});
We can use any of these CSS variable declarations to add Next.js fonts with Tailwind CSS.
tailwind.config.js fileLet’s add the CSS variables as a font family in the Tailwind CSS configuration file:
const { fontFamily } = require('tailwindcss/defaultTheme');

/** @type {import('tailwindcss').Config} */
module.exports = {
  content: [
    './pages/**/*.{js,ts,jsx,tsx}',
    './components/**/*.{js,ts,jsx,tsx}',
  ],
  theme: {
    extend: {
      fontFamily: {
        antonio: ['var(--antonio-font)', ...fontFamily.sans],
        ibm: ['var(--ibmSans-font)', ...fontFamily.sans],
        cooper: ['var(--cooper-font)', 'ui-serif', 'Georgia'],
      },
    },
  },
  plugins: [],
};
We can now use font-antonio, font-ibm, and font-cooper utility class names to apply the fonts. A component that implements these utilities will look like this:
const Tailwind = () => {
  return (
    <div>
      <h1 className="font-ibm">With Tailwind CSS</h1>
      <p className="font-antonio">This is a first paragraph</p>
      <p className="font-cooper">This is a second paragraph</p>
    </div>
  );
};

export default Tailwind;
If we want to apply one of the utilities (for instance, font-cooper) globally to the document, we can add it as className to the Component wrapper element in the pages/_app.js file:
function MyApp({ Component, pageProps }) {
  return (
    <>
      {/* ... */}
      <div className={`${antonio.variable} font-cooper`}>
        <Component {...pageProps} />
      </div>
    </>
  );
}

export default MyApp;
As we have seen in this article, the next/font system introduced in Next.js v13 simplifies font optimization by abstracting its complexity. We have used this system to add both custom and Google Fonts font families in a Next.js application.
In our demo project, we added multiple fonts to help demonstrate the various methods for using fonts in Next.js. However, in a production site, we should consider minimizing the number of fonts to preload.
I hope you enjoyed this article. If you have questions or contributions, share your thoughts in the comment section. See the complete source code for the project on GitHub.
Debugging Next applications can be difficult, especially when users experience issues that are difficult to reproduce. If you’re interested in monitoring and tracking state, automatically surfacing JavaScript errors, and tracking slow network requests and component load time, try LogRocket.
LogRocket captures console logs, errors, network requests, and pixel-perfect DOM recordings from user sessions and lets you replay them as users saw it, eliminating guesswork around why bugs happen — compatible with all frameworks.
LogRocket's Galileo AI watches sessions for you, instantly identifying and explaining user struggles with automated monitoring of your entire product experience.
The LogRocket Redux middleware package adds an extra layer of visibility into your user sessions. LogRocket logs all actions and state from your Redux stores.


Modernize how you debug your Next.js apps — start monitoring for free.

AI tools generate working React code fast, but miss race conditions, empty states, debouncing, and accessibility. Here’s how to catch bugs before production.

Learn how to use Gemini CLI subagents to delegate frontend, backend, testing, and docs tasks to specialized agents with guardrails and clear ownership.

Learn how next-browser gives AI agents runtime context for debugging Next.js apps, including React props, hydration, PPR, forms, and performance.

Build dynamic LLM routing in Next.js with OpenRouter, TanStack AI, task classification, model fallbacks, and cost-aware routing.
Hey there, want to help make our blog better?
Join LogRocket’s Content Advisory Board. You’ll help inform the type of content we create and get access to exclusive meetups, social accreditation, and swag.
Sign up now

