Custom fonts can transform the look and feel of a website, and Tailwind simplifies this with flexible font customization using local files and Google Fonts. These custom fonts can be used to improve readability, brand identity, and evoke certain emotions, all while maintaining Tailwind’s utility-first principles.

Custom fonts are typically either self-hosted, meaning they reside on the same web server as your website, or served from an external provider like Google Fonts. In the case of self-hosted fonts, you can upload your font files to your server and reference them in your code. Alternatively, with external providers, you simply link to their hosted fonts.
However, when working with Tailwind CSS, the process of using custom fonts, whether local or external, requires a slightly different setup.
In this article, I’ll walk you through how to use Google Fonts and locally installed fonts in your Tailwind projects to help you improve your project typography and design consistency. I’ll also show you how to integrate a custom Tailwind font family into your project.
N.B., This article focuses on font family customizations in Tailwind CSS. If you’re looking to style rich text content like blog posts or documentation, check out our guide on the Tailwind Typography plugin.
Editor’s note: This article was updated by David Omotayo in May 2025 to answer common FAQs around custom fonts in Tailwind CSS and add information about the default Tailwind font family.
Tailwind CSS is a utility-first CSS framework that allows you to build custom designs without ever leaving your HTML. It comes with a set of utility classes that you can use to style your elements without having to write any CSS code.
Tailwind is a great tool for building websites, but it doesn’t have any built-in support for web fonts like Google Fonts. If you want to use custom fonts in your project, you have to add them yourself. But don’t worry, it’s not as difficult as it sounds!
It would be best to have a small application to experiment with as we progress, so I’ve set up a starter project on GitHub.
To set up this Next.js and Tailwind project, follow the instructions in the README file. Once you clone this project, run the following command to install the required dependencies:
npm install
Then, start the dev server by running this command:
npm run dev
You should see the following:

Now, let’s add some custom fonts to this project.
Tailwind CSS offers the flexibility to define and integrate custom font families into your project, which you can incorporate alongside existing font families. Let’s explore how to create and apply custom font families in Tailwind:
The Tailwind framework was built with customization in mind. By default, Tailwind
searches the root directory for a tailwind.config.js file that contains all our customizations.
To create the tailwind.config.js file, run the following command, which uses the npx CLI:
npx tailwind init
Our starter project already contains a tailwind.config.js file. Open the file and navigate to the theme section. Define your custom font families within the fontFamily key:
// tailwind.config.js
module.exports = {
  theme: {
    extend: {
      fontFamily: {
        customFont: ['"Custom Font"', "sans-serif"],
        // Add more custom font families as needed
      },
    },
  },
  // Other Tailwind configuration settings
};
Replace the custom font with the name of your desired font family. You can specify multiple fallback font families in case the primary one isn’t available.
Now that we’ve defined our custom Tailwind font family, we can apply it to any element in our project. To do this, we need to add the font family to the element’s class attribute:
<p className="font-customFont">...</p>
Google Fonts are a great way to add custom fonts to your website. They are free, easy to use, and have a wide variety of fonts to choose from.
Tailwind recommends integrating Google Fonts through the Tailwind CSS Typography plugin for the best rendering performance. Alternatively, you can use Google Fonts with the following methods:
npm packages such as the google-fonts plugin as a third-party solution@import ruleOne way to add a custom font in Tailwind is by using the Typography plugin developed by the Tailwind team. This plugin offers an alternative approach to font customization that differs from the standard method. However, since it follows a different setup process, it’s beyond the scope of this article. You can check out our dedicated guide on the Tailwind Typography plugin to learn more about this method.
Another way to use Google Fonts in Tailwind CSS is to add the CDN link to your index.html file, or in our case, the _document.js file, as we are using Next.js:
// _document.js
<Head>
  <link rel="preconnect" href="https://fonts.googleapis.com" />
  <link rel="preconnect" href="https://fonts.gstatic.com" crossorigin />
  <link
    href="https://fonts.googleapis.com/css2?family=Poppins:wght@400;500&display=swap"
    rel="stylesheet"
  />
</Head>
Next, we must add the font family to the tailwind.config.js file.
Let’s tell Tailwind to use the Poppins font that we added instead. Open up your tailwind.config.js file and update the configuration to inherit and extend from fontFamily.sans:
/** @type {import('tailwindcss').Config} */
const { fontFamily } = require("tailwindcss/defaultTheme");
module.exports = {
  content: [
    "./pages/**/*.{js,ts,jsx,tsx}",
    "./components/**/*.{js,ts,jsx,tsx}",
  ],
  theme: {
    extend: {
      fontFamily: {
        poppins: ["Poppins", ...fontFamily.sans],
      },
    },
  },
  plugins: [],
};
We’re extending the default Tailwind configuration to add a new font-poppins utility class. This means it will be available alongside Tailwind’s default font classes.
This approach aligns well with Tailwind’s utility-first styling philosophy. If we ever need to use the Poppins font elsewhere in the project, we can simply add the font-poppins class to the element: no additional setup required. It also allows us to apply different fonts at various breakpoints if we want to.
Now, let’s use the font in our project. Open up the index.js file and add the font-poppins class to the section element:
// index.js
<section className="font-poppins text-gray-600">
  ...
</section>
Now, let’s see what we have:

Our custom font is now applied to the text in our project.
Another way to integrate Google Fonts in Tailwind CSS is to use the @import rule. This rule allows you to import a CSS file into another CSS file, which is useful when you want to use a CSS file that is not in the same directory or folder as the CSS file you are importing it into.
The CSS file can also be on a different server or even on a different domain. We will use it to import the Google Fonts CSS file into our Tailwind CSS file.
To use the @import rule, we need to add the Google Fonts CSS file to our global.css file:
/* global.css */
@tailwind base;
@tailwind components;
@tailwind utilities;
@import url("https://fonts.googleapis.com/css2?family=Poppins:wght@400;500&display=swap");
To test this out, remove the CDN link from the _document.js file.
Now, let’s see what we have:

Our font is still applied to the text in our project.
Whenever I Google “How to use custom fonts in Tailwind,” the results say little about using local/downloaded fonts. However, 90 percent of the time, that’s precisely what I’m looking for. This section explains how to use locally installed fonts alongside Google Fonts, giving you the flexibility to style your Tailwind project.
Starting with the v3 release, Tailwind CSS recommends adding local fonts via modern bundler workflows such as unplugin-fonts or postcss-font-magician to simplify font loading and improve the developer experience.
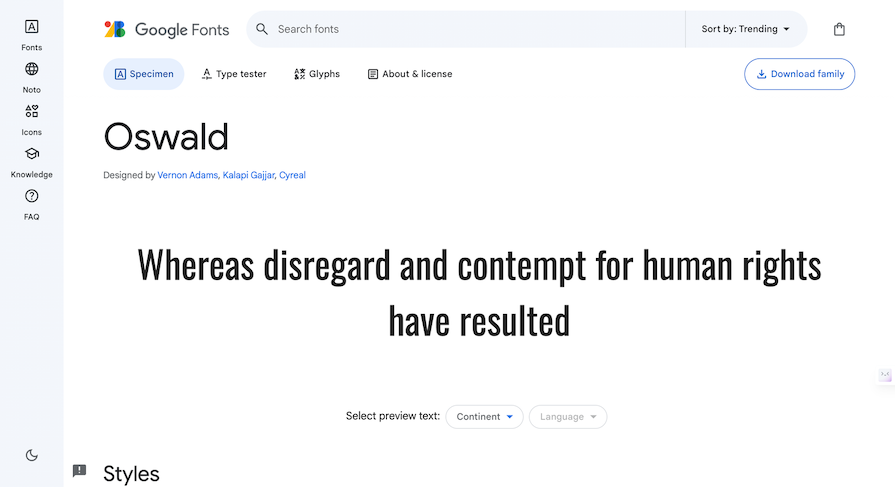
To begin, we need to find and install a font. In this example, we will use the Oswald font, a Google web font that was created by Vernon Adams, Kalapi Gajjar, and Cyreal.
To install Oswald, we need to download the font files from the Google Fonts website. Search for the font you want and click on the Download family button. This will download a zip file containing the font files:
Once the download is complete, unzip the file and copy the font files into the public/fonts folder in your project. If you don’t have a fonts folder, create one.
Install the unplugin-fonts package into your demo TailwindCSS project using the following command:
npm i unplugin-fonts
Next, register unplugin-fonts as a plugin in your tailwind.config.js file to use the Oswald local font:
const { fontFamily } = require("tailwindcss/defaultTheme");
const Unfonts = require("unplugin-fonts");
// tailwind.config.js
module.exports = {
  content: [
    "./pages/**/*.{js,ts,jsx,tsx}",
    "./components/**/*.{js,ts,jsx,tsx}",
  ],
  theme: {
    fontSize: {
      title: `2.6rem;`,
      paragraph: `1.2rem;`,
    },
    fontFamily: {
      poppins: ["Poppins", ...fontFamily.sans],
      adelia: ["ADELIA", "cursive"],
    },
  },
  plugins: [
    require("@tailwindcss/typography"),
    Unfonts.default.vite({
      custom: {
        families: [
          {
            name: "Oswald",
            local: "Oswald",
            src: "./public/fonts/Oswald-VariableFont_wght.ttf",
          },
        ],
      },
    }),
  ],
};
An alternative way to add local fonts with Tailwind CSS is through the @font-face directive in CSS files.
We need to add the font files to the global.css file:
@tailwind base;
@tailwind components;
@tailwind utilities;
@import url("https://fonts.googleapis.com/css2?family=Poppins&display=swap");
@font-face {
  font-family: "Oswald";
  src: url("../public/fonts/Oswald-VariableFont_wght.ttf");
}
Then, add the font family to the tailwind.config.js file:
const { fontFamily } = require("tailwindcss/defaultTheme");
// tailwind.config.js
module.exports = {
    ...
  theme: {
    fontFamily: {
      poppins: ["Poppins", ...fontFamily.sans],
      oswald: ["Oswald", ...fontFamily.sans],
    },
  },
  plugins: [],
};
Now, let’s use the font in our project. Open up the index.js file and add the font-oswald class to the h1 element:
// index.js
<h1 className="font-oswald text-primary-800 mb-4 text-4xl font-medium">
  Microdosing synth tattooed vexillologist
</h1>
Now, let’s see what we have:

And that’s it! We are now using a locally installed font in our project.
While Tailwind offers many options by default, it also enables you to extend the default configuration by adding your own classes or changing the properties of the default configuration. To do this, we use the tailwind.config.js file.
We can extend the color and font size configurations by updating the tailwind.config.js file, like so:
const { fontFamily } = require("tailwindcss/defaultTheme");
// tailwind.config.js
module.exports = {
  content: [
    "./pages/**/*.{js,ts,jsx,tsx}",
    "./components/**/*.{js,ts,jsx,tsx}",
  ],
  theme: {
    extend: {
      colors: {
        primary: {
          500: "#FF6363;",
          800: "#FF1313;",
        },
      },
    },
    fontSize: {
      title: `2.6rem;`,
      paragraph: `1.2rem;`,
    },
    fontFamily: {
      poppins: ["Poppins", ...fontFamily.sans],
      oswald: ["Oswald", ...fontFamily.sans],
    },
  },
  plugins: [],
};
In the code above, we added a fontSize property to the theme object. This fontSize property contains our custom font sizes: title and paragraph. We added a new colors property that contains a primary color with two shades: 500 and 800.
We can apply these classes to style our component like so:
export default function Home() {
return (
<section className="font-poppins text-gray-600">
<div className="container flex flex-col items-center justify-center px-5 py-24 mx-auto">
<div className="lg:w-2/3 w-full text-center">
<h1 className="font-oswald text-primary-800 mb-4 text-4xl font-medium">
Microdosing synth tattooed vexillologist
</h1>
<p className="text-primary-500 mb-8 leading-relaxed">
Meggings kinfolk echo park stumptown DIY, kale chips beard jianbing
tousled. Chambray dreamcatcher trust fund, kitsch vice godard
disrupt ramps hexagon mustache umami snackwave tilde chillwave ugh.
Pour-over meditation PBR&B pickled ennui celiac mlkshk freegan
photo booth af fingerstache pitchfork.
</p>
<p class="text-sm sm:text-base md:text-lg lg:text-xl xl:text-2xl">
Dynamic Font Sizing
</p>
</div>
</div>
</section>
);
}
Now, if you check your browser, you will see that our project has a new look with the styles applied:

Performance is of the utmost importance. It ensures a great user experience, and we all generally like it when websites are fast. As a result, you might not want to ship any assets that you’re not using in production.
When that is the case and you want to get rid of any default configs in your project before shipping, all you have to do is update your Tailwind config by removing the configs you are not using:
const { fontFamily } = require("tailwindcss/defaultTheme");
// tailwind.config.js
module.exports = {
  content: [
    "./pages/**/*.{js,ts,jsx,tsx}",
    "./components/**/*.{js,ts,jsx,tsx}",
  ],
  theme: {
    fontFamily: {
      poppins: ["Poppins", ...fontFamily.sans],
      oswald: ["Oswald", ...fontFamily.sans],
    },
  },
  plugins: [],
};
The difference is that we omitted the extend: {} object within the theme: {} object and directly specified values for fontFamily. This will ultimately override all default fonts and use only the ones we’ve specified.
Starting from the v3 release, the JIT (Just-In-Time) engine for Tailwind CSS automatically removes unused CSS within production builds, without needing a purge configuration in the tailwind.config.js file.
If you have a legacy project using older versions of Tailwind CSS, the deprecated purge feature allows you to discard all unused CSS in production builds. You enable it by adding the purge key to the config of your old project, like so:
const { fontFamily } = require("tailwindcss/defaultTheme");
// tailwind.config.js
module.exports = {
  content: [
    "./pages/**/*.{js,ts,jsx,tsx}",
    "./components/**/*.{js,ts,jsx,tsx}",
  ],
  purge: {
    enabled: true,
    content: [
      "./pages/**/*.{js,ts,jsx,tsx}",
      "./components/**/*.{js,ts,jsx,tsx}",
    ],
  },
  theme: {
    fontFamily: {
      poppins: ["Poppins", ...fontFamily.sans],
      oswald: ["Oswald", ...fontFamily.sans],
    },
  },
  plugins: [],
};
Starting with Tailwind v4, the tailwind.config.js file is no longer automatically generated during installation. While Tailwind hasn’t entirely dropped support for the config file, you can still create and use it manually. They’ve made it clear in the documentation that going forward, the preferred approach is the CSS-first configuration method.
This method essentially lets you define all of Tailwind CSS’s configuration directly within your project’s global CSS file. So, in the case of custom fonts, rather than configuring the fontFamily key inside the theme section of tailwind.config.js like this:
const { fontFamily } = require("tailwindcss/defaultTheme");
// tailwind.config.js
module.exports = {
    ...
  theme: {
    fontFamily: {
      poppins: ["Poppins", ...fontFamily.sans],
      oswald: ["Oswald", ...fontFamily.sans],
    },
  },
};
Instead, you’ll use the @theme directive in your global CSS file and define your custom font using the --font-* theme variables:
@theme {
  --font-oswald: "Oswald", "sans-serif";
}
Once set, you can apply the custom font just like any other Tailwind utility class, by using the font’s variable name. In this case, font-oswald:
<div class="font-oswald">
  <!-- ... -->
</div>
The process is similar when using Google Fonts, but there’s one important detail to keep in mind: the @import rule for the font must appear at the very top of your CSS file to ensure it’s properly loaded by the browser:
@import url('https://fonts.googleapis.com/css2?family=Poppins:wght@400;500&display=swap');

@theme {
  --font-roboto: "Poppins", sans-serif;
}
Responsive, or dynamic, font sizing is a technique that allows you to change the size of your UI elements based on the size of the screen. This is useful when you want to ensure your UI elements are readable on all devices, regardless of their screen size.
Tailwind provides responsive text classes that allow you to set different font sizes based on the screen size. To implement dynamic font sizing in Tailwind CSS, you can leverage Tailwind’s utility classes along with responsive design principles. Here’s how you can achieve dynamic font sizing:
<p class="text-sm sm:text-base md:text-lg lg:text-xl xl:text-2xl">
  Dynamic Font Sizing Using Responsive Text Classes
</p>
In the example above, we are using
text-sm class — To set the font size to 12px on the smallest screenssm:text-base class — To set the font size to 16px on small screensmd:text-lg class — To set the font size to 18px on medium screenslg:text-xlclass — To set the font size to 20px on large screensxl:text-2xl class — To set the font size to 24px on extra-large screensAn alternative method for implementing dynamic font sizing with Tailwind fonts is using clamp arbitrary values. While introducing a clamp utility class is still being discussed, you can use a clamp arbitrary value to make your text responsive without having to add multiple breakpoint classes:
<p class="text-[clamp(1rem, 2.5vw, 2rem)]"> Dynamic Font Sizing with Clamp </p>
Adding custom fonts to Tailwind isn’t always smooth sailing. This section addresses common questions like “Why isn’t my custom font showing up?” and outlines fixes for common issues.
When your custom font doesn’t display as expected, the browser is likely falling back to default system fonts. This is a built-in fallback behavior in Tailwind. If a custom font fails to load, Tailwind ensures that a default font is used to prevent the browser from rendering the text content using a generic font.
Make sure your custom font is being properly imported. If you’re using Google Fonts, confirm that the @import statement or <link> tag is correctly included, either in your global CSS or your tailwind.config.js (if you’re managing styles that way). If you’re using @font-face with local fonts, double-check the file paths and the font-family name for accuracy.
Verify that the font is included in the production build. During production builds, asset files can be moved or excluded. Make sure your font files are in web-friendly formats like .woff or .woff2, and place them in a publicly accessible location, typically the /public folder or a designated assets/ directory, depending on your framework.
When using @font-face, reference your fonts with relative paths that match their final build location. For example:
@font-face {
  font-family: 'MyFont';
  src: url('/fonts/my-font.woff2') format('woff2');
  font-weight: normal;
  font-style: normal;
}
Before we wrap up, let’s answer some common questions developers often ask about using custom fonts and font families in Tailwind CSS:
Tailwind provides three default font family utilities: font-sans, font-serif, and font-mono. These classes use a stack of system fonts for their respective typefaces, sans-serif, serif, and monospace.
Here’s an example of their respective font stacks:
sans-serif— system-ui, sans-serif, Apple Color Emoji, Segoe UI Emoji, Segoe UI Symbol, Noto Color Emoji.serif — Georgia, Cambria, Times New Roman, Times, serifmonospace — SFMono-Regular, Menlo, Monaco, Consolas, Liberation Mono, Courier New, monospaceSo, when using any of these classes, you’re actually relying on their full font stack listed above.
You can change the font in Tailwind CSS using either of the following methods:
theme.fontFamily section in your tailwind.config.js file@font-face rule, assigning it a name, and then referencing that name in your Tailwind configuration, exactly as we’ve demonstrated throughout this articleYes. You can use Google Fonts with Tailwind. In fact, this article walks you through how to import and integrate Google Fonts into your Tailwind project.
In this article, we explored how to use Google Fonts in CSS and integrate them into your Tailwind CSS projects. From performing a Google font import in CSS to configuring local fonts, we’ve covered all the essentials for styling your frontend effectively. Use these methods to improve your font management and your Tailwind designs.
What are your go-to fonts for web projects? Share them with us in the comments!
As web frontends get increasingly complex, resource-greedy features demand more and more from the browser. If you’re interested in monitoring and tracking client-side CPU usage, memory usage, and more for all of your users in production, try LogRocket.

LogRocket lets you replay user sessions, eliminating guesswork around why bugs happen by showing exactly what users experienced. It captures console logs, errors, network requests, and pixel-perfect DOM recordings — compatible with all frameworks.
LogRocket's Galileo AI watches sessions for you, instantly identifying and explaining user struggles with automated monitoring of your entire product experience.
Modernize how you debug web and mobile apps — start monitoring for free.

Learn how contrast-color() automatically picks accessible text colors using native CSS, without JavaScript.

Learn how to build smooth staggered animations in CSS using modern features like sibling-index(), complete with practical examples, fallbacks, and accessibility tips.

Compare the top AI development tools and models of July 2026. View updated rankings, feature breakdowns, and find the best fit for you.

Learn how to detect unused and ghost dependencies in JavaScript projects using Knip, a project-level linter that keeps your dependency graph accurate.
Would you be interested in joining LogRocket's developer community?
Join LogRocket’s Content Advisory Board. You’ll help inform the type of content we create and get access to exclusive meetups, social accreditation, and swag.
Sign up now

