Editor’s note: This article was last updated on 29 March 2023 to add a section on Netlify and Cloudflare limitations. For more information, check out this tutorial for deploying apps with Netlify and this tutorial for deploying with Cloudflare Pages.

Serverless technologies help developers deploy and manage apps through a cloud provider. This can minimize costs because developers don’t have to pay for what they don’t use and they also don’t need to maintain a server.
Netlify, a powerful serverless platform with an intuitive Git-based workflow, automated deployments, and shareable previews, has been a major player among serverless platforms since 2014.
However, Cloudflare’s Cloudflare Pages, a Jamstack platform for frontend developers to collaborate and deploy websites, has seen increasing adaptation by the community since its release in April 2021.
Cloudflare Pages has been a full-stack platform since November 2021, creating direct competition to Netlify because developers can now create backend functions and frontend code together.
In this article, we’ll discuss how the Netlify and Cloudflare pages compare in terms of developer experience, performance, and build time to help you make informed decisions when deploying your own Jamstack website.
Jump ahead:
The Replay is a weekly newsletter for dev and engineering leaders.
Delivered once a week, it's your curated guide to the most important conversations around frontend dev, emerging AI tools, and the state of modern software.
Third-party signup services are alternatives to username/password authentication and are critical when measuring the success of an onboarding experience. Compared to Cloudlfare, Netlify makes signing up much easier.
Netlify allows users to sign up or log in via third parties like GitHub, GitLab, Bitbucket, and email while Cloudflare Pages only allows email sign-up and login.
Because most developers are already logged into their version control platforms on their browsers, signing up or into Netlify is more convenient because it uses the credentials of those version control platforms. Developers can then easily deploy code from these platforms.
While Cloudflare Pages provide integration with GitHub and GitLab, the sign-in process via email can make using Cloudflare Pages tedious.
Both Netlify and Cloudflare Pages follow the same rules when adding functions for dynamic features, such as requiring us to put everything we create into a /functions folder, including dynamic features.
Now, let’s see how to route and write serverless functions in Cloudflare Pages and Netlify.
In Cloudflare Pages, using a /functions directory generates a routing table based on the files present in the directory. You can write your functions using JavaScript (.js ) or TypeScript (.ts ).
For example, assume this directory structure:
├── ...
├── functions
|   └── api
│       ├── [[path]].js
│       ├── [username]
│       │   └── profile.js
│       ├── time.js
│       └── todos
│           ├── [[path]].js
│           ├── [id].js
│           └── index.js
└── ...
The following routes will generate based on the file structure, mapping the URL pattern to the /functions file that is invoked:
| Request | File |
|---|---|
/api/todos/*/** |
/functions/api/todos/[[path]].ts |
/api/todos/* |
/functions/api/todos/[id].ts |
/api/todos |
/functions/api/todos/index.ts |
/api/time |
/functions/api/time.ts |
/*/profile |
/functions/api/[username]/profile.ts |
/** |
/functions/api/[[path]].ts |
When writing request handlers within your Cloudflare Pages application, each /functions file must export a function to handle the incoming request. Each function then receives a singular context object that contains all the information for the request:
export async function onRequest(context) {
  // Contents of context object
  const {
    request, // same as existing Worker API
    env, // same as existing Worker API
    params, // if filename includes [id] or [[path]]
    waitUntil, // same as ctx.waitUntil in existing Worker API
    next, // used for middleware or to fetch assets
    data, // arbitrary space for passing data between middlewares
  } = context;

  return new Response("How you dey?");
}
In the above code sample, we exported an onRequest function. This is a generic name because it generically handles all HTTP requests.
However, to react to specific HTTP request methods, you can use the method name as a suffix to the exported function. For example, a handler that should only receive GET requests should be named onRequestGet. The following are other handlers that Cloudflare Pages supports:
onRequestPostonRequestPutonRequestPatchonRequestDeleteonRequestHeadonRequestOptionsThese are the requests you export to write your first function. For example, you can write a function to output “Hello World” when you make a post request to /hello-world in the /functions/hello-world.js file:
//functions/hello-world.js
// Reacts to POST /hello-world
export async function onRequestPost(request) {
  // ...
  return new Response(`Hello world`);
}
By default, all functions in Netlify are deployed with the following:
To create a function in Netlify, we must first create a /functions folder; note that you can call this folder anything.
We are then required to create a netlify.toml file in our root directory. This tells Netlify where to look when deploying functions. Because we decided to put our functions in a functions folder, this file should look like this:
//netlify.toml file
[build]
  functions = "functions"
Writing functions in Netlify
Now, let’s create a file called hello.js in the /functions directory. This would make our function available at .netlify/functions/hello:
exports.handler = aysnc function(event, context) {
  return {
    statusCode : 200,
    body: JSON.stringify ({message: "How far, Howdy?"})
  };
}
But, assuming we have a React application running at http://localhost:8080, we can access the above function at http://localhost:8080/.netlify/functions/hello or http://localhost:8080/functions/hello.
Both Cloudflare Pages and Netlify have wonderful built-in CLI tools, which help us work locally with both platforms to develop and test everything in the development stage before pushing to production.
The full-stack Cloudflare Pages brings Wrangler, which is easy to install, specifically through npm and cURL. Netlify, on the other hand, has Netlify CLI, which can also be installed with npm.
Both Cloudflare Pages’ and Netlify’s CLIs have the same authentication method of storing a machine’s access token for future uses.
In Cloudflare’s system, however, you have a user that can have multiple accounts and zones. As a result, your user is configured globally on your machine via a single Cloudflare token.
Your account(s) and zone(s) will then be configured per project but will use your Cloudflare token to authenticate all API calls. A configuration file where the account(s) and zone(s) information is stored is created in a .wrangler directory in your computer’s home directory.
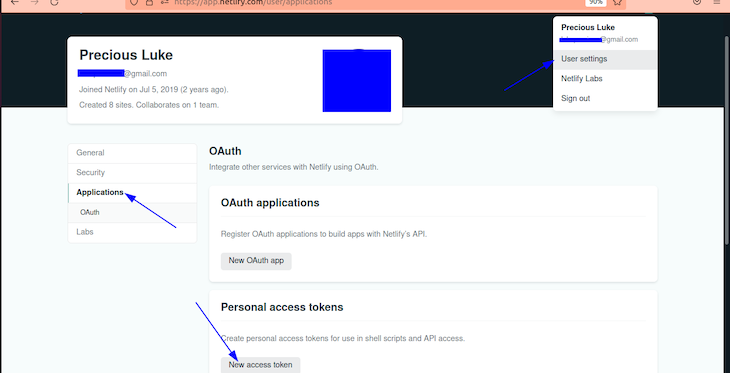
Netlify’s CLI uses an access token to authenticate with Netlify. You can obtain this token by using the command line or in the Netlify UI:

To authenticate and obtain an access token using the command line, enter the following command from any directory:
netlify login
This will open a browser window, asking you to log in with Netlify and grant access to the Netlify CLI.
Once authorized, the Netlify CLI stores your access token in a config.json global configuration file. The Netlify CLI then uses the token in this file automatically for all future commands.
As for setup, both Cloudlfare and Netlify are straightforward and easy to set up. They both support Secure Sockets Layer (SSL) certificates for free, which encrypts sensitive data sent across the internet.
For language support, full-stack Cloudflare Pages supports JavaScript and TypeScript, while Netlify supports Golang, JavaScript/Node.js, and Typescript.
Netlify and Cloudflare Pages are serverless platforms offering free trial versions for developers to test their services. While both platforms offer similar functionalities, there are differences in the limitations of their free trial versions regarding the number of function invocations, build time, number of websites, bandwidth amount, etc.
Netlify allows 125K requests of serverless functions per site monthly; Cloudflare Pages, on the other hand, has a different approach. It allows 100K function invocation requests daily. This sounds great, but keep in mind that if you have 10 websites deployed on Cloudflare Pages, the 10 websites will share the 100K requests.
Bandwidth is the amount of data that can be transferred between a site, its users, and servers.
The build time is the time it takes to build a project out completely after it is deployed. This could be after you push a change to your GitHub or Gitlab repository synced to either Cloudflare Pages or Netlify.
Cloudflare Pages allows you to host an unlimited number of websites and provides unlimited bandwidth for your websites. Cloudflare Pages also allows a maximum of 500 website builds in a month and one concurrent build per time.
Netlify, on the other hand, offers 100GB of bandwidth per month for all your websites hosted with them. Netlify also allows for a maximum of 500 websites to be hosted per account. Netlify uses a different approach in measuring builds, which is time. Netlify allows for 300 build minutes per month and one concurrent build per time.
| Feature | Netlify | Cloudflare |
|---|---|---|
| Number of function invocations | 125,000 per month per site | 100,000 per day for all your sites |
| Builds | 300 build minutes per month | 500 builds per month |
| Concurrent builds | 1 | 1 |
| Number of websites | 500 | unlimited |
| Bandwidth amount | 100GB for all sites | unlimited |
| CLI | available | available |
While Netlify has been a standard of serverless platforms since 2014, full-stack Cloudflare Pages seems to be promising in Jamstack website deployment.
With both platforms providing a way to run backend code on their servers, it is a dream come true, especially for those not-too-big projects.
Overall, the choice between Netlify and Cloudflare Pages will depend on the specific needs of your project. If you require a larger amount of serverless function invocations per month, Netlify may be the better choice for you. However, if you are looking for a platform that offers unlimited builds and deploys of static websites and serverless functions, Cloudflare Pages may be the better option. Additionally, it is important to consider the limitations of each platform’s free trial version regarding the number of requests, bandwidth amount, and build times.
You can learn more about what each platform has to offer in the Cloudflare Pages documentation and the Netlify documentation.
Install LogRocket via npm or script tag. LogRocket.init() must be called client-side, not
server-side
$ npm i --save logrocket

// Code:

import LogRocket from 'logrocket';
LogRocket.init('app/id');
// Add to your HTML:

<script src="https://cdn.lr-ingest.com/LogRocket.min.js"></script>
<script>window.LogRocket && window.LogRocket.init('app/id');</script>

Explore Shadcn UI, a reusable component collection. See its features, pros, cons, and more to determine if you should use it in your project.

Cache components change how rendering decisions are made in Next.js, allowing static and dynamic UI to coexist on the same page without blocking the initial render.

A practical walkthrough of building local-first, privacy-preserving AI agents using small language models.

async/await in TypeScriptTypeScript’s async/await lets you write asynchronous code that reads like synchronous code, making it easier to understand, maintain, and reason about.
Hey there, want to help make our blog better?
Join LogRocket’s Content Advisory Board. You’ll help inform the type of content we create and get access to exclusive meetups, social accreditation, and swag.
Sign up now
5 Replies to "Netlify vs. Cloudflare Pages"
Cloudflare provides 100k function calls per day, not month. Would need to rectify that.
Thanks Luke! This was a very helpful and objective review.
I using both cloudflare pages in netlify but in my opinion cloudflare pages is far better than
Having experienced both GitHub Pages and Cloudflare in my projects, I found that GitHub is particularly effective for handling large data files like custom sprites. It’s an excellent choice for scenarios where speed and user-friendly setup are paramount. On the other hand, Cloudflare shines in providing robust performance and ease of use. Integrating your GitHub Pages site with Cloudflare is seamless, and its ability to host private repositories enables serving your website without making the underlying code public. In my experience, it’s all about choosing the right tool for the specific needs of your project, and both GitHub and Cloudflare offer compelling features for different aspects of web development.
good