Editor’s note: This article was last updated 14 October 2022 to include additional setup commands.
Netlify prides itself on being the fastest way to build amazing sites, and it can be a serious boon to your productivity. Netlify has easily worked its way into the hearts and minds of many developers; some even consider it to be the best thing that’s happened to them when it comes to software development and deployment. Netlify has a popular tagline that can serve as an anchor for this tutorial, “just git push to deploy worldwide”.
In this tutorial, we’ll take an in-depth look at deploying React apps using Netlify, exploring three different approaches. To follow along with this tutorial, you’ll need a working knowledge of the following:
Aside from the fact that most of its features are absolutely free, Netlify also eases deployments by providing the following:
There are three common ways to deploy applications to Netlify. Before we dive into the specifics of each method, let’s cover some generic steps that apply across all the different deployment methods.
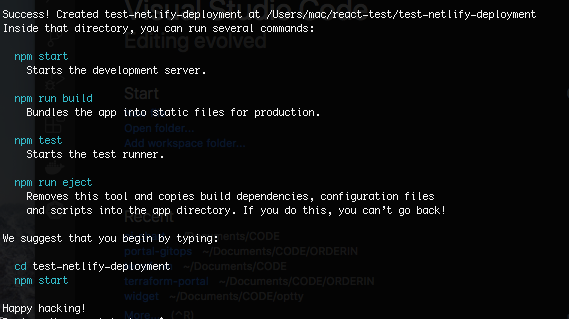
React is an open source frontend JavaScript library for building user interfaces and UI components. To get started with creating a React app, we’ll use the Create React app library to create an app called test-netlify-deployment.
In the terminal, run the following command:
npx create-react-app test-netlify-deployment
cd test-netlify-deployment
The command above installs all the packages required to create a simple React application as well as some static files, giving us a base to work with. For this tutorial, we’ll deploy the sample app as is, but please feel free to make as many changes as you want to your sample application.
Next, we’ll create a build of our application in a production-ready build folder by running the command below:
npm run build
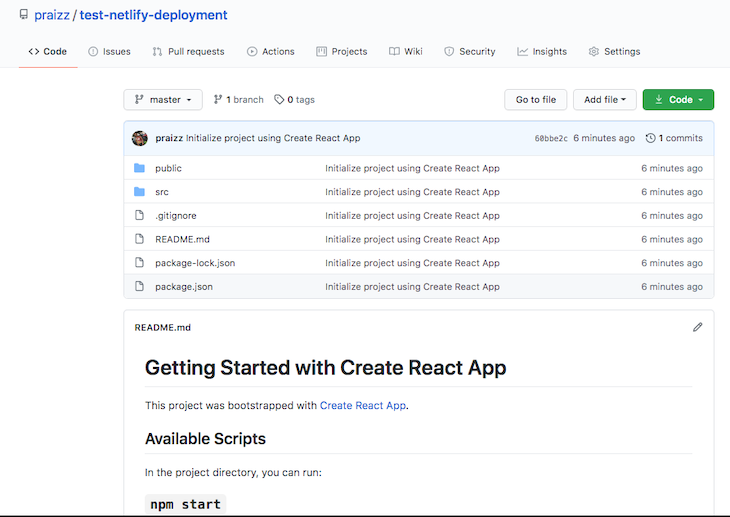
The command above generates a build folder that represents a minified version of the entire application, containing everything we would need to deploy the application. Now that our React app is ready to be deployed, we can push the app to our version control of choice. In this case, I’ll choose GitHub.
While there are many version control systems available, for the sake of this tutorial, I’ll focus on the GitHub version control system.
Create a GitHub repository with any name you want. Then, we’ll push our React app to the GitHub repo as shown in the image below; feel free to check out my sample repo:
Now that we’re done setting up our example application, we can dive into the different methods available for deploying our app to Netlify.
For developers who would rather deploy and configure applications manually than use the command line terminal, the Netlify UI is the best option.
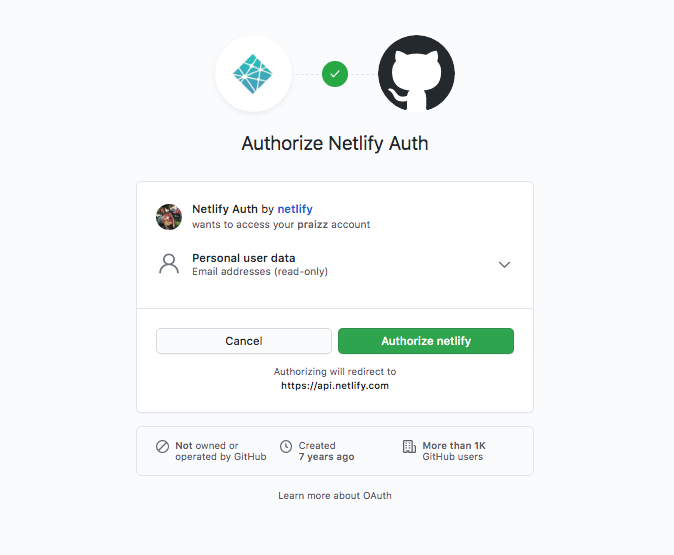
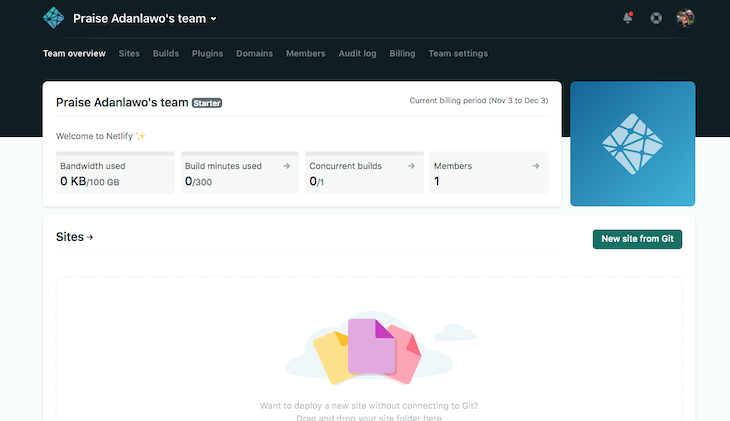
If you don’t have a Netlify account already, you can create a free one. We’ll log into Netlify with the GitHub account we already created and follow the prompts to authorize Netlify Auth:
After authorizing Netlify Auth, we are redirected to our GitHub teams page. We’ll need to create a new site from Git, as shown below:
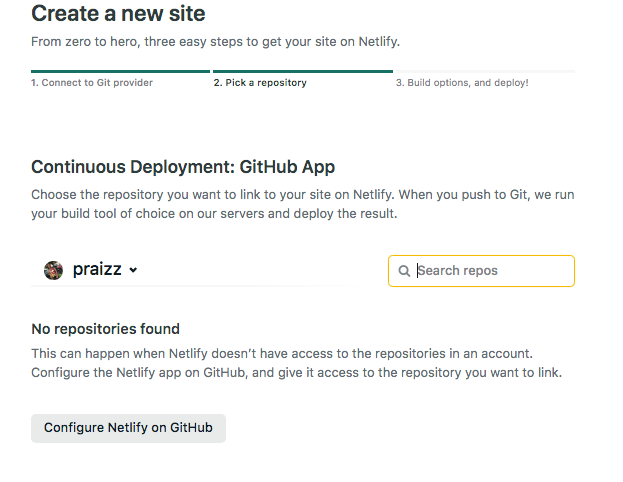
On the Create a new site page, we’ll be prompted to authorize Netlify to access the GitHub repositories. We can choose to give Netlify access to the entire GitHub account, or we can give Netlify access to a specific repository by clicking on the Configure Netlify on GitHub button at the bottom of the page:
After selecting the repository where the React application is hosted and choosing the deployment branch from the step above, we specify the basic build settings required to deploy the site. For applications created with Create React App, these fields should be pre-populated.
The settings include a base directory, which is the folder that Netlify will assume is the main folder to run the build command from. By default, it will assume the root of your Git repo, but you can specify a subdirectory, which is useful when multiple projects are in the same repo.
The build command will trigger the build of your project. If you’re not using Create React App to generate your React app, check the package.json to see if there is a build script; usually, it will be npm run build. The output from the build command should be expected in the publish directory. For Create React App, it should be build.
Once you’ve specified the build settings, click on the Deploy Site button, and voila! We’ll see the site deployment in progress. Upon successful deployment, we can preview our site with the test domain it returns:
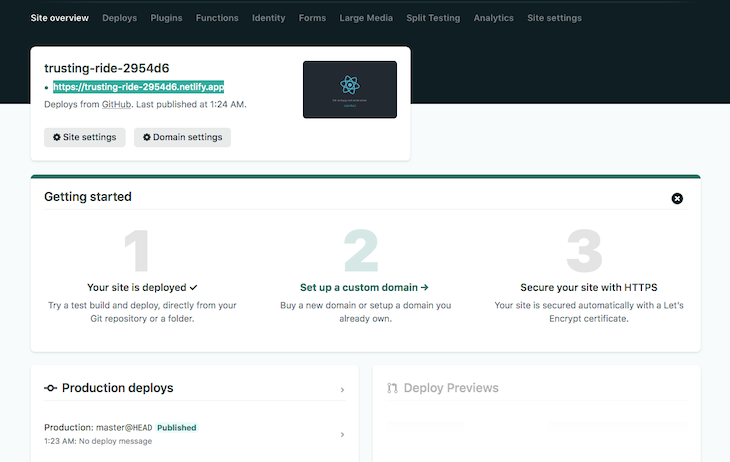
Once we’ve previewed our React app deployment and feel good about how it looks, we can configure a proper domain to serve our application. In the Deploys tab, we see details of our site deployment, where we register the subdomain we’d like to use for our React application.
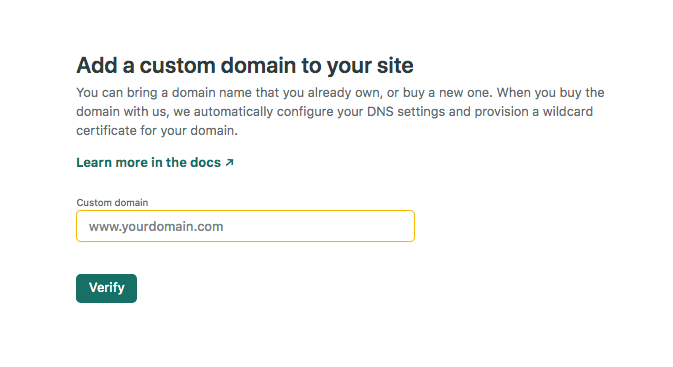
If we want to use a preregistered domain, Netlify will want us to verify that the domain is ours. We’ll click on set up a custom domain from the image above, prompting us to verify our custom domain before Netlify can configure it:
Once our domain is successfully verified, we can access our application on the configured domain.
The Netlify drag and drop feature is fairly similar to the Netlify UI method described above. However, the drag and drop feature is unique in that it utilizes the online app feature and is specifically suited for fast deployments.
To connect your GitHub account to your Netlify account, you can follow the same steps from above. However, you’ll see that in this instance, we are greeted with a blank page as shown below. We refer to this as the online app feature. We won’t create a new site from Git like we did in the first method:

Since our React app is up-to-date with a build folder, we just have to drag the build folder into the blank space above, which is otherwise known as the online app. Netlify handles the deployment for us.
To configure the site domain, follow the same approach as configuring the site domain in the Netlify UI method described above.
The Netlify CLI method is for developers who are more comfortable running deployments from the command line terminal instead of using the UI or the drag and drop feature.
Installing the Netlify CLI is quick and easy; just run the command below:
npm install netlify-cli -g
After installing the CLI, we navigate to our working directory and run the following commands to authorize our Netlify CLI against the Netlify account:
cd test-netlify-deployment
netlify deploy
Ensure that the pop-up is not blocked in the browser window for redirects. Running the Netlify deploy command will redirect us to a browser window requesting authorization for the Netlify CLI:

Now that the CLI has adequate permissions to access the Netlify account, we can go ahead and deploy the application.
There are a few command line prompts that we’ll want to go through together. You can navigate the prompts by using the arrow keys on your device.
This folder isn't linked to a site yetAfter authorizing the app, the first prompt asks if we want to deploy this application to a pre-existing site or to a new site. In this case, we’re deploying to a new site, so we select Create & configure a new site.
Choose a site nameIn the second prompt, you could either decide to configure the site details or to leave it blank so that Netlify gives you a random name. Whatever option you choose, you can always update it later:

From the image above, we can see how Netlify easily generates a custom domain URL from the site name. However, even though we have a URL, we’re not done with the deployment just yet.
Deploy pathSince we’re running the netlify deploy command in our React app’s working directory, our deployment path is our build folder. As a result, we’ll need to specify the path to our build directory in response to the prompt. Only the build folder contains the production-ready files needed to deploy the application:
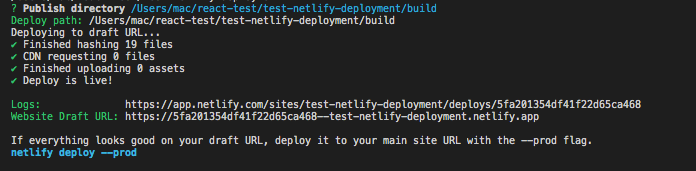
Now, we have a URL that we can test with.
If the URL redirects to a webpage that throws a Page not found error, the issue has to do with an incorrect build file. Run the netlify deploy command again and update the build file accordingly. If everything looks good on your draft URL, deploy it to your main site URL with the --prod flag.
After testing with the website draft URL, we can take our application live by running the command below from our output above:
netlify deploy --prod
Once again, we’re required to specify the deploy path, which is the path to our build directory. After successful deployment, we’ll get an updated website URL:
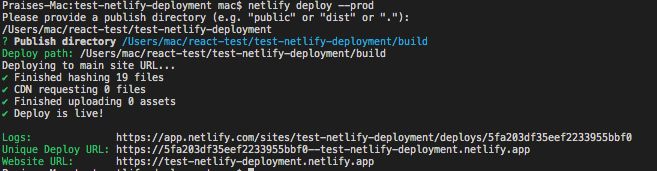
Two important things to note are the Unique deploy URL and the Live URL, as shown above.
The Unique deploy URL represents the URL specific to each deployment. The Live URL is the production website URL.
Now, we can access our React application from the Live URL.
Deploying React apps and other applications with Netlify is a seamless process, owing largely to the platform’s easy-to-use features.
Once you choose your preferred deployment method and meet the requirements, i.e., installing the CLI, you can typically deploy your app to Netlify in under 60 seconds.
I hope you’ve enjoyed creating and deploying a React application with me. Let me know in the comment section if you run into any issues or errors. Happy coding!
Install LogRocket via npm or script tag. LogRocket.init() must be called client-side, not
server-side
$ npm i --save logrocket

// Code:

import LogRocket from 'logrocket';
LogRocket.init('app/id');
// Add to your HTML:

<script src="https://cdn.lr-ingest.com/LogRocket.min.js"></script>
<script>window.LogRocket && window.LogRocket.init('app/id');</script>

A guide for using JWT authentication to prevent basic security issues while understanding the shortcomings of JWTs.

Discover how to build, render, and automate product demo videos with Remotion, replacing traditional screen recordings with reusable React code.

Chrome’s Modern Web Guidance embeds modern web platform skills into AI coding agents, helping them choose native HTML, CSS, and browser APIs over legacy patterns.

Learn how to use Fallow to analyze AI-generated code, detect dead code, duplicate logic, and complexity issues, and integrate automated code quality checks into your AI-assisted development workflow.
Hey there, want to help make our blog better?
Join LogRocket’s Content Advisory Board. You’ll help inform the type of content we create and get access to exclusive meetups, social accreditation, and swag.
Sign up now

