This tutorial is all about understanding the MERN stack. We’ll outline the basics of the MERN stack and demonstrate how to use it by developing a simple CRUD application from scratch.

To demonstrate how the MERN stack works, we’ll first configure the server side by connecting Node.js and Express.js to MongoDB on the backend. Then, we’ll create some APIs. After that, we’ll walk you through building the frontend, using React to build our user interfaces. Once both are complete, we’ll connect the frontend to the backend.
If you’re looking for a more general overview of the MERN stack, including a comparison against other JavaScript stacks, check out “What is the MERN stack? Overview with examples.”
Editor’s note: This MERN stack guide was last updated on 29 November 2023 to fix code errors and provide insights into deployment strategies for MERN apps.
The phrase MERN stack comprises the following technologies that allow for faster application development:
MongoDB, Express.js, and Node.js help you build the backend of an application, while React powers the frontend. Node.js and React rank as the two most popular web frameworks and technologies, according to the most recent Stack Overflow developer survey. And MongoDB is also one of the most popular databases for developers. About 21 million websites use React to power their frontend. These statistics should give you a clear idea of how stable and popular these technologies are.
Learning the MERN stack will help you become a full-stack developer, which is in high demand. However, it takes time to become a good MERN stack developer.
So, before learning technologies like React or Node.js, it is important to ensure that your fundamentals are strong. Many developers fail to be good MERN stack developers because they lack the fundamental knowledge of JavaScript.
This demo is designed to highlight the MERN setup. The objective is to develop a simple project with the best possible structure so that you can use it as a boilerplate and elevate your MERN stack projects to meet industry standards.
To begin our MERN stack tutorial, we’ll show you how to set up a server with Express.js and Node.js.
To create a project folder, enter the folder through the terminal, then run $ npm init. It will then ask you some questions about the package name, version, entry point, and more.
Hit Enter if you want to keep the default. After that, you will get something like this:
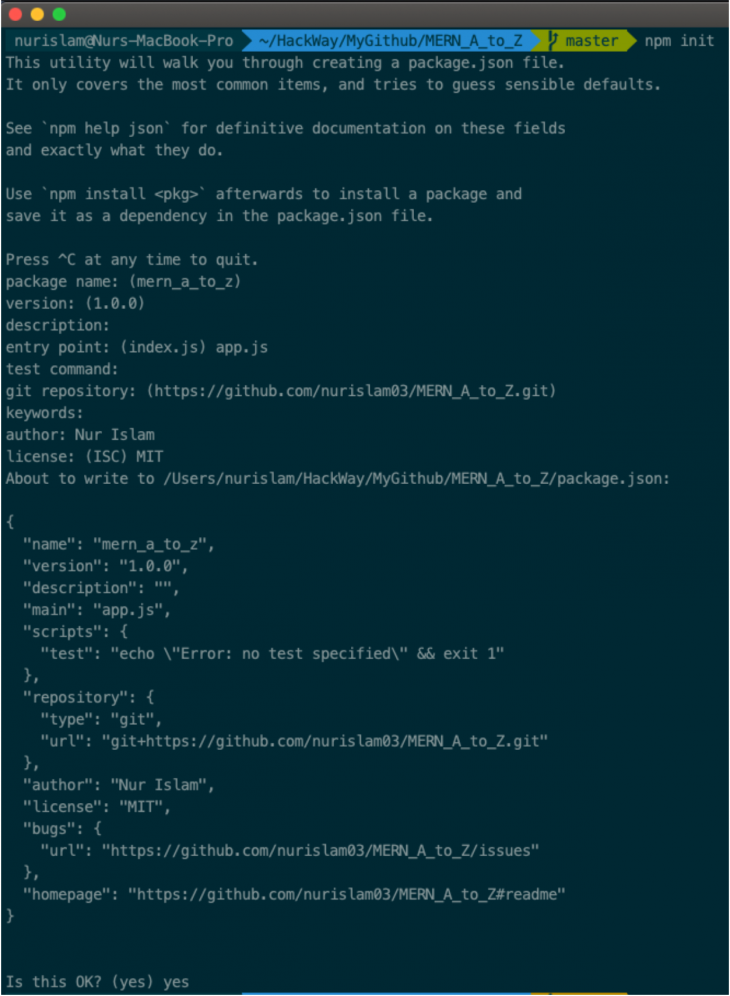
Select yes, and you’re ready to go.
This will create a file named package.json. Alternatively, you can append a -y flag to the command, which will instruct the CLI to use the default configurations:
npm init -y
Next, we’ll add some dependencies with $ npm i express mongoose body-parser . Type or copy the command above and hit the Enter button. You’ll see something like this:
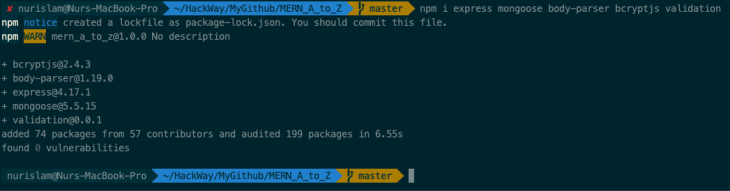
Here’s what we get in the code above:
body-parser: Allows us to get the data throughout the requestexpress: Is our main frameworkmongoose: Is used to connect and interact with MongoDBNow, we’ll add nodemon as a dev dependency. If you don’t want to add this, you can skip it — it’s optional:
npm i -D nodemon
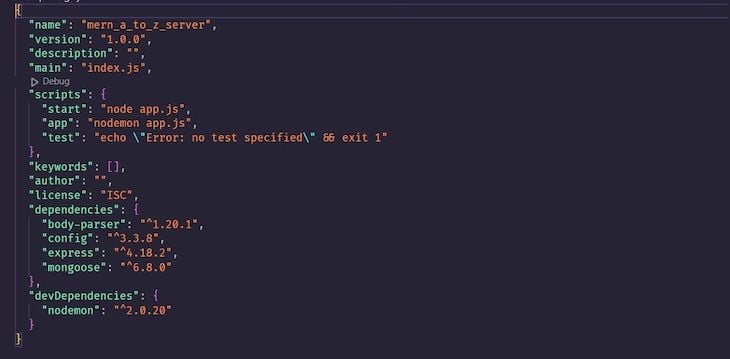
To use nodemon, add "app": "nodemon app.js" to your scripts tag under the package.json file.
nodemon is a utility that will monitor any changes in your source and automatically restart your server. The app.js is the entry point for the application. It is also important to define a start script here with "start": "node app.js".
After that, your package.json should look like this:
Now, create a file named app.js for our entry point. You can create this from the terminal with the $ touch app.js command.
Then, paste the following code:
// app.js

const express = require('express');

const app = express();

app.get('/', (req, res) => res.send('Hello world!'));

const port = process.env.PORT || 8082;

app.listen(port, () => console.log(`Server running on port ${port}`));
After that, run the $ node app command. You will see Server running on port 8082. You can also check it from the browser by opening the browser and entering http://localhost:8082.
At this point, if we change anything, we’ll need to restart the server manually. But, if we set up nodemon, then we don’t have to restart it every time. nodemon will watch if there is any change and restart the server automatically.
So, what you need to do for that is a little change to the scripts in our package.json file. See below:
// package.json

{
  "name": "mern_a_to_z",
  "version": "1.0.0",
  "description": "",
  "main": "server.js",
  "scripts": {
    "test": "echo \"Error: no test specified\" && exit 1",
    "start": "node app.js",
    "app": "nodemon app.js"
  },
  "keywords": [],
  "author": "",
  "license": "ISC",
  "dependencies": {
    "body-parser": "^1.20.2",
    "config": "^3.3.9",
    "cors": "^2.8.5",
    "express": "^4.18.2",
    "mongoose": "^8.0.2",
    "nodemon": "^3.0.2"
  }
}
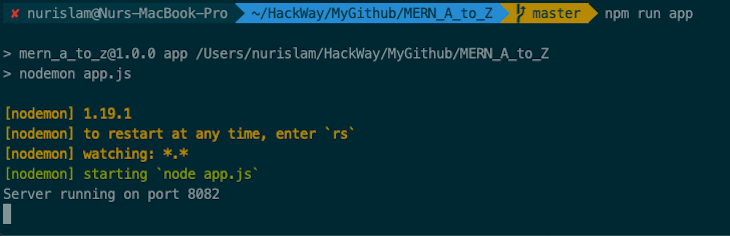
Now, you can run your project using the $ npm run app command. If you get any error at this point, run the commands below:
$ npm install
$ npm run app
You will see the following changes in your terminal if everything is successful:
MongoDB provides a multi-cloud database service known as Atlas, which simplifies the process of deploying and managing MongoDB databases. We will use Atlas to create the database for our MERN application.
To begin, log on to your MongoDB Atlas dashboard and initiate a new project. Feel free to assign it any name; in our case, we’ll name it MERN_A_TO_Z. Next, create a new database cluster by clicking the create button in the overview tab and selecting the desired plan. We will be using the free plan.
On the same page, you have the option of selecting a preferred provider, region, and name for the database. For now, we will use the default settings:
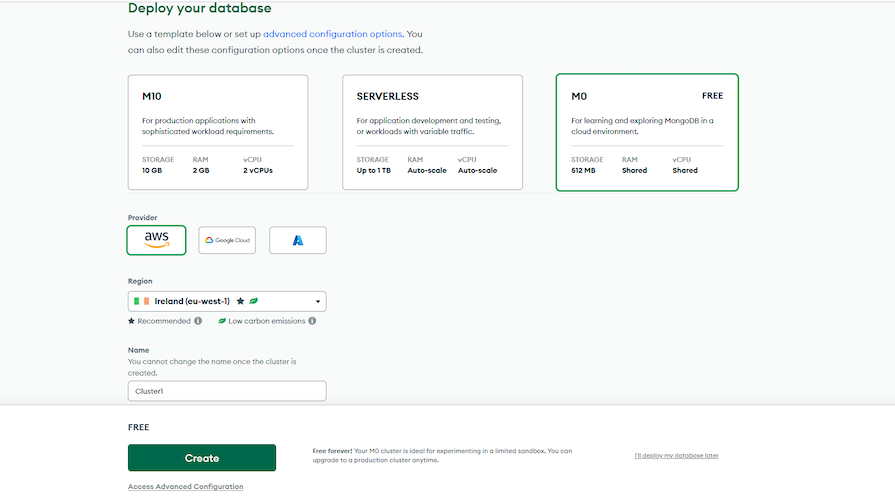
After clicking the Create button, the creation process will begin in the background.
While the cluster is being created, you will be presented with a security quickstart. This quickstart allows you to create a user and enable access to any network that needs to read and write data to your cluster:
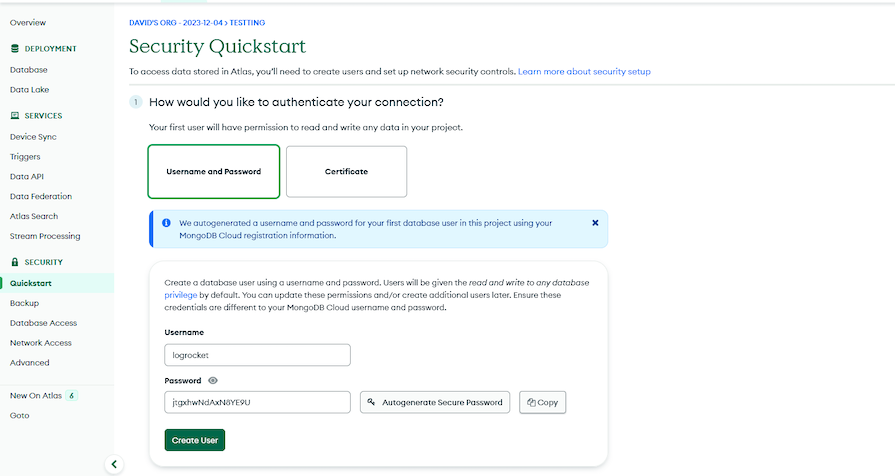
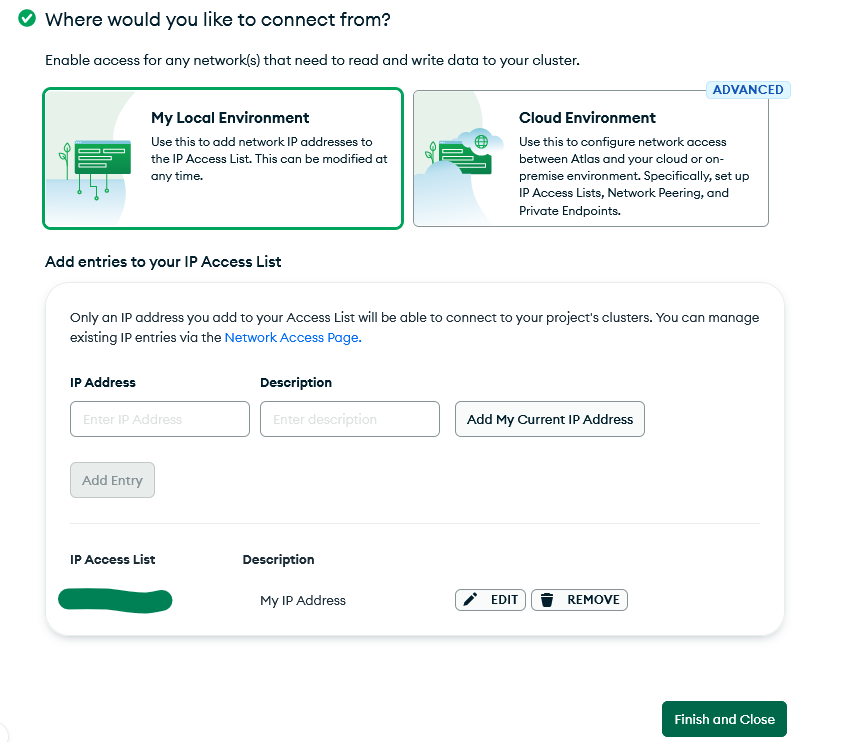
Choose Username and Password as your authentication method. Create a user and copy the auto-generated password to a safe place where you can easily access it for later use. Lastly, select My Local Environment and click the Add My IP Address button to include your local development environment and IP address in your database access list:
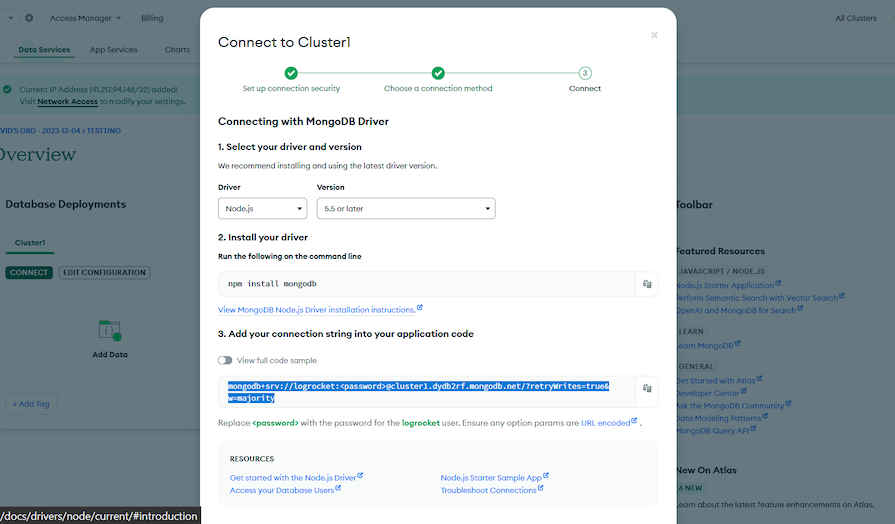
Upon successfully creating the cluster, you will be redirected to the overview page. There, you will see the newly created cluster. Click the Connect button and select the Drivers option under the Connect to your application connection type:
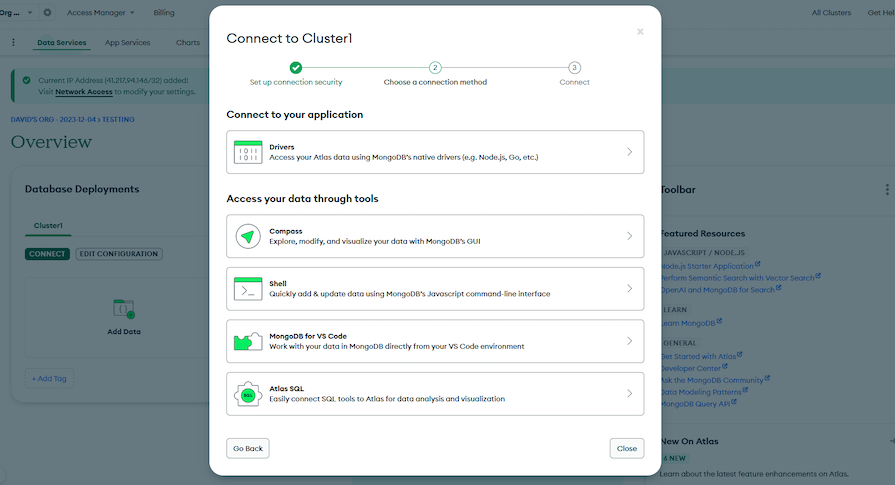
In the following step, you will be presented with a connection string that we’ll use to connect the database to our backend. Copy and store the string just as you did with the password earlier. We will put them to use in the next section:
Although not required for this tutorial, as we are working on a small project, it is important to understand MongoDB’s advanced querying techniques, such as aggregation pipelines. These pipelines allow us to perform complex manipulations and transformations on data sets directly in the database, providing powerful querying capabilities, including document grouping, filtering, transformation, and the calculation of aggregate values.
Additionally, optimizing the database performance is essential, especially when scaling your application and for large-scale MERN applications, as this improves the performance of your application. MongoDB provides various methods to achieve this, including but not limited to:
Now that we have a database set up, we can go ahead and connect it to our project.
Inside the project folder, create another folder named config, and add a db.js file with the following code:
// db.js

const mongoose = require("mongoose");
const db =
  "mongodb+srv://logrocket:<password>@cluster1.dydb2rf.mongodb.net/?retryWrites=true&w=majority";
/* Replace <password> with your database password */

mongoose.set("strictQuery", true, "useNewUrlParser", true);

const connectDB = async () => {
  try {
    await mongoose.connect(db);
    console.log("MongoDB is Connected...");
  } catch (err) {
    console.error(err.message);
    process.exit(1);
  }
};
module.exports = connectDB;
You must replace the string in the code above with the one you copied from your database in the previous section, as well as the placeholder with the user password you copied from the dashboard.
We need a little change in our app.js file to connect to the database. Update your app.js with this:
// app.js

const express = require('express');
const connectDB = require('./config/db');

const app = express();

// Connect Database
connectDB();

app.get('/', (req, res) => res.send('Hello world!'));

const port = process.env.PORT || 8082;

app.listen(port, () => console.log(`Server running on port ${port}`));
Now, you can run the project using the $ npm run app command. You should see the following:
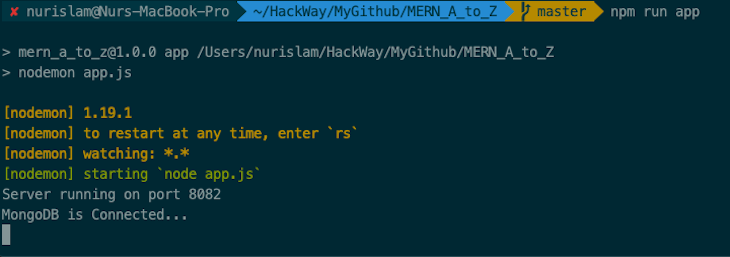
Great! So far, we are on the right track, and our database is successfully connected. Now, time to complete the route setup, and after that, we will see how to create RESTful APIs.
To get started, create a folder named routes. In it, create another folder named api, which will hold all our APIs. Inside the api folder, create a file named books.js. We will create some APIs here to show how it works in a moment.
Now, update your books.js with the following code:
// routes/api/books.js

const express = require('express');
const router = express.Router();

// Load Book model
const Book = require('../../models/Books');

// @route   GET api/books/test
// @desc    Tests books route
// @access  Public
router.get('/test', (req, res) => res.send('book route testing!'));

// @route   GET api/books
// @desc    Get all books
// @access  Public
router.get('/', (req, res) => {
  Book.find()
    .then(books => res.json(books))
    .catch(err => res.status(404).json({ nobooksfound: 'No Books found' }));
});

// @route   GET api/books/:id
// @desc    Get single book by id
// @access  Public
router.get('/:id', (req, res) => {
  Book.findById(req.params.id)
    .then(book => res.json(book))
    .catch(err => res.status(404).json({ nobookfound: 'No Book found' }));
});

// @route   POST api/books
// @desc    Add/save book
// @access  Public
router.post('/', (req, res) => {
  Book.create(req.body)
    .then(book => res.json({ msg: 'Book added successfully' }))
    .catch(err => res.status(400).json({ error: 'Unable to add this book' }));
});

// @route   PUT api/books/:id
// @desc    Update book by id
// @access  Public
router.put('/:id', (req, res) => {
  Book.findByIdAndUpdate(req.params.id, req.body)
    .then(book => res.json({ msg: 'Updated successfully' }))
    .catch(err =>
      res.status(400).json({ error: 'Unable to update the Database' })
    );
});

// @route   DELETE api/books/:id
// @desc    Delete book by id
// @access  Public
router.delete('/:id', (req, res) => {
  Book.findByIdAndDelete(req.params.id)
    .then(book => res.json({ mgs: 'Book entry deleted successfully' }))
    .catch(err => res.status(404).json({ error: 'No such a book' }));
});

module.exports = router;
To interact with our database, we need to create a model for each resource. So, create a folder called models in the root, and inside the models folder, create a file called Book.js and update it with this:
// models/Book.js

const mongoose = require('mongoose');

const BookSchema = new mongoose.Schema({
  title: {
    type: String,
    required: true
  },
  isbn: {
    type: String,
    required: true
  },
  author: {
    type: String,
    required: true
  },
  description: {
    type: String
  },
  published_date: {
    type: Date
  },
  publisher: {
    type: String
  },
  updated_date: {
    type: Date,
    default: Date.now
  }
});

module.exports = Book = mongoose.model('book', BookSchema);
We’re all set. However, if we try to test the API as it is with tools such as Postman and Thunder client, or call the API using the POST or PUT requests on the frontend, we will likely get an undefined request body and the following CORS error:
"Access to XMLHttpRequest at 'http://localhost:8082/api/books' from origin 'http://localhost:3000' has been blocked by CORS policy: Response to preflight request doesn't pass access control check: No 'Access-Control-Allow-Origin' header is present on the requested resource."
The reason for this error is due to the browser’s security policy (same-origin policy), which prevents websites or web applications from requesting data from APIs with different origins (URLs) without explicit permission. The undefined request body error occurs because we are not parsing the data (request body) being sent to the API using the POST and PUT requests.
To solve these issues, we must first install the cors package and use a module such as body-parser or the express.json() method as a middleware in our backend application to handle different types of data, such as JSON, URL-encoded, and more. Navigate to the project’s root and run the following command:
npm install cors body-parser
Now, update app.js, the backend’s entry point with the following code:
const express = require("express");
const connectDB = require("./config/db");
const routes = require("./routes/api/books");
const cors = require("cors");
const bodyParser = require("body-parser");

const app = express();

// use the cors middleware with the
// origin and credentials options
app.use(cors({ origin: true, credentials: true }));

// use the body-parser middleware to parse JSON and URL-encoded data
app.use(bodyParser.json());
app.use(bodyParser.urlencoded({ extended: true }));

// use the routes module as a middleware
// for the /api/books path
app.use("/api/books", routes);

// Connect Database
connectDB();

app.get("/", (req, res) => res.send("Hello world!"));
const port = process.env.PORT || 8082;
app.listen(port, () => console.log(`Server running on port ${port}`));
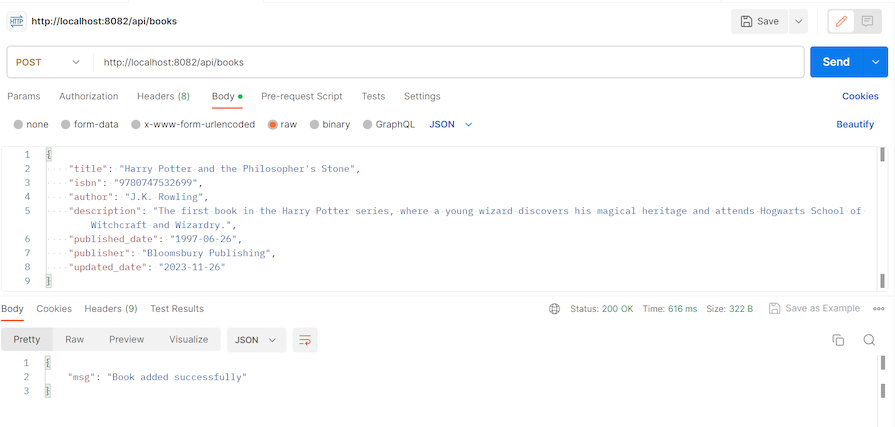
Now you can test all the API endpoints through Postman. It’s important to note that before testing APIs using Postman, you need to run the project first:
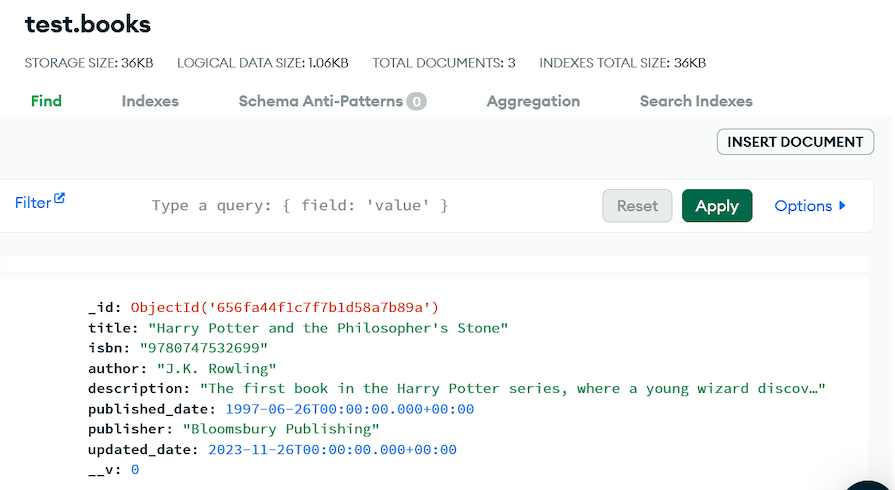
To confirm that the data was successfully saved to the database, you can navigate back to your MongoDB Atlas dashboard and view the collection:
This concludes the backend portion of the tutorial, which covers the M, E , and N in the MERN acronym.
This is not a comprehensive Node.js tutorial, and as such, some topics have been omitted due to their scope. For more information, refer to the following linked articles to learn more about implementing features such as authentication and authorization using tools like JWT, which allows you to verify users and their access levels.
So far, so good! Now that we’ve set up our backend, we’ll move on to the frontend aspect of this MERN stack tutorial. In this section, we will utilize Vite’s create-vite tool to create a React project and build our user interfaces.
You will also need to have any version of Node.js that is greater than v18 and any version of npm that is greater than v5.6 installed on your local development machine.
As a first step, open a terminal window and create a new directory using the mkdir command. Then, change into the newly created directory and run the following command to scaffold a React boilerplate project using Vite:
npm create vite@latest my-app -- --template react
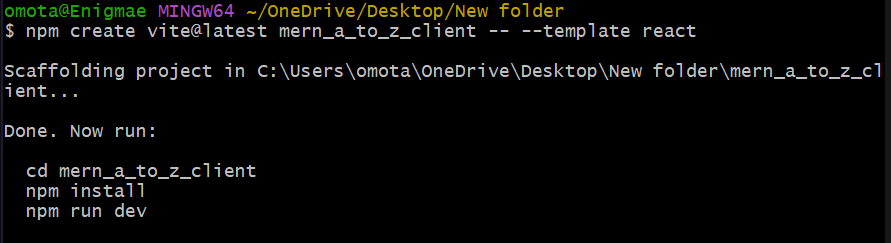
You can replace my-app with whatever you’d like to use as your project name. For example, my project name is mern_a_to_z_client, so my command will be as follows:
npm create vite@latest mern_a_to_z_client -- --template react
N.B., The project name must be in lowercase letters. If everything goes right, then you will see something like the following image, where you will find some instructions along with the commands:
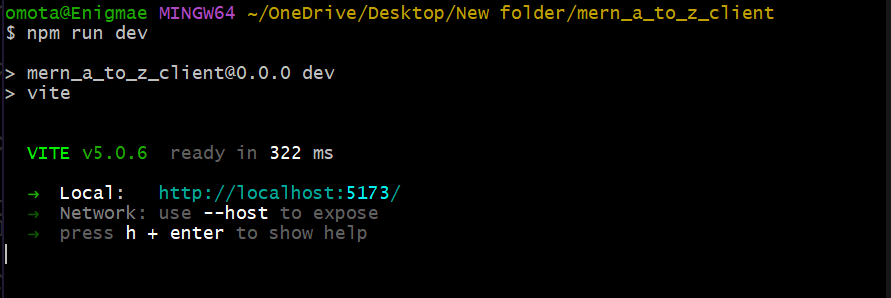
Next, follow the instructions and navigate to the project directory using the cd mern_a_to_z_client command. Then, install the project’s dependencies and start the development server:
npm install
npm run dev
Once the development server is up and running, you will see the following message in your terminal:
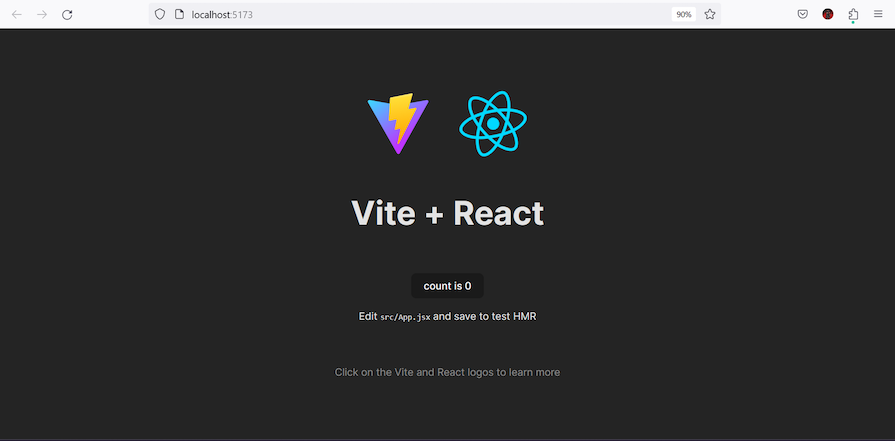
Now, open http://localhost:5173 to view it in the browser. This page will automatically reload if you make changes to the code:
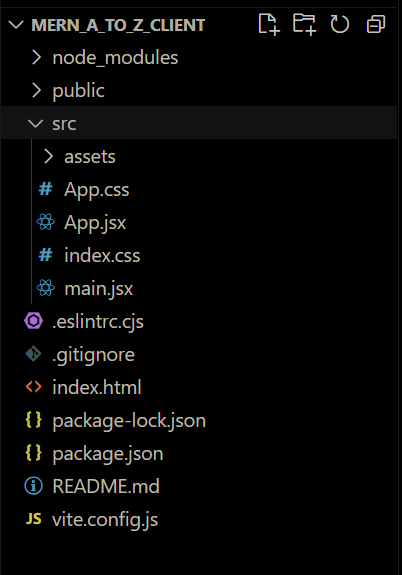
Inside the project directory, our initial file structure should look like this:
We have our initial setup file for the frontend part. Now, we can start integrating our backend with our frontend. Before that, I want to add Bootstrap to our project.
First, you’ll need to install Bootstrap as a dependency of the project using the following command:
npm install bootstrap
Once the installation is complete, open the main.jsx file in the root folder of the project and add the following code:
// Bootstrap CSS
import "bootstrap/dist/css/bootstrap.min.css";

// Bootstrap Bundle JS
import "bootstrap/dist/js/bootstrap.bundle.min";
After doing that, the contents of the main.jsx should look like this:
import React from "react";
import ReactDOM from "react-dom/client";
import App from "./App.jsx";
import "./index.css";

// Bootstrap CSS
import "bootstrap/dist/css/bootstrap.min.css";
// Bootstrap Bundle JS
import "bootstrap/dist/js/bootstrap.bundle.min";

ReactDOM.createRoot(document.getElementById("root")).render(
  <React.StrictMode>
    <App />
  </React.StrictMode>
);
Once this process is complete, we can begin using Bootstrap classes in our project. However, before we do so, let us install some other packages that we will need for this tutorial.
Because our backend exposes APIs for CRUD functionalities, our frontend is expected to be able to do the following:
To be able to effectively implement these features, we’ll need a routing system and an efficient HTTP client. The react-router-dom and Axios packages will work. Use the following command to install them:
$ npm install --save react-router-dom
$ npm install --save axios
Axios is a lightweight HTTP client for Node.js and the browser, similar to a Fetch API. Axios is a promise-based async/await library for readable asynchronous code. We can easily integrate it with React, and it is effortless to use in any frontend framework. We’ll call our APIs through Axios.
There are multiple reasons why Axios is widely used, including its backward compatibility. Old browsers like IE11 can also easily run Axios as the package issues the XMLHttpRequest under the hood.
Axios also automatically stringifies the payload when sending a request. But, when you are using Fetch API, it is important that you convert the payload to JSON.
package.json fileAt this point, our package.json file should be similar to the code below:
// MERN_A_to_Z_Client - package.json

{
  "name": "vite-project",
  "private": true,
  "version": "0.0.0",
  "type": "module",
  "scripts": {
    "dev": "vite",
    "build": "vite build",
    "lint": "eslint . --ext js,jsx --report-unused-disable-directives --max-warnings 0",
    "preview": "vite preview"
  },
  "dependencies": {
    "axios": "^1.6.2",
    "bootstrap": "^5.3.2",
    "react": "^18.2.0",
    "react-dom": "^18.2.0",
    "react-router-dom": "^6.20.1"
  },
  "devDependencies": {
    "@types/react": "^18.2.37",
    "@types/react-dom": "^18.2.15",
    "@vitejs/plugin-react": "^4.2.0",
    "eslint": "^8.53.0",
    "eslint-plugin-react": "^7.33.2",
    "eslint-plugin-react-hooks": "^4.6.0",
    "eslint-plugin-react-refresh": "^0.4.4",
    "vite": "^5.0.0"
  }
}
Inside the src folder (mern_a_to_z_client/src/), create another folder called components, and inside it, create five different files:
CreateBook.jsShowBookList.jsBookCard.jsShowBookDetails.jsUpdateBookInfo.jsWe will work with these five files a bit later.
Open the main.jsx file inside the src folder: (mern_a_to_z_client/src/main.jsx), import the components we created in the previous section, and add a browser router using the CreateBrowserRouter and the RouterProvider components, as seen below:
import React from "react";
import ReactDOM from "react-dom/client";
import { createBrowserRouter, RouterProvider } from "react-router-dom";
import "./index.css";

// Bootstrap CSS & JS imports
import "bootstrap/dist/css/bootstrap.min.css";
import "bootstrap/dist/js/bootstrap.bundle.min";

// Components imports
import CreateBook from "./components/CreateBook";
import ShowBookList from "./components/ShowBookList";
import ShowBookDetails from "./components/ShowBookDetails";
import UpdateBookInfo from "./components/UpdateBookInfo";

// Routes
const router = createBrowserRouter([
  { path: "/", element: <ShowBookList /> },
  { path: "/create-book", element: <CreateBook /> },
  { path: "/show-book/:id", element: <ShowBookDetails /> },
  { path: "/edit-book/:id", element: <UpdateBookInfo /> },
]);

ReactDOM.createRoot(document.getElementById("root")).render(
  <React.StrictMode>
    <RouterProvider router={router} />
  </React.StrictMode>
);
Here, we define all the routes. For a specific path definition, its corresponding component will be rendered.
Next, update a CSS file called App.css in the src folder with the following code:
.CreateBook {
  background-color: #2c3e50;
  min-height: 100vh;
  color: white;
}

.ShowBookDetails {
  background-color: #2c3e50;
  min-height: 100vh;
  color: white;
}

.UpdateBookInfo {
  background-color: #2c3e50;
  min-height: 100vh;
  color: white;
}

.ShowBookList {
  background-color: #2c3e50;
  height: 100%;
  width: 100%;
  min-height: 100vh;
  min-width: 100px;
  color: white;
}

/* BookList Styles */
.list {
  display: grid;
  margin: 20px 0 50px 0;
  grid-template-columns: repeat(4, 1fr);
  grid-auto-rows: 1fr;
  grid-gap: 2em;
}

.card-container {
  width: 250px;
  border: 1px solid rgba(0,0,.125);
  margin: 0 auto;
  border-radius: 5px;
  overflow: hidden;
}

.desc {
  height: 130px;
  padding: 10px;
}

.desc h2 {
  font-size: 1em;
  font-weight: 400;
}

.desc h3, p {
  font-weight: 300;
}

.desc h3 {
  color: #6c757d;
  font-size: 1em;
  padding: 10px 0 10px 0;
}
Now, it’s time to add feature components to our MERN stack project. Our CreateBook.js file is responsible for adding, creating, or saving a new book or a book’s info.
CreateBook.jsUpdate CreateBook.js with the following code:
import React, { useState } from "react";
import { Link } from "react-router-dom";
import axios from "axios";
import { useNavigate } from "react-router-dom";

const CreateBook = (props) => {
  const navigate = useNavigate();

  const [book, setBook] = useState({
    title: "",
    isbn: "",
    author: "",
    description: "",
    published_date: "",
    publisher: "",
  });

  const onChange = (e) => {
    setBook({ ...book, [e.target.name]: e.target.value });
  };

  const onSubmit = (e) => {
    e.preventDefault();
    axios
      .post("http://localhost:8082/api/books", book)
      .then((res) => {
        setBook({
          title: "",
          isbn: "",
          author: "",
          description: "",
          published_date: "",
          publisher: "",
        });
        // Push to /
        navigate("/");
      })
      .catch((err) => {
        console.log("Error in CreateBook!");
      });
  };

  return (
    <div className="CreateBook">
      <div className="container">
        <div className="row">
          <div className="col-md-8 m-auto">
            <br />
            <Link to="/" className="btn btn-outline-warning float-left">
              Show BooK List
            </Link>
          </div>
          <div className="col-md-10 m-auto">
            <h1 className="display-4 text-center">Add Book</h1>
            <p className="lead text-center">Create new book</p>
            <form noValidate onSubmit={onSubmit}>
              <div className="form-group">
                <input
                  type="text"
                  placeholder="Title of the Book"
                  name="title"
                  className="form-control"
                  value={book.title}
                  onChange={onChange}
                />
              </div>
              <br />
              <div className="form-group">
                <input
                  type="text"
                  placeholder="ISBN"
                  name="isbn"
                  className="form-control"
                  value={book.isbn}
                  onChange={onChange}
                />
              </div>
              <br />
              <div className="form-group">
                <input
                  type="text"
                  placeholder="Author"
                  name="author"
                  className="form-control"
                  value={book.author}
                  onChange={onChange}
                />
              </div>
              <br />
              <div className="form-group">
                <input
                  type="text"
                  placeholder="Describe this book"
                  name="description"
                  className="form-control"
                  value={book.description}
                  onChange={onChange}
                />
              </div>
              <br />
              <div className="form-group">
                <input
                  type="date"
                  placeholder="published_date"
                  name="published_date"
                  className="form-control"
                  value={book.published_date}
                  onChange={onChange}
                />
              </div>
              <br />
              <div className="form-group">
                <input
                  type="text"
                  placeholder="Publisher of this Book"
                  name="publisher"
                  className="form-control"
                  value={book.publisher}
                  onChange={onChange}
                />
              </div>
              <button
                type="submit"
                className="btn btn-outline-warning btn-block mt-4 mb-4 w-100"
              >
                Submit
              </button>
            </form>
          </div>
        </div>
      </div>
    </div>
  );
};

export default CreateBook;
ShowBookList.jsThe ShowBookList.js component will be responsible for showing all the books we already have stored in our database. Update ShowBookList.js with this code:
import React, { useState, useEffect } from 'react';
import '../App.css';
import axios from 'axios';
import { Link } from 'react-router-dom';
import BookCard from './BookCard';

function ShowBookList() {
  const [books, setBooks] = useState([]);

  useEffect(() => {
    axios
      .get('http://localhost:8082/api/books')
      .then((res) => {
        setBooks(res.data);
      })
      .catch((err) => {
        console.log('Error from ShowBookList');
      });
  }, []);

  const bookList =
    books.length === 0
      ? 'there is no book record!'
      : books.map((book, k) => <BookCard book={book} key={k} />);

  return (
    <div className='ShowBookList'>
      <div className='container'>
        <div className='row'>
          <div className='col-md-12'>
            <br />
            <h2 className='display-4 text-center'>Books List</h2>
          </div>

          <div className='col-md-11'>
            <Link
              to='/create-book'
              className='btn btn-outline-warning float-right'
            >
              + Add New Book
            </Link>
            <br />
            <br />
            <hr />
          </div>
        </div>

        <div className='list'>{bookList}</div>
      </div>
    </div>
  );
}

export default ShowBookList;
BookCard.jsHere, we use a functional component called BookCard.js, which takes a book’s info from ShowBookList.js and makes a card for each book. Write the following code to update your BookCard.js file:
import React from 'react';
import { Link } from 'react-router-dom';
import '../App.css';

const BookCard = ({book}) => {

  return (
    <div className='card-container'>
      <img
        src='https://images.unsplash.com/photo-1495446815901-a7297e633e8d'
        alt='Books'
        height={200}
      />
      <div className='desc'>
        <h2>
          <Link to={`/show-book/${book._id}`}>{book.title}</Link>
        </h2>
        <h3>{book.author}</h3>
        <p>{book.description}</p>
      </div>
    </div>
  );
};

export default BookCard;
N.B., Here, I used the same
img srcfor each book, as each book’s respective image may not always be available. Change the image source, and you can also use a different image for each book.
The ShowBookDetails component has one task: it shows all the info we have about any book. We have both delete and edit buttons here to get access:
import React, { useState, useEffect } from 'react';
import { Link, useParams, useNavigate } from 'react-router-dom';
import '../App.css';
import axios from 'axios';

function ShowBookDetails(props) {
  const [book, setBook] = useState({});

  const { id } = useParams();
  const navigate = useNavigate();

  useEffect(() => {
    axios
      .get(`http://localhost:8082/api/books/${id}`)
      .then((res) => {
        setBook(res.data);
      })
      .catch((err) => {
        console.log('Error from ShowBookDetails');
      });
  }, [id]);

  const onDeleteClick = (id) => {
    axios
      .delete(`http://localhost:8082/api/books/${id}`)
      .then((res) => {
        navigate('/');
      })
      .catch((err) => {
        console.log('Error form ShowBookDetails_deleteClick');
      });
  };

  const BookItem = (
    <div>
      <table className='table table-hover table-dark'>
        <tbody>
          <tr>
            <th scope='row'>1</th>
            <td>Title</td>
            <td>{book.title}</td>
          </tr>
          <tr>
            <th scope='row'>2</th>
            <td>Author</td>
            <td>{book.author}</td>
          </tr>
          <tr>
            <th scope='row'>3</th>
            <td>ISBN</td>
            <td>{book.isbn}</td>
          </tr>
          <tr>
            <th scope='row'>4</th>
            <td>Publisher</td>
            <td>{book.publisher}</td>
          </tr>
          <tr>
            <th scope='row'>5</th>
            <td>Published Date</td>
            <td>{book.published_date}</td>
          </tr>
          <tr>
            <th scope='row'>6</th>
            <td>Description</td>
            <td>{book.description}</td>
          </tr>
        </tbody>
      </table>
    </div>
  );

  return (
    <div className='ShowBookDetails'>
      <div className='container'>
        <div className='row'>
          <div className='col-md-10 m-auto'>
            <br /> <br />
            <Link to='/' className='btn btn-outline-warning float-left'>
              Show Book List
            </Link>
          </div>
          <br />
          <div className='col-md-8 m-auto'>
            <h1 className='display-4 text-center'>Book's Record</h1>
            <p className='lead text-center'>View Book's Info</p>
            <hr /> <br />
          </div>
          <div className='col-md-10 m-auto'>{BookItem}</div>
          <div className='col-md-6 m-auto'>
            <button
              type='button'
              className='btn btn-outline-danger btn-lg btn-block'
              onClick={() => {
                onDeleteClick(book._id);
              }}
            >
              Delete Book
            </button>
          </div>
          <div className='col-md-6 m-auto'>
            <Link
              to={`/edit-book/${book._id}`}
              className='btn btn-outline-info btn-lg btn-block'
            >
              Edit Book
            </Link>
          </div>
        </div>
      </div>
    </div>
  );
}

export default ShowBookDetails;
UpdateBookInfo.jsUpdateBookInfo.js, as its name indicates, is responsible for updating a book’s info. An Edit Book button will trigger this component to perform. After clicking Edit Book, we will see a form with the old info, which we will be able to edit or replace:
import React, { useState, useEffect } from 'react';
import { Link, useParams, useNavigate } from 'react-router-dom';
import axios from 'axios';
import '../App.css';

function UpdateBookInfo(props) {
  const [book, setBook] = useState({
    title: '',
    isbn: '',
    author: '',
    description: '',
    published_date: '',
    publisher: '',
  });

  const { id } = useParams();
  const navigate = useNavigate();

  useEffect(() => {
    axios
      .get(`http://localhost:8082/api/books/${id}`)
      .then((res) => {
        setBook({
          title: res.data.title,
          isbn: res.data.isbn,
          author: res.data.author,
          description: res.data.description,
          published_date: res.data.published_date,
          publisher: res.data.publisher,
        });
      })
      .catch((err) => {
        console.log('Error from UpdateBookInfo');
      });
  }, [id]);

  const onChange = (e) => {
    setBook({ ...book, [e.target.name]: e.target.value });
  };

  const onSubmit = (e) => {
    e.preventDefault();

    const data = {
      title: book.title,
      isbn: book.isbn,
      author: book.author,
      description: book.description,
      published_date: book.published_date,
      publisher: book.publisher,
    };

    axios
      .put(`http://localhost:8082/api/books/${id}`, data)
      .then((res) => {
        navigate(`/show-book/${id}`);
      })
      .catch((err) => {
        console.log('Error in UpdateBookInfo!');
      });
  };

  return (
    <div className='UpdateBookInfo'>
      <div className='container'>
        <div className='row'>
          <div className='col-md-8 m-auto'>
            <br />
            <Link to='/' className='btn btn-outline-warning float-left'>
              Show BooK List
            </Link>
          </div>
          <div className='col-md-8 m-auto'>
            <h1 className='display-4 text-center'>Edit Book</h1>
            <p className='lead text-center'>Update Book's Info</p>
          </div>
        </div>

        <div className='col-md-8 m-auto'>
          <form noValidate onSubmit={onSubmit}>
            <div className='form-group'>
              <label htmlFor='title'>Title</label>
              <input
                type='text'
                placeholder='Title of the Book'
                name='title'
                className='form-control'
                value={book.title}
                onChange={onChange}
              />
            </div>
            <br />

            <div className='form-group'>
              <label htmlFor='isbn'>ISBN</label>
              <input
                type='text'
                placeholder='ISBN'
                name='isbn'
                className='form-control'
                value={book.isbn}
                onChange={onChange}
              />
            </div>
            <br />

            <div className='form-group'>
              <label htmlFor='author'>Author</label>
              <input
                type='text'
                placeholder='Author'
                name='author'
                className='form-control'
                value={book.author}
                onChange={onChange}
              />
            </div>
            <br />

            <div className='form-group'>
              <label htmlFor='description'>Description</label>
              <textarea
                type='text'
                placeholder='Description of the Book'
                name='description'
                className='form-control'
                value={book.description}
                onChange={onChange}
              />
            </div>
            <br />

            <div className='form-group'>
              <label htmlFor='published_date'>Published Date</label>
              <input
                type='text'
                placeholder='Published Date'
                name='published_date'
                className='form-control'
                value={book.published_date}
                onChange={onChange}
              />
            </div>
            <br />

            <div className='form-group'>
              <label htmlFor='publisher'>Publisher</label>
              <input
                type='text'
                placeholder='Publisher of the Book'
                name='publisher'
                className='form-control'
                value={book.publisher}
                onChange={onChange}
              />
            </div>
            <br />

            <button
              type='submit'
              className='btn btn-outline-info btn-lg btn-block'
            >
              Update Book
            </button>
          </form>
        </div>
      </div>
    </div>
  );
}

export default UpdateBookInfo;
To properly run and test your MERN application, you need to have the backend and frontend running simultaneously. To achieve this, open two terminal tabs and navigate to the root directory of both the frontend and server on both tabs. In their respective terminals, run the commands to start both servers, as follows:
Frontend:
npm run dev
Backend:
npm run app
If you encounter any error while trying to start the servers, run the npm install command and repeat the steps.
Once both servers are up and running, you can proceed to your browser and open http://localhost:5173/ . Now, you can add a book, delete a book, show the list of books, and edit books:
Deploying a MERN stack is not as straightforward as deploying a static page or a SPA. In this case, the server must be taken into account. Deploying a MERN application effectively requires adopting a variety of strategies to ensure smooth deployment, scalability, and maintainability. The best way to deploy MERN applications often includes containerization with Docker, utilization of cloud services, and CI/CD pipelines.
Containerization with Docker: Docker is an open platform for running and shipping applications. Docker provides a way to encapsulate application components into containers and separate them from the infrastructure, thus enabling quicker software delivery and ensuring consistency across different environments (development, testing, and production). It allows developers to package their MERN applications and their dependencies as containers and enables seamless deployment across various platforms.
Cloud services: Cloud services are infrastructures that facilitate the flow of user data from the frontend client to the provider’s system (server), and back. Cloud services like AWS, Google Cloud, and Azure offer scalable infrastructure and simplified resources for hosting and deploying MERN applications.
CI/CD pipelines: Continuous integration and continuous deployment (CI/CD) pipelines are a series of automated steps used to improve software delivery throughout its lifecycle. Tools like Jenkins, CircleCI, GitHub Actions, or GitLab CI/CD allow developers to automate the different stages of developing MERN applications, such as building, testing, and deploying. This practice helps maintain code quality, reduce deployment errors, and enable rapid iteration.
This is not necessarily the only optimal approach to deploying a MERN application, as the specific strategies will depend on the project requirements. However, as a general rule, a combination of the strategies listed above ensures improved performance, reliability, and most importantly, ease of maintenance.
Congratulations! You have successfully completed this MERN stack tutorial. You can visit my GitHub to see the server side and client side portions of this MERN stack tutorial. You can also check out the complete repo for our MERN stack example app.
Install LogRocket via npm or script tag. LogRocket.init() must be called client-side, not
server-side
$ npm i --save logrocket

// Code:

import LogRocket from 'logrocket';
LogRocket.init('app/id');
// Add to your HTML:

<script src="https://cdn.lr-ingest.com/LogRocket.min.js"></script>
<script>window.LogRocket && window.LogRocket.init('app/id');</script>

Learn how to build smooth staggered animations in CSS using modern features like sibling-index(), complete with practical examples, fallbacks, and accessibility tips.

Compare the top AI development tools and models of July 2026. View updated rankings, feature breakdowns, and find the best fit for you.

Learn how to detect unused and ghost dependencies in JavaScript projects using Knip, a project-level linter that keeps your dependency graph accurate.

Learn how Storybook MCP enables AI agents to understand your component library, generate accurate UI, and validate code using documentation, stories, and automated tests.
Would you be interested in joining LogRocket's developer community?
Join LogRocket’s Content Advisory Board. You’ll help inform the type of content we create and get access to exclusive meetups, social accreditation, and swag.
Sign up now

