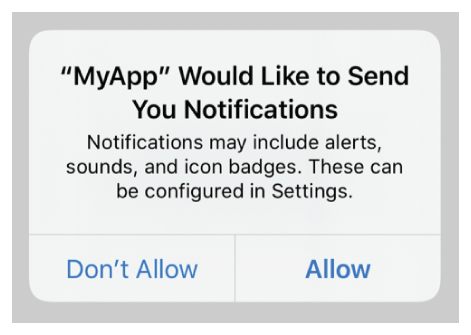
Notifications play an important role within our applications. They are the primary source of driving users to engage with our app. Often, companies will notify users about newly received messages, and notifications in wallet applications, for example, inform users about upcoming bill payments.

There are several types of notifications we can implement within our apps, such as remote and local notifications, interactive notifications, and silent notifications. In this article, we’ll cover how to implement these types of notifications using react-native-notifications.
The Replay is a weekly newsletter for dev and engineering leaders.
Delivered once a week, it's your curated guide to the most important conversations around frontend dev, emerging AI tools, and the state of modern software.
React-native-notifications is an open-source product by Wix that helps devs easily implement notifications in React Native apps. According to the documentation, you may integrate it with iOS 10 and Android 5 (API 21). It can also be compiled on Windows, macOS, and Linux operating systems.
At the time of writing, the library supports:
Let’s start by installing the library. This guide assumes that you are running React Native v10.x.
With npm:
npm install --save react-native-notifications
With Yarn:
yarn add react-native-notifications
Now we need to make a few changes in native files to work with react-native-notifications.
cocoapods is not installedReact Native works with cocoapods. If it is not installed on your machine, then run this command:
sudo gem install cocoapods
Now move to your project directory using cd.
cocoapods is installed prior to the installation of react-native-notificationsIt’s time to install cocoapods into the iOS directory of the project. When we install the react-native-notification library, it automatically adds pods to the Podfile. So, we just need to run this command:
pod install --project-directory=ios/
cocoapods was later installed and pods were not added to Podfile by react-native-notificationsIf you have freshly installed cocoapods or the required pod is not added to the Podfile, then you can manually add it:
Open ./ios/Podfile (assuming that you are in project directory) and add this to the list of pods:
pod 'react-native-notifications', :podspec => '../node_modules/react-native-notifications/react-native-notifications.podspec'
Now run this:
cd iOS && pod install
In the next step, we’ll make a few changes in the AppDelegate.m file. Open the ./ios/{project_name}/AppDelegate.m file and complete the following steps.
#import "RNNotifications.h"
monitorNotifications with this code snippet:
- (BOOL)application:(UIApplication *)application didFinishLaunchingWithOptions:(NSDictionary *)launchOptions {
    [RNNotifications startMonitorNotifications]; // -> Add this line

    return YES;
}
- (void)application:(UIApplication *)application didRegisterForRemoteNotificationsWithDeviceToken:(NSData *)deviceToken {
  [RNNotifications didRegisterForRemoteNotificationsWithDeviceToken:deviceToken];
}

- (void)application:(UIApplication *)application didFailToRegisterForRemoteNotificationsWithError:(NSError *)error {
  [RNNotifications didFailToRegisterForRemoteNotificationsWithError:error];
}
First open MainApplication.java and add this to the library:
import com.wix.reactnativenotifications.RNNotificationsPackage;
On Android, push notifications are managed by Google Firebase Cloud Messaging (FCM), so you’ll need to use it moving forward. If you haven’t used Firebase in your project before, then follow the steps provided in the set-up guide.
We need to link react-native-notifications in the ./android/settings.gradle file, like so:
include ':react-native-notifications'
project(':react-native-notifications').projectDir = new File(rootProject.projectDir, '../node_modules/react-native-notifications/lib/android/app')
If you’d like, you can set some default settings for the notifications in Android, such as the default icon, text color, etc., to be displayed. These settings will be used if we do not provide specific settings when sending out notifications.
Next, open AndroidManifest.xml and add the following code:
<!-- Set custom default icon. This is used when no icon is set for incoming notification messages. -->
<meta-data
        android:name="com.google.firebase.messaging.default_notification_icon"
        android:resource="@drawable/notification_icon" />
<!-- Set color used with incoming notification messages. This is used when no color is set for the incoming notification message. -->
<meta-data
        android:name="com.google.firebase.messaging.default_notification_color"
        android:resource="@color/colorAccent" />
Here, we are setting a default notification icon, which is stored in a drawable folder. Please note that the icon name should be notification_icon. We’re also setting a default text color, which we will add to the colors.xml file.
<resources>
    <color name="colorAccent">#C60C30</color>
</resources>
First of all, we need to understand how push notifications work. Every device has a unique device ID. To send a notification, we need this ID. Let’s review how to implement push notifications step by step.
In iOS, we need to get permission from users to display notifications.

On Android, we register the device on FCM and get the refresh token.
This is done by calling the remoteNotificationsRegistered() function. It works for both platforms.
import { Notifications } from 'react-native-notifications';

class App extends Component {
    constructor() {
        // Request permissions on iOS, refresh token on Android
        Notifications.registerRemoteNotifications();

        Notifications.events().registerRemoteNotificationsRegistered((event: Registered) => {
            // TO-DO: Send the token to my server so it could send back push notifications...
            console.log("Device Token Received", event.deviceToken);
        });
        Notifications.events().registerRemoteNotificationsRegistrationFailed((event: RegistrationError) => {
            console.error(event);
        });
    }
}
First, we import the react-native-notifications library in App.js. In the constructor, we call registerRemoteNotifications(), which will show the permission dialog on iOS and register the app on FCM on Android.
Depending on the success of this function, either the registerRemoteNotificationsRegistered() function or registerRemoteNotificationsRegistrationFailed() function will be called.
If it fails, then you won’t be allowed to send notifications. You may try for permissions again later and hope for success.
If it is successful, then registerRemoteNotificationsRegistered() will provide the deviceToken, which we need to send to the backend and register with notification services.
Here’s how to check what permissions the user has granted on iOS.
Notifications.ios.checkPermissions().then((currentPermissions) => {
    console.log('Badges enabled: ' + !!currentPermissions.badge);
    console.log('Sounds enabled: ' + !!currentPermissions.sound);
    console.log('Alerts enabled: ' + !!currentPermissions.alert);
    console.log('Car Play enabled: ' + !!currentPermissions.carPlay);
    console.log('Critical Alerts enabled: ' + !!currentPermissions.criticalAlert);
    console.log('Provisional enabled: ' + !!currentPermissions.provisional);
    console.log('Provides App Notification Settings enabled: ' + !!currentPermissions.providesAppNotificationSettings);
    console.log('Announcement enabled: ' + !!currentPermissions.announcement);
});
From your server, you can send notifications using refresh tokens. Now it’s time to handle them in your app, but how we do so depends on whether the app is in the foreground or background.
When the app is in the foreground — meaning it is active and used by the user — the notificationReceivedForeground() event is fired. Similarly, if the app is running in the background, the notificationReceivedBackground() event will fire.
Here’s the code block for if the app is running in the foreground:
Notifications.events().registerNotificationReceivedForeground((notification: Notification, completion: (response: NotificationCompletion) => void) => {
      console.log("Notification Received - Foreground", notification.payload);

      // Calling completion on iOS with `alert: true` will present the native iOS inApp notification.
      completion({alert: true, sound: true, badge: false});
        });
It’s important to call the completion callback to indicate that the process is completed.
Here’s the code if the app is in the background.
Notifications.events().registerNotificationReceivedBackground((notification: Notification, completion: (response: NotificationCompletion) => void) => {
      console.log("Notification Received - Background", notification.payload);

      // Calling completion on iOS with `alert: true` will present the native iOS inApp notification.
      completion({alert: true, sound: true, badge: false});
        });
If a notification is opened when a user taps it, a notificationOpened event will fire.
Notifications.events().registerNotificationOpened((notification: Notification, completion: () => void, action: NotificationActionResponse) => {
      console.log("Notification opened by device user", notification.payload);
      console.log(`Notification opened with an action identifier: ${action.identifier} and response text: ${action.text}`);
      completion();
        });
The data that’s received in notification.payload is:
identifiertitlesubtitlebodysoundbadgecategorypayloadWhen we send notifications from the app, they are referred to as local notifications. They are fully supported in React Native using postLocalNotification().
let localNotification = Notifications.postLocalNotification({
    body: "Local notification!",
    title: "Local Notification Title",
    sound: "chime.aiff",
    silent: false,
    category: "SOME_CATEGORY",
    userInfo: { },
    fireDate: new Date(),
});
With it, we can pass various options like body, title, sound, and category. The fireDate property schedules the notification to a date and time, and it’s required when you want to show the notification in the future.
This property works only on iOS. The event returns a unique notification ID, which we store in a local variable, localNotification. This is used to cancel the scheduled notification in case we need to.
To cancel the local notification, we need to pass the localNotification variable to the cancelLocalNotification() function.
Notifications.cancelLocalNotification(localNotification);
For iOS, we have more functions we can use to cancel notifications:
cancelAllLocalNotifications() is used to cancel all scheduled, local notifications. It doesn’t require any notificationremoveDeliveredNotifications() removes notifications from the notification center that were already delivered. You need to pass the array of notification IDs to remove themremoveAllDeliveredNotifications() removes all the delivered notifications from the notification centerReact-native-notifications is the bridge between React Native and native notification APIs, and it works with both Android and iOS.
In this blog post, we learned about both push and local notifications and how they help increase user engagement. Although many options are specific to platforms, react-native-notifications handles both platforms well and provides common functions wherever possible.

LogRocket's Galileo AI watches sessions for you and and surfaces the technical and usability issues holding back your React Native apps.
LogRocket also helps you increase conversion rates and product usage by showing you exactly how users are interacting with your app. LogRocket's product analytics features surface the reasons why users don't complete a particular flow or don't adopt a new feature.
Start proactively monitoring your React Native apps — try LogRocket for free.

Explore how the Universal Commerce Protocol (UCP) allows AI agents to connect with merchants, handle checkout sessions, and securely process payments in real-world e-commerce flows.

React Server Components and the Next.js App Router enable streaming and smaller client bundles, but only when used correctly. This article explores six common mistakes that block streaming, bloat hydration, and create stale UI in production.

Gil Fink (SparXis CEO) joins PodRocket to break down today’s most common web rendering patterns: SSR, CSR, static rednering, and islands/resumability.

@container scroll-state: Replace JS scroll listeners nowCSS @container scroll-state lets you build sticky headers, snapping carousels, and scroll indicators without JavaScript. Here’s how to replace scroll listeners with clean, declarative state queries.
Hey there, want to help make our blog better?
Join LogRocket’s Content Advisory Board. You’ll help inform the type of content we create and get access to exclusive meetups, social accreditation, and swag.
Sign up now