Firebase provides a variety of hosted backend services, such as authentication, a real-time database, cloud storage, and machine learning. What we’re focusing on, however, is Firebase Authentication.

Firebase Authentication includes a plethora of methods and utilities for integrating secure authentication into your Flutter application.
In this article, we’ll demonstrate how to use Firebase to implement a simple authentication process that includes user sign-up, sign-in, and password reset functionalities in your Flutter app.
In this tutorial, we will go through the following steps:
To get started with our tutorial, first, we will create a new Flutter project. Start by running the following command in your terminal:
$ flutter create firebase_demo
Then, open the project using your preferred IDE. Run the following code in your terminal to open it with VS Code:
$ code firebase_demo
Next, we need to add dependencies to our project. The required plugins needed for this project are:
firebase_core: For initializing Firebase service. This plugin is required to use any Firebase service in a Flutter appfirebase_auth: To get access to Firebase Authentication servicesRun the following commands in your terminal to get and install the plugins in your project:
$ flutter pub add firebase_core
$ flutter pub add firebase_auth
$ flutter pub get
Now that we have installed the required dependencies, let’s get on with creating and setting up Firebase Console.
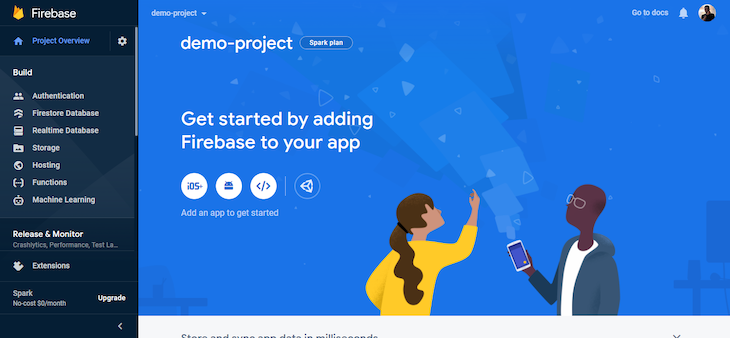
Before we can use Firebase in our Flutter application, we must first create a new Firebase project.
To do this, head over to Firebase Console and follow the steps for creating a Firebase project. You will be directed to your Firebase project dashboard once the process is complete.
Now that we’ve created a Firebase project, we need to set up Firebase for each platform (Android, iOS, and web). See the complete configuration guides below for each platform:
Finally, to use the Email/Password sign-in feature from the Firebase Authentication service, we have to enable this by navigating to the Authentication tab from the left menu of the Firebase dashboard and selecting the Email/Password option.
Here, enable the Email/Password option by toggling the Enable switch and clicking the Save button.

Now that we’ve successfully set up and configured our Firebase project, let’s get started with building and integrating Firebase Authentication into our Flutter application.
Before using any Firebase service within our app, we need to first initialize the Firebase App. We do that by calling the initializeApp method on Firebase in the main function present at the main.dart file.
import 'package:firebase_core/firebase_core.dart';
import 'package:firebase_demo/routes.dart';
import 'package:firebase_demo/screens/login.dart';
import 'package:flutter/material.dart';

void main() async {
  WidgetsFlutterBinding.ensureInitialized();
  await Firebase.initializeApp();  //here we initialize our Firebase App
  runApp(const MyApp());
}
//...
After initializing the Firebase App, let’s move on to setting up our authentication service class.
In Flutter, it’s best practice to seclude your logic from your UI. To do this, we’ll create a new dart file called authentication_service.dart. In it, we will define a class called AuthenticationService and initialize the FirebaseAuth plugin.
This class will handle all authentication-related functions and expose methods for users to sign in, sign up, reset passwords, and sign out.
class AuthenticationService {
  final _auth = FirebaseAuth.instance;
//...
}
Next, we’ll begin defining our methods in it, starting with the registration of new users.
To register a new user, we will define a method called createAccount(), and this method will take the user email, password, and username as an argument, as shown in the code snippet below.
Future<AuthStatus> createAccount({
    required String email,
    required String password,
    required String name,
  }) async {
    try {
      UserCredential newUser = await _auth.createUserWithEmailAndPassword(
        email: email,
        password: password,
      );
      _auth.currentUser!.updateDisplayName(name);
      _status = AuthStatus.successful;
    } on FirebaseAuthException catch (e) {
      _status = AuthExceptionHandler.handleAuthException(e);
    }
    return _status;
  }
Here, we passed in the user email and password to the createUserWithEmailandPassword() method from the FirebaseAuth plugin and updated the user’s display name with the username.
Notice how we handled errors in the catch block of this method; we passed the FirebaseAuthException error object to a method called handleAuthException() from the AuthExceptionHandler class. This method returns the AuthStatus and generates an error message based on reading the error code from the FirebaseAuthException object.
The code snippet below shows the AuthExceptionHandler class:
import 'package:firebase_auth/firebase_auth.dart';

enum AuthStatus {
  successful,
  wrongPassword,
  emailAlreadyExists,
  invalidEmail,
  weakPassword,
  unknown,
}

class AuthExceptionHandler {
  static handleAuthException(FirebaseAuthException e) {
    AuthStatus status;
    switch (e.code) {
      case "invalid-email":
        status = AuthStatus.invalidEmail;
        break;
      case "wrong-password":
        status = AuthStatus.wrongPassword;
        break;
      case "weak-password":
        status = AuthStatus.weakPassword;
        break;
      case "email-already-in-use":
        status = AuthStatus.emailAlreadyExists;
        break;
      default:
        status = AuthStatus.unknown;
    }
    return status;
  }
  static String generateErrorMessage(error) {
    String errorMessage;
    switch (error) {
      case AuthStatus.invalidEmail:
        errorMessage = "Your email address appears to be malformed.";
        break;
      case AuthStatus.weakPassword:
        errorMessage = "Your password should be at least 6 characters.";
        break;
      case AuthStatus.wrongPassword:
        errorMessage = "Your email or password is wrong.";
        break;
      case AuthStatus.emailAlreadyExists:
        errorMessage =
            "The email address is already in use by another account.";
        break;
      default:
        errorMessage = "An error occured. Please try again later.";
    }
    return errorMessage;
  }
}
To login an existing user on the app, define a method named login() in the AuthenticationService class, which will accept the user’s email and password as parameters, as seen in the code sample below:
  Future<AuthStatus> login({
    required String email,
    required String password,
  }) async {
    try {
      await _auth.signInWithEmailAndPassword(email: email, password: password);
      _status = AuthStatus.successful;
    } on  FirebaseAuthException catch (e) {
      _status = AuthExceptionHandler.handleAuthException(e);
    }
    return _status;
  }
This method, like the createAccount() method, returns the AuthStatus of the user, whether it’s successful or not.
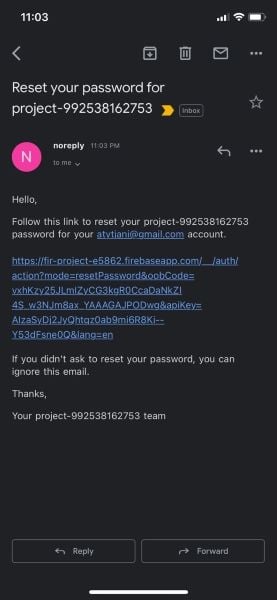
To reset a user password, we’ll call the sendPasswordResetMail() method on the FirebaseAuth object; this method accepts a String parameter which serves as the user email. Firebase handles password resets by sending a reset password link to the user email.
  Future<AuthStatus> resetPassword({required String email}) async {
    await _auth
        .sendPasswordResetEmail(email: email)
        .then((value) => _status = AuthStatus.successful)
        .catchError((e) => _status = AuthExceptionHandler.handleAuthException(e));
    return _status;
  }
Here’s a sample of what the password reset email looks like:

Finally, to sign a user out from our application, we define a method named logout(). This method contains a one-liner code that entails calling the signOut() method on the FirebaseAuth object, as shown in the code snippet below.
  Future<void> logout() async {
    await _auth.signOut();
  }
That concludes the AuthenticationService class. Next up is building the UI and making use of the methods we created in the AuthenticationService class.
Our application will consist of four screens:
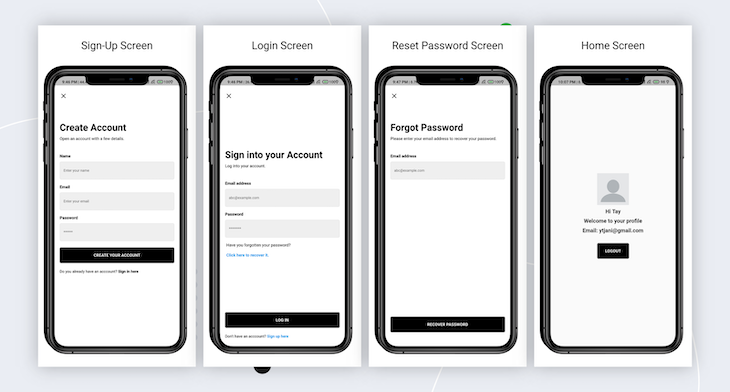
Let’s begin by building the registration screen.
The RegistrationScreen has three TextFormField widgets that serve as our email, password, and username fields, as well as a button to handle event submission, as shown in the code snippet below from the sign_up.dart file.
//...
class _SignUpScreenState extends State<SignUpScreen> {
  final _key = GlobalKey<FormState>();
  final _emailController = TextEditingController();
  final _passwordController = TextEditingController();
  final _nameController = TextEditingController();
  final _authService = AuthenticationService();
  //disposing all text controllers
  @override
  void dispose() {
    _emailController.dispose();
    _passwordController.dispose();
    _nameController.dispose();
    super.dispose();
  }

  @override
  Widget build(BuildContext context) {
    var size = MediaQuery.of(context).size;
    return Scaffold(
      body: Container(
        width: size.width,
        height: size.height,
        color: Colors.white,
        child: SingleChildScrollView(
          child: Padding(
            padding: const EdgeInsets.only(
                left: 16.0, right: 16.0, top: 50.0, bottom: 25.0),
            child: Form(
              key: _key,
              child: Column(
                crossAxisAlignment: CrossAxisAlignment.start,
                mainAxisSize: MainAxisSize.min,
                children: [
                  GestureDetector(
                    onTap: () => Navigator.pop(context),
                    child: const Icon(Icons.close),
                  ),
                  const SizedBox(height: 70),
                  const Text(
                    'Create Account',
                    style: TextStyle(
                      fontSize: 35,
                      fontWeight: FontWeight.bold,
                      color: Colors.black,
                    ),
                  ),
                  const SizedBox(height: 10),
                  const Text(
                    'Open an account with a few details.',
                    style: TextStyle(
                      fontSize: 15,
                      color: Colors.black,
                    ),
                  ),
                  const SizedBox(height: 40),
                  const Text(
                    'Name',
                    style: TextStyle(
                      fontSize: 15,
                      color: Colors.black,
                      fontWeight: FontWeight.bold,
                    ),
                  ),
                  const SizedBox(height: 10),
                  CustomTextField(
                    hintText: 'Enter your name',
                    keyboardType: TextInputType.name,
                    textCapitalization: TextCapitalization.sentences,
                    validator: (value) =>
                        Validator.fullNameValidate(value ?? ""),
                    controller: _nameController,
                  ),
                  const SizedBox(height: 16),
                  const Text(
                    'Email',
                    style: TextStyle(
                      fontSize: 15,
                      color: Colors.black,
                      fontWeight: FontWeight.bold,
                    ),
                  ),
                  const SizedBox(height: 10),
                  CustomTextField(
                    hintText: 'Enter your email',
                    keyboardType: TextInputType.emailAddress,
                    textCapitalization: TextCapitalization.none,
                    validator: (value) => Validator.validateEmail(value ?? ""),
                    controller: _emailController,
                  ),
                  const SizedBox(height: 16),
                  const Text(
                    'Password',
                    style: TextStyle(
                      fontSize: 15,
                      color: Colors.black,
                      fontWeight: FontWeight.bold,
                    ),
                  ),
                  const SizedBox(height: 10),
                  CustomTextField(
                    hintText: '******',
                    obscureText: true,
                    maxLength: 6,
                    keyboardType: TextInputType.number,
                    textCapitalization: TextCapitalization.none,
                    controller: _passwordController,
                    validator: (value) =>
                        Validator.validatePassword(value ?? ""),
                  ),
                  const SizedBox(height: 20),
                  CustomButton(
                    label: 'CREATE YOUR ACCOUNT',
                    color: Colors.black,
                    onPressed: () async {
                      if (_key.currentState!.validate()) {
                        LoaderX.show(context);
                        final _status = await _authService.createAccount(
                          email: _emailController.text.trim(),
                          password: _passwordController.text,
                          name: _nameController.text,
                        );
                        if (_status == AuthStatus.successful) {
                          LoaderX.hide();
                          Navigator.pushNamed(context, LoginScreen.id);
                        } else {
                          LoaderX.hide();
                          final error =
                              AuthExceptionHandler.generateErrorMessage(
                                  _status);
                          CustomSnackBar.showErrorSnackBar(
                            context,
                            message: error,
                          );
                        }
                      }
                    },
                    size: size,
                    textColor: Colors.white,
                    borderSide: BorderSide.none,
                  ),
                  const SizedBox(height: 20),
                  GestureDetector(
                    onTap: () {
                      Navigator.pushNamed(context, LoginScreen.id);
                    },
                    child: RichText(
                      textScaleFactor: 0.8,
                      text: const TextSpan(
                        text: "Do you already have an acccount? ",
                        style: TextStyle(
                          color: Colors.black,
                          fontSize: 15,
                        ),
                        children: [
                          TextSpan(
                            text: 'Sign in here',
                            style: TextStyle(
                              color: Colors.black,
                              fontSize: 15,
                              fontWeight: FontWeight.bold,
                            ),
                          ),
                        ],
                      ),
                    ),
                  ),
                ],
              ),
            ),
          ),
        ),
      ),
    );
  }
}
So, if we check the onPressed property of our CustomButton widget:
onPressed: () async {
  if (_key.currentState!.validate()) {
    LoaderX.show(context);
    final _status = await _authService.createAccount(
      email: _emailController.text.trim(),
      password: _passwordController.text,
      name: _nameController.text,
    );
    if (_status == AuthStatus.successful) {
      LoaderX.hide();
      Navigator.pushNamed(context, LoginScreen.id);
    } else {
      LoaderX.hide();
      final error = AuthExceptionHandler.generateErrorMessage(_status);
      CustomSnackBar.showErrorSnackBar(
        context,
        message: error,
      );
    }
  }
},
The code snippet above validates the inputs before passing the email, password, and username values to the createAccount() method from the AuthenticationService class for handling.
If the AuthStatus is successful, we direct the user to the LoginScreen. Otherwise, we display a snackbar with the error message that occurred.
The UI code for the LoginScreen is very similar to that of the RegistrationScreen, only that it has two TextFormField widgets that serve as our email and password fields, as well as a button to handle event submission. So, for the sake of brevity, I’ll leave out the LoginScreen UI code and focus on the code to be written in the CustomButton onPressed callback in the loginscreen.dart file.
//...
CustomButton(
  label: 'LOG IN',
  color: Colors.black,
  onPressed: () async {
    if (_key.currentState!.validate()) {
      LoaderX.show(context);
      final _status = await _authService.login(
        email: _emailController.text.trim(),
        password: _passwordController.text,
      );
      if (_status == AuthStatus.successful) {
        LoaderX.hide();
        Navigator.pushNamed(context, HomeScreen.id);
      } else {
        LoaderX.hide();
        final error = AuthExceptionHandler.generateErrorMessage(_status);
        CustomSnackBar.showErrorSnackBar(
          context,
          message: error,
        );
      }
    }
  },
//...
The code snippet translates to validating the inputs, then passing the email and password values to the login() method from the AuthenticationService class for delegation.
If the AuthStatus is successful, we direct the user to the HomeScreen. Otherwise, we show a snackbar with the error message that occurred.
The ResetPassword screen has a TextFormField widget that represents the email field and a button to handle event submission.
Let’s take a look at the onPressed property from the CustomButton widget:
CustomButton(
  label: 'RECOVER PASSWORD',
  color: Colors.black,
  onPressed: () async {
    if (_key.currentState!.validate()) {
      LoaderX.show(context);
      final _status = await _authService.resetPassword(
          email: _emailController.text.trim());
      if (_status == AuthStatus.successful) {
        LoaderX.hide();
        Navigator.pushNamed(context, LoginScreen.id);
      } else {
        LoaderX.hide();
        final error = AuthExceptionHandler.generateErrorMessage(_status);
        CustomSnackBar.showErrorSnackBar(context, message: error);
      }
    }
  },
  size: size,
  textColor: Colors.white,
  borderSide: BorderSide.none,
),
Here — just like the previous methods we’ve treated — we first handle the validation of input, then we pass in the user email to the resetPassword() method from the AuthenticationService class. If the status is successful, we direct the user to the LoginScreen; otherwise, we display a snackbar stating the error that has occurred.
Next, we need to provide a screen that reveals the user’s profile data when they successfully log in.
The HomeScreen will simply display the user’s email and display name, as well as a button to handle signing out the user.
In the CustomButton onPressed callback, we simply called the signOut() method on the FirebaseAuth plugin, and if it’s successful, we navigate the user back to the LoginScreen.
//...
class HomeScreen extends StatelessWidget {
  const HomeScreen({Key? key}) : super(key: key);
  static const String id = 'home_screen';
  @override
  Widget build(BuildContext context) {
    var size = MediaQuery.of(context).size;
    return Scaffold(
      body: SafeArea(
        child: SizedBox(
          height: size.height,
          width: size.width,
          child: Column(
            mainAxisAlignment: MainAxisAlignment.center,
            children: [
              Container(
                width: 100,
                height: 100,
                decoration: const BoxDecoration(
                  image: DecorationImage(
                    image: AssetImage('assets/blank-dp.png'),
                  ),
                ),
              ),
              const SizedBox(height: 10),
              Text(
                'Hi ${AuthenticationService.auth.currentUser!.displayName}',
                style: const TextStyle(
                  fontSize: 20,
                  fontWeight: FontWeight.bold,
                ),
              ),
              const SizedBox(height: 10),
              const Text(
                'Welcome to your profile',
                style: TextStyle(
                  fontSize: 20,
                  fontWeight: FontWeight.bold,
                ),
              ),
              const SizedBox(height: 10),
              Text(
                'Email: ${AuthenticationService.auth.currentUser!.email}',
                style: const TextStyle(
                  fontSize: 20,
                  fontWeight: FontWeight.bold,
                ),
              ),
              const SizedBox(height: 30),
              SizedBox(
                width: 100,
                child: CustomButton(
                  label: 'LOGOUT',
                  color: Colors.black,
                  onPressed: () async {
                    LoaderX.show(context);
                    await AuthenticationService.auth.signOut().then((value) {
                      LoaderX.hide();
                      Navigator.pushNamedAndRemoveUntil(
                          context, LoginScreen.id, (route) => false);
                    });
                  },
                  size: size,
                  textColor: Colors.white,
                  borderSide: BorderSide.none,
                ),
              )
            ],
          ),
        ),
      ),
    );
  }
}
To wrap this up, we’ve learned what Firebase is, how to set up a Firebase App, and how to integrate Firebase Authentication in our Flutter apps by running through examples such as user sign-up, and sign-in, password reset, and user sign-out.
The complete source code of this project is available on GitHub. Thank you for taking the time to read this and I hope you found this article useful!
Install LogRocket via npm or script tag. LogRocket.init() must be called client-side, not
server-side
$ npm i --save logrocket

// Code:

import LogRocket from 'logrocket';
LogRocket.init('app/id');
// Add to your HTML:

<script src="https://cdn.lr-ingest.com/LogRocket.min.js"></script>
<script>window.LogRocket && window.LogRocket.init('app/id');</script>
Hey there, want to help make our blog better?
Join LogRocket’s Content Advisory Board. You’ll help inform the type of content we create and get access to exclusive meetups, social accreditation, and swag.
Sign up now
Learn how OpenAPI can automate API client generation to save time, reduce bugs, and streamline how your frontend app talks to backend APIs.

Discover how the Interface Segregation Principle (ISP) keeps your code lean, modular, and maintainable using real-world analogies and practical examples.

<selectedcontent> element improves dropdowns

Learn how to implement an advanced caching layer in a Node.js app using Valkey, a high-performance, Redis-compatible in-memory datastore.


