A toast is a UI element that provides messages to a user in a non-interruptive manner. They usually pop up from the bottom of the screen and disappear after a short while.

For the purposes of this post, let’s say we want to build toasts such that, on mount, they fade into the bottom right part of the screen. When we add another toast, the previous toast should animate up, and the new toast fades in at the end. We’ll use Framer Motion and React portals for this.
We also want a feature to close all toasts together. For this, it’s good to have a central state management specifically for toasts. We’ll use Zustand for that.
It also lets us do advanced stuff like setting limits on how many toasts can show up on screen and setting a default duration after which toasts should disappear. Implementing the advanced stuff is left as an exercise to the reader, though.
This will be the finished product:
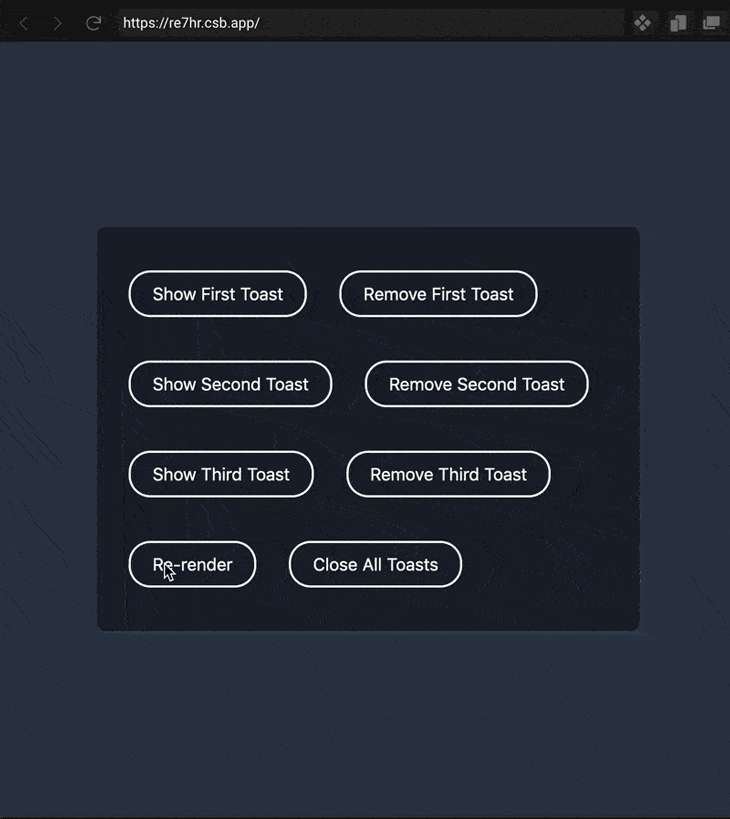
You can play around with the demo in this CodeSandbox.
For our animated toast, we’ll approach it like we’re making a library. The library could have many parts, but only some are exposed to the users. We’ll make a Toasts.js file that contains three parts:
Toast component and useToastControls Hook.Toast component: This component gets the store state from the Zustand custom Hook and decides whether it should render toast content.useToastControls custom Hook: We can’t let users have complete access to the Zustand store, so we’ll export this custom Hook instead.Before we start implementing each of the above, let’s see how it’s going to be used typically:
import { Toast, useToastControls } from "./Toasts";
function App() {
 const { show, closeAll } = useToastControls();
 return (
   <div className="app">
     <button onClick={() => show('toast-first')}>Show Toast</button>
     <button onClick={closeAll}>Close all</button>
     <Toast uniqueId="toast-first" className="toast-blue">
       Hey! I'm a toast
     </Toast>
   </div>
 );
}
We can render any number of Toast components, but each of them should have a uniqueId prop.
We can also choose to give the toast some classes or content to render inside. The useToastsControl custom Hook will give us methods like show, close, and closeAll. To show a toast, we have to pass that toast’s uniqueId to the show method.
Since we’ll need to use React portals to render the toast, we need a DOM node already present in the page. For that, we’ll change the index.html (in a CRA app) to this:
 <div id="root"></div>
 <div id="toasts-portal"></div>
We’ll also add some CSS to position the #toasts-portal container in the bottom right. Then we’ll make it a flexbox so that the toasts stack on top of each other with a gap in between.
#toasts-portal {
  position: absolute;
  bottom: 20px;
  right: 20px;
  display: flex;
  flex-direction: column;
  align-items: flex-end;
  gap: 30px;
}
Now that we know how it’s going to be used, let’s go ahead and implement the three parts of the Toasts.js file.
Zustand is a small (~700B) state management library. The way it works is that we call the create method with a callback function. This function returns a store object. We can keep various states in the store, as well as methods that can update the state.
The create method then returns a custom Hook, which, in our case, we’ve named useToastStore. We can call this custom Hook in any React component to get access to the state and methods kept in that Zustand store.
Sidenote: The great thing about Zustand is that we’re not restricted to a single store — we can create multiple stores for various use cases. Just like toasts, modals can have their own store, API cache can have a different one, user session management can also have a different one, and so on. If some state changes in one store, only components using that store will re-render without any extra comparisons.
In Toasts.js, the Zustand store is made like this. Keep in mind that it’s not exported:
const useToastStore = create((set, get) => ({
 toastList: new Set(),
 show(toastId) {
   const { toastList } = get();
   const newToastList = new Set(toastList);
   newToastList.add(toastId);
   set({
     toastList: newToastList
   });
 },
 close(toastId) {
   const { toastList } = get();
   const newToastList = new Set(toastList);
   newToastList.delete(toastId);
   set({
     toastList: newToastList
   });
 },
 closeAll() {
   const newToastList = new Set();
   set({
     toastList: newToastList
   });
 }
}));
The callback function returns an object with a state named toastList and three methods: show, close, and closeAll.
The toastList state is a Set object where we will store the list of toast IDs that are currently shown on the screen. Why did I choose a Set? Because it ensures that each ID in it is unique. Also, I was bored of using arrays for everything.
The methods then take care of adding or removing the toast IDs from toastList. The show method accepts a toastId as an argument. It gets the toastList state by calling the get method, then it creates a new Set instance with values from the existing toastList.
After that, the toastId is added to newToastList. Finally, we set the toastList state to newToastList using the set method.
The closeAll method just sets the toastList to an empty Set instance. The reason we need to create a new Set instance in each method is because, just like in React, state updates in Zustand need to be immutable.
Also, if you’re wondering where these get and set methods came from, check the beginning of the callback function — it receives these methods as arguments.
Toast componentThe Toast component does most of the heavy lifting, so we’ll implement it step by step:
Inside the component, we call the useToastStore custom Hook. By default, it would return everything in the store. That means if anything in the store changes, then the Toast component will re-render.
If you have small stores, then this isn’t an issue. But when it does become a problem, you can do it this way:
import shallow from "zustand/shallow";
export function Toast(props) {
 const { uniqueId, config = {}, className, children } = props;
 const { duration = 3500, role = "status" } = config;
 const { toastList, close } = useToastStore(
   (store) => ({
     toastList: store.toastList,
     close: store.close
   }),
   shallow
 );
 const isShown = toastList.has(uniqueId);
 return (); // will be expanded in the next step
}
Since we only want the toastList state and close method, we can selectively pick only those two from the store. This is done by passing a selector function to useToastStore. The selector returns an object, so we will also tell useToastStore to shallow-compare the data returned by the selector. This is similar to how the new Redux Hooks are used.
Now that we have the toastList from the store and uniqueId from the Toast component’s prop, we can check whether that uniqueId belongs in the toastList with the toastList.has method. We store the result of it in the isShown variable, which we’ll use in the next step.
We need to render the toast’s content inside the "#toasts-portal" DOM node so that it always enters from the bottom of the screen. For that, we’ll use portals.
To get the enter animations working, we will use the motion utility from Framer Motion. When isShown is true, the motion.div component will mount, and it will transition from the values provided in the initial prop to the values of animate prop.
But when isShown becomes false and the motion.div component unmounts, we want an exit animation, too. For that, we need to wrap everything in the AnimatePresence component and pass a unique key to the motion.div component. Then we can specify the exit animation using the exit prop. Note that AnimatePresence will stay mounted regardless of isShown.
The other interesting thing is that we’re passing a layout prop to motion.div, which ensures that upward movement of a toast is also animated. Apart from that, it’s just a simple div with classes, relevant ARIA role, and children.
import { AnimatePresence, motion } from "framer-motion";
export function Toast(props) {
 // stuff from previous step
 return createPortal(
   <AnimatePresence>
     {isShown && (
       <motion.div
         key={uniqueId}
         layout
         initial={{ opacity: 0, y: 50, scale: 0.3 }}
         animate={{ opacity: 1, y: 0, scale: 1 }}
         exit={{ opacity: 0, y: 20, scale: 0.5 }}
         className={cn("toast", className)}
         role={role}
       >
         {children}
       </motion.div>
     )}
   </AnimatePresence>,
   document.querySelector("#toasts-portal")
 );
}
The last piece of the Toast component is declaring an effect that closes the toast. After a given duration, we call the close method of the Zustand store with the uniqueId prop as its argument.
import { useEffect } from "react";
export function Toast(props) {
 const isShown = toastList.has(uniqueId);
 useEffect(() => {
   if (!duration || !isShown) {
     return;
   }
   const timeoutId = setTimeout(() => {
     close(uniqueId);
   }, duration);
   return () => {
     clearTimeout(timeoutId);
   };
 }, [uniqueId, isShown, duration, close]);
}
With that, we’ve finished the implementation of the Toast component. The next part is a little extra thing I’ve added just to show how a library can hide internal implementation details.
useToastControls custom HookOur toast implementation encapsulates the logic to show messages to users. The benefit is that the internal implementation can change without breaking any user’s code.
In Toasts.js, the Zustand store is an implementation detail. It contains the toastList set. If a user gets access to toastList, they might modify it however they like and cause bugs. As such, we want to add constraints such that users can call the show, close, and closeAll methods but can’t modify the toastList state directly.
For that, we make a custom Hook that selects the show, close, and closeAll methods and returns them. Now we can export this custom Hook instead.
export function useToastControls() {
 const controls = useToastStore(
   (store) => ({
     show: store.show,
     close: store.close,
     closeAll: store.closeAll
   }),
   shallow
 );
 return controls;
}
Putting everything together, you can see how our finished Toasts.js looks in this CodeSandbox.
I hope you enjoyed the article and learned at least one new thing. You can follow me on Twitter to get updates about new articles and discuss various web development topics.
Install LogRocket via npm or script tag. LogRocket.init() must be called client-side, not
server-side
$ npm i --save logrocket

// Code:

import LogRocket from 'logrocket';
LogRocket.init('app/id');
// Add to your HTML:

<script src="https://cdn.lr-ingest.com/LogRocket.min.js"></script>
<script>window.LogRocket && window.LogRocket.init('app/id');</script>

I migrated 20 production-style components from Tailwind to StyleX. Here’s what the data showed about LOC, CSS bundle size, build time, and type safety.

A guide for using JWT authentication to prevent basic security issues while understanding the shortcomings of JWTs.

Discover how to build, render, and automate product demo videos with Remotion, replacing traditional screen recordings with reusable React code.

Chrome’s Modern Web Guidance embeds modern web platform skills into AI coding agents, helping them choose native HTML, CSS, and browser APIs over legacy patterns.
Hey there, want to help make our blog better?
Join LogRocket’s Content Advisory Board. You’ll help inform the type of content we create and get access to exclusive meetups, social accreditation, and swag.
Sign up now

