
NestJS is a progressive Node.js framework for building efficient, reliable, and scalable server-side applications. In this tutorial, we will learn how to implement a secure Google single sign-on (SSO) in the NestJS backend service and connect it to a React frontend application to authenticate users in a simple web application.

Jump ahead:
client and server folders in NestJS
The Replay is a weekly newsletter for dev and engineering leaders.
Delivered once a week, it's your curated guide to the most important conversations around frontend dev, emerging AI tools, and the state of modern software.
client and server folders in NestJSTo get started, we’ll create the frontend client and backend server folders. Next, we’ll navigate to the client folder and initialize the React application by running the command npx create-react app react-nestjs in the terminal. This will create all the necessary files for our frontend app.
For the backend side, we will run the nest new server command in the terminal. This will scaffold a new NestJS project directory and populate the directory with the initial core NestJS files and supporting modules.
The folder directory should look like this:
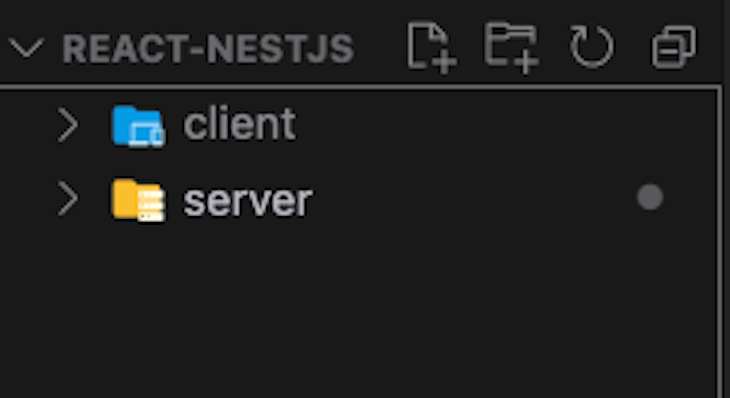
Then, we will navigate to client and run npm run start to get our frontend app up and running. This will start a local development server as localhost:3000.
To begin our backend development server, we’ll navigate to the server folder and run npm run start. Because we’ve already used the localhost:3000, we will change the port for the backend to localhost:8080 in the main.ts file:
import { NestFactory } from '@nestjs/core';
import { AppModule } from './app.module';

async function bootstrap() {
 const app = await NestFactory.create(AppModule);
 await app.listen(8080);
}
bootstrap();
The npm run start will start the development server for us at localhost:8080 and display “Hello, World!” from the app.controller.ts file.
The app.controller.ts uses the getHello method defined in app.service.ts to return the text when the development server starts at localhost:8080. When you check the app.controller.ts, you should see this:
import { Controller, Get, Post, Body } from '@nestjs/common';
import { AppService } from './app.service';
@Controller()
export class AppController {
 constructor(private readonly appService: AppService) {}

 @Get()
 getHello(): string {
   return this.appService.getHello();
 }
This is the result in the app.service.ts file:
import { Injectable } from '@nestjs/common';
@Injectable()
export class AppService {
  getHello(): string {
   return 'Hello World!';
 }
You can read more about the controllers in NestJS here.
After scaffolding our app, we’ll set up a new project on the Google Cloud Platform. First, we’ll navigate to the console and create a new project by selecting Project Bar in the top left corner. Then, click New Project and enter your project details. After that, search for credentials in the search bar and select API and Services.
Then, we’ll configure the content screen by clicking the Configure Consent Screen before creating our credentials. Next, select Configure Screen and enter the app information. Next, we’ll select Save and Continue. Then, click Credentials, Create Credentials, and select OAuth client ID.
This will prompt us to a page to create an OAuth Client ID, where we will select Web application as the Application Type. Then, we can add the JavaScript origins and the redirect URIs as locahost:3000. We’ll also add a second URI with the value http://localhost. Finally, click Create to get the client ID and the client secret:
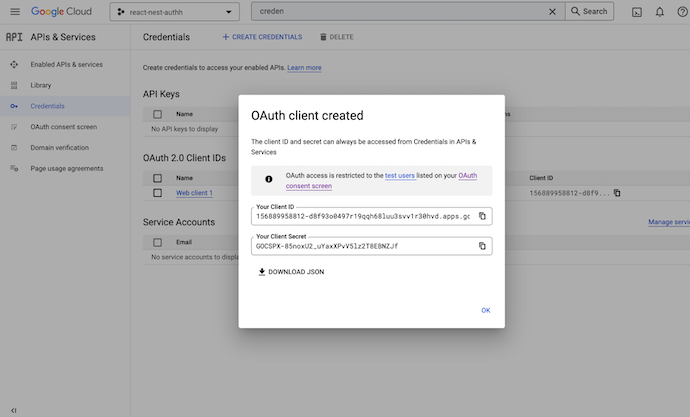
To set up the Google Auth Library, we will use React OAuth 2.0. To get started, let’s run the command npm i @react-oauth/google in the terminal. After creating our client ID, we’ll wrap the home page with the GoogleOAuthProvider.
Then, inside App.js, we will clean up the bootstrapped code and replace it with the following:
import "./App.css";
import { GoogleOAuthProvider, GoogleLogin } from "@react-oauth/google";

function App() {
 return (
   <div className="App">
         <h1>Welcome</h1>
         <GoogleOAuthProvider      clientId="192710632585-6dvq7283tr2pug31h5i6ii07fgdeu6q3.apps.googleusercontent.com
"
         >
           <GoogleLogin
             onSuccess={async (credentialResponse) => {
             console.log(credentialResponse);
                        }}
             onError={() => {
               console.log("Login Failed");
             }}
           />
         </GoogleOAuthProvider>
   </div>
 );
}

export default App;
Here, we used GoogleOAuthProvider and the GoogleLogin APIs to implement the Google SSO functionality. Then, we logged the credential response from GoogleLogin in the console. We also passed the clientId to the GoogleOAuthProvider.
clientIdNow, we’ll sign in with our email and check the console for the logged credential response. In the console, we should have a clientId response object:

Lastly, we have to store the clientId that we’re passing to GoogleOAuthProvider in an environment variable file. Because it’s a Secret ID, it should not be directly exposed to the browser or pushed to the repository alongside other code.
Next, create a .env file in the client folder, and add .env to .gitignore so the file is ignored when pushed to the repository. Inside .env, create a REACT_APP_GOOGLE_CLIENT_ID variable and pass it in the clientId raw value:
# google client id
REACT_APP_GOOGLE_CLIENT_ID=192710632585-6dvq7283tr2pug31h5i6ii07fgdeu6q3.apps.googleusercontent.com
It’s important to note that the variable name has to be prefixed with the REACT_APP keyword.
Then, in App.js, we will pass process.env.REACT_APP_GOOGLE_CLIENT_ID as the value for clientId for React to read .env:
import "./App.css";
import { GoogleOAuthProvider, GoogleLogin } from "@react-oauth/google";
function App() {
 return (
   <div className="App">
         <h1>Welcome</h1>
         <GoogleOAuthProvider
           clientId={process.env.REACT_APP_GOOGLE_CLIENT_ID}
         >
           <GoogleLogin
             onSuccess={async (credentialResponse) => {
               console.log(credentialResponse);
                         }}
             onError={() => {
               console.log("Login Failed");
             }}
           />
         </GoogleOAuthProvider>
       </div>
 );
}

export default App;
We will use Zustand for our global state management. However, you can use Redux, Recoil, or any state management of your choice. To get started, run npm install zustand to install the package:
Then, we will create a hook folder and create the useStore.js store file:
import create from "zustand";

export const useStore = create((set) => ({
 // get the data from local storage
 authData: localStorage.getItem("authData")
   ? JSON.parse(localStorage.getItem("authData"))
   : null,

 setAuthData: (authData) => {
   localStorage.setItem("authData", JSON.stringify(authData));
   set({ authData });
 },
}));
Next, we’ll make an Axios POST request using the Axios.post method whenever a user logs in.
First, install Axios with npm install axios and make a Post request when selecting GoogleLogin:
import "./App.css";
import { GoogleOAuthProvider, GoogleLogin } from "@react-oauth/google";
import axios from "axios";
import { useStore } from "./hooks/useStore";

function App() {
 const setAuthData = useStore((state) => state.setAuthData);
 return (
   <div className="App">
              <h1>Welcome</h1>
         <GoogleOAuthProvider
           clientId={process.env.REACT_APP_GOOGLE_CLIENT_ID}
         >
           <GoogleLogin
             useOneTap={true}
             onSuccess={async (credentialResponse) => {
               console.log(credentialResponse);
               const { data } = await axios.post(
                 "http://localhost:8080/login",
                                );
               localStorage.setItem("AuthData", JSON.stringify(data));
               setAuthData(data);
             }}
             onError={() => {
               console.log("Login Failed");
             }}
           />
         </GoogleOAuthProvider>
      </div>
 );
}

export default App;
Remember, we set the port for our backend as 8080, so we’ll request 8080/login later in our backend. Then, we’ll store the data from the backend server in local storage and set setAuthData to the data that our backend service will return.
Next, we need to set up our NestJS folder in the server we created earlier:
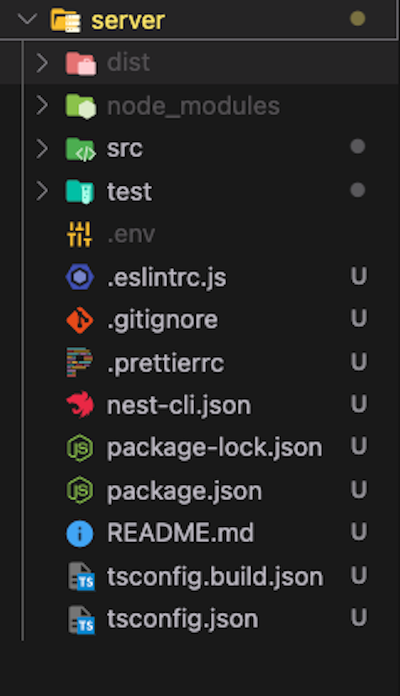
To confirm that we successfully connected NestJS to the frontend app, we will return React x NestJS in app.controller.ts using the POST HTTP request method:
import { Controller, Post } from '@nestjs/common';
import { AppService } from './app.service';
@Controller()
export class AppController {
 @Post('/login')
 login: string {
   return 'Reaxt x NestJS';
 }
}
Now, let’s log in to the frontend app and check the browser’s local storage:

Once we log in successfully, we can send the response as a text. From here, we’ll create a schema and send the name, email, picture user objects.
Remember, for the connection between NestJS and React to work, we need to enable cors in the NestJS main.ts file. Otherwise, there will be an error when calling the backend endpoint:
import { NestFactory } from '@nestjs/core';
import { AppModule } from './app.module';

async function bootstrap() {
 const app = await NestFactory.create(AppModule);
 //enable cors
 app.enableCors({
   origin: 'http://localhost:3000',
 });
 await app.listen(8080);
}
bootstrap();
Because our port origin is localhost:3000, we will pass it to the origin in the enableCors method.
We will start with the Google Auth Library: Node.js Client on the server side. To install this package, run npm i google-auth-library and import the OAuth2Client to retrieve an access token, then refresh the token.
Next, we will initiate a new OAuth2Client instance, pass clientId, and generate the secret when setting up the Google Cloud Platform.
Again, we do not want to pass the values plainly in our code, so we need to implement .env for the server side. First, create an .env and include it in .gitignore. Then, add the two variables in the .env file:
GOOGLE_CLIENT_ID=192710632585-6dvq7283tr2pug31h5i6ii07fgdeu6q3.apps.googleusercontent.com
GOOGLE_CLIENT_SECRET=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
Now, we need to load and parse .env from the project root directory. We’ll also merge key-value pairs from .env with the environment variables and store the result in a private structure accessed through the ConfigService. To do this, we will install npm i --save @nestjs/config which uses dotenv internally.
Then, we’ll import the ConfigModule from nest/config into the root AppModule and control its behavior using the .forRoot() static method:
import { Module } from '@nestjs/common';
import { AppController } from './app.controller';
import { AppService } from './app.service';
import { ConfigModule } from '@nestjs/config';

@Module({
 imports: [
   ConfigModule.forRoot({
     isGlobal: true,
     envFilePath: '.env',
   }),
  ],
 controllers: [AppController],
 providers: [AppService],
})
export class AppModule {}
Now, we can read our .env variables from anywhere inside the project. Next, we’ll implement the Google Authentication in app.controller.ts:
import { Controller, Get, Post, Body } from '@nestjs/common';
import { AppService } from './app.service';
import { OAuth2Client } from 'google-auth-library';

const client = new OAuth2Client(
 process.env.GOOGLE_CLIENT_ID,
 process.env.GOOGLE_CLIENT_SECRET,
);

@Controller()
export class AppController {
 @Post('/login')
 async login(@Body('token') token): Promise<any> {
   const ticket = await client.verifyIdToken({
     idToken: token,
     audience: process.env.GOOGLE_CLIENT_ID,
   });
    // log the ticket payload in the console to see what we have
   console.log(ticket.getPayload());
    }
}
Here, we pass the idToken and audience to the Body decorator, the equivalent of req.body. The audience is the clientId and the token will come from our credentialObject on the frontend.
We will pass the token in App.js as the credentialObject.credentials to pass it alongside Body:
<GoogleLogin
             useOneTap={true}
             onSuccess={async (credentialResponse) => {
               console.log(credentialResponse);
               const { data } = await axios.post(
                 "http://localhost:8080/login",
                 {
                   // pass the token as part of the req body
                   token: credentialResponse.credential,
                 }
               );
               localStorage.setItem("AuthData", JSON.stringify(data));
               setAuthData(data);
             }}
             onError={() => {
               console.log("Login Failed");
             }}
           />
When we successfully log in, we should have this in our terminal as the ticket.getPayload() data:

For this tutorial, we will use MongoDB to save users’ information in the database. To get started, sign up or log in to a MongoDB Cloud Services account. Then, create a new free-tier cluster:
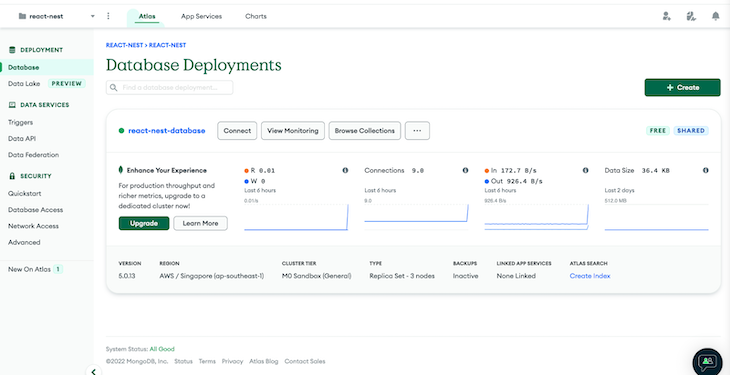
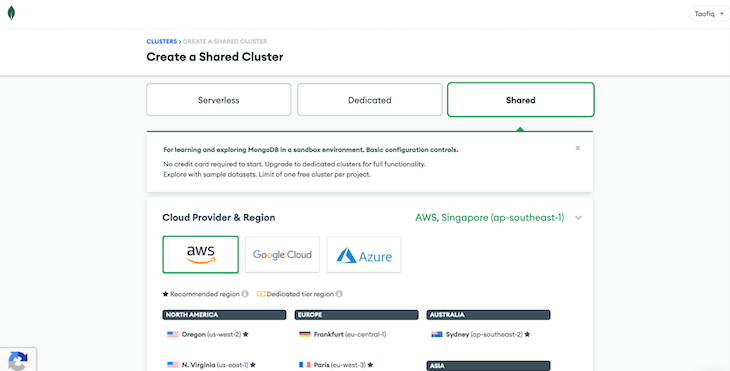
After creating the cluster, connect with your application to get your MONGOURI. Copy the URI and paste it into the .env file for the server. Then, we will connect our database with our NestJS app inside the app.module.ts.
We will create a user schema by creating the user.schema.ts file. You can read more about connecting the MongoDB database in NestJS here:
MONGO_URI=mongodb+srv://Taofiq:[email protected]/?retryWrites=true&w=majority


import { Prop, Schema, SchemaFactory } from '@nestjs/mongoose';
import { Document } from 'mongoose';

export type UserDocument = User & Document;

@Schema()
export class User {
 @Prop()
 name: string;

 @Prop()
 email: string;

 @Prop()
 image: string;
}

export const UserSchema = SchemaFactory.createForClass(User);
In our schema, we’ll send the name, email, and image props as a response when a login request is made to the Post.
Now, in the app module, we will configure the MongoDB connection:
import { Module } from '@nestjs/common';
import { AppController } from './app.controller';
import { AppService } from './app.service';
import { ConfigModule } from '@nestjs/config';
import { MongooseModule } from '@nestjs/mongoose';
import { User, UserSchema } from './user.schema';

@Module({
 imports: [
   ConfigModule.forRoot({
     isGlobal: true,
     envFilePath: '.env',
   }),
   MongooseModule.forRoot(process.env.MONGO_URI),
   MongooseModule.forFeature([{ name: User.name, schema: UserSchema }]),
 ],
 controllers: [AppController],
 providers: [AppService],
})
export class AppModule {}
Moving on, we will create an app service to create new users and log existing users into the app:
import { Injectable } from '@nestjs/common';
import { InjectModel } from '@nestjs/mongoose';
import { Model } from 'mongoose';
import { User, UserDocument } from './user.schema';

@Injectable()
export class AppService {
 constructor(@InjectModel(User.name) private userModel: Model<UserDocument>) {}
 async login({
   email,
   name,
   image,
 }: {
   email: string;
   name: string;
   image: string;
 }): Promise<any> {
   const user = await this.userModel.findOne({ email: email });
   if (!user) {
     const newUser = new this.userModel({ email, name, image });
     await newUser.save();
     return newUser;
   } else {
     console.log(user);
     return user;
   }
 }
}
Here, we’ll create a new login function. First, we’ll verify the existence of a user’s email. If they are not in the database, create a new user with the userModel. If the user already exists in the database, we will return the existing user’s name, email, and image when the endpoint is called. From here, a ticket is created and the token and audience values are passed in:
{
                   // pass the token as part of the req body
                   token: credentialResponse.credential,
                 }
Then, in our app.controller.ts, we will use login by using the token we passed in App.js. Here’s a recap of the ticket.getPayload() object data for when a user successfully logs in:

Since our schema is based on name, email, and image, we can destructure these values from ticket.getPayload and use them in the login:
@Post('/login')
 async login(@Body('token') token): Promise<any> {
   const ticket = await client.verifyIdToken({
     idToken: token,
     audience: process.env.GOOGLE_CLIENT_ID,
   });
   console.log(ticket.getPayload(), 'ticket');
   const { email, name, picture } = ticket.getPayload();
   const data = await this.appService.login({ email, name, image: picture });
   return {
     data,
     message: 'success',
   };
 }
When a user tries to log in, the destructured props are taken from the ticket object data and passed to the login. If the user exists, log in the user and send the user data back to the frontend app. If the user does not exist, create new data for the user and send it back to the frontend app.
Now, we can move back to the client and create a User component that will display the user details when they log in. We will create a component folder with a User.js file and send back the name, email, and image.
We’ll use the useStore hook and render the displayed data when a user logs in.
We will also check that the User is only rendered when the data is sent from the backend server and create a Logout button using the GoogleAuth.signOut() API. When clicked, the button will be called, remove the authData from the local storage, set the setAuthData to null, and reload the window:
import React from "react";
import { useStore } from "../hooks/useStore";
import { googleLogout } from "@react-oauth/google";
import "../User.css";
const User = () => {
 const { authData, setAuthData } = useStore();
 return (
   <div className={"container"}>
     {authData && (
       <>
         <h1>{authData.data.name}</h1>
         <p>{authData.data.email}</p>
         <img src={authData.data.image} alt="profile" />

         <button
           onClick={() => {
             googleLogout();
             localStorage.removeItem("AuthData");
             setAuthData(null);
             window.location.reload();
           }}
           className={"button"}
         >
           Logout
         </button>
       </>
     )}
   </div>
 );
};

export default User;
Now, we can use Logout in App.js:
import "./App.css";
import { GoogleOAuthProvider, GoogleLogin } from "@react-oauth/google";
import axios from "axios";
import { useStore } from "./hooks/useStore";
import User from "./components/User";

function App() {
 const setAuthData = useStore((state) => state.setAuthData);
 return (
   <div className="App">
     {!useStore((state) => state.authData) ? (
       <>
         <h1>Welcome</h1>
         <GoogleOAuthProvider
           clientId={process.env.REACT_APP_GOOGLE_CLIENT_ID}
         >
           <GoogleLogin
             useOneTap={true}
             onSuccess={async (credentialResponse) => {
               console.log(credentialResponse);
               const { data } = await axios.post(
                 "http://localhost:8080/login",
                 {
                   // pass the token as part of the req body
                   token: credentialResponse.credential,
                 }
               );
               localStorage.setItem("AuthData", JSON.stringify(data));
               setAuthData(data);
             }}
             onError={() => {
               console.log("Login Failed");
             }}
           />
         </GoogleOAuthProvider>
       </>
     ) : (
       <>
         <h1>React x Nestjs Google Sign in</h1>
         <User />
       </>
     )}
   </div>
 );
}

export default App;
Here, we’ll check if authData was sent from the backend server with useStore hook. If there is no data, it will render a “Welcome” text and the Google login button. However, if the user has logged in, we will render React x NestJs Google sign in and the User Details.
Now, let’s start the whole process and see it in action:

When we log in, we have the text and the user details:
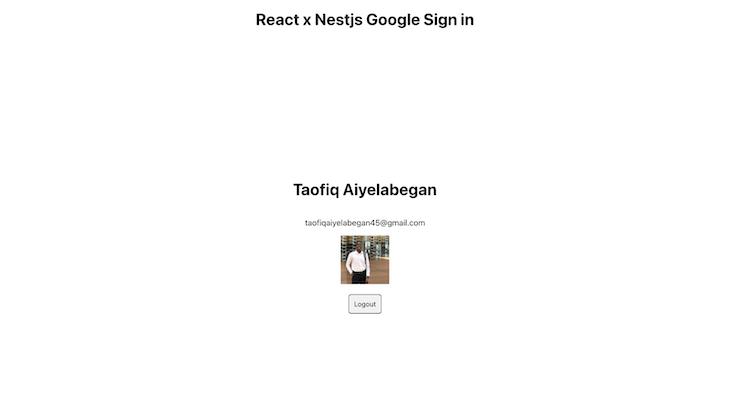
Next, we can check our database to see if the user is saved:
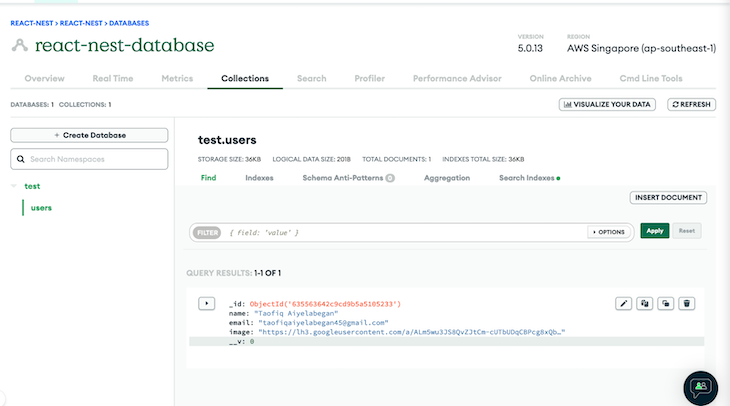
Success! Our user is in our database. In summary, we successfully logged in using Google sign-in, retrieved the user data from NestJS, and displayed it on the React frontend app once the user signed in.
Now, when we log out, we’ll see this:
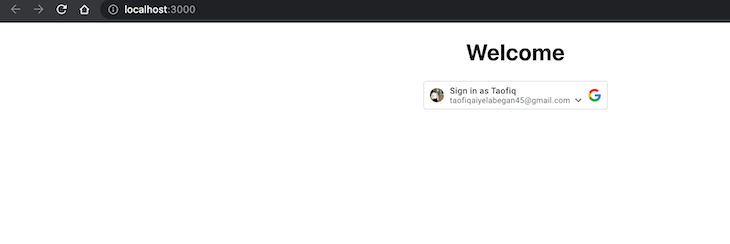
In this tutorial, we learned how to implement a secure Google sign-on in a NestJS project. We connected it to a basic frontend React application while saving the user information in a database. You can find the complete code for this project in my repository here. Happy coding!
Install LogRocket via npm or script tag. LogRocket.init() must be called client-side, not
server-side
$ npm i --save logrocket

// Code:

import LogRocket from 'logrocket';
LogRocket.init('app/id');
// Add to your HTML:

<script src="https://cdn.lr-ingest.com/LogRocket.min.js"></script>
<script>window.LogRocket && window.LogRocket.init('app/id');</script>

@container scroll-state: Replace JS scroll listeners nowCSS @container scroll-state lets you build sticky headers, snapping carousels, and scroll indicators without JavaScript. Here’s how to replace scroll listeners with clean, declarative state queries.

Russ Miles, a software development expert and educator, joins the show to unpack why “developer productivity” platforms so often disappoint.

Discover what’s new in The Replay, LogRocket’s newsletter for dev and engineering leaders, in the February 18th issue.

Learn how to recreate Claude Skills–style workflows in GitHub Copilot using custom instruction files and smarter context management.
Hey there, want to help make our blog better?
Join LogRocket’s Content Advisory Board. You’ll help inform the type of content we create and get access to exclusive meetups, social accreditation, and swag.
Sign up now