If you’ve been working with Tailwind CSS for a while, you probably know it doesn’t follow the traditional approach when it comes to styling content-rich UIs, like blogs, documentation pages, or CMS-powered content. This can make using the library feel tedious and repetitive for these use cases.

That’s because Tailwind removes all default browser styling by design. This is beneficial for most use cases, since it saves you from having to reset and override generic user-agent styles. However, it can become problematic when you’re trying to style content you don’t control, such as rich text from a CMS or Markdown-generated content.
Due to the importance of the style reset feature, the Tailwind team didn’t remove it. Instead, they introduced a Typography plugin called @tailwindcss/typography (also known as the prose plugin) that gives you beautiful, pre-styled typography out of the box.
In this article, I’ll walk you through how to set up and use the Tailwind Typography plugin in your project.
The Tailwind Typography plugin is a first-party plugin that transforms raw, unstyled HTML content into clean, well-formatted typography using a single utility prose class.
It applies a well-balanced set of typographic defaults to the child elements of any container it’s applied to, therefore automatically styling elements like paragraphs, headings, lists, blockquotes, and tables to look polished and readable right out of the box.
Think of the plugin as a pre-defined style for content you don’t directly control, such as blog posts, documentation pages, or Markdown-rendered content, without sacrificing Tailwind’s core utility-first styling approach or disabling its base styles.
As mentioned earlier, the best time to use the Tailwind Typography plugin is when you’re dealing with content you don’t have direct control over. But what exactly does that mean?
In this context, “content you don’t control” refers to text that either lives on a server or comes in formats that you can’t directly modify with utility classes, such as Markdown or CMS-generated HTML strings.
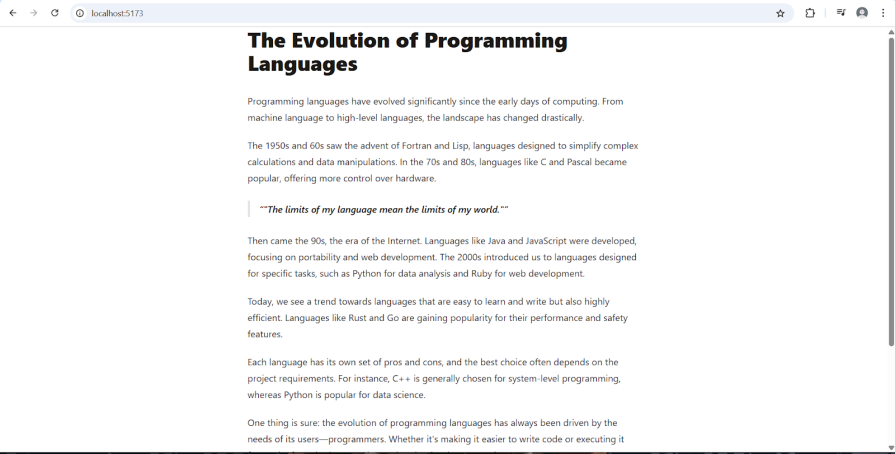
For example, if your page content is written directly in HTML and structured like this:
<article>
        <h2>The Rise of Artificial Intelligence in Everyday Life</h2>
        <div>
                ...
        </div>
        <p>
                ...
        </p>
        <p>
                ...
        </p>
        <blockquote>
                ...
        </blockquote>
        <h3>Challenges and Opportunities</h3>
        <p>
                ...
        </p>
        <ul>
                ...
        </ul>
        <pre>

                    ...
               </pre> </article>
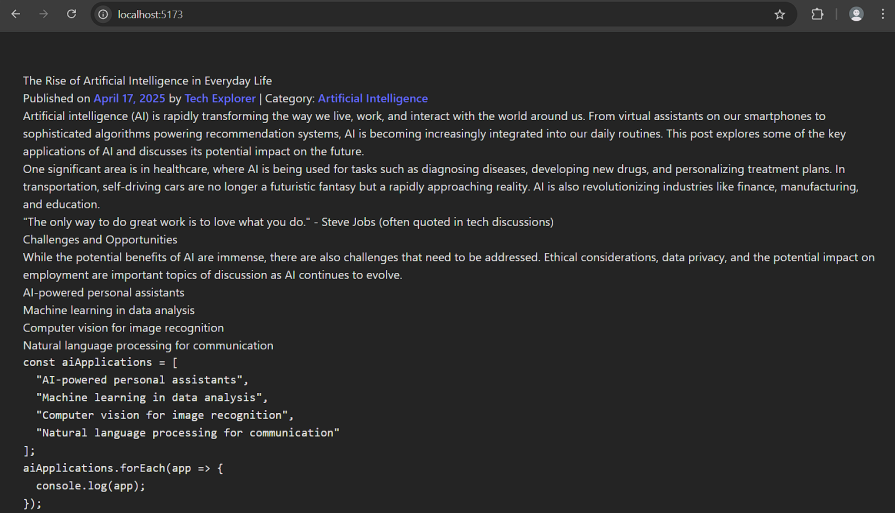
…it will initially appear unstyled due to Tailwind stripping away the browser’s default styles:
But since you have direct access to the HTML, you can simply apply utility classes to each element and style them as needed.
However, if the content is coming from a CMS or is in Markdown format, you won’t be able to target or modify the elements directly, as seen in this example:
const Blog = ({ postId }: { postId: number }) => {
  const [blogPost, setBlogPost] = useState<BlogPost | null>(null);

  useEffect(() => {
  // Data fetching logic
  }, [postId]);

  return (
    <article>
      <h1>{blogPost.title}</h1>
          ...
      <div dangerouslySetInnerHTML={{ __html: blogPost.content ?? "" }} />
    </article>
  );
};
Styling the generated content using Tailwind CSS or even vanilla CSS will be challenging and time-consuming, as the content is dynamically generated from the CMS, and we do not have direct access to the corresponding HTML elements.
That’s where the Tailwind Typography plugin comes in handy. Instead of digging through dev tools to analyze the CMS-generated HTML and identifying patterns post-render, you can simply install the @tailwindcss/typography plugin.
Then slap the prose class on the container, and the content will be styled automatically. No extra work needed!
To get started with the Tailwind Typography plugin, make sure Node.js is installed on your machine and Tailwind is properly set up in your project. Then run the following command to install the plugin:
npm install -D @tailwindcss/typography
After installing the package, you’ll need to configure it. How you do that depends on the version of Tailwind you’re using.
For Tailwind versions below v4, the plugin needs to be added via the tailwind.config.js file as follows:
module.exports = {
  plugins: [
      require('@tailwindcss/typography')
  ]
}
In version 4, the tailwind.config.js file is deprecated. Plugin configuration now happens in your global CSS file, usually App.css or index.css, depending on the framework. Adding a plugin is now as simple as importing it into one of these CSS files:
@import "tailwindcss";
@plugin "@tailwindcss/typography";
Like I mentioned earlier, using the plugin is straightforward. Simply add the prose class to the wrapper element around your content, and it’ll be automatically formatted.
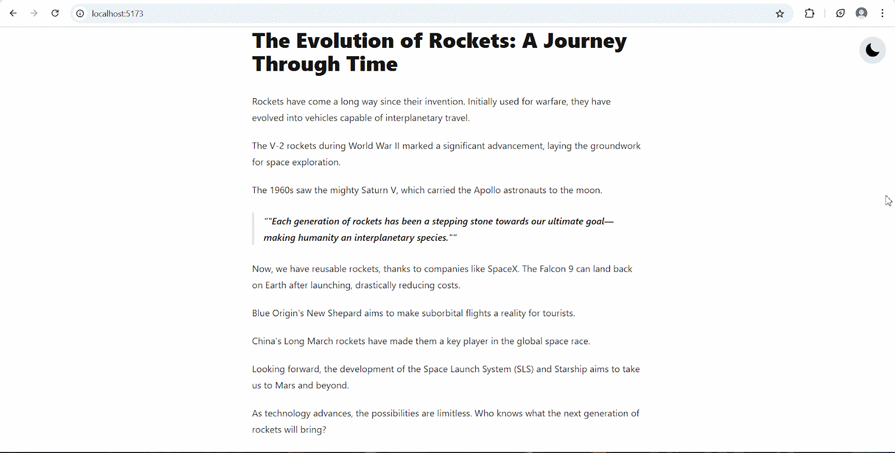
In the previous section, the wrapper was the article element. We already saw how the content looks when rendered with Tailwind’s default styles. Now, let’s add the prose class to that same article element:
<article className=”class="prose">
  ...
</article>
Here’s what happens: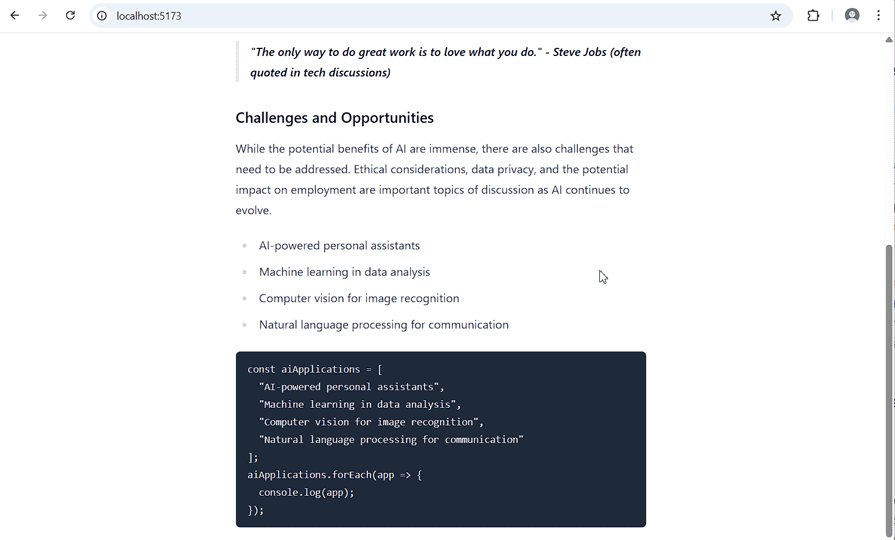
The content instantly looks more polished.
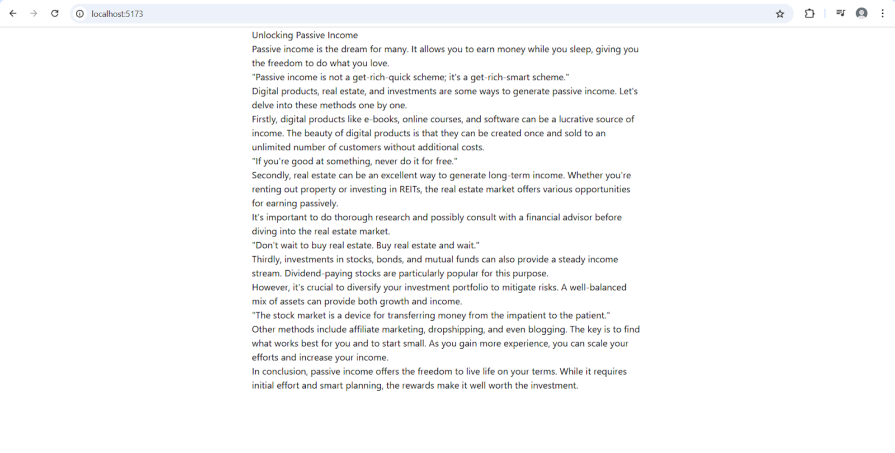
To really test this out, let’s look at content that’s dynamically rendered from the server:
const Blog = () => {
        ...

  useEffect(() => {
    const fetchBlogContent = async () => {
      try {
        const response = await fetch("https://jsonfakery.com/blogs/random");
        if (!response.ok) {
          throw new Error("Failed to fetch blog content");
        }
        const data = await response.json();
        setBlogContent(data.main_content);
      } catch (err: any) {
        setError(err.message);
      }
    };

    fetchBlogContent();
  }, []);

  return (
    <article className="prose prose-slate mx-auto my-0 max-w-2xl">
      <div dangerouslySetInnerHTML={{ __html: blogContent ?? "" }} />
    </article>
  );
};
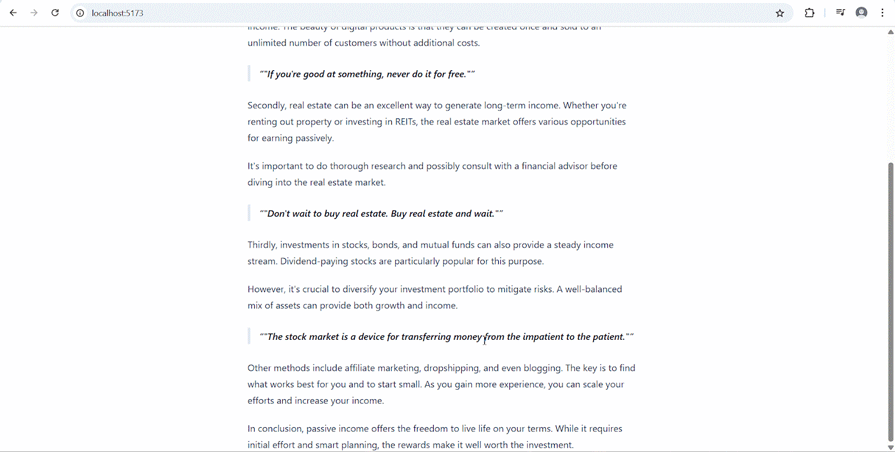
As expected, the result is consistent:
Once you add the prose class to the wrapper element, it’ll get formatted automatically:
The prose class pretty much takes care of formatting, responsiveness, and overall aesthetics of your content automatically. However, if you’d like more control over how your content is styled, Tailwind provides options for customization to suit your preferences.
While the Tailwind Typography plugin provides a sensible set of defaults for styling content, it also offers several ways to tailor the appearance to your specific design needs.
So far, we’ve used the prose class and demonstrated how it works. However, this class is part of a larger set of prose modifier classes that you can use to control the plugin’s behavior. One category of these modifiers is used to define typography colors based on the five gray scales that Tailwind provides by default:
prose-gray— Gray (Default)prose-slate— Slateprose-zinc— Zincprose-neutral— Neutralprose-stone— StoneLet’s say your project uses the Stone shade of gray, which has a warmer tone. You can make your typography match this by adding the prose-stone class to your content wrapper.
But here’s the key part: you still need to include the base prose class. The modifier on its own won’t work. So the full class would look like this:
    <article className="prose prose-stone">
      <div dangerouslySetInnerHTML={{ __html: blogContent ?? "" }} />
    </article>
This applies the stone-colored typography styles, while keeping everything else handled by the base prose class:
If you want to go beyond grayscale options, you can create a custom color theme using the theme.extend.typography API in your Tailwind config file. This way, you can apply custom colors to specific typography elements like blockquotes, code blocks, headings, and lists.
This is especially useful if you want to align your font choices with your brand or project’s design. You can read more about how to add custom fonts in Tailwind CSS on the LogRocket blog.
Now, you might be thinking: isn’t the config file deprecated in Tailwind v4? Technically, yes, but this is one of the few exceptions where using the config file is still valid.
Start by creating a tailwind.config.js file in your project’s root if you don’t already have one. Then add the @config directive to your global CSS file.
NB. If you’re using an older version of Tailwind, you can skip this step:
@import "tailwindcss";
@plugin "@tailwindcss/typography";
@config "./tailwind.config.js";
Next, open the config file and add a custom theme (let’s call it orange) inside the theme.extend.typography section. In this custom theme, you’ll override the plugin’s default color variables with your own values under the css key:
module.exports = {
  theme: {
    extend: {
      typography: ({ theme }) => ({
        orange: {
          css: {
            "--tw-prose-headings": theme("colors.orange.900"),
            "--tw-prose-quotes": theme("colors.orange.900"),
            "--tw-prose-quote-borders": theme("colors.orange.300"),
          },
        },
      }),
    },
  },
};
Here’s what’s happening:
--tw-prose-* variables are the internal values the Typography plugin usestheme() helperYou can find a list of these variables in the plugin’s documentation or by inspecting the CSS generated by the default prose class in your browser’s developer tools.
To use your new theme in your markup, combine the base prose class with your custom modifier: prose-{theme name} (in this case, prose-orange) like this:
    <article className="prose prose-orange">
      <div dangerouslySetInnerHTML={{ __html: blogContent ?? "" }} />
    </article>
Lastly, restart your dev server or rebuild your project to see the updates take effect.
The best part is that only the elements you’ve customized, such as headings and blockquotes in our example, will use the new orange color. Everything else will stay the same:

Since the Tailwind Typography plugin handles most of the styling for you, a good edge case to think about is how it behaves when switching between color themes, like light and dark mode.
In some cases, you might notice that the text becomes hard to read or even disappears entirely when switching to dark mode. That’s because the default typography colors aren’t designed for dark backgrounds:

To fix this, the Tailwind Typography plugin provides a built-in modifier, dark:prose-invert, that lets us invert the typography color based on the current color theme. This doesn’t just do a basic color inversion. Instead, it switches to a set of handcrafted typography colors made specifically for dark mode.
Just like other modifiers, you use it by adding it directly to your content wrapper. For example:
    <article className="prose prose-stone dark:prose-invert">
      <div dangerouslySetInnerHTML={{ __html: blogContent ?? "" }} />
    </article>
Once that’s in place, your typography will automatically adapt based on the active theme, light or dark, without any extra configuration:
While the Tailwind Typography plugin is great for making text look clean and readable with minimal effort, it does have a few quirks you should watch out for. Here are some common issues and tips to keep things running smoothly when using the prose class:
Tailwind has “preflight” base styles that are designed to smooth over cross-browser inconsistencies, but they can sometimes be too broad. If the typography plugin isn’t specific enough, these base styles might inadvertently override the typography plugin. For example, you might find that the default link color or font-weight isn’t what the plugin intends because a more general Tailwind style is taking precedence.
It might seem logical to wrap different sections of content in separate prose containers. But nesting them can lead to conflicting styles. The outer prose wrapper will cascade its styles down, which might override or clash with the inner one.
If you’re adding your own styles, as we did with the custom color theme, you need to be aware that the Typography plugin uses fairly specific selectors. If your styles don’t seem to be applying, it might be a specificity issue. Try making your selectors more specific or target parent elements as needed.
Make sure the Markdown used in your content is consistent. For example, always use ** for bold and * for italics instead of mixing it up with alternatives like __ or _. Inconsistent syntax can lead to unexpected rendering.
If your content is coming from a CMS, see if it’s possible to configure the rich text editor to output consistent and clean Markdown. It’s not always possible, but it’s worth checking.
If you’d like to play around with the plugin, you can find the official demo on Tailwind play.
Tailwind prose can save you a lot of effort, especially when you’re dealing with content you don’t fully control, like Markdown or CMS-driven text. The prose class takes care of the messy styling bits so you can focus on the actual logic and functionality of your app. If it’s not already part of your setup, now’s a good time to start using it.
Happy hacking!

Discover how React Fiber works under the hood. Learn how React builds the DOM, handles concurrent rendering, and works alongside React 19 features and the new React Compiler.

Learn how to use Skybridge, an open-source React framework, to build and deploy cross-platform AI apps and interactive UI widgets for ChatGPT, Claude, and MCP clients from a single codebase.

Learn how to set up Meilisearch, index documents, and build keyword, semantic, and hybrid search with AI-powered retrieval.

Compare pnpm and npm across security defaults, disk usage, dependency strictness, and workspace policy to decide which package manager fits your project.
Would you be interested in joining LogRocket's developer community?
Join LogRocket’s Content Advisory Board. You’ll help inform the type of content we create and get access to exclusive meetups, social accreditation, and swag.
Sign up now

