
Feature flags are powerful mechanisms devs can use to release software safely. They enable development teams to add or remove a feature from a software system on the fly, without the need for any code changes with deployments.

It is a very important skill for developers to be able to differentiate deployment from a release. Code deployment is a technical task, whereas releasing features to customers is more of a business activity. With advanced use of feature flags, releasing a feature to a subset of customers significantly reduces the blast radius if anything goes wrong with the new feature.
The Replay is a weekly newsletter for dev and engineering leaders.
Delivered once a week, it's your curated guide to the most important conversations around frontend dev, emerging AI tools, and the state of modern software.
Feature flags allow us to build safely without disrupting the proper app behavior in production. It’s one of the necessary structures that’s needed when building a huge project that’s constantly in development. The aim is to have a stable and functioning production app, even with so many moving parts.
They are especially useful for specific use cases such as A/B testing, when actively adding new features, or displaying certain features based on user roles.
For A/B testing, feature flags can allow us to easily test different user-facing interfaces and how users react to them. For instance, this experimentation can help test the conversion rate of different landing pages and how it affects the bottom line. Plus, once we’re satisfied with the results, flags can be removed without any serious code change.
Also, when adding multiple new features to the development environment, there’s the possibility of one feature being ready before the others. To deploy to production, we use flags to hide the uncompleted features from the users.
Feature flags also allow us to display different features to users with different roles and permissions. This is useful in cases where all the users are using the same application.
In this post, we will look into how we can implement a simple feature flag in a React app that pulls in stories from an unofficial HN Search API on Algolia. The feature flag, which will be hosted on Flagsmith, will be used to show and hide the points for each Hacker News story.
Let’s get going!
Before we dive into the code, you should be prepared with the following:
Some prior knowledge of feature flags or remote config will be helpful, but is not required for you to follow along.
Time to jump into the code!
To create a basic Hacker News front page with React, we will first create a new React app with Create React App.
To create a new react app using CRA, we will run the following command:
npx create-react-app hn-react
This command creates a basic React application for us in a couple of minutes. When the npx script finishes execution it will look something like the below:
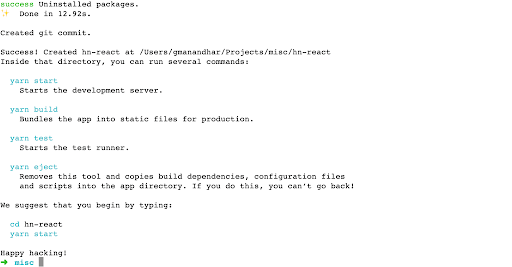
After that, we can go into the newly created hn-react folder with cd hn-react. To run the development server, execute the following:
yarn start
This command runs the development server and opens the default browser at http://localhost:3000, which will show something like below:
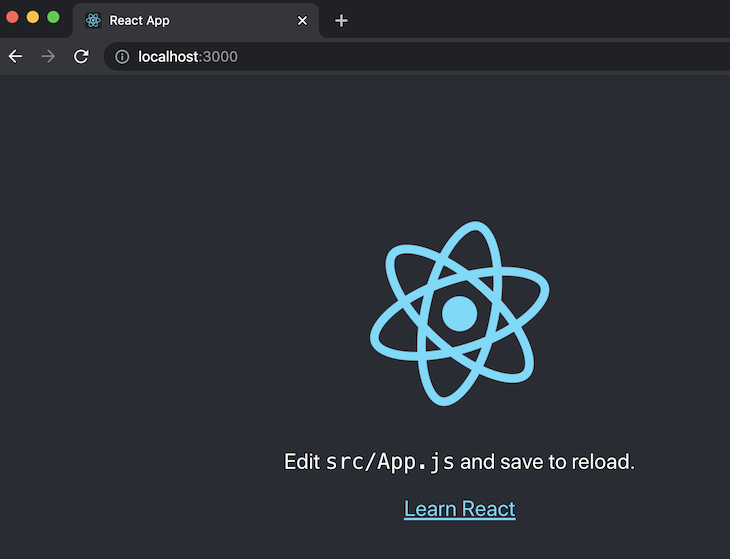
Hurray! Our React app skeleton is running. Next, we will change the React app to display stories from Hacker News.
To change the boilerplate React app to show stories from Hacker News, we will change the src/app.js to look like the following:
import React, { useState, useEffect } from 'react';
import './App.css';

function App() {
  const [stories, setStories] = useState([]);
  const [message, setMessage] = useState('loading...');
  useEffect(() => {
    async function fetchNewsStories () {
      try {
        const data = await (await fetch('https://hn.algolia.com/api/v1/search_by_date?tags=front_page')).json();
        setStories(data.hits)
        const message = data.hits.length ? '' : 'No stories found';
        setMessage(message);
      } catch (err) {
        console.log(`err: ${err.mesasge}`, err);
        setMessage('could not fetch stories');
      }
    }
    fetchNewsStories()
  }, []);

  return (
    <div className="App">
      <header className="App-header">
        <h2>Latest HN Stories</h2>
        {message}
        <div className="stories">
          {Array.isArray(stories) && stories.map(
            story => story.url && <h3><a href={story.url} target="_blank" rel="noreferrer">{story.title}</a> - by {story.author}</h3>
          )}
        </div>
      </header>
    </div>
  );
}

export default App;
The main changes we made in the App.js file call the Hacker News API provided by Algolia in the useEffect hook, then render the stories as fetched from the API later in the component.
We make use of the useState hook to set two variables: stories and message. Both of these are set in the fetchNewsStories async function that calls the API mentioned above.
In case of any error while fetching the stories, the stories array is set to empty by default, and the message is set to “could not fetch stories,” which is first set to “loading.” If stories are fetched successfully, then the message is set to an empty string.
A basic loop is used with the stories variable with a map to cycle through the stories. For each story that has a URL, its title, a link, and the author are printed as an H3 element.
Similarly, we will also change the styling in src/App.css to be same as below:
.App-header {
  min-height: 100vh;
  display: flex;
  flex-direction: column;
  align-items: center;
  justify-content: center;
  font-size: calc(10px + 2vmin);
  color: black;
}

h3 {
  padding-left: 0.5em;
}

.App-link {
  color: #61dafb;
}
We have removed the background color and made the text black for .App-header. We have also removed any styles associated with the logo animation, because the logo has been removed.
To make the text more readable we have added a 0.5em padding to the H3. If we run the app again with yarn start, it will look something like the below on http://localhost:3000:
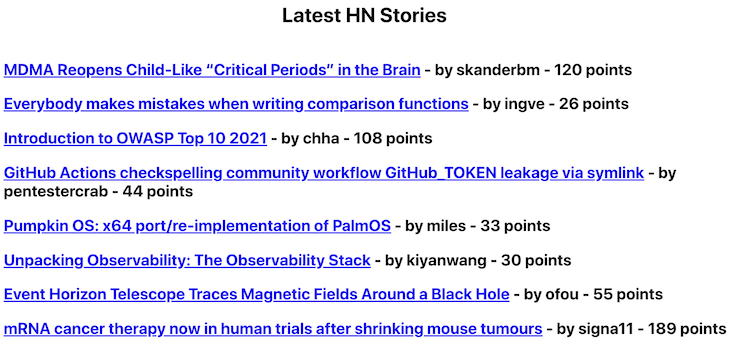
Congrats! Your basic React app that calls the unofficial Hacker News API is functioning. These code changes can be found as a pull request for your convenience.
Next up, we will set up a feature flag on Flagsmith to show or hide the points.
Flagsmith is an amazing feature flag service that also has an open source version we can host on our own. For this tutorial, we will be using Flagsmith Cloud.
To get started, sign in using GitHub at app.flagsmith.com.
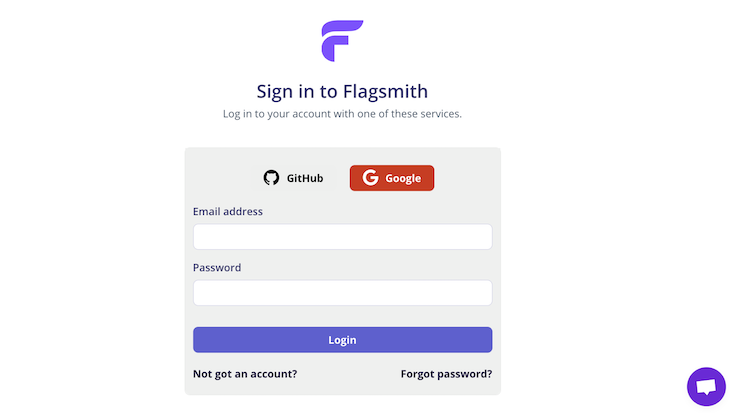
You will be asked to authorize Flagsmith with your GitHub as follows:
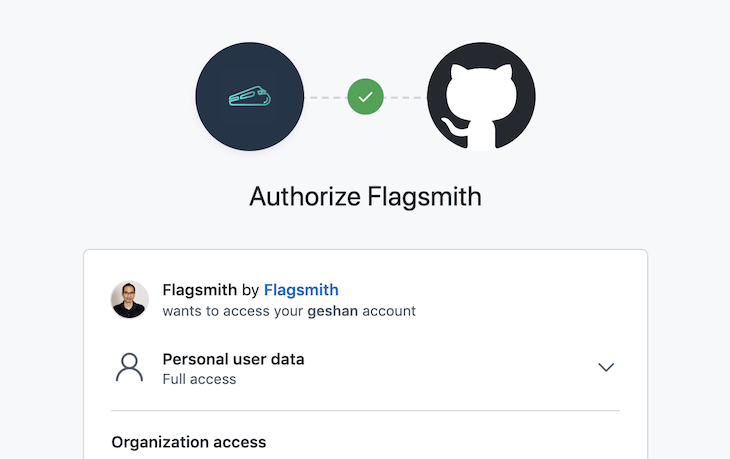
At the bottom of the screen, you can click the Authorize Flagsmith button. It might ask for your GitHub password and after that, you will be redirected to the Flagsmith UI.
You can create a new project by clicking the + button beneath the Flagsmith logo on the left. We can name the project HN-react, and click the Create Project purple button:

Consequently, after creating the project, Flagsmith will automatically create the Development and Production environments.
After that, we will create our first feature flag. Click the Create Your First Feature button available at the end of the page:
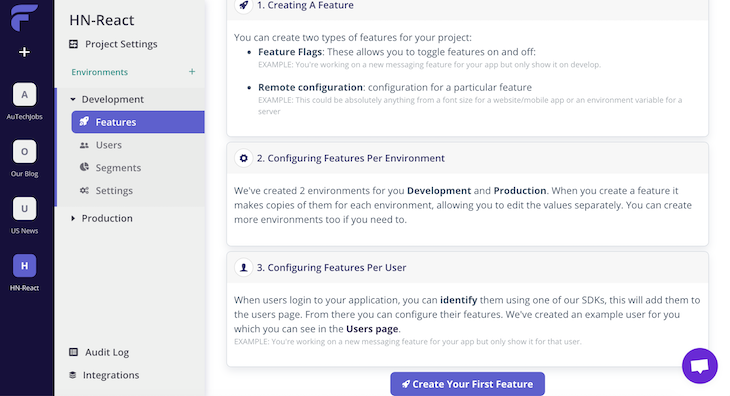
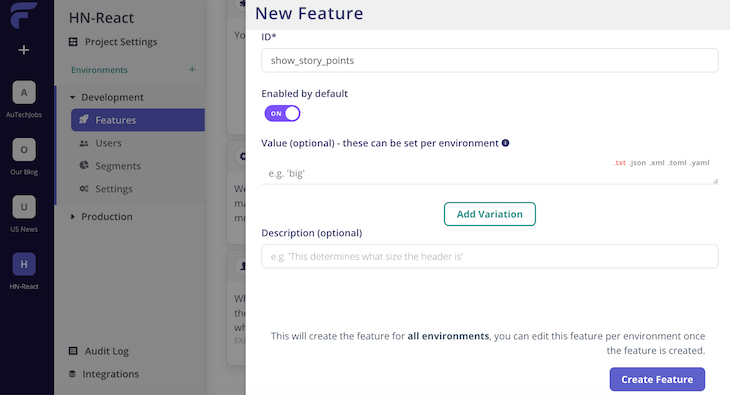
We will add the ID as show_story_points, make sure Enabled by default is on, and click Create Feature:
Subsequently, the feature flag will be available for our use like so:
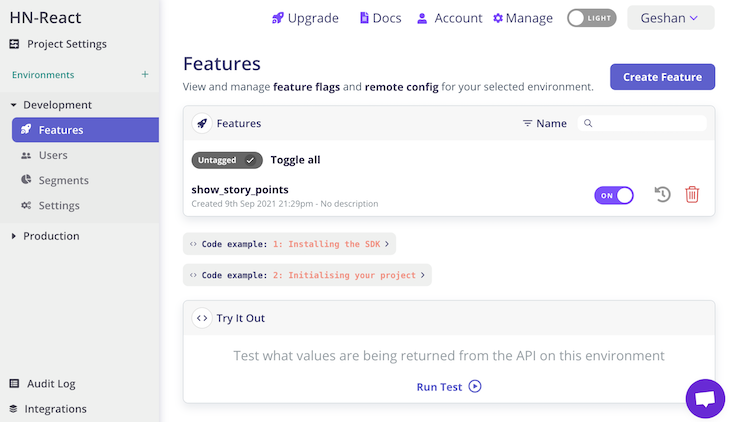
As the next step, we will add the Flagsmith JavaScript SDK and use it to get the feature flag we just created running within our React app.
We have already created the feature flag on Flagsmith’s UI, and now we will use it in our sample Hacker News clone app. To do this, we will add the Flagsmith JavaScript SDK from npm by running:
yarn add flagsmith
It will take a bit of time to add the Flagsmith client on the package.json file. At the time of writing, it is version 1.6.4.
Once we have the Flagsmith client installed, we will again change the src/App.js to incorporate the client, and enable the feature flag to show or hide the points for each Hacker News story.
To being with, we will add the following line at line two of the src/Apps.js file:
import flagsmith from 'flagsmith';
Then, we will add the following at line eight to initialize the showStoryPoints variable:
const [showStoryPoints, setShowStoryPoints] = useState(false);
After that, we will add the code below in the useEffect function below the fetchNewsStories call at line 22 as follows:
flagsmith.init({
  environmentID:"DRLDV3g6nJGkh4KZfaSS5c",
  cacheFlags: true,
  enableAnalytics: true,
  onChange: (oldFlags, params) => {
    setShowStoryPoints(flagsmith.hasFeature('show_story_points'));
  }
});
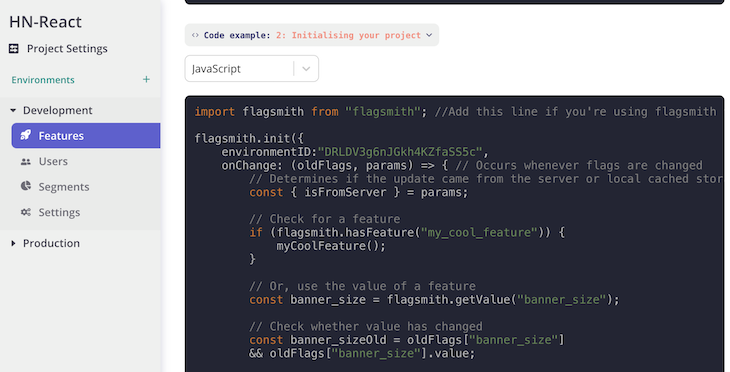
In this code block, flags are cached in local storage, and we are enabling analytics and checking if the feature is available on change. You must get the environment ID from the section of the feature flag page as seen below:
The next step is to add the following code where you see the looping through stories on line 40:
{Array.isArray(stories) && stories.map(
            story => story.url && <h3><a href={story.url} target="_blank" rel="noreferrer">{story.title}</a> - by {story.author} {showStoryPoints ? '- points '+ story.points : ''}</h3>
)}
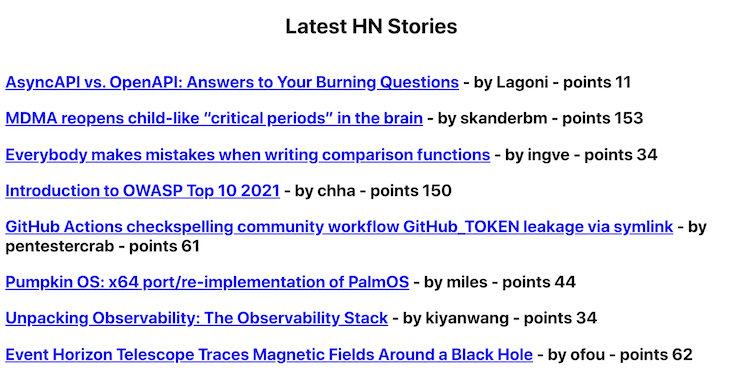
In the above loop, we check if the showStoryPoints variable is true, which is set per the state of our feature flag. If it is true, we show the points for the story; else we show an empty string.
After this change, if you run the app again with yarn start, it will show the following:
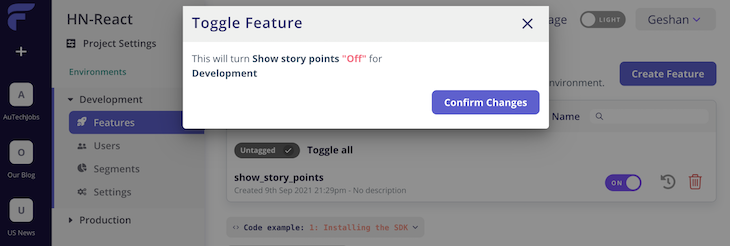
Now, go to the Flagsmith interface and turn off the feature flag like so:
Subsequently, if you refresh the page at http://localhost:3000 it will show the following:
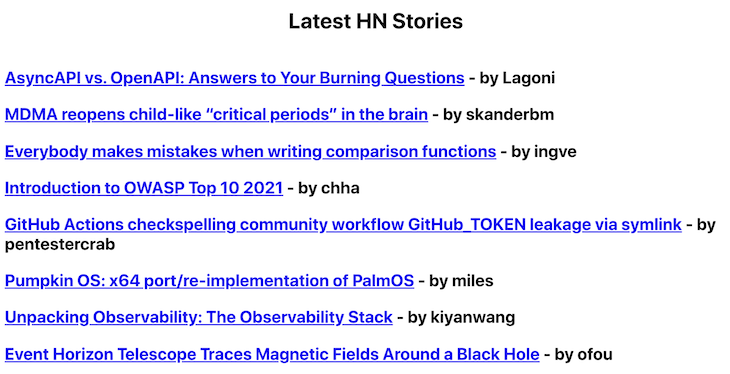
Hurray! You have successfully implemented your first feature flag, and changed the feature of the application without any code changes.
The code for this section is available as a pull request for your reference. The final product with the story’s points can be viewed on Netlify.
Another method is to handle feature flags using libraries directly within the codebase. Some of the most used React libraries for this are react-feature-flags and flagged. They don’t require any visual platform or keys like flagsmith; instead, everything is implemented within the codebase, and the list of flags is hardcoded directly in the codebase or in an .env file.
In this tutorial, we learned how to use a basic feature flag within a React application using Flagsmith. Feature flags make releasing any major features simple and safe.
Every change is risky, and every deployment is a change to a running system. With feature flags, we can minimize the risk of change when it is needed. Feature flags also give non-technical team members (like a product owner) the ability to enable or disable a feature without requiring any code changes or deployment.
The most effective use of feature flags can be with a rollout to only a subset of customers, like the employees of your organization. With these practices in place, releasing even something as crucial as the change to the payment gateway can be managed with much lower risk than releasing a feature to all the customers at once.
I hope you can practice the “deployment is not a release” philosophy well with feature flags.
Install LogRocket via npm or script tag. LogRocket.init() must be called client-side, not
server-side
$ npm i --save logrocket

// Code:

import LogRocket from 'logrocket';
LogRocket.init('app/id');
// Add to your HTML:

<script src="https://cdn.lr-ingest.com/LogRocket.min.js"></script>
<script>window.LogRocket && window.LogRocket.init('app/id');</script>

React Server Components and the Next.js App Router enable streaming and smaller client bundles, but only when used correctly. This article explores six common mistakes that block streaming, bloat hydration, and create stale UI in production.

Gil Fink (SparXis CEO) joins PodRocket to break down today’s most common web rendering patterns: SSR, CSR, static rednering, and islands/resumability.

@container scroll-state: Replace JS scroll listeners nowCSS @container scroll-state lets you build sticky headers, snapping carousels, and scroll indicators without JavaScript. Here’s how to replace scroll listeners with clean, declarative state queries.

Explore 10 Web APIs that replace common JavaScript libraries and reduce npm dependencies, bundle size, and performance overhead.
Hey there, want to help make our blog better?
Join LogRocket’s Content Advisory Board. You’ll help inform the type of content we create and get access to exclusive meetups, social accreditation, and swag.
Sign up now
2 Replies to "How to implement feature flags in React"
I am trying to implement feature flags per customer in a React app. Any guidance to do it elegantly in React?
Hey Vijay,
For that use case multivariate flag might be an option https://flagsmith.com/blog/introducing-multivariate-flags/ .