Most applications are driven by web APIs, which hold data that other applications can access and manipulate to fit their demands. This API will only be meaningful to the users if your application has interfaces that let them interact with the raw API data.

Creating such modern web applications calls for modern web solutions. In this article, we will discuss how to create an API in Django and set up a Vue.js interface to consume it. We will build a handy full stack “to-do” app that uses a Django-based API and interactive Vue interfaces. This will hopefully teach you many of the critical concepts of full-stack web programming.
To follow along with this tutorial, it is necessary to have the following:
Vue is one of the most popular JavaScript frontend frameworks. It helps create interfaces and can process API data. Some of the reasons for choosing to work with Vue include the following:
First is application reactivity, which allows you to automatically adjust to changes and update the user interface. Vue allows focusing on your page’s components that you want to be reactive. This way, it knows precisely which components need to be re-rendered when a state changes. Instead of re-rendering the whole page component.
Next is scalability and flexibility. Vue is suitable for all project sizes, from small side projects to a large enterprise-level app. It gives you the ability to scale up incrementally, then progressively add in the tools and features that you need to build.
Finally, there’s component reusability. This allows you to create components that are injected anywhere into multiple sections pages.
Django is a Python-based framework for building web applications. Django REST framework works on top of Django. It is a library we can use to build web-based APIs quickly and efficiently with minimal code.
While setting up this Django project, we will use a virtual environment. The virtual environment helps to separate different Python environments for different projects. Let’s say you have multiple projects that rely on a single package, such as Django. Each project may be using a different version of Django, so if you upgrade that package, it can break the codebase of your project.
The virtual environment helps you isolate environments for each project. This way, each project will run only the dependencies, packages, and the specific versions they need.
Go ahead and create a project folder where you want your Django project to live. Open a terminal that points to the created directory. Then create a virtual environment using the following command:
python3 -m venv django_rest_api
Once the process is done, cd to the created django_rest_api directory:
cd django_rest_api
Now, activate the virtual environment. If you are on Windows, use command django_rest_api/Scripts/activate, or source django_rest_api/bin/activate if you are on Linux or MacOS.
Once that is set, go ahead and install Django to your environment:
python -m pip install django
Now we can initialize and start the Django REST project:
django-admin startproject django_rest_api_tasks
This will result in the creation of a new directory with the following file structure:
django_rest_api_tasks, a top level project folderdjango_rest_api_tasks/django_rest_api_tasks, a lower level project folder for managing appsmanage.py, the command center file for your projectThe next step is to start an app. Django has “projects” and “apps,” which are slightly different from each other. A project is a high level unit that encapsulates apps. It can contain multiple apps, but an app only belongs to one project.
Apps are a lower level units that represent a specific module. For example, in our project, we will create an app called tasks. To do so, change the directory to the django_rest_api_tasks folder like so:
cd django_rest_api_tasks
The run a startapp to create the tasks app:
python manage.py startapp tasks
By running the above command, a tasks folder will be created inside the django_rest_api_tasks directory. Go ahead and add tasks to the INSTALLED_APPS list in the django_rest_api_tasks/settings.py file:
INSTALLED_APPS = [
    'tasks'
]
We can now start setting up a Django REST API.
First, we will define the structure of a task model. This defines what data the tasks app will process. Create a task model by navigating to the tasks/models.py file and add the below code:
from django.db import models

# Create your models here.
class Task(models.Model):
    #title
    title = models.CharField(max_length=100)
    description = models.TextField(blank=True, null=True) #description
    completed = models.BooleanField(default=False)
    #completed
    created_at = models.DateTimeField(auto_now_add=True) #created_at

    def __str__(self):
        #return the task title
        return self.title
This will set up a task with a title, description, completed, and created_at values. Run the migrations command to initialize the above task model to a sqlite database:
python manage.py makemigrations tasks
After running the above command, in the tasks folder, under migrations, you will have a 0001_initial.py file.
To add these model modifications to the sqlite database, we will need to use the command migrate:
python manage.py migrate
This will generate a db.sqlite3 file inside the parent django_rest_api_tasks folder. To see whether everything is working properly, start the shell using the following command:
python manage.py shell
Inside the shell environment, import the Task model:
from tasks.models import Task
Instantiate the Task model:
t = Task(title="Coding in Python",description="Building a REST API using django")
Save the instantiated record:
t.save()
Get the saved records:
Task.objects.all()
This will give you the following output:
<QuerySet [<Task: Coding in Python>]>
If you got the above response, the database is working correctly, and you can exit the shell using the following command:
exit()
First and foremost, we must install Django REST framework before we can build up this Django REST API:
python -m pip install djangorestframework
Once the installation is done, on django_rest_api_tasks/settings.py, and add rest_framework on the list of installed apps:
INSTALLED_APPS = [
    'tasks',
    'rest_framework'
]
In the tasks app directory, create a serializers.py file. In this file, we will define the model and the fields for the API as follows:
from rest_framework import routers,serializers,viewsets
from .models import Task
class TaskSerializer(serializers.HyperlinkedModelSerializer):
    class Meta:
        model = Task
        fields = ['id', 'title', 'description', 'completed', 'created_at']
The next step is to set up the various CRUD operation requests that the API will be handling.
An API involves creating, reading, updating, and deleting operations. We need to set up these operations to the to-do list REST API. Navigate to the tasks/views.py file and follow these steps:
First, add the following imports:
# parsing data from the client
from rest_framework.parsers import JSONParser
# To bypass having a CSRF token
from django.views.decorators.csrf import csrf_exempt
# for sending response to the client
from django.http import HttpResponse, JsonResponse
# API definition for task
from .serializers import TaskSerializer
# Task model
from .models import Task
Next, we will handle incoming requests for getting and creating tasks:
@csrf_exempt
def tasks(request):
    '''
    List all task snippets
    '''
    if(request.method == 'GET'):
        # get all the tasks
        tasks = Task.objects.all()
        # serialize the task data
        serializer = TaskSerializer(tasks, many=True)
        # return a Json response
        return JsonResponse(serializer.data,safe=False)
    elif(request.method == 'POST'):
        # parse the incoming information
        data = JSONParser().parse(request)
        # instanciate with the serializer
        serializer = TaskSerializer(data=data)
        # check if the sent information is okay
        if(serializer.is_valid()):
            # if okay, save it on the database
            serializer.save()
            # provide a Json Response with the data that was saved
            return JsonResponse(serializer.data, status=201)
            # provide a Json Response with the necessary error information
        return JsonResponse(serializer.errors, status=400)
Now we can handle incoming requests for updating and deleting a task:
@csrf_exempt
def task_detail(request, pk):
    try:
        # obtain the task with the passed id.
        task = Task.objects.get(pk=pk)
    except:
        # respond with a 404 error message
        return HttpResponse(status=404)
    if(request.method == 'PUT'):
        # parse the incoming information
        data = JSONParser().parse(request)
        # instanciate with the serializer
        serializer = TaskSerializer(task, data=data)
        # check whether the sent information is okay
        if(serializer.is_valid()):
            # if okay, save it on the database
            serializer.save()
            # provide a JSON response with the data that was submitted
            return JsonResponse(serializer.data, status=201)
        # provide a JSON response with the necessary error information
        return JsonResponse(serializer.errors, status=400)
    elif(request.method == 'DELETE'):
        # delete the task
        task.delete()
        # return a no content response.
        return HttpResponse(status=204)
Next, prepare a urls.py file in the directory designated for tasks app, and include the following code block in it:
from django.urls import path
from totasks import views

# define the urls
urlpatterns = [
    path('tasks/', views.tasks),
    path('tasks/<int:pk>/', views.task_detail),
]
From above, we are defining two URLs:
tasks/ for fetching and adding tasks/tasks/<int:pk>/ for deleting and updating a task with a dynamic IDUpdate django_rest_api_tasks/urls.py as follows to expose these task URLs:
from django.contrib import admin
from django.urls import path,include

urlpatterns = [
    # for tasks
    path('api/', include('tasks.urls')),
    # for admin side
    path('admin/', admin.site.urls),
]
Our API is now fully set! To test it, run the Django development server using the runserver command as shown below:
python manage.py runserver
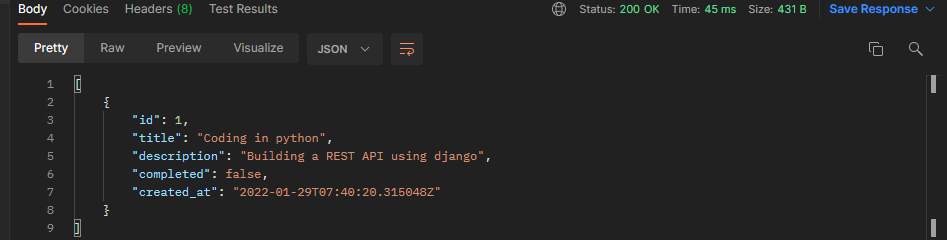
Navigate to your Postman and enter the URL http://localhost:8000/api/ts/. Then execute a GET request to fetch the tasks. Your response should be similar to what you can see here:
Because we will be using a client application to communicate to our Django REST API, we need to set up a Cross-Origin Resource Sharing (CORS) API policy.
We have the Django REST API and the Vue client app here. These apps run on different URLs, thus, they have different origins. URLs with similar protocols, domains, and ports are considered to be of the same origin. In this case, the REST API is running on port 8000, so we can’t use this port to run the Vue client app. We will have to access port 8000 and make a request to the REST API to access different task endpoints, and we will have to use a different port to access the Vue app in the browser.
In this case, the application’s URLs will have different origins. Browser security prevents making requests to different origins; the same-origin policy is the term used to describe this limitation. Essentially, it stops a rogue website from accessing sensitive data from a different origin.
In an API context, you can let other origins access some of your API data. Thus, you must use CORS to share your resources.
To set up CORS for our REST API, first stop the development server and install the django-cors-headers package using this command:
python -m pip install django-cors-headers
Then, on the django_rest_api_tasks/django_rest_api_tasks/settings.py file, add corsheaders in the list of installed apps:
INSTALLED_APPS = [
    'django.contrib.admin',
    'django.contrib.auth',
    'django.contrib.contenttypes',
    'django.contrib.sessions',
    'django.contrib.messages',
    'django.contrib.staticfiles',
    'tasks',
    'rest_framework',
    'corsheaders'
]
In the same file, update MIDDLEWARE as shown below:
MIDDLEWARE = [

    'django.contrib.sessions.middleware.SessionMiddleware',
    'django.middleware.common.CommonMiddleware',
    'corsheaders.middleware.CorsMiddleware',
    'django.contrib.auth.middleware.AuthenticationMiddleware',
    'django.middleware.csrf.CsrfViewMiddleware',
    'django.contrib.messages.middleware.MessageMiddleware',
    'django.middleware.clickjacking.XFrameOptionsMiddleware',
    'django.middleware.security.SecurityMiddleware',
]
For this article, we won’t whitelist any specific origin. We will give full access to the API to any other origins. Therefore, add the following line to the same file:
CORS_ALLOW_ALL_ORIGINS = True
Finally, use the runserver command to run the development server again:
python manage.py runserver
Go ahead and create a fresh directory and call it client. To set up a basic Vue app, you need to have the Vue CLI installed on your computer.
To install the Vue CLI, run:
npm install -g @vue/cli
In the client folder, open a command prompt and enter the following command to create an instance of the Vue boilerplate for your project:
vue create django_tasks_client
Select default in the resulting menu and wait for CLI to set up the application completely. Once the application has been completed, navigate to the newly created folder:
cd django_tasks_client
Additionally, we will install Axios to handle the communication between the client and Django REST server:
npm install axios
Now you can start the development server to test if everything is working as expected:
npm run serve
You should be able to access the default landing page by loading http://localhost:8080 into your browser.
Now we will create Vue components that allow us to perform the CRUD operations to the API.
Create a new Tasks.vue file in your project’s src/components directory. Add the following code within this file.
First, render the view:
<template>
    <div class="tasks_container">
        <div class="tasks_content">
            <h1>Tasks</h1>
            <ul class="tasks_list">
                <li v-for="task in tasks" :key="task.id">
                    <h2>{{ task.title }}</h2>
                    <p>{{ task.description }}</p>
                    <button @click="toggleTask(task)">
                        {{ task.completed ? 'Undo' : 'Complete' }}
                    </button>
                    <button @click="deleteTask(task)">Delete</button>
                </li>
            </ul>
        </div>
    </div>
</template>
Next, add a script:
<script>
    export default {
        data() {
            return {
                // tasks
                tasks: ['']
            }
        },
        methods: {
            async getData() {
                try {
                    // fetch tasks
                    const response = await this.$http.get('http://localhost:8000/api/tasks/');
                    // set the data returned as tasks
                    this.tasks = response.data;
                } catch (error) {
                    // log the error
                    console.log(error);
                }
            },
        },
        created() {
            // Fetch tasks on page load
            this.getData();
        }
    }
</script>
Replace the HelloWorld component with the tasks component in the src/App.vue file, as seen in the following code:
<template>
  <div id="app">
    <Tasks />
  </div>
</template>
<script>
import Tasks from "./components/Tasks.vue";
export default {
  name: "App",
  components: {
    Tasks,
  },
};
</script>
<style>
#app {
  font-family: Avenir, Helvetica, Arial, sans-serif;
  -webkit-font-smoothing: antialiased;
  -moz-osx-font-smoothing: grayscale;
  text-align: center;
  color: #2c3e50;
  margin-top: 60px;
}
</style>
Also, configure Axios in src/main.js by adding the following lines:
// import axios
import axios from 'axios'

// set a prototype for http
Vue.prototype.$http = axios;
Ensure that your development server is still up and running and visit your http://localhost:8080 page.

To handle creating a task, make the following changes on the components/Tasks.vue file:
Add the following view inside tasks_container right above the tasks_content closing div:
<div class="add_task">
    <form v-on:submit.prevent="submitForm">
        <div class="form-group">
            <label for="title">Title</label>
            <input type="text" class="form-control" id="title" v-model="title">
        </div>
        <div class="form-group">
            <label for="description">Description</label>
            <textarea class="form-control" id="description" v-model="description"></textarea>
        </div>
        <div class="form-group">
            <button type="submit">Add Task</button>
        </div>
    </form>
</div>
In the scripts section, navigate to the data() function, and add title and description inside return:
data(){
    return {
        tasks: [],
        title: '',
        description: ''
    }
}
Now, add the submitForm method under methods. This goes below the getData() function like so:
async submitForm(){
    try {
        // Send a POST request to the API
        const response = await this.$http.post('http://localhost:8000/api/tasks/', {
            title: this.title,
            description: this.description,
            completed: false
        });
        // Append the returned data to the tasks array
        this.tasks.push(response.data);
        // Reset the title and description field values.
        this.title = '';
        this.description = '';
    } catch (error) {
        // Log the error
        console.log(error);
    }
}
Ensure that your development server is up and running. Enter a task title and description on the rendered form and click Add Task button. Your task will be submitted and added to the existing tasks.
To update a task, we will implement toggleTask in the methods as shown below:
async toggleTask(task){
    try{

        // Send a request to API to update the task
        const response = await this.$http.put(`http://localhost:8000/api/tasks/${task.id}/`, {
            completed: !task.completed,
            title: task.title,
            description: task.description
        });

        // Get the index of the task being updated
        let taskIndex = this.tasks.findIndex(t => t.id === task.id);

        // Reset the tasks array with the new data of the updated task

        this.tasks = this.tasks.map((task) => {
            if(this.tasks.findIndex(t => t.id === task.id) === taskIndex){
                return response.data;
            }
            return task;
        });

    }catch(error){

        // Log any error
        console.log(error);
    }
}
From your page, click complete for any task. The status of the task will be updated to “done,” and you will have an undo button to show that everything worked correctly.
Similarly, to handle deleting a task, we will implement the deleteTask function on the async methods as follows:
async deleteTask(task){

    // Confirm if one wants to delete the task
    let confirmation = confirm("Do you want to delete this task?");

    if(confirmation){
        try{

        // Send a request to delete the task
        await this.$http.delete(`http://localhost:8000/api/tasks/${task.id}`);

        // Refresh the tasks
        this.getData();
        }catch(error){

        // Log any error

        console.log(error)
        }
    }
}
From your page, click delete on any task. The task will be deleted and removed from the list.
If you get stuck, check the code used in this tutorial on GitHub.
This guide taught you how you can a full-stack web app using Vue and Django. It creates a minimal learning base that lets you learn and create scalable web applications.
Like other frontend technologies such as React and Angular, Vue provides you with many tools and components to help you hit the ground running. It has an easy learning curve and the capacity to integrate with other technologies such as Django. Check its documentation, and learn more features that its ecosystem has.
Debugging Vue.js applications can be difficult, especially when users experience issues that are difficult to reproduce. If you’re interested in monitoring and tracking Vue mutations and actions for all of your users in production, try LogRocket.

LogRocket lets you replay user sessions, eliminating guesswork by showing exactly what users experienced. It captures console logs, errors, network requests, and pixel-perfect DOM recordings — compatible with all frameworks.
With Galileo AI, you can instantly identify and explain user struggles with automated monitoring of your entire product experience.
Modernize how you debug your Vue apps — start monitoring for free.

Learn how to protect full-stack projects from NPM supply chain attacks with a practical security checklist.

Explore 15 essential MCP servers for web developers to enhance AI workflows with tools, data, and automation.

Learn how contrast-color() automatically picks accessible text colors using native CSS, without JavaScript.

Learn how to build a harness-style AI workflow using Claude Code with specialized Dev, QE, and Ops subagents, gated handoffs, MCP telemetry, and LEARNING.md.
Hey there, want to help make our blog better?
Join LogRocket’s Content Advisory Board. You’ll help inform the type of content we create and get access to exclusive meetups, social accreditation, and swag.
Sign up now

