Editor’s note: This tutorial was last updated by Ukeje Goodness on 13 March 2024 to include Django’s authentication and permission mechanisms, information about customizing Django HTTP responses, and a section about best practices to employ when testing REST APIs built with Django.

Django REST framework (DRF) is a powerful and flexible toolkit for building web APIs. In this tutorial, we’ll learn how to easily build a CRUD API using the Django REST framework. To build our sample to-do list application, we’ll start by setting up the Django REST framework in a Django project, followed by a complete tutorial on how to create a CRUD REST API with Django REST framework.
Django is a free, open source, Python-based web framework that follows the Model-View-Template (MVT) architectural pattern. It reduces the hassle of web development so you can focus on writing your app instead of reinventing the wheel.
A REST API is a popular way for systems to expose useful functions and data. REST, which stands for representational state transfer, can be made up of one or more resources that can be accessed at a given URL and returned in various formats, like JSON, images, HTML, and more.
Django REST framework (DRF) is a powerful and flexible toolkit for building web APIs. Its main benefit is that it simplifies the process of serialization.
Django REST framework is based on Django’s class-based views, so it’s an excellent option if you’re familiar with Django. It adopts implementations like class-based views, forms, model validators, the QuerySet API, and more.
Ideally, you’d want to create a virtual environment to isolate dependencies — however, this is optional. Run the command python -m venv django_env from inside your projects folder to create the virtual environment. Then, run source ./django_env/bin/activate to turn it on.
Keep in mind that you’ll need to reactivate your virtual environment in every new terminal session. You’ll know that it is turned on because the environment’s name will become part of the shell prompt.
Navigate to an empty folder in your terminal and install Django and Django REST framework in your project with the commands below:
pip install django
pip install django_rest_framework
Create a Django project called todo with the following command:
django-admin startproject todo
Then, cd into the new todo folder and create a new app for your API:
django-admin startapp todo_api
Run your initial migrations of the built-in user model:
python manage.py migrate
Next, add rest_framework and todo to the INSTALLED_APPS inside the todo/todo/settings.py file:
# settings.py
INSTALLED_APPS = [
    'django.contrib.admin',
    'django.contrib.auth',
    'django.contrib.contenttypes',
    'django.contrib.sessions',
    'django.contrib.messages',
    'django.contrib.staticfiles',
    'rest_framework',
    'todo_api'
]
Create a serializers.py and urls.py file in todo/todo_api and add new files as configured in the directory structure below:
├── todo
│   ├── __init__.py
│   ├── settings.py
│   ├── urls.py
├── db.sqlite3
├── manage.py
└── todo_api
    ├── admin.py
    ├── serializers.py
    ├── __init__.py
    ├── models.py
    ├── urls.py
    └── views.py
Be sure to include rest_framework and URLs as shown below in your main urls.py file:
# todo/todo/urls.py : Main urls.py
from django.contrib import admin
from django.urls import path, include
from todo_api import urls as todo_urls

urlpatterns = [
    path('admin/', admin.site.urls),
    path('api-auth/', include('rest_framework.urls')),
    path('todos/', include(todo_urls)),
]
Next, create a superuser. We’ll come back to this later:
python manage.py createsuperuser
GET, POST, PUT, and DELETE methodsIn a RESTful API, endpoints define the structure and usage of the GET, POST, PUT, and DELETE HTTP methods. You must organize these methods logically.
To show how to build a RESTful app with Django REST framework, we’ll create an example to-do API. We’ll use two endpoints with their respective HTTP methods, as shown in the table below:
| Endpoint | GET |
POST |
PUT |
DELETE |
|---|---|---|---|---|
todos/api/ |
1. List All: List all to-dos for requested user | 2. Create: Add a new to-do | N/A | N/A |
todos/api/<int:todo_id> |
3. Retrieve: Get a to-do with a given todo_id |
N/A | 4. Update: Update a to-do with a given todo_id |
5. Delete: Delete a to-do with a given todo_id |
Let’s start by creating the model for our to-do list:
# todo/todo_api/models.py
from django.db import models
from django.contrib.auth.models import User

class Todo(models.Model):
    task = models.CharField(max_length = 180)
    timestamp = models.DateTimeField(auto_now_add = True, auto_now = False, blank = True)
    completed = models.BooleanField(default = False, blank = True)
    updated = models.DateTimeField(auto_now = True, blank = True)
    user = models.ForeignKey(User, on_delete = models.CASCADE, blank = True, null = True)

    def __str__(self):
        return self.task
After creating the model, migrate it to the database:
python manage.py makemigrations
python manage.py migrate
To convert the Model object to an API-appropriate format like JSON, Django REST framework uses the ModelSerializer class to convert any model to serialized JSON objects:
# todo/todo_api/serializers.py
from rest_framework import serializers
from .models import Todo
class TodoSerializer(serializers.ModelSerializer):
    class Meta:
        model = Todo
        fields = ["task", "completed", "timestamp", "updated", "user"]
In this section, we’ll walk through how to create two API views: list view and detail view.
The first API view class deals with the todos/api/ endpoint, in which it handles GET for listing all to-dos of a given requested user and POST for creating a new to-do. Notice that we’ve added permission_classes, which only allow for authenticated users:
# todo/todo_api/views.py
from rest_framework.views import APIView
from rest_framework.response import Response
from rest_framework import status
from rest_framework import permissions
from .models import Todo
from .serializers import TodoSerializer

class TodoListApiView(APIView):
    # add permission to check if user is authenticated
    permission_classes = [permissions.IsAuthenticated]

    # 1. List all
    def get(self, request, *args, **kwargs):
        '''
        List all the todo items for given requested user
        '''
        todos = Todo.objects.filter(user = request.user.id)
        serializer = TodoSerializer(todos, many=True)
        return Response(serializer.data, status=status.HTTP_200_OK)

    # 2. Create
    def post(self, request, *args, **kwargs):
        '''
        Create the Todo with given todo data
        '''
        data = {
            'task': request.data.get('task'),
            'completed': request.data.get('completed'),
            'user': request.user.id
        }
        serializer = TodoSerializer(data=data)
        if serializer.is_valid():
            serializer.save()
            return Response(serializer.data, status=status.HTTP_201_CREATED)

        return Response(serializer.errors, status=status.HTTP_400_BAD_REQUEST)
The GET method first fetches all the objects from the model by filtering with the requested user ID. Then, it serializes from the model object to a JSON serialized object. Next, it returns the response with serialized data and status as 200_OK.
The POST method fetches the requested data and adds the requested user ID to the data dictionary. Next, it creates a serialized object and saves the object if it’s valid. If valid, it returns serializer.data, which is a newly created object with the status 201_CREATED. Otherwise, it returns the serializer.errors with the status 400_BAD_REQUEST.
Create an endpoint for the class-based view above:
# todo/todo_api/urls.py : API urls.py
from django.conf.urls import url
from django.urls import path, include
from .views import (
    TodoListApiView,
)

urlpatterns = [
    path('api', TodoListApiView.as_view()),
]
Then, run the Django server:
python manage.py runserver
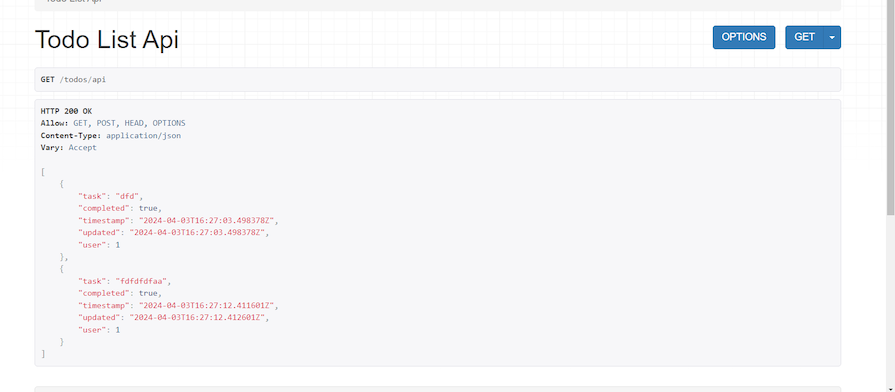
Now, we’re ready for the first test. Navigate to http://127.0.0.1:8000/todos/api/. Make sure you’re logged in with your superuser credentials:
You can create a new to-do by posting the following code:
{
    "task": "New Task",
    "completed": false
}
Now that we’ve successfully created our first endpoint view, let’s create the second endpoint, todos/api/<int:todo_id> API view.
In this API view class, we need to create three methods for handling the corresponding HTTP methods, GET, PUT, and DELETE, as discussed above:
# todo/api/views.py
from rest_framework.views import APIView
from rest_framework.response import Response
from rest_framework import status
from todo.models import Todo
from .serializers import TodoSerializer
from rest_framework import permissions

class TodoDetailApiView(APIView):
    # add permission to check if user is authenticated
    permission_classes = [permissions.IsAuthenticated]

    def get_object(self, todo_id, user_id):
        '''
        Helper method to get the object with given todo_id, and user_id
        '''
        try:
            return Todo.objects.get(id=todo_id, user = user_id)
        except Todo.DoesNotExist:
            return None

    # 3. Retrieve
    def get(self, request, todo_id, *args, **kwargs):
        '''
        Retrieves the Todo with given todo_id
        '''
        todo_instance = self.get_object(todo_id, request.user.id)
        if not todo_instance:
            return Response(
                {"res": "Object with todo id does not exists"},
                status=status.HTTP_400_BAD_REQUEST
            )

        serializer = TodoSerializer(todo_instance)
        return Response(serializer.data, status=status.HTTP_200_OK)

    # 4. Update
    def put(self, request, todo_id, *args, **kwargs):
        '''
        Updates the todo item with given todo_id if exists
        '''
        todo_instance = self.get_object(todo_id, request.user.id)
        if not todo_instance:
            return Response(
                {"res": "Object with todo id does not exists"},
                status=status.HTTP_400_BAD_REQUEST
            )
        data = {
            'task': request.data.get('task'),
            'completed': request.data.get('completed'),
            'user': request.user.id
        }
        serializer = TodoSerializer(instance = todo_instance, data=data, partial = True)
        if serializer.is_valid():
            serializer.save()
            return Response(serializer.data, status=status.HTTP_200_OK)
        return Response(serializer.errors, status=status.HTTP_400_BAD_REQUEST)

    # 5. Delete
    def delete(self, request, todo_id, *args, **kwargs):
        '''
        Deletes the todo item with given todo_id if exists
        '''
        todo_instance = self.get_object(todo_id, request.user.id)
        if not todo_instance:
            return Response(
                {"res": "Object with todo id does not exists"},
                status=status.HTTP_400_BAD_REQUEST
            )
        todo_instance.delete()
        return Response(
            {"res": "Object deleted!"},
            status=status.HTTP_200_OK
        )
The GET method first fetches the object with the ID todo_id and the user as the request user from the to-do model. If the requested object is not available, it returns the response with the status 400_BAD_REQUEST. Otherwise, it serializes the model object to a JSON serialized object and returns the response with serializer.data and the status 200_OK.
The PUT method fetches the to-do object if it is available in the database, updates its data with requested data, and saves the updated data in the database.
The DELETE method fetches the to-do object if it is available in the database, deletes it, and provides a response.
Update the API urls.py as demonstrated below:
# todo/api/urls.py : API urls.py
from django.conf.urls import url
from django.urls import path, include
from .views import (
    TodoListApiView,
    TodoDetailApiView
)

urlpatterns = [
    path('api', TodoListApiView.as_view()),
    path('api/<int:todo_id>/', TodoDetailApiView.as_view()),
]
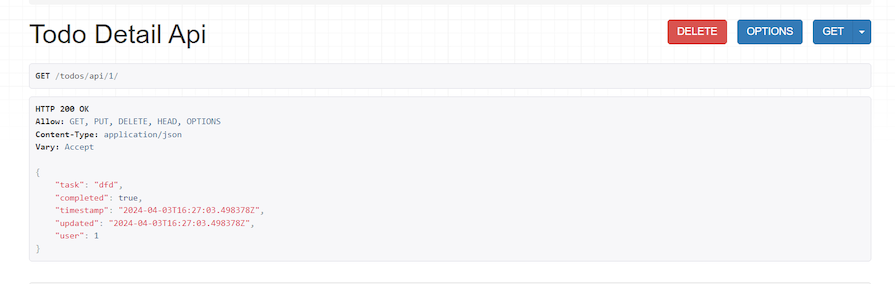
Now, if you navigate to http://127.0.0.1:8000/todos/api/<id>/, it will show the Detail API view page. Notice that you correctly navigate to a valid ID. In the image below, I used 7 as the ID:
You can implement authentication and permissions in your Django apps in multiple ways.
You can use the Simple JWT package (a DRF extension) for JWT authentication. Additionally, you can use djoser, a powerful Django package that makes authentication endpoint implementation and user management easier in DRF APIs.
Execute this command to install the packages:
pip install djangorestframework-simplejwt djoser
Next, you need to configure your Django project settings. First, add djoser to INSTALLED_APPS like this:
INSTALLED_APPS = [
    # third party apps
    'djoser',
]
Next, add REST_FRAMEWORK settings:
REST_FRAMEWORK = {
    'DEFAULT_AUTHENTICATION_CLASSES': (
        'rest_framework_simplejwt.authentication.JWTAuthentication',
      'DEFAULT_SCHEMA_CLASS': 'drf_spectacular.openapi.AutoSchema',  # drf-spectacular settings
    ),
}
Add the SIMPLE_JWT settings to configure the simplejwt package:
SIMPLE_JWT = {
    'AUTH_HEADER_TYPES': ('JWT',),
    "ACCESS_TOKEN_LIFETIME": timedelta(days=1),
    "REFRESH_TOKEN_LIFETIME": timedelta(days=2),
}
Now, add djoser authentication URL routes in your [url.py](<http://url.py>) file.
urlpatterns = [
    path('admin/', admin.site.urls),
    path('auth/', include('djoser.urls')),
    path('auth/', include('djoser.urls.jwt')),
]
Create a serializers.py file in your Django app (not project!) and add this to the file:
from djoser.serializers import UserSerializer, UserCreateSerializer as BaseUserSerializer

class UserCreateSerializer(BaseUserSerializer):
    class Meta(BaseUserSerializer.Meta):
        fields = ['id', 'email', 'username', 'password']
Here, you imported two serializers from the djoser package. The UserSerializer serializes user objects while the UserCreateSerializer creates user objects.
The custom serializer inherits from djoser’s UserCreateSerializer and overrides the Meta class to define the id, email, username, and password fields for serialization:
class CurrentUserSerializer(UserSerializer):
    class Meta(UserSerializer.Meta):
        fields = ['id', 'email', 'username', 'password']
The CurrentUserSerializer class inherits from UserSerializer. Like UserCreateSerializer, the Meta class is overridden for custom behavior, and fields are specified.
Now, create a custom `permissions.py` file in the Django app directory and add this code to the file:


from rest_framework import permissions

class IsOwner(permissions.BasePermission):
    def has_object_permission(self, request, view, obj):
        if request.method in permissions.SAFE_METHODS:
            # Allow read-only methods for everyone
            return True
        # Check if the user making the request is the owner of the student object
        return obj.user == request.user
Here, you’ve defined a custom permissions class that extends the permissions.BasePermission from DRF.
The IsOwner class is customer permission that ensures general read access for all users while restricting modification rights to the user with the object. The SAFE_METHODS list identifies read-only requests universally.
Add these to your views.py file:
from rest_framework_simplejwt.authentication import JWTAuthentication
from permissions import IsOwner
from rest_framework.permissions import IsAuthenticated
We’ve imported the JWTAuthentication class from the rest_framework_simplejwt.authentication module. JWTAuthentication is a DRF authentication class that verifies the JWTs in the request headers.
You’ve also imported a custom permission for the app (IsOwner).
Add the JWT authentication and custom permissions to the TodoListApiView and the TodoDetailApiView:
authentication_classes = [JWTAuthentication]
permission_classes = [IsAuthenticated, IsOwner]
The two lines of code add the JWT authentication and custom permissions to both endpoints, requiring the user to authenticate using JWT tokens and not edit other users’ to-do items.
Now, let’s test the functionality. Execute the code using the command below:
python [manage.py](<http://manage.py>) runserver
Now, navigate to this page to view the documentation:
<http://127.0.0.1:8000/api/schema/swagger/#/todos/todos_api_create>
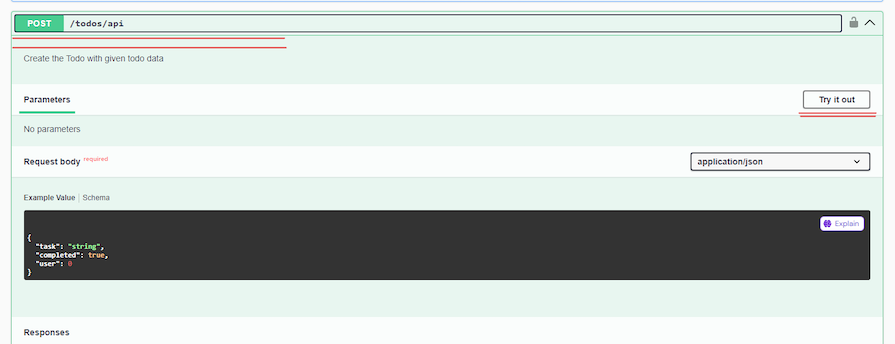
Click on the endpoint /todo/api/, then click Try it out.
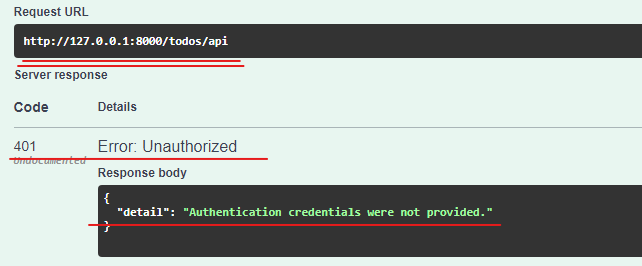
Next, fill the serializer fields with the required testing data and click Execute. Upon making that user request to the endpoint, our JWT authentication mechanism picked up the request but didn’t find the required access token for the route, thus responding with a 401 error:
To get your authentication credentials, you must first create a user. In your terminal, run the following command:
python [manage.py](<http://manage.py>) createsuperuser
Provide the required credentials you are prompted for in the terminal. Then, head to the Django admin panel (http://127.0.0.1:8000/admin/) to create a guest user. Log in with the superuser credentials created before:
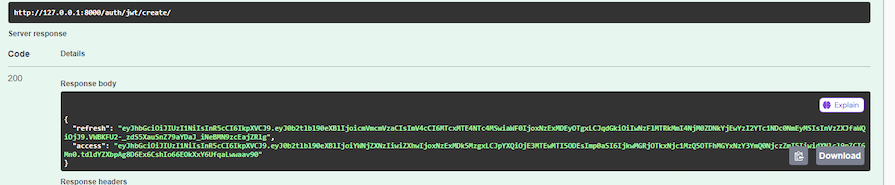
Click the + icon beside the Users model to add the guest user to the project DB. Then, head over to the endpoint, auth/jwt/create:

Fill out the request body with the recently created guest user’s credentials (username and password), then click Execute.
The request returns the expected response and the access and refresh tokens for authenticating the user:
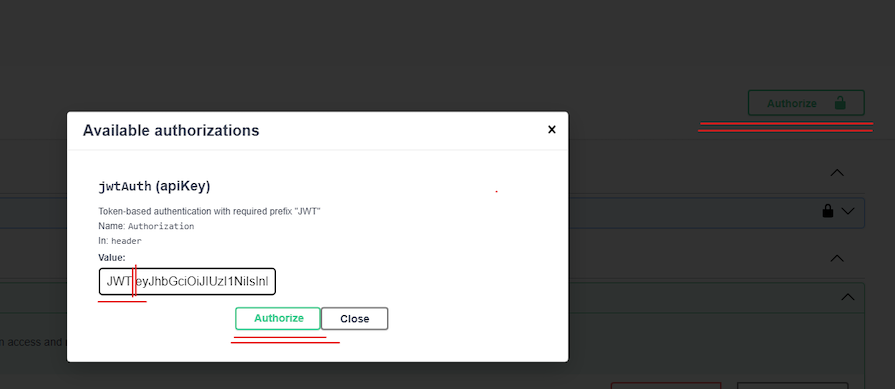
Copy the access token from the response body. Then click on the Authorize button with the lock icon. A popup is displayed — input the letters “JWT”, followed by a space, and the access token. Then, click Authorize:
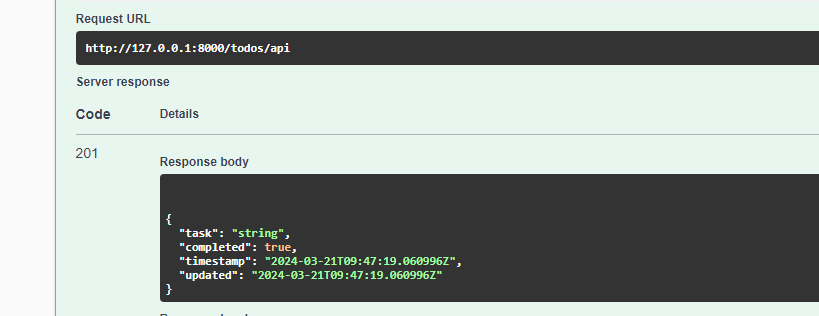
Now head back to the post endpoint /todos/api. Leave the request body as it is and click Execute. The endpoint now gives the proper response because the user has been authenticated!
Here’s how you can customize HTTP responses in your project. Using the examples in the TodolistApiView, update the GET method with this:
 def get(self, request, *args, **kwargs):
        # Retrieve all todo items for the authenticated user
        todos = Todo.objects.filter(user=request.user)
        serializer = TodoSerializer(todos, many=True)
        print(request.user)
        print(todos)

        # Construct custom response data
        custom_data = {
            'count': todos.count(),  # Total count of todos
            'results': serializer.data,  # Serialized todo items
            'message': 'List of todo items retrieved successfully.'
        }
        # Return custom response
        return Response(custom_data, status=status.HTTP_200_OK)
The get function customizes HTTP responses with the DRF. It retrieves to-do items associated with the authenticated user, serializes them, and constructs a custom response with the count of the to-do items, serialized data, and a success message before returning them as the HTTP response with a 200 HTTP status code.
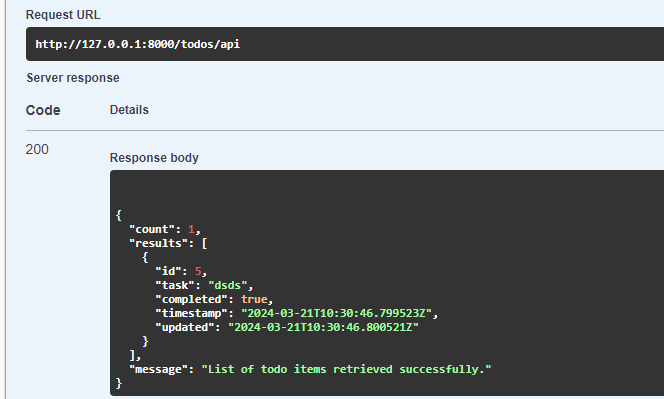
To test this functionality, head over to the /todos/api GET method:
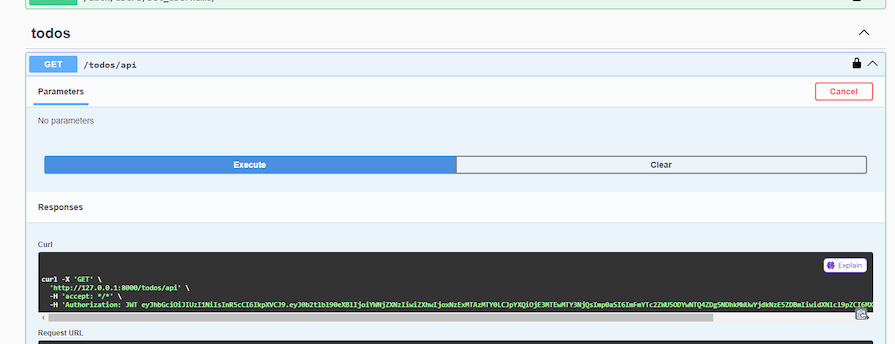
Based on the code in the todolist API view, when you click Execute, you can see the response body give back the number of to-do items, the results, and the success message:
Implement best practices to test the REST API projects you’ve built with DRF. Here are some practices that you can try out for your project:
TestCase or DRF APITestCase. DRF extends them to add API-specific features that you can use to test your endpointsFinally, as your API evolves, regularly review and update your tests to reflect functionality, requirements, and code base structure changes in the long term.
Congratulations! You’ve successfully built your first fully functional CRUD Django REST API. Building a RESTful API can be complicated, but Django REST framework handles complexity fairly well. I hope you have fun building new APIs using DRF, and be sure to leave a comment if you have any questions. Happy coding!
Install LogRocket via npm or script tag. LogRocket.init() must be called client-side, not
server-side
$ npm i --save logrocket

// Code:

import LogRocket from 'logrocket';
LogRocket.init('app/id');
// Add to your HTML:

<script src="https://cdn.lr-ingest.com/LogRocket.min.js"></script>
<script>window.LogRocket && window.LogRocket.init('app/id');</script>

Debug RSC hydration mismatches in production with Next.js instrumentation, Suspense isolation, HTML diffing, and CI smoke tests.

Explore why npm dependencies are a major supply chain security risk and how to protect JavaScript apps from compromised packages and transitive threats.

Enabled React Compiler v1.0 on a production Next.js app. Here’s every warning, breakage, and silent opt-out I documented — and what actually worked.

We built the same app in TanStack Start RSC and Next.js RSC. TanStack shipped 40% less JS and built 4x faster — but Next.js is still the safer production bet.
Would you be interested in joining LogRocket's developer community?
Join LogRocket’s Content Advisory Board. You’ll help inform the type of content we create and get access to exclusive meetups, social accreditation, and swag.
Sign up now

