It was only a matter of time before more programming languages were written to rival Solidity. Vyper is similar to Solidity, but it is written in a more modern way.

In this tutorial, we’ll walk you through how to build smart contracts using Vyper.
Vyper is a pythonic language that is similar to Solidity but written in a more modern way. It is used to write smart contracts that run on the Ethereum Virtual Machine.
Next to Solidity, Vyper is the second-most popular choice of contract programming language for developers. From its name, we can easily deduce it is based on the Python language.
Vyper is a strongly typed language, which means we can only use one type of data; no data type can be used in place of another.
Why would you choose Vyper for writing smart contracts over the more well-known and widely used Solidity? Vyper’s killer features are fueling its rapid rise in popularity and adoption. These unique features are designed to alleviate some of the issues developers commonly face when writing smart contracts in Solidity.
Research from the National University of Singapore School of Computing found that many smart contracts are faulty and can perform unpredictably.
Specifically, the researchers discovered that some smart contracts give away Ethers to arbitrary addresses that have never deposited Ethers, provided data, or owned the contract. These contracts are called prodigal contracts.
By contrast, according to the research, contracts that can be killed by their owners when they are drained of Ethers, when attacked, or in the event of an emergency are called suicidal contracts. Greedy contracts are those that lock Ethers and lack the instructions to send them out due to errors.
Then there are posthumous contracts, which do reside in the Ethereum blockchain when they are killed off but keep receiving transactions even though the transactions cannot call the contract code. These lock the Ethers in the contract balance.
Vyper aims to help you avoid these problems. Vyper features bounds and overflow checks on arrays and arithmetic ops. It also enables you to compute a precise upper bound for gas consumption and has support for signed integers and decimal fixed-point numbers.
You can read more about Vyper’s unique features, principles, and goals — including security, language and compiler simplicity, and auditability — in the official Vyper docs.
To put it simply, Vyper eliminates the problems associated with prodigal, suicidal, greedy, and posthumous contracts by tightening the loop on the free roam it gives to developers.
With the basics out of the way, let’s walk through the process of building smart contracts with Vyper.
First, we need to install Vyper. To do that, we will need Python 3.6 or higher. You can download Python binaries from the Python website.
We’ll also need the pip package manager. To install it, we can use the following command:
sudo apt-get install python3-pip
Alternatively, you can download a script from here and then run the following command:
python3 get-pip.py
Make sure the pip package manager is installed globally on your machine:
pip
If we get command not found, we need to manually set the path to point to our pip installation folder.
For Mac users, you can do this by adding the following line to the ~/.bashrc file:
export PATH="$PATH:/Users/chidumennamdi/Library/Python/3.8/bin"
We test if the pip command works by typing pip in the terminal.
Next, we install Vyper using the pip command:
pip install vyper
For our demonstration, we’ll build a smart contract that can store and display a user’s name. To test our smart contract, we’ll use the Ropsten Testnet. This will enable us to test our smart contract with virtual Eths before deploying to the Ethereum mainnet.
First, we need to install MetaMask. MetaMask is a browser extension that enables you to interact with the Ethereum blockchain.
If you have not registered MetaMask yet, you can do so by clicking the MetaMask logo in the top-right corner of the browser. This will open a new tab.
Register and log in, then click the dropdown menu and select Ropsten Test Network. There is a copy icon next to a series of alphanumerical numbers. This is the address of your Ethereum wallet. Copy this address; we will use it to get free Eth.
Visit the Ropsten Ethereum Faucet and paste the address in the text box. Click the button labeled Send me test Ether to get free Eth.
Going back to our MetaMask, we’ll see 0.3Eth in our account. Now we can write and deploy our smart contract.
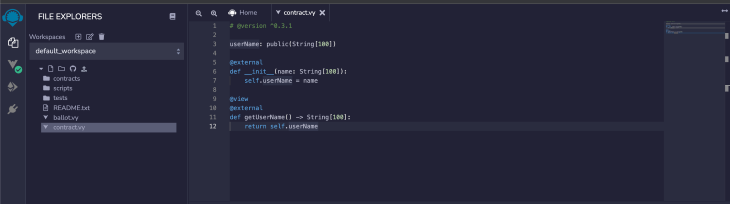
Vyper programs are written in files with a .vy extension. Let’s break down the structure of a smart contract in Vyper.
A smart contract contains:
self objectWe will write a simple contract that will save a user’s name and also enable the user to retrieve it.
We will create a folder, vyper_contract, and a file, contract.vy, inside this folder.
Paste the below code in the contract.vy file:
# @version ^0.3.1

userName: public(String[100])

@external
def __init__(name: String[100]):
    self.userName = name

@view
@external
def getUserName() -> String[100]:
    return self.userName
The first line, # @version ^0.3.1, is the pragma that tells the Vyper compiler to use version 0.3.1 to compile the smart contract.
The second bit of code is a state variable, userName, which holds the name of the user.
We see an @external being used; this tells Vyper that the function is an external function — i.e., the function can be called from the outside.
The __init__ function is the constructor of the smart contract. It is called when the smart contract is deployed.
The @view in the getUserName function tells Vyper that the function does not change the state of the blockchain — i.e., it only reads state from the blockchain. This getUserName function returns the userName state variable, which is the name of the user.
We’ll compile our smart contract using the vyper command:
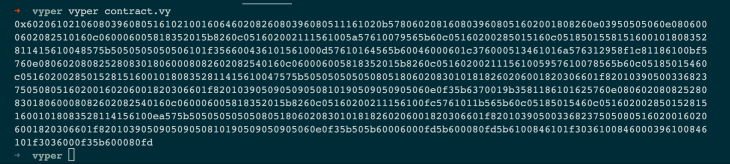
vyper contract.vy
We’ll see a hexadecimal string in the terminal. This is the bytecode of the smart contract.
Next, run the Vyper server, vyper-server. This will start a server on http://localhost:8000; we’ll use this URL in Remix to compile remotely and deploy.
![]()
We will use the Remix IDE to compile our smart contract remotely and deploy it. Navigate to the Remix IDE, create a new file called contract.vy, and paste the above code into the file.
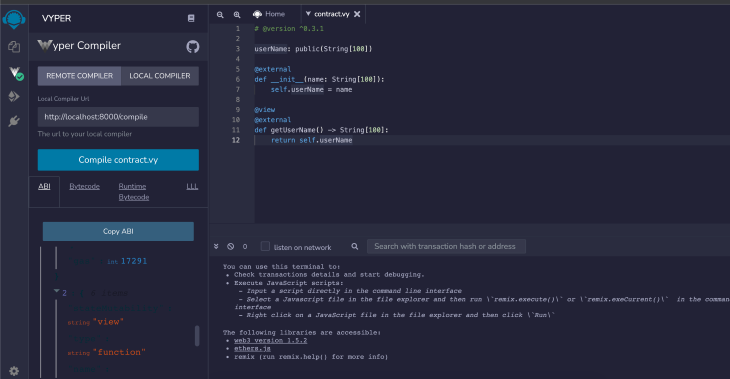
Next, we will install the Vyper plugin in our Remix IDE, click on the socket icon in the sidebar, and search for “vyper.”
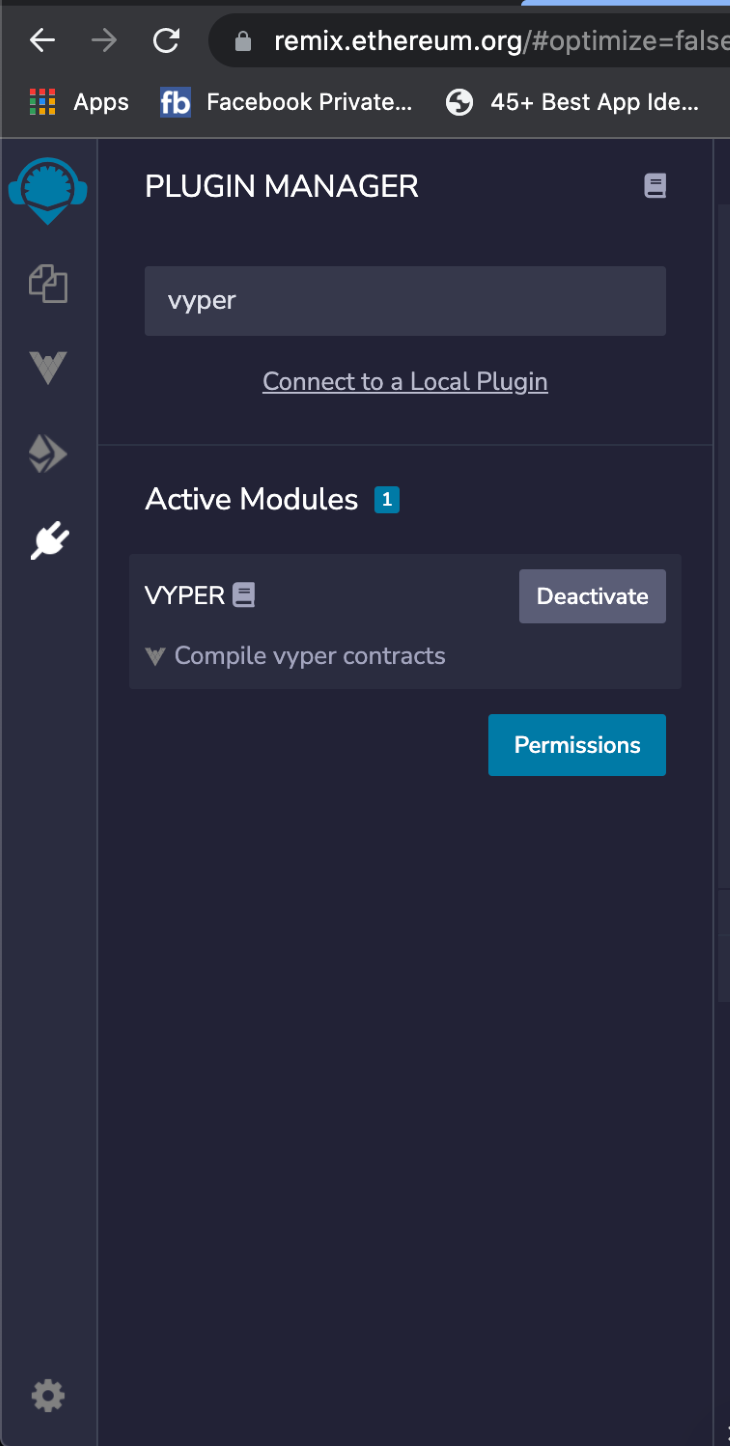
Click Activate on the item that appears. Then, click on the Vyper icon and press the Compile contract.vy button. You should see this:
We’ll now deploy our smart contract.
Click the Ethereum icon in the sidebar:
![]()
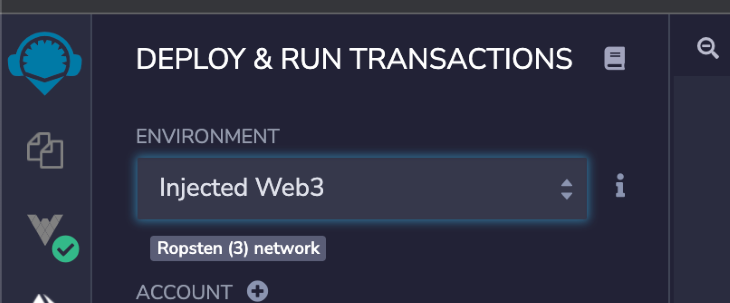
From the ENVIRONMENT dropdown, select Injected Web3. A small UI underneath it will change to the Ropseten Testnet we are connected to.
Click on Deploy and enter your name beside the Deploy button.
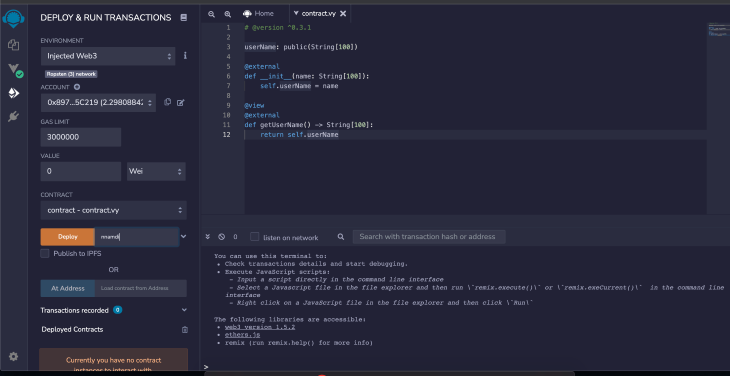
Clicking the Deploy button will cause the MetaMask UI to appear.
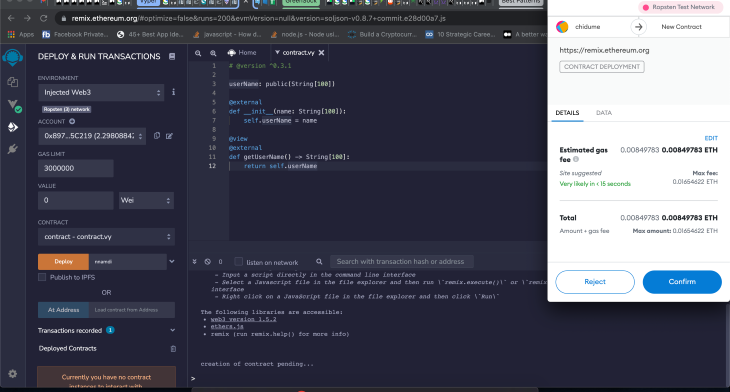
Click Confirm and your Vyper smart contract will be deployed to the Ropsten Testnet.
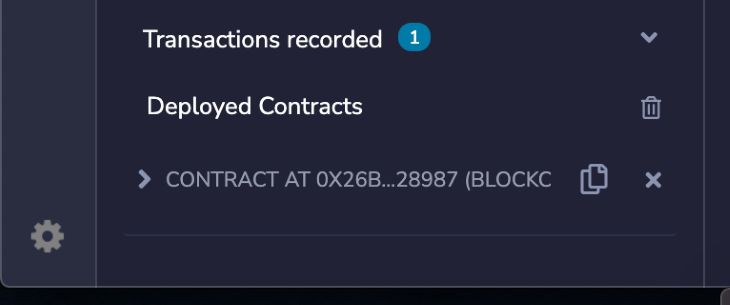
Above is our deployed smart contract. We can interact with it to call the methods in our Remix browser IDE or view the deployed contract on the Ropsten Ethereum Faucet.
Click on the CONTRACT AT 0x26… dropdown. We’ll see our functions and state variables: getUserName, and userName.
Let’s click getUserName:
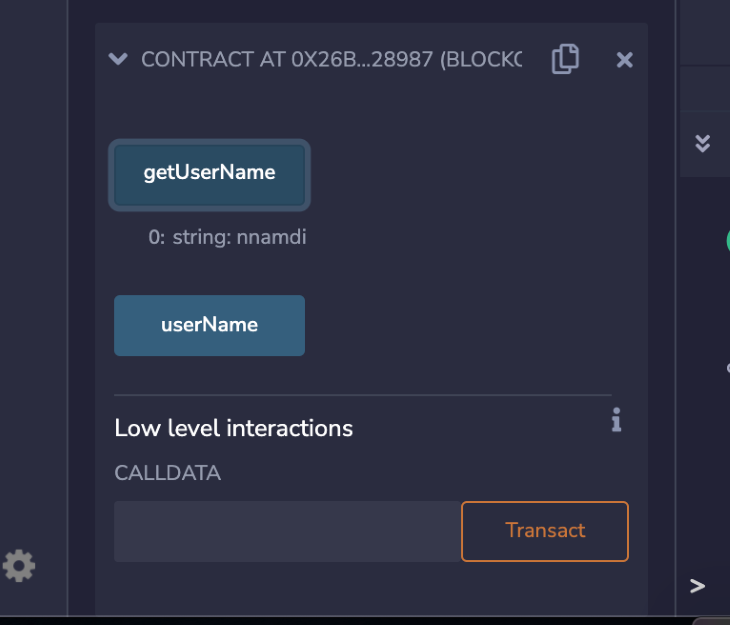
It returns “nnamdi,” the string we passed to the constructor during deployment. This action called the getUserName function in the contract.
Congratulations! If you’ve made it this far, you have successfully tested and deployed your Vyper smart contract.
In this tutorial, we introduced you to Vyper and the issues — namely, prodigal, suicidal, greedy, and posthumous contracts — Vyper is designed to remediate.
Next, we demonstrated how to install Vyper and built a simple smart contract that can store and display a user’s name. We learned how to deploy a smart contract using Vyper and Remix and how to interact with it.
Client-side issues that impact users’ ability to activate and transact in your apps can drastically affect your bottom line. If you’re interested in monitoring UX issues, automatically surfacing JavaScript errors, and tracking slow network requests and component load time, try LogRocket.

LogRocket lets you replay user sessions, eliminating guesswork around why bugs happen by showing exactly what users experienced. It captures console logs, errors, network requests, and pixel-perfect DOM recordings — compatible with all frameworks.
LogRocket's Galileo AI watches sessions for you, instantly identifying and explaining user struggles with automated monitoring of your entire product experience.
Modernize how you debug web and mobile apps — start monitoring for free.

Discover how React Fiber works under the hood. Learn how React builds the DOM, handles concurrent rendering, and works alongside React 19 features and the new React Compiler.

Learn how to use Skybridge, an open-source React framework, to build and deploy cross-platform AI apps and interactive UI widgets for ChatGPT, Claude, and MCP clients from a single codebase.

Learn how to set up Meilisearch, index documents, and build keyword, semantic, and hybrid search with AI-powered retrieval.

Compare pnpm and npm across security defaults, disk usage, dependency strictness, and workspace policy to decide which package manager fits your project.
Hey there, want to help make our blog better?
Join LogRocket’s Content Advisory Board. You’ll help inform the type of content we create and get access to exclusive meetups, social accreditation, and swag.
Sign up now

