
Editor’s note: This article was last reviewed and updated on 23 September 2024.
There are a few reasons why your Vue components aren’t automatically importing in your templates:
If you’ve checked these and your Vue auto imports are still not showing in your template, consider using unplugin-vue-components, a tool that automatically imports and registers any Vue components you use.
unplugin-vue-components uses the Rollup API as an abstraction layer over a variety of bundler/build tool APIs, converting Rollup-style build hooks and calls to be compatible with the target bundler. This means that one plugin (or unplugin) can work across bundlers like Rollup, webpack, and Vite rather than having to be ported to a new build tool.
unplugin-vue-components uses unplugin to allow it to be used almost anywhere, meaning you can slot it into a project without having to rewrite much.
Now that you know a bit about unplugin-vue-components, let’s try it out.
The Replay is a weekly newsletter for dev and engineering leaders.
Delivered once a week, it's your curated guide to the most important conversations around frontend dev, emerging AI tools, and the state of modern software.
Unlike global registration, unplugin-vue-components is more intelligent with component management, as it can statically analyze your code.
Meanwhile, global registration forces the registered component to be included in the bundler output whether it is used or not. This can increase the size of your final code quite significantly, reducing performance.
unplugin-vue-components analyzes your code to see where components are used, making tree shaking and code splitting more effective. Additionally, unplugin-vue-components does not require you to manually register every component, and instead just makes you specify the components folder (or not, if you are using src/components).
unplugin-vue-components also has a more powerful configuration, as you will see later. With it, you can do things such as integrate TypeScript types, create custom functions to redirect components to specific libraries, and create a global transformation function.
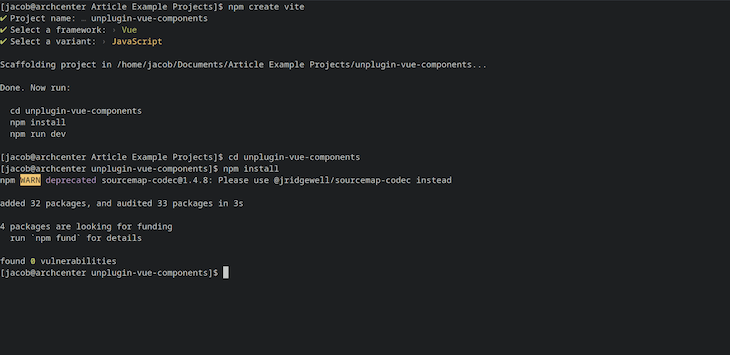
Setting up unplugin-vue-components is simple. First, you will need to create a new Vue project. I recommend using Vite, but due to the nature of unplugin, you can use whatever you want.
For Vite, you must run npm create vite and go through the setup wizard, making sure to select Vue as the framework. More complex projects should use create-vue, instead, as it offers more customization. The setup wizard will give you instructions to finish the setup:
After you finish the project scaffolding, you need to install unplugin-vue-components with npm or another package manager of your choice:
npm i -D unplugin-vue-components
Now, you need to tell your bundler to use it. To do this, add unplugin-vue-components to your bundler’s config file. For example, with Vite, you would go to vite.config.js and add the following:
import Components from 'unplugin-vue-components/vite' // This imports the plugin

export default defineConfig({
  // The rest of the config here should be left untouched
  plugins: [
    Components({ /* plugin config here */}) // This registers the plugin in Vite
  ]
})
If you are using webpack, your webpack.config.js should look more like this:
module.exports = {
  // The rest of the config here should be left untouched
  plugins: [
    require('unplugin-vue-components/webpack')({ /* plugin config here */ }) // This imports and registers the plugin in Webpack
  ]
}
If you do not store your components in src/components, you will need to configure a new path to use. You can do this by passing an array of the paths you want for unplugin-vue-components into the dirs property of the unplugin-vue-components config:
import Components from 'unplugin-vue-components/vite'

export default defineConfig(
  plugins: [
    Components({dirs: ["src/example/dir/here","other/example"]})
  ]
})
Now, the Vue auto import and registration should work! Test it out by using a component without importing or registering it.
If you are using the Vite Vue template, you can test this by removing the HelloWorld import at the top of App.vue. Next, run npm run dev and check if it works:

It isn’t difficult to migrate existing projects to unplugin-vue-components. First, you will need to follow the installation steps above. Make sure to update your bundler config file to add the plugin the correct way (this can differ between bundlers).
After that, as described above, you should add your component directories through the dirs property. If all of your components are in src/components, you can skip this step:
{
  dirs: ["src/example/dir/here","other/example"]
} // this should be passed as an argument in the plugin function, like shown above for Vite.
After that, remove the import and register statements. Luckily, you can do this gradually, as unplugin-vue-components does not conflict with existing statements.
Now that we have set up unplugin-vue-components, let’s look at how to use its features.
By default, there is no way to auto-import and register components from other modules. However, with a tiny bit of configuration, you can get them working using resolvers. Resolvers are functions that allow you to direct components to a specific package based on their names. For example, if you are using the Dropdown component in Ant Design, you can redirect every use of <Dropdown> to AntD’s Dropdown.
For many popular UI libraries, unplugin-vue-components includes a built-in resolver that you can use by importing and passing to the resolvers config property:
import Components from 'unplugin-vue-components/vite'
import {
  AntDesignVueResolver,
} from 'unplugin-vue-components/resolvers' // import the resolver

Components({
  resolvers: [
    AntDesignVueResolver(), // pass the resolver in the config; you can configure the resolver by passing options in an object parameter
  ],
})
However, many packages do not have built-in resolvers. Luckily, creating your own is simple. Resolvers are functions that take in a string specifying the component name and return the actual component name and package name.
As an example, let’s create a resolver that redirects all usage of any components starting with Example and redirect them to example-package with the Example prefix removed:
Components({
  resolvers: [
    (componentName) => {
      if (componentName.startsWith("Example")) {
        return { name: componentName.slice(6), from: "example-package" };
      }
    },
  ],
});
We can do many more advanced things with the resolver function, too. For example, if we only want to match certain components from example-package, we can add an array to match components from:
const ExampleElements = ["Dropdown", "Button", "Card"]; // this should be outside of the config

// ... config ...
Components({
  resolvers: [
    (componentName) => {
      if (
        componentName.startsWith("Example") &&
        ExampleElements.includes(componentName.splice(6)) // check if the name minus example is in the above array
      ) {
        return { name: componentName.slice(6), from: "example-package" };
      }
    },
  ],
});
If the component library has multiple variants for each component, you can also iterate through the array and check if the component is there using string.startsWith() instead. The possibilities are endless!
First, in order to get proper TypeScript support, use Volar. Volar is a language server for Vue that allows you to use more advanced Vue development features like type checking, syntax highlighting, and autocomplete in your IDE/text editor. While Vue does not support this use of TypeScript yet, Volar has already added support for type checking and autocomplete in this case.
Now, you need to update your config file to include the dts property, set to true:
{
  dts: true // put this in the unplugin-vue-components config
}
This should also automatically be enabled if TypeScript is installed. Another thing you need to do is add components.d.ts to your tsconfig.js includes list. components.d.ts is the file containing all of the types, and if you do not tell TypeScript to include it, it won’t do anything.
That is all you need to do in most cases. However, if you are using libraries that already register components globally and do not provide types, unplugin-vue-components can help with that, too. You can use its type support for components that are not imported by unplugin-vue-components; you just need to add them to the config file.
For example, if you wanted unplugin-vue-components to contain types for ExampleComponentOne and ExampleComponentTwo from package example-package, you would change the config to something like this:
{
  dts: true,
  types: [{
    from: 'example-package',
    names: ['ExampleComponentOne', 'ExampleComponentTwo'],
  }],
}
Now you get the same type support as with any other components using unplugin-vue-components.
unplugin-vue-components does not support importing other files by default. However, you can use another unplugin tool to achieve this: unplugin-auto-import. unplugin-auto-import allows you to use JavaScript functions without having to import them, and while it is more complicated to configure than unplugin-vue-components, it is still easy to use.
First, you will need to install unplugin-auto-import as you installed unplugin-vue-components (this includes adding it to the bundler config). Then, you will need to add Regex expressions to specify what files you want included in the include property. From there, you can add presets and custom package configurations to the imports property:
AutoImport({
  // targets to transform
  include: [
    /\.[tj]sx?$/, // match .ts, .tsx, .js, .jsx
  ],
  // imports to include
  imports: [
    "example-preset", // for certain packages, unplugin-auto-import includes a preset, which you can use like this
    {
      "example-package": [
        "namedImport", // this is how you declare named imports to use
        ["alisedImport", "exampleAlias"], // you can also alias named imports. This will use function aliasedImport from example-package and alias it to exampleAlias
        ["default", "exampleDefault"], // you can use default as the name to get the default export.
      ],
    },
  ],
  // local directories to use auto-import with.
  dirs: ["./src/assets/scripts"],
});
For more information on how to use this, check out the unplugin-auto-import documentation.
In this article, we explored how to reduce your code bloat by automatically importing Vue components using tools like unplugin-vue-components and unplugin-auto-import. Consider implementing these tools in your project to benefit from their Vue component handling techniques.
Thanks for reading!
Debugging Vue.js applications can be difficult, especially when users experience issues that are difficult to reproduce. If you’re interested in monitoring and tracking Vue mutations and actions for all of your users in production, try LogRocket.

LogRocket lets you replay user sessions, eliminating guesswork by showing exactly what users experienced. It captures console logs, errors, network requests, and pixel-perfect DOM recordings — compatible with all frameworks.
With Galileo AI, you can instantly identify and explain user struggles with automated monitoring of your entire product experience.
Modernize how you debug your Vue apps — start monitoring for free.

When should you move API logic out of Next.js? Learn when Route Handlers stop scaling and how ElysiaJS helps.

Explore how Dokploy streamlines app deployment with Docker, automated builds, and simpler infrastructure compared to traditional CI/CD workflows.

A side-by-side look at Astro and Next.js for content-heavy sites, breaking down performance, JavaScript payload, and when each framework actually makes sense.

AI-generated tests can speed up React testing, but they also create hidden risks. Here’s what broke in a real app.re
Hey there, want to help make our blog better?
Join LogRocket’s Content Advisory Board. You’ll help inform the type of content we create and get access to exclusive meetups, social accreditation, and swag.
Sign up now

