At the prototyping stage of product development, especially in high-fidelity prototypes, we are normally working with tools that are as close to the production level of our apps as possible. Data provided via REST is as close to production as that gets (at least, when working on frontend apps).

Some of the popular options that exist for ad hoc REST servers are Express, Fastify, Koa, Nest, and Hapi. We also have options for creating custom-made servers or consuming mock APIs, which is usually a time-consuming and unreliable task.
One of the new candidates and the subject of this post is ChiselStrike, a scalable backend-as-a-service platform that simplifies the backend development process and eases the progress from prototyping to production.
ChiselStrike brings to the table several useful features that speed up app prototyping and is backed by a powerful API that allows customization for each of your projects.
As we unravel what ChiselStrike offers when prototyping inside this post, we are going to cover the following:
ChiselStrike is a general-purpose platform for creating and hosting web services backends; it can be used for any web or mobile application that you could host in the cloud.
On top of this, ChiselStrike is scalable and extensively simplifies the backend development process when building apps. You can develop ChiselStrike apps in TypeScript, bringing all of the syntactical advantages offered by the JavaScript superset into the development process.
To demonstrate how ChiselStrike issues simplification, here is an example of the ChiselStrike code that would implement all of the CRUD operations for a BlogPost data model:
import { ChiselEntity } from "@chiselstrike/api"

export class BlogPost extends ChiselEntity {
  title: string
  cover: string
  content: string
  publishedAt: Date = new Date()
  updatedAt?: number
}

export default BlogPost.crud()
The above code creates both a BlogPost model for our datastore and a route providing all HTTP request endpoints for our REST API. Meaning, we can use the route, /blogpost, to handle all CRUD requests made to our API with a few additional considerations.
ChiselStrike allows us to work both offline (in our development environment) and on the cloud (for production apps) using an SQLite database and a Postgres-like database respectively.
ChiselStrike has many obvious advantages. But out of all of them, the following stand out:
To avoid making this a chronological post about ChiselStrike’s features, we’ll go through it intuitively by trying to work on a real-life product prototype that obtains its data from a ChiselStrike server. And, while working through this app’s prototype, we’ll learn about ChiselStrike’s important concepts and API.
Let’s take inspiration from the following prototype of an ecommerce app.
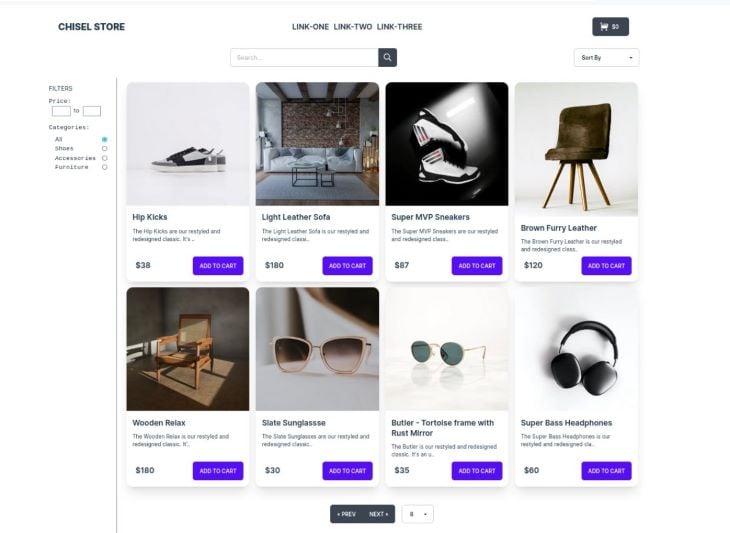
What we see above, is a high-fidelity layout of a product page for Chisel Store, our imaginary ecommerce site.
We’ll break down this store’s prototype into five sections by their functionalities, which we are going to demonstrate by providing data with ChiselStrike.
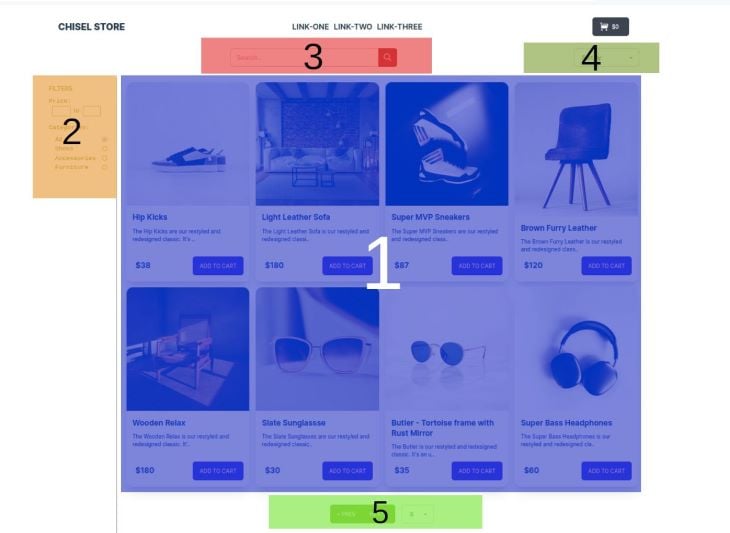
For brevity, let’s name the numbered sections by their functionalities so we can easily communicate what we’ll be working on:
N.B., the prerequisites to work with ChiselStrike are Node v14.18.0 or above and npm. TypeScript knowledge is helpful but not required. Depending on your working environment, an HTTP client might also be useful if you fancy quick testing of the ChiselStrike server’s routes. Knowledge of HTTP and its methods is also a bonus when working with REST APIs.
We need to create a new ChiselStrike project, which is going to provide data for our frontend web app, Chisel Store. To do so, we need to run the following command on the terminal inside our target directory:
npx [email protected] chisel-store
When the command has finished running, cd into the newly created directory chisel-store. This is the layout of the project files you will find inside:
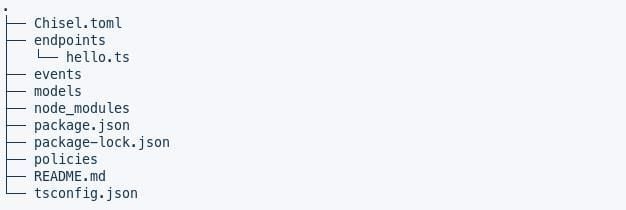
Chisel.toml is ChiselStrike’s configuration file where all essential top-level directories are specified (routes, models, policies, events) while tsconfig.json is the project’s TypeScript configuration. A Dockerfile is also generated for building Docker images of the ChiselStrike application, which we can then use to deploy ChiselStrike applications to Kubernetes, Fly.io, and others. We’ll see the uses of most of the top-level directories as we proceed.
To run the ChiselStrike server locally, run the shell command npm dev inside the project’s directory, subsequently running the dev script inside package.json:
npm run dev
Inside package.json, you will notice that ChiselStrike installed two dependencies, @chiselstrike/api and @chiselstrike/cli. @chiselstrike/api provides the runtime API for interacting programmatically with chiseld (the ChiselStrike server) inside a ChiselStrike project, while @chiselstrike/cli provides the ChiselStrike CLI used during development, facilitating the chisel dev script we’ve run to start our local server.
The above command started the server, which is accessible through the 8080 port. Hence, all of our API endpoints will use localhost:8080 as the base URL, prefixed with /dev (we’ll see later why routes are prefixed with /dev).
Note, we’ll be referring to localhost:8080 as sBASE_URL from here onward.
Try visiting localhost:8080/dev/hello to see the popular “Hello, world!” phrase as the resulting JSON output.
To fetch data for our Chisel Store project, we need to be able to construct routes through which we’ll be consuming data inside our app.
In ChiselStrike, routes are created by a combination of TypeScript .ts files placed inside the /routes and entities found within the /entities top-level directories respectively.
Routes are created by adding a TypeScript file inside the /routes directory, where the name of the file becomes part of the route’s path name: BASE_URL/dev/[TS_FILE_NAME].
These TypeScript files are sufficient to create API route endpoints as we’ve witnessed with the /dev/hello route above. Opening its .ts file, /routes/hello.ts, we find the following code:
// hello.ts
// Example ChiselStrike route
//
// To access the route, run:
//
// curl -d '{"hello": "world"}' localhost:8080/dev/hello
import { ChiselRequest, RouteMap } from "@chiselstrike/api";
export default new RouteMap()
    .get("/", function (): string {
        return "hello world";
    })
    .post("/", async function (req: ChiselRequest): Promise {
        return await req.json();
    });
This route file implements a node module that’s exporting a single RouteMap object that is defining the behavior of the HTTP GET and POST requests using the get() and post() handler functions respectively.
The handler functions accept a single ChiselRequest parameter that describes the client’s request. The ChiselRequest parameter is a subclass of the Request class from the Fetch API.
To create a product listing’s route for the Chisel Store app, we’ll create the following products.ts file under the /routes directory:
// routes/products.ts
import { RouteMap } from "@chiselstrike/api";

export default new RouteMap()
    .get("/", function (): [] {
        return [];
    })
When saving this file, chiseld will give you a nod by logging the message Applied: on the running terminal initiated with the npm run dev command.
Visiting the BASE_URL/dev/products route we created, we receive an empty JSON output. We expect this since we are returning an empty array inside the get() handler function. But since we need working data, we’ll need application data of some sort, in this case products’ data being returned to our Chisel Store application.
So, despite that the /products route was created above and is recognized by our project, it is insufficient for us. To make it useful, we need to couple it with a respective data model.
ChiselStrike provides us with a very simple way to define data models within projects. All we need to do is export a model class extending the @chiselstrike/api‘s ChiselEntity inside a TypeScript file from within the /models directory.
Let’s create a Products model for our app as follows:
// models/Product.ts
import { ChiselEntity } from "@chiselstrike/api"
// import { Category } from "./Category"

export class Product extends ChiselEntity {
  name: string
  price: number
  image: string
  details?: string
  soldOut: boolean = false
  // category: Category = new Category()
  createdAt: Date = new Date()
}
Just like with the products.ts file, saving the above file will prompt chiseld to give us an Applied: message on the running terminal.
Within the above class, we have defined name, price, details, soldOut, and createdAt as the properties of our Product model. We have declared details as an optional property by suffixing it with a ? as is done with optional TypeScript properties, meaning we are not required to provide a value for it when creating a new Product entity.
We have given false as a default value to soldOut and added the current date in milliseconds to the createdAt property.
For now, ignore the commented code because we’ll talk more about that later.
The ChiselEntity class acquired from ChiselStrike’s runtime API is a base class for all entities that we define in a ChiselStrike project. This class provides some functions for working with the entity programmatically.
The Product entity declared above gives us a sufficient data model to work with when trying to populate the Chisel Store’s product listing section. All we need is to find a way to make this data model pair with the /products route. We have seen this already in the introduction above when we were showing off ChiselStrike’s features.
To accomplish this, replace the code inside the endpoint file routes/products.ts with the following:
// routes/products.ts
import { Product } from "../models/Product.ts"

export default Product.crud()
Visiting the /dev/products endpoint again, we’ll get this output:
{
  "results": []
}
As we can see, an HTTP GET request has been handled in this instance.
Let’s try submitting data to this endpoint.
With your HTTP client of choice, submit the following JSON data with an HTTP POST request to the /dev/products route:
{
  "name": "Super Bass Headphones",
  "price": 60,
  "image": "https://asset-train.twic.pics/images/headphone-1.jpg"
}
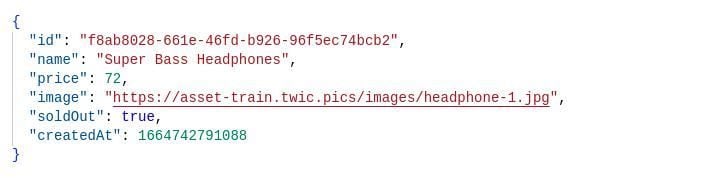
We should be getting the following JSON response if everything is in order:
{
  "id": "f8ab8028-661e-46fd-b926-96f5ec74bcb2",
  "name": "Super Bass Headphones",
  "price": 60,
  "image": "https://asset-train.twic.pics/images/headphone-1.jpg",
  "soldOut": false,
  "createdAt": 1664742791088
}
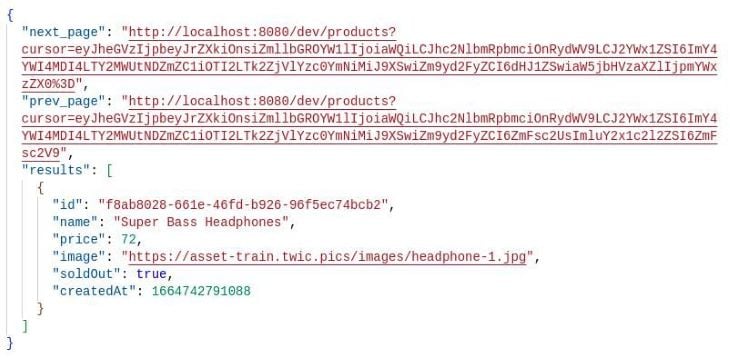
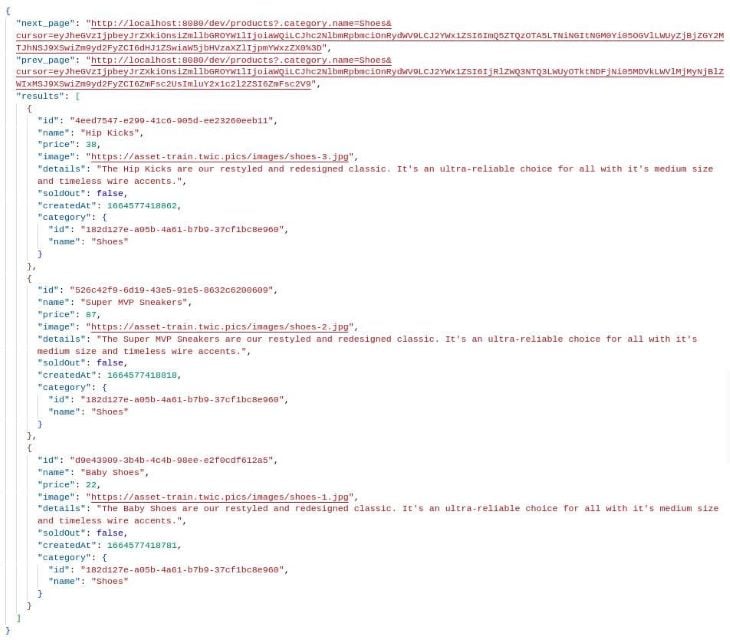
Now, try accessing the BASE_URL/dev/products endpoint once more. Below is the resulting JSON response to this request to our endpoint:
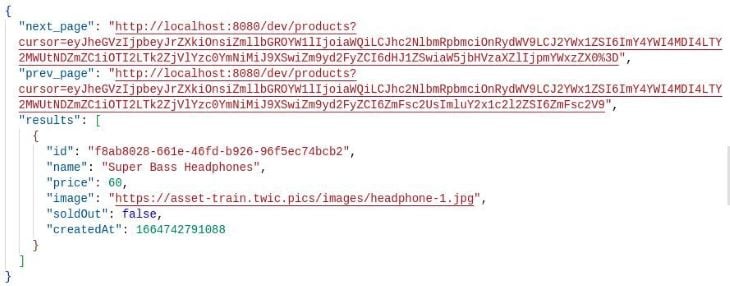
We’ll discuss the next_page and prev_page properties later. Placing our focus on the results property for now, we can see that the data we added on the previous POST request is listed as an item in this array.
The crud() method passed from the ChiselEntity class handles all the CRUD HTTP operations we expect from API endpoints — i.e., the creation, reading, updating, and deletion of data.
This is one of ChiselStrike’s most powerful features because, with the two lines of code inside the products.ts file, we can handle all of the basic HTTP operations that can be sent to our route. This would make for a smooth transition to production since we want CRUD operations handled when working not only on prototypes but to a meaningful extent when also running our production apps.
We have already seen the creation and reading of data, so now we’ll cover the part on updating and deleting created entities.
To update the data added to the datastore, we simply need to make an HTTP PATCH request toward our route, adding the unique id of the product we are trying to update as the last part of the endpoint path BASE_URL/dev/products/product_id.
Using the data we added last to our datastore, extract the obtained id from the POST response and place it on the product_id part of the route path above. With your HTTP client, make a PATCH request using the following JSON data as the payload:
{
  "price": 72,
  "soldOut": true
}
We should receive the following JSON response:
Before proceeding with a deletion request, visit the BASE_URL/dev/products once more to see the data we currently have. We can also see the changes that we made through the previous request:
To delete this piece of data from our datastore, all we need is to make an HTTP DELETE request passing the items’ id just like we did in the PATCH request.
If we visit the products endpoint after making the delete request, we see this JSON output:
"Deleted ID f8ab8028-661e-46fd-b926-96f5ec74bcb2"
Accessing the BASE_URL/dev/products afterward gives us an empty results property array as we had initially:
{
  "results": []
}
This part finalizes the first section of our Chisel Store application on product listings. We’ll be populating the section with data obtained through making HTTP GET requests to our ChiselStrike server in a short while; we just need to cover one more concept first.
To cover the second section of our Chisel Store prototype, product filters, we need to implement another of ChiselStrike’s useful features: entity relationships. Since our product filtering section expects a list of categories that a visitor may use to filter, we need to add a Category entity that will be used to place the products into their related group.
This is why we commented out the category property of our Product entity.
Create a Category.ts file inside the /models directory and add the following code inside it:
// models/Category.ts
import { ChiselEntity } from "@chiselstrike/api"

export class Category extends ChiselEntity {
  name: string
}
Head to the /endpoints directory and create an endpoint for this entity:
// models/categories.ts
import { Category } from "../models/Category.ts"

export default Category.crud()
The two files created above create an endpoint that handles all CRUD operations for the /dev/categories endpoint.
Now, back inside our models/Product.ts entity file, comment out the two lines handling the Category entity import and declaration of the category property:
// models/Product.ts
import { ChiselEntity } from "@chiselstrike/api"
import { Category } from "./Category"

export class Product extends ChiselEntity {
  name: string
  price: number
  image: string
  details?: string
  soldOut: boolean = false
  category: Category = new Category()
  createdAt: number = Date.now()
}
The terms “referred entity” and “referenced entity” are used to describe category and Product respectively in the code above, and this is how entity relationships are created in ChiselStrike.
To create a referenced Category entity as we create a new product, we need to pass its details on the category property.
Try making an HTTP POST request that is passing the following JSON payload to the /dev/products endpoint to see the results:
{
  "name": "Baby Shoes",
  "price": 22,
  "image": "https://asset-train.twic.pics/images/shoes-1.jpg",
  "category": {
    "name": "Shoes"
  }
}
Here is the expected JSON response:
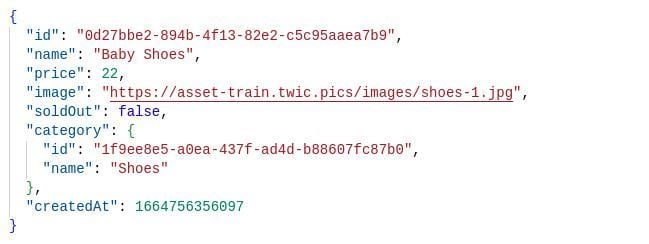
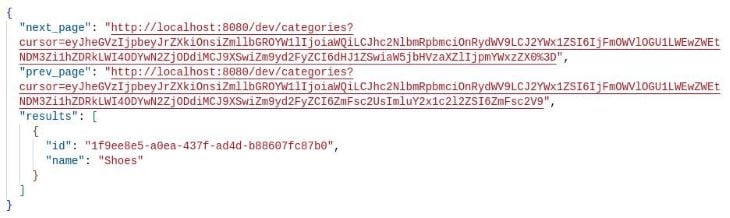
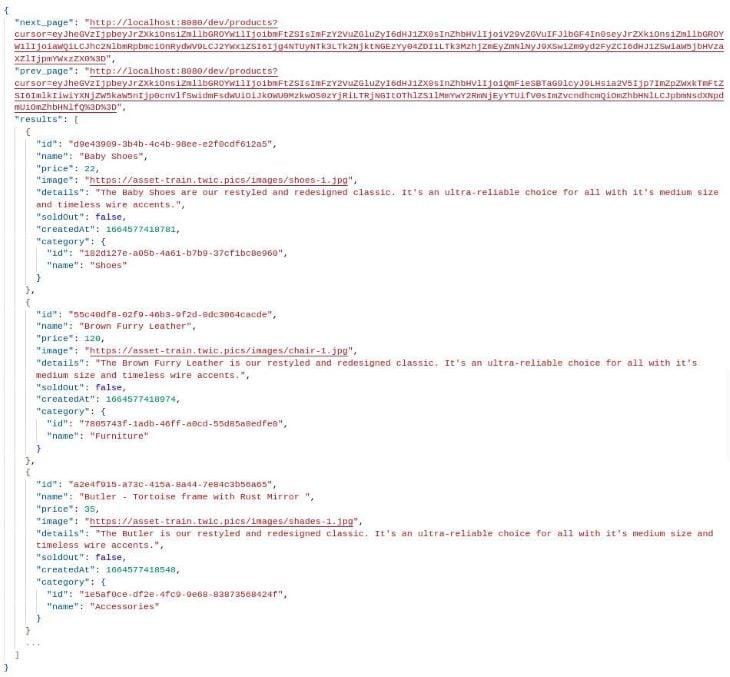
As we can see, a new category entity has been created per the result payload, and we can check on its existence by fetching the /dev/categories endpoint, getting the output below:
Adding a Category as a referenced entity to the existing referencing entity, Product, is a depiction of a ChiselStrike migration. This wouldn’t work if the Product entity had existing data. This is mainly because we were adding a new required data property, a behavior that ChiselStrike wouldn’t allow. You can read more on ChiselStrike entity migrations on this page.
Now that we have the Category model set up and running, we can use it within product filtering inside our app. We can now seed some data to our datastore.
To continue working with the Chisel Store example, you can clone its GitHub repository and run npm run dev inside the project to deploy the local server, followed by running node utils/seed.js to seed some data to our datastore. Or, if you don’t want to clone this repository, copy the code from the repo’s utils/seed.js file, which has some data we can use to seed the local ChiselStrike datastore with.
Let’s see how we can implement the filtering, limiting, and ordering of ChiselStrike endpoint results. We want to cater to the functionalities the remaining sections of our Chisel Store app need.
To add product filtering — a crucial feature inside any ecommerce website’s product listing page — we need to know how to implement filters on the ChiselStrike server’s routes.
ChiselStrike gives us access to several filters that we can pass as parameters to our routes, ultimately filtering the returned JSON results.
We can pass as many filtering parameters to the eroutes as allowed to get our intended results. The route filters can be roughly grouped into comparison and equality filters.
The supported comparison filters in ChiselStrike are as follows:
lt: less thanlte: less than or equal togt: greater thangte: greater than or equal tolike: similar to SQL LIKE, includes wildcards % and _unlike: similar to SQL NOT LIKE, includes wildcards % and _We apply comparison filters by prefixing the property in question with a period, .property_name, and suffixing it with the tilde-prefixed comparison filter ~. We then assign a relevant filter value to this complex query parameter.
Observing the product filtering section of our Chisel Store app, we need to filter the products being listed by price range and category.
We can filter the products by a price range in three possible ways, depending on the data being provided by the user:
price, we need to filter the returned products by applying only the gte operator on the price property, hence passing the query .price~gte with the provided price. To get all products above 50$, we will need to construct the route URL into BASE_URL/dev/products?.price~gte=50price, we need to filter the returned products by applying only the lte operator on the price property. To get all products below or equal to 120$, we will need to construct the route URL to be BASE_URL/dev/products?.price~lte=120price, we’ll need to pass two filters, gte and lte filters, assigning them the lower and higher prices respectively. Borrowing the previous price limits, we end up with the final route URL: BASE_URL/dev/products?.price~gte=50&.price~lte=120We can apply the like comparison filter to handle the product search section of our app. The like filter is suitable for handling search operations and behaves just like its SQL counterpart. In our case, our search results route URL would be constructed as BASE_URL/dev/products?.name~like=%search_term%.
N.B., as of this moment (@chiselstrike/api - v0.12.1), the like filter operates on one property per endpoint call.
This covers half of our products filter and finalizes the product search functionalities for the app.
The equality filter, =, operates by filtering entity properties with the exact value as the one passed as the parameter. Like the like filter, it only supports filtering one property per endpoint request.
Here is how we can construct a route to filter the product categories for the remaining half of the product filters section: BASE_URL/dev/products?.category.name=category_name.
Trying to list only the products belonging to the shoes category per the seed data provided above, we can visit this endpoint: BASEURL/dev/products?.category.name=categoryname. We should end up with the following results:
This completes the product filters section for our app. You can read more about the endpoint filtering properties that ChiselStrike supports here.
Onto our app’s fourth section, product sorting. We are going to enable sorting listed products by passing the sort parameter to our /products route.
To sort products in the order of a specific property, we need to pass the name of an existing entity property as the value of the sort parameter.
For example, to sort the returned products by the order of their names in our app, we need to construct the route URL as BASE_URL/dev/products?.category.sort=name. Fetching this endpoint will give us the following JSON output:
As you may have noticed, queried results are in ascending order by default. To get the sort in a descending order, prefix the property being passed with a minus - sign. In this case, we’d modify our route URL to BASE_URL/dev/products?.category.sort=name.
This covers the product sorting section of our ecommerce prototype.
No one wants to see an endless page of results, and we can implement lazy loading results to better this, but sometimes users are just scrolling down to access your footer and not trying to see more items. Hence, when not thoughtfully implemented, lazy loading may account for just as bad of a user experience.
Pagination is not only a good frontend implementation, but likewise with backend data fetching. You don’t want a client to fetch a million rows of data from a backend because that might be an expensive transaction for both parties, the server and client.
ChiselEntity class’s crud() method paginates fetched data by capping the returned data at a thousand elements per page. This is why we saw the next_page and prev_page properties accompanying all of the GET requests made to the server in previous examples.
The cursor query accompanying the next and previous pages is ChiselStrike’s implementation of cursor-based paging. In short, the cursor ensures that you only get entities that come after the last element on the current page and avoids pitfalls such as getting duplicates if insertions or deletions happen as we transition between pages.
To modify Chisel Store’s default paging capacity, we use the page_size query parameter. This parameter sets up the number of items we want returned per request.
To implement pagination for Chisel Store, we pass a reasonable number as the value for the page_size parameter.
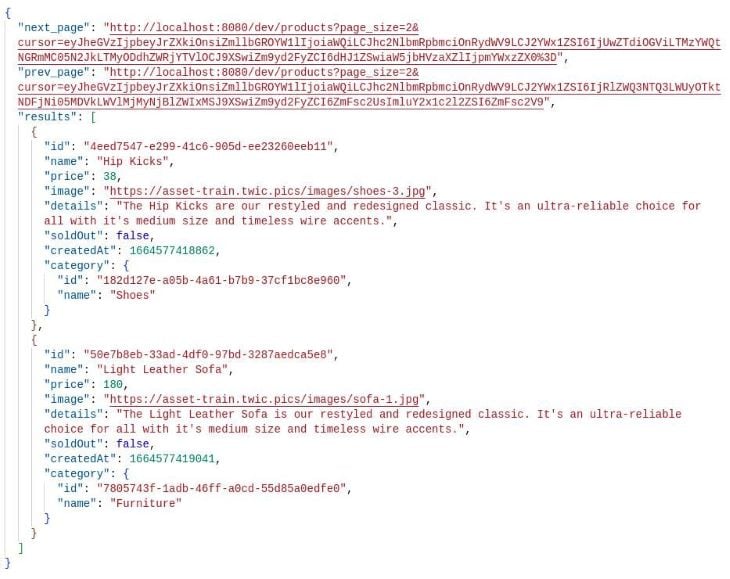
Passing 2 as the page_size to the products route, BASEURL/dev/products?pagesize=2, we get the following result:
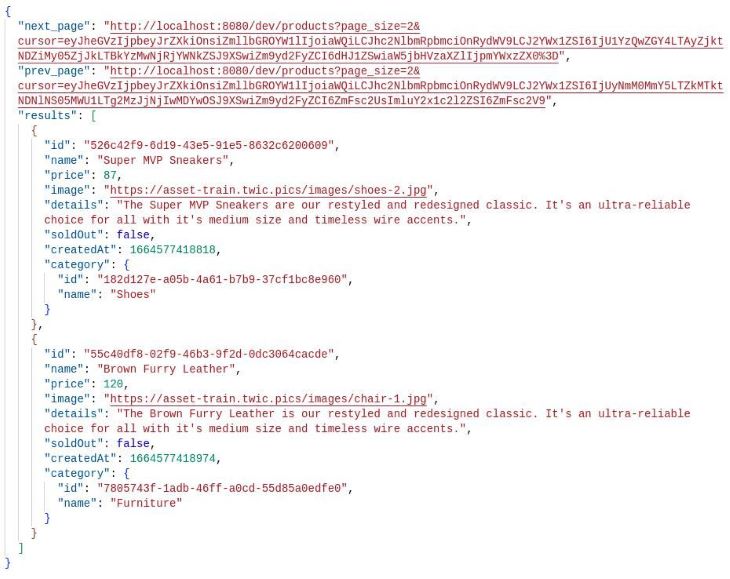
Visiting the endpoint provided in the next_page property of the result takes us to the next page in the data pagination order, which has this data:
Then, following the prev_page endpoint URL from the second result returns us to the data page from the earlier response.
We can then implement this on the pagination section of our app, using the previous page button to trigger data fetching from the prev_page URL and likewise with the next page pagination button with the respective next_page URL.
This ultimately sums up the pagination section of our app, and the final part of the functionalities we intend to implement in this prototype.
As we can see in this project, a high-fidelity ecommerce prototype, we were able to accomplish the task of providing the data to make it fully dynamic and presentable enough to proceed to the next phase in its development lifecycle. We were able to do this without having to scour through all of ChiselStrike’s API.
This short demonstration lays out how easy it is to carry out rapid prototyping with ChiselStrike.
You can visit the GitHub repository for our Chisel Store app here.
Not only does ChiselStrike provides us with a superb starting point for prototyping projects, but it also goes beyond that initial level by facilitating a smooth transition into production.
Let’s see some of its features.
Beyond simple CRUD requests, ChiselStrike allows us to customize our methods to suit unique use cases.
We can easily customize a CRUD endpoint to restrict certain HTTP methods. Let’s look at this example:
// routes/products.ts
import { Product } from "../models/Product";
import { crud, responseFromJson } from "@chiselstrike/api";

export default crud(
  Product,
  {
    deleteAll: false,
    deleteOne: false,
    createResponse: (body: unknown, status: number) => {
      if (status < 400){
        const data = body["results"] || body;
        return responseFromJson({ data }, status);
      }
      return responseFromJson({ error: body }, status);
    }
  }
)
We’ve restricted access to DELETE requests to the /dev/products route by setting the deleteAll and deleteOne properties of the configuration object passed as the second argument to the top-level crud() function to false.
Additionally, we’ve modified the data being fetched on this route by placing it inside a data property, stripping out the pagination properties for successful requests and returning error information for unsuccessful ones.
When we make HTTP DELETE requests to the /dev/products route, we will receive this response:
Method DELETE is not supported for "/products/<ROUTE_ID>"
We can go further and fully customize our our route endpoints using ChiselStrike’s RouteMap API:
import { Product } from "../models/Product"
import { RouteMap, ChiselRequest } from "@chiselstrike/api"

async function getAllProducts() : Promise<Product[]>{
  return Product.findAll();
}

async function getOneProduct(req: ChiselRequest) : Promise<Product>{
  const id = req.params.get("id");
  return Product.findOne({id});
}

export default new RouteMap()
  .get("/", getAllProducts)
  .get("/:id", getOneProduct)
In the above code, we are using the RouteMap API, which gives us the independence to specify routes by HTTP method. It also enables us to observe GET requests made to the products route /dev/products and those which pass an entity’s id: /dev/products/. We are handling these endpoint requests using the getAllProducts() and getOneProduct() functions.
ChiselStrike supports the application adding and hot reloading secrets accessed at runtime.
N.B., always treat secrets with care and apply safety practices whenever using them in a VCS environment.
To add secrets to a ChiselStrike project, create a .env file at the root of our project and add the secrets in JSON:
{
  "secret": "Not so secretive",
  "vcs": {
    "randomkey": "livingdangerously",
    "githubkey": "stageandcommitmeatyourownperil"
  }
}
We can then access the keys by using the getSecret method exported from @chiselstrike/api as follows. Create a new secrets route inside our ChiselStrike app, then visit it to see the secrets information returned:
// routes/secrets.ts
import { getSecret, RouteMap, responseFromJson } from "@chiselstrike/api";

export default new RouteMap()
  .get("/", async function(){
    const secret = getSecret("vcs");
    return responseFromJson(secret)
  })
Sometimes, we need to be working on different branches of our projects, trying new features and experimenting inside branches that are more likely to experience errors.
ChiselStrike enables us to version our API into more than the initial /dev/ root endpoint we’ve been accessing. The /dev part of the API routes we’ve been accessing up to this point is a “development” version of the API since ChiselStrike treats API versioning as a first-class citizen.
Regardless of API versioning being a production-oriented workflow, we can try it within our local projects; we just have to make ample changes to what we’ve been working with.
Add a new start script to the project’s package.json file:
{
  "scripts": {
    "dev": "chisel dev",
    "start": "chisel start"
  }
}
Halt the npm run dev command we were running initially and start the server using start instead: npm run start. Our project should resume as usual, with the /dev routes accessible.
To create a new branch, test, in our project directory, run:
npx chisel apply --version test
Chisel should report the addition of this new API version with the log message INFO - Version "test" is ready. We can now access all of the previously added routes prefixed with /test/.

Visiting the /test/products endpoint should return an empty response, while the old /dev prefixed routes should be working as normal.
To populate the test version of our API, we can make the same data population requests we made to the dev API, only making sure that we are replacing the dev with test for the newly created API version endpoints.
We can also choose to migrate the data from our old dev datastore to test:
npx chisel populate --version test --from dev
On successful data migration, we should receive an OK message from the terminal.
Try visiting the test branch’s /products route once more. It should now contain a carbon copy of the data returned when accessing the dev API /products endpoint.
Read more on ChiselStrike API versioning here.
Since not everything can fit into this post, here is a list of more of ChiselStrike’s features.
findMany() and findOne()Not only does ChiselStrike enable efficient prototyping, but it also involves as small of a source code footprint as possible. ChiselStrike covers essential operations with the power of the ChiselEntity class and its powerful crud() method.
You’ve gotten a sampling of what ChiselStrike can do with our demo, but feel free to try ChiselStrike in other apps, like those with read-only interfaces or dynamic features like forms and polls.
Install LogRocket via npm or script tag. LogRocket.init() must be called client-side, not
server-side
$ npm i --save logrocket

// Code:

import LogRocket from 'logrocket';
LogRocket.init('app/id');
// Add to your HTML:

<script src="https://cdn.lr-ingest.com/LogRocket.min.js"></script>
<script>window.LogRocket && window.LogRocket.init('app/id');</script>
Hey there, want to help make our blog better?
Join LogRocket’s Content Advisory Board. You’ll help inform the type of content we create and get access to exclusive meetups, social accreditation, and swag.
Sign up now
Discover how the Interface Segregation Principle (ISP) keeps your code lean, modular, and maintainable using real-world analogies and practical examples.

<selectedcontent> element improves dropdowns

Learn how to implement an advanced caching layer in a Node.js app using Valkey, a high-performance, Redis-compatible in-memory datastore.

Learn how to properly handle rejected promises in TypeScript using Angular, with tips for retry logic, typed results, and avoiding unhandled exceptions.


