Editor’s note: This post was reviewed for accuracy on 26 March 2024 by Isaac Okoro regarding updates and changes to Preact Signals since the article’s first publication in 2022, as well as to add a section comparing Preact Signals to other popular state management solutions.

Preact is a small, lightweight alternative to React with the same modern API. It comes with support for Signals, a performant state management library with a set of reactive primitives for managing the application state.
Signals automatically updates the state when the value changes, comes with no dependency arrays, and updates the DOM directly — making it lightning-fast. The Preact team claims this makes Signals a better way to manage state.
In this article, we will learn how Signals works, its benefits, features, and more.
Signals is a library written in pure JavaScript, which means we can use it in Vue.js, Angular, Svelte, and any application with a JavaScript file. While it can be used in any JavaScript file, the Preact team also developed packages for Preact and React. Signals was built by drawing inspiration from Solid and Vue.
According to the Preact Signals docs, at its core, a signal is an object with a .value property that holds some value. Accessing a signal’s value property from within a component automatically updates that component when the value of that signal changes. We will understand this more and see how it works later in the article.
At the time of this writing, you can install Preact Signals into your project by running the command below:
npm install @preact/signals
The Signals team comprises developers with years of experience building software applications for startups and large-scale businesses. Over time, they’ve discovered a recurring problem with managing the application state.
To understand the problem Signals aims to solve, let’s consider a real-world scenario. Say a parent component that holds some state has two children components, and one of the children has to access that state:
import { useState } from "react";

export default function App() {
  const [count, setCount] = useState(0);
  function addToCount() {
    setCount((count) => count + 1);
  }
  return (
    <div className="App">
      <Parent count={count} addToCount={addToCount} />
    </div>
  );
}

function Parent({ count, addToCount }) {
  return (
    <div>
      <ChildOne />
      <ChildTwo count={count} addToCount={addToCount} />
    </div>
  );
}

function ChildOne() {
  return <p>A Dummy Counter App</p>;
}

function ChildTwo({ count, addToCount }) {
  return (
    <div>
      <span>{count}</span>
      <div>
        <button onClick={addToCount}>+</button>
      </div>
    </div>
  );
}
In the code snippet below, the Parent acts as a container that passes the count state to ChildTwo, while ChildOne is a stateless component. The problem lies in what happens when we click the button to update the state.
Parent, ChildOne, and ChildTwo all re-render, even though ChildTwo is the only component directly using the state. While we can address this problem of unnecessary re-renders using methods such as memoization, the Preact team aims to eliminate this issue altogether with Signals.
We can address this performance issue of unnecessary re-renders by switching to Signals:
import { signal } from "@preact/signals"; //importing signal

export default function App() {
  const count = signal(0); //creating the signal

  function addToCount() {
    return (count.value = count.value + 1); //updating the count
  }

  return (
    <div className="App">
      <Parent count={count} addToCount={addToCount} />
    </div>
  );
}

function Parent({ count, addToCount }) {
  return (
    <div>
      <ChildOne />
      <ChildTwo count={count} addToCount={addToCount} />
    </div>
  );
}

function ChildOne() {
  return <p>A Dummy Counter App</p>;
}

function ChildTwo({ count, addToCount }) {
  return (
    <div>
      <span>{count.value}</span> //accessing the count value
      <div>
        <button onClick={addToCount}>+</button>
      </div>
    </div>
  );
}
The application has become more performant by changing only four lines of code. How does Signals achieve this? How does it prevent unnecessary re-rendering and ensure optimal performance when reacting to state updates?
This is possible because a signal is an object that contains a value. Unlike the useState scenario that passes the state directly through the component tree, Signals only passes the object, which acts as a reference to the value. This ensures that only the components that access the .value of the signal object render when the state changes.
Signals track when their value is accessed and updated. Accessing a signal’s .value property from within a component automatically re-renders the component when that signal’s value changes.
As a result, a signal can be updated without re-rendering the components it was passed through because those components see the signal and not its value.
Signals was built with performance in mind, and the following features and behaviors make it distinct. The team behind Signals describes it as follows:
The first benefit of managing state with Signals is that Signals does not re-render a whole component or application when state changes.
Instead, it updates the part of the application attached to the state value being tracked. This ensures that applications remain performant while ensuring reactivity in response to user actions.
According to the documentation, what makes Signals unique and great is that:
State changes automatically update components and UI in the most efficient way possible. Automatic state binding and dependency tracking allows Signals to provide excellent ergonomics and productivity while eliminating the most common state management footguns.
Second, we can declare global signals and import them into children components throughout the application. It simplifies the complexities around state management by providing a simple and intuitive plug-and-play API that is easy to use.
Lastly, we don’t have to set up a dependencies array like React’s useEffect Hook. Signals will automatically detect dependencies and call effects when dependencies change.
Let’s implement our knowledge of Signals and use it to manage the state of a simple counter application.
First, start by setting up a fresh React app with npx create-react-app signals-react-app. Then, install the React package using npm install @preact/signals-react.
Copy the code below into your App.js file to set up the counter application:
import { signal } from "@preact/signals";

const count = signal(0);

function increaseCount() {
  return (count.value = count.value + 1);
}
function reduceCount() {
  return (count.value = count.value - 1);
}

export default function App() {
  return (
    <div className="App">
      <span>{count}</span>
      <div>
        <button onClick={reduceCount}>-</button>
        <button onClick={increaseCount}>+</button>
      </div>
    </div>
  );
}
In the code above, we accessed the signal object from the @preact/signals-react package and used that to set up a count state. The value we passed to the signal is now accessible from its .value property.
Second, we set up two functions, increaseCount and reduceCount, which increase and reduce the value of the count, respectively. We also passed the functions to each button’s onClick handlers.
This is a basic implementation of Signals, but it does a good job of showing us how it works.
Besides the signal object, Signals also has a computed function that we can use to set up derived states. With computed, we can create a new signal from the other signals’ values. The returned computed signal is read-only and is automatically updated when any signal that depends on it changes.
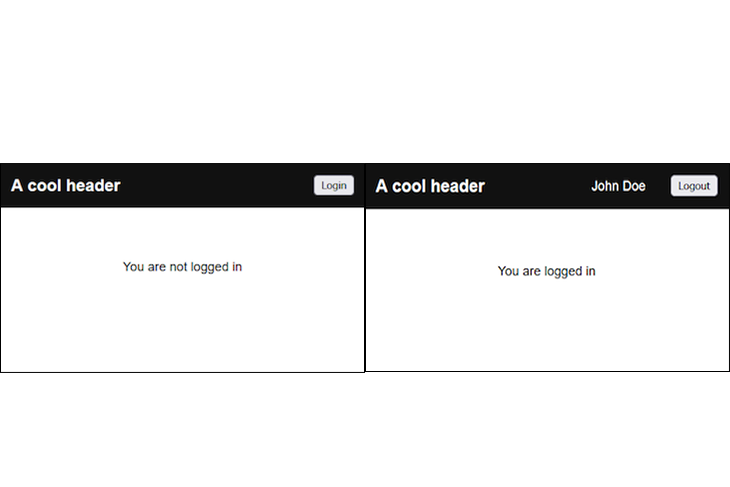
Let’s set up a dummy user authentication application to see how computed works. Here are some pictures of what we will build:
We will start by creating an AuthSignal.js file containing the state and authentication logic. Copy and paste the following code into the file:
import { signal, computed } from "@preact/signals";

export const user = signal(null); //the default state

//derived state based on whether a user exists
export const isLoggedIn = computed(() => {
  return !!user.value;
});
In the code above, we imported signal and computed from @preact/signals-react. We also set up a user signal with a default value of null, meaning there is no logged in user at first.
We also used the user signal to derive the value of isLoggedIn. If a user exists, isLoggedIn will be true. Then, we exported user and isLoggedIn for use in other parts of the application.
The Header component consists of the logged in user’s name and two buttons: one for logging in and the other for logging out.
To set it up, copy and paste the code below:
import { user } from "../AuthSignals";

const dummyUserData = {
  name: "John Doe",
  email: "[email protected]"
};
export default function Header() {
  return (
    <header>
      <h1>A cool header</h1>
      <ul>
        {user.value && <li>{user.value.name}</li>}
        {!user.value ? (
          <li>
            <button onClick={() => { user.value = dummyUserData }}>
              Login
            </button>
          </li>
        ) : (
          <li>
            <button onClick={() => { user.value = null }}>
              Logout
            </button>
          </li>
        )}
      </ul>
    </header>
  );
}
Let’s break it down and look at what we did:
user signal from AuthSignalsdummyUserData containing some random user detailsuser signal’s valueuser signal with the dummyUserDatauser signal to nullHome componentThe Home component displays a simple message notifying us if we are logged in or not. Let’s set it up:
import { isLoggedIn } from "../AuthSignals";
export default function Home() {
  return (
    <div>
      <span>
        {isLoggedIn.value ? "You are logged in" : "You are not logged in"}
      </span>
    </div>
  );
}
Remember, isLoggedIn is a derived state with a Boolean value that changes based on the value of user signal. We conditionally render a message base on the value of isLoggedIn.
Finally, we bring the components together in the App.js file:
import Header from "./components/Header";
import Home from "./components/Home";
export default function App() {
  return (
    <div>
      <div className="App">
        <Header />
        <Home />
      </div>
    </div>
  );
}
With that, we have learned more about computed and used it to create a dummy user authentication system.
Like Preact, Solid also comes with its own state management solution called Signals. As we saw earlier, Solid is one of the frameworks from which the Preact team drew inspiration.
Solid provides a createSignal function that is similar to React’s useState Hook:
import { createSignal } from "solid-js";

const [count, setCount] = createSignal(0);

function Counter() {
  const increment = () => setCount(count() + 1);

  return (
  <button type="button" onClick={increment}>
    {count()}
  </button>);
}
It will take the initial state as a parameter and return two items we can access by array destructuring. The first item in the array is the getter and the second item is the state’s setter.
Note that, like Preact Signals, we don’t need to keep createSignal inside the component function. Similar to the computed function in Preact Signals, Solid also provides a way to create derived signals:
const doubleCount = () => count() * 2;

return (
  <button type="button" onClick={increment}>
    {count()}
    <div>Count: {doubleCount()}</div>;
  </button>);
Although the two-state management packages share some similarities, there are some differences between the two.
First, Preact and Solid’s Signals have different APIs, where Solid’s implementation is similar to React’s useState. Solid’s method for creating derived signals is different from Preact’s. And unlike Preact, Solid’s Signals can only be used in Solid applications.
Let’s compare Signals to other proven and battle-tested state management solutions:
| Feature | Signals | Redux | MobX | Zustand | Context API |
|---|---|---|---|---|---|
| Learning Curve | Low | High | Medium | Low | Low |
| Performance | High | Moderate | High | Good | Moderate |
| Centralized Store | Yes | Yes | No | Yes | No |
| Complexity | Simple | Complex | Medium | Simple | Simple |
| Use Cases | Simple and medium complex state management | Commonly used in large-scale applications | Suitable for various project sizes | Commonly used in large-scale applications | Suitable for small to medium projects |
Signals are easy to use and compared to other state management solutions, they have a very low learning curve. With that being said, there are occasions where Signals might not be robust enough for your project, and you might need to choose another state manager.
Project size and complexity is one thing to consider when choosing a state management solution. Signals are great for smaller projects or those with simpler state management needs. When the project size becomes large and complex, then using another state manager like Redux or Zustand is a better idea.
Team expertise is another reason to consider before selecting a state manager for your project. Signals are a great choice if the developers in your team have prior experience with React and the useState hook.
Preact Signals is a fresh and welcoming solution to the problems related to state management issues. It is still relatively new, but it appears to have a promising future because of its minimalistic and simple architecture.
While you may not be immediately sold on using it for large-scale projects, consider trying it out in personal and practice ones. You may fall in love with it. Grab the code for the demo applications we built through the counter app and user auth system.
Install LogRocket via npm or script tag. LogRocket.init() must be called client-side, not
server-side
$ npm i --save logrocket

// Code:

import LogRocket from 'logrocket';
LogRocket.init('app/id');
// Add to your HTML:

<script src="https://cdn.lr-ingest.com/LogRocket.min.js"></script>
<script>window.LogRocket && window.LogRocket.init('app/id');</script>

Discover how React Fiber works under the hood. Learn how React builds the DOM, handles concurrent rendering, and works alongside React 19 features and the new React Compiler.

Learn how to use Skybridge, an open-source React framework, to build and deploy cross-platform AI apps and interactive UI widgets for ChatGPT, Claude, and MCP clients from a single codebase.

Learn how to set up Meilisearch, index documents, and build keyword, semantic, and hybrid search with AI-powered retrieval.

Compare pnpm and npm across security defaults, disk usage, dependency strictness, and workspace policy to decide which package manager fits your project.
Would you be interested in joining LogRocket's developer community?
Join LogRocket’s Content Advisory Board. You’ll help inform the type of content we create and get access to exclusive meetups, social accreditation, and swag.
Sign up now

