Although React’s components have a fast lifecycle, they suffer due to excessive re-rendering, harming production time and performance overall. While in smaller applications, these unnecessary re-renders typically go unnoticed, as a UI grows with heavier components rendering on the component tree, both developers and users experience the negative side effects.

To combat the problem, developers have introduced third-party performance optimization libraries like re-reselect, a wrapper for the popular library Reselect, which is used mainly with Redux to enhance performance by writing memoized selectors. In this tutorial, we’ll explore re-reselect by creating a simple to-do list application.
To follow along with this tutorial, you should be familiar React and Reselect. Let’s get started!
Essentially, selectors are functions that take Redux state as an input and return a value derived from that state. In React Redux, when the useSelector() Hook’s reducer action is dispatched, it runs for every mounted component, recalculating the selector with every dispatch and causing performance issues.
We often perform expensive calculations in selector functions. There are instances where our selector does not see any value change despite dispatching actions for the reducer or re-rendering the component. Ideally, the selector should return the same value without any calculations.
However, after a component re-renders in React, everything is created with a new reference. Therefore, the selector function has to perform the expensive calculation again.
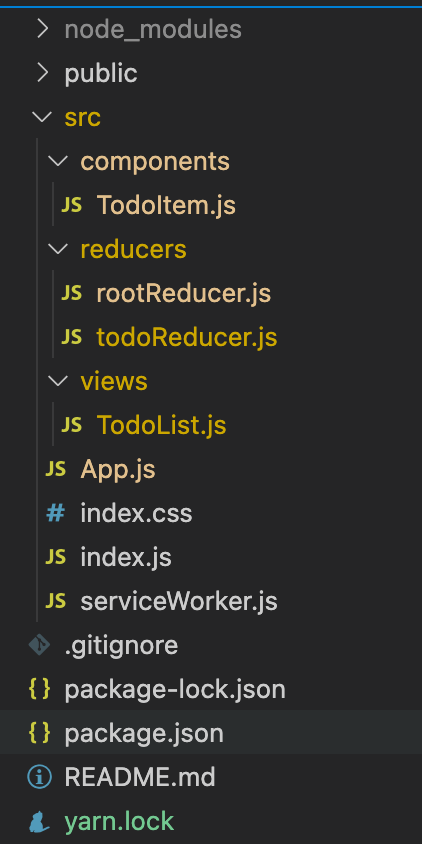
Let’s see an example of this with code; assume that we have a to-do list application with the central state in the reducer and the following folder structure:
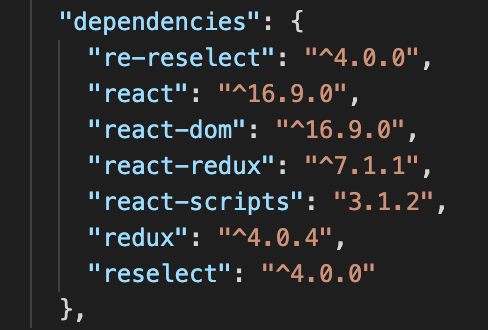
We’ll install the following dependencies in our project:
To create the application store and set the entry point element node root, add the following code to index.js:
import React from 'react';
import ReactDOM from 'react-dom';
import './index.css';
import { Provider } from 'react-redux';
import { createStore } from 'redux';
import rootReducer from './reducers/rootReducer';
import App from './App';
import * as serviceWorker from './serviceWorker';

const store = createStore(rootReducer)


ReactDOM.render(
<Provider store={store}><App /></Provider>, document.getElementById('root'));


serviceWorker.unregister();
Next, we’ll generate the main representational component for rendering our application’s layout. Add the code below to app.js:
import React from 'react';
import TodoList from './views/TodoList';

function App() {

   return (
       <div className="App">
           <main className="container">
               <div className="divider"></div>
               <TodoList/>
           </main>
       </div>
   );
}

export default App;
todoReducer.js contains the central state for our application, which is extracted by the selector functions:
const initState = {
   todoList: [
       {
           id: 1,
           content: 'Play video game',
           weight:1
       }, {
           id: 2,
           content: 'Learn nodejs & python',
           weight:2

       }, {
           id: 3,
           content: 'Join meetup event',
           weight:3

       }
   ]
}

const todoReducer = (state = initState, action) => {
   switch (action.type) {
       case 'ADD_TODO':
           return {
               ...state,
               todoList: [
                   ...state.todoList,
                   action.payload
               ]
           }
       case 'REMOVE_TODO':
           return {
               ...state,
               todoList: action.payload
           }
       default:
           return state
   }
}

export default todoReducer;
In rootReducer.js, we’ll combine all of the reducers in the application:
import todoReducer from './todoReducer';
import {combineReducers} from 'redux';

//Combine all the sub reducers
const rootReducer = combineReducers({
   todos:todoReducer
})

export default rootReducer
We have a TodoItem that renders the reducer’s todo state. Each item has a cross icon that will dispatch an event, deleting that specific item based on its ID:
import React from 'react';
import {useSelector, useDispatch} from 'react-redux';

//Single todo item component
const TodoItem = (props) => {
   const todoList = useSelector(state => state.todos.todoList)
   const dispatch = useDispatch();

   const removeTodoItem = (todoId) => {
       let newTodoList = todoList.filter(item => item.id !== todoId);
       dispatch({type: 'REMOVE_TODO', payload: newTodoList})

   }

   return (
       <li className="collection-item" key={props.item.id}>{props.item.content}
           <span
               onClick={() => {
               removeTodoItem(props.item.id)
           }}
               className="secondary-content">
               <i className="remove-btn material-icons blue-text">clear</i>
           </span>
       </li>
   );
}

export default TodoItem;
Finally, we’ll create a component called TodoList.js, where we call our selectors along with a list of empty nodes, making the component extensive for the DOM:
import React,{useState} from 'react';
import { useSelector,useDispatch } from 'react-redux';
import TodoItem from '../components/TodoItem';


const TodoList = () => {


 const todoList = useSelector(state => state.todos.todoList.filter(todo => todo.content.includes('a')));


 const dispatch = useDispatch();

 const [inputTodo,setInputTodo] =  useState('');

 const handleInput = (e)=>{
   setInputTodo(e.target.value);
 }

 //Handle onClick event
 const addNewTodo = ()=>{
   //Valid input value
        let newTodoObject={
           id: Math.random(),
           content:inputTodo,
           weight:Math.random(),

       }
        //Add new todo item into List with the action
       dispatch({type:'ADD_TODO',payload:newTodoObject});
       setInputTodo('');
         function returnBlankNodes(){
           let nodes = [];
                   for (let i=0;i<10000;i++) {
                   nodes.push(<p></p>)
   }
                   return nodes
 }
 }

   return (
       <section id="section-todo">
       <h3 className="center-align white-text blue">Todo List</h3>
       {
           todoList.length>0?
           (<ul className="collection">
           {
             todoList.map(item => {
               return <TodoItem key={item.id} item={item} />
             })
           }
         </ul>):
         (<p className="center-align">You don't have anything to do! Awesome!</p>)
       }

       <div className="row">
       <p className="red-text err-msg col s12 center-align">
       </p>
       <div className="input-field col s10">
       <input onChange={handleInput} value={inputTodo} placeholder="Add todo..." id="todo-input" type="text" />
       <label htmlFor="todo-input" className="active">New Todo</label>
       </div>

       <button className="btn col s2 blue" onClick={addNewTodo} >Add</button>
       </div>
       {returnBlankNodes()}

     </section>
     );
}
export default TodoList;
We are taking the todoList from our store and rendering the component on the browser. The list is then extracted by the todoList selector with filtering applied to it.
Currently, the todoList is recalculated with each render. Anytime we enter anything in our text field, the state of our component changes. Ideally, the selector should run only when we make a change in the Redux store, for example, when we add a new to-do item.
If there are hundreds of items in our Redux store, the todoList selector will be CPU extensive. In these cases, we have to use memoization, which will run the selector only when the value of todoList changes in our store.
We can use re-reselect to create memoized selectors. The result will be stored in the memory, and it will be fetched only if the value doesn’t change. Each selector has its own memoization, meaning it cannot cache multiple selectors.
To better understand this, let’s consider another following example:
import { createSelector } from 'reselect'

const getTodosSelector = state => state.todos.todoList

const getTodosWithLetter = createSelector(
   getTodosSelector,
   (state,Letter)=>Letter,
   (toDos,Letter) => toDos.filter(todo.content.includes(Letter))
)
const a=getTodosWithLetter(state,’a’) //cache created
const e=getTodosWithLetter(state,’e’)  //cache invalidated
const a_again=getTodosWithLetter(state,’a’) //cache created again.

a!===a_again.
In the code snippet above, we created a selector using Reselect that takes an alphabet and filters the results based on it. Currently, one selector is shared between all of the English letters, however, the selector can have a cache for only a single letter.
We could create selectors for each individual letter, however, this approach is tedious. As we can see above, we have a, e, and a_again. At first, the selector creates a cache for letter a, but after providing a different letter, the cache is invalidated and a new cache is created for the letter e. Ideally, creating a selector with a different letter should add a new cache without overriding the previous one.
Instead, let’s re-write the code above with re-reselect as follows:
import {createCachedSelector} from 're-reselect';

const getTodosSelector = state => state.todos.todoList

const getTodosWithLetter = createCachedSelector(
   getTodosSelector,
   (state,Letter)=>Letter,
   (toDos,Letter) => toDos.filter(todo.content.includes(Letter))
)(
 (state, Letter) => Letter // Cache selectors by Letter name
);

const a=getTodosWithLetter(state,'a') //cache created
const e=getTodosWithLetter(state,'e')  //new cache created
const a_again=getTodosWithLetter(state,'a') //fetched from cache
// memoization is preserved among different components
To use the code above, we must simply import createCachedSelector. Notice that the syntax is almost similar to Reselect.
Additionally, we must tell the selector about the cache criteria. In the code above, we have specified it with the letter name. Instead of destroying the previous cache, a new cache is created for a single selector.
Reselect is already very performant, but re-reselect takes things one step further by introducing deep cache management. In our example above, we have created three selectors.
When we used Reselect earlier, our filter ran three times because new caches were constantly recreated. however, with re-reselect, our filter ran only two times. With a_again, it fetches the data from our cache against the letter.
To integrate re-reselect with React Redux, let’s create a new file called todoSelector.js and add the following code:
// todoSelector.js

import {createCachedSelector} from 're-reselect';

export const getTodosSelector = state => state.todos.todoList

export const  getTodosWithLetter = createCachedSelector(

    getTodosSelector,
    (state,Letter)=>Letter,
    (todoList,Letter) => todoList.filter(todo=>todo.content.includes(Letter))
 )(
  (state, Letter) => Letter // Cache selectors by Letter name
 );
Import it in TodoList.js as follows:
import { getTodosWithLetter } from './todoSelector';
const todoList = useSelector(state=>getTodosWithLetter(state,'a'));
Let’s run the project in the browser to see the result. Start the project by running the following command:
yarn start
Voila, we’ve successfully added a cached selector with re-reselect!
In this article, we learned how to create selectors that have deeply managed caches. We built an example to-do list application with a component that recalculated on each re-render. After integrating re-reselect, the selector will only run when we make a change in the Redux store.
If you have expensive selectors in your project, re-reselect can drastically improve your app’s performance, especially if you have a larger application. I hope you enjoyed this tutorial.
Install LogRocket via npm or script tag. LogRocket.init() must be called client-side, not
server-side
$ npm i --save logrocket

// Code:

import LogRocket from 'logrocket';
LogRocket.init('app/id');
// Add to your HTML:

<script src="https://cdn.lr-ingest.com/LogRocket.min.js"></script>
<script>window.LogRocket && window.LogRocket.init('app/id');</script>

Debug RSC hydration mismatches in production with Next.js instrumentation, Suspense isolation, HTML diffing, and CI smoke tests.

Explore why npm dependencies are a major supply chain security risk and how to protect JavaScript apps from compromised packages and transitive threats.

Enabled React Compiler v1.0 on a production Next.js app. Here’s every warning, breakage, and silent opt-out I documented — and what actually worked.

We built the same app in TanStack Start RSC and Next.js RSC. TanStack shipped 40% less JS and built 4x faster — but Next.js is still the safer production bet.
Would you be interested in joining LogRocket's developer community?
Join LogRocket’s Content Advisory Board. You’ll help inform the type of content we create and get access to exclusive meetups, social accreditation, and swag.
Sign up now