Expo is an open-source platform that makes developing cross-platform iOS and Android mobile apps much easier than before. The Expo SDK is a series of native libraries for each iOS and Android platform, and it allows JavaScript to access the system features of the device such as the camera, push notifications, local storage, contacts, and other hardware and operating system APIs.

The Replay is a weekly newsletter for dev and engineering leaders.
Delivered once a week, it's your curated guide to the most important conversations around frontend dev, emerging AI tools, and the state of modern software.
To install Expo, you need Node.js version 12 or newer in your machine because Expo’s command-line tools and dependency management relies on the Node platform. You can check your Node version by running the Node -v command on your terminal.
Expo offers a command-line interface called Expo CLI. It is used to test the app while it’s being developed either in iOS or Android.
npm install -g expo-cli
To test the functionality of your mobile app, you’ll need the Expo client app for Android and iPhone. You can find them in Google Play Store and the App Store.
Let’s build an Expo app and see how it works. You can create a new Expo app with the following command:
expo init your_app_name
Replace your_app_name with the name of the app you wish to build. Once you hit enter, you’ll be prompted to select the type of template for your app.
You can choose any template that works for your app. For now, I’ll pick “blank workflow” to make things simple.
Next, you’ll be prompted to install the template via Yarn. If you have already installed Yarn, choose yes, or otherwise, choose continue. Once you follow the next steps, your app will be ready to use.
Jump into the following commands to start the project.
cd <app_name>
npm start or yarn start
After successfully executing the above commands, it will launch a new development metro environment. You will get the QR code, which should be scanned via Expo’s client app in Android and the default Camera app in iPhones. By now, you are all set to go.
Our project consists of several important files: App.json has all the app configurations, such as the app name, SDK version, icon, and so on. The dependencies of the app are listed in the package.json file. Then there’s App.js, which runs when the app gets started. There, you will see the render method, which wraps all the components inside a single component within the return statement.
You can use the styles object at the bottom of the App.js file to specify the styles for your UI components. Moving styles out of the render method will enhance the readability of code in React Native.
Here’s the sample code in App.js:
import React from 'react';
import { StyleSheet, View, Text } from 'react-native';


export default class Main extends React.Component {

//render method returning RN components
  render() {
    return (
      <View style={styles.title}>
        <Text style={styles.title_txt}>My First App</Text>
      </View>
    );
  }


}
//code your styles here
const styles = StyleSheet.create({
  title: {
    //Your styles here
  },
  title_txt: {
    //Your styles here
  }
});
Expo comes with several built-in libraries that are often found in most applications. Refer to the Expo documentation for more details on this. However, the following libraries will be useful in most of the apps you build:
AppAuth, AuthSession: authenticates users via OAuthSplashScreen: makes a splash screen when launching the applocalization: manages l10n/i18n of your application for localization purposesAppLoading: loads assets, fonts, and the likeMapView: uses maps inside the appImagePicker/ImageManipulator: opens images or videos from the deviceSharing: shares data between the app and the deviceSecureStore: saves data on the device storageCamera: captures photos and videos using the device’s cameraHere are some extra features that Expo supports:
Notifications: push notifications from the Expo Push serviceAdmob: Google’s SDK for AdMobFacebookAds: Facebook SDKBranch: integrations using branch.ioAmplitude: Amplitude analytics for mobile appsAdditionally, you have access to:
Audio: plays or records soundsAV: plays audio/videoART: draws things using SVGBrightness: manages brightnessBackgroundFetch: runs background tasksPayments: supports payment integrations via Stripe using Apple Pay and Android PayIn general, there are around 80 APIs that you can access once you’ve installed it via Yarn, npm, or Expo without closing the metro bundler, which is just another way to speed up your progress.
Let’s learn how Expo works by adding a splash screen. First, create an image in .png format, which is appropriate for a splash screen in your app. Then, place that image in your app directory. Here, I have added it to the root of the directory.
Now, install the expo-splash-screen library to the app using the following command:
expo install expo-splash-screen
Next, create a new file and import the above library. After that, create a function to display the splash screen, like so:
import React, { useCallback, useEffect, useState } from 'react';
import { StyleSheet, Text, View } from 'react-native';

//import splash screen library here
import * as SplashScreen from 'expo-splash-screen';
//import your image from the directory
import splashScreenImage from './splashScreenImage.png'

export default function SplashScreen() {
  const [loaded, setLoaded] = useState(false);

  useEffect(() => {
    async function prepare() {
      try {
       // Keep our splash screen awake while the app fetches the resources
        await SplashScreen.preventAutoHideAsync();
        // Pre-load any content here
        // Also you can make any API calls here
        // Delay loading for one second
        await new Promise(resolve => setTimeout(resolve, 1000));
      } catch (e) {
        console.warn(e);
      } finally {
        // Tell the app that our resources are finished loading
        setLoaded(true);
      }
    }

    prepare();
  }, []);

  const onLayoutRootView = useCallback(async () => {
    if (loaded) {
      // Now, let's inform our splash screen to disappear as our resources are loaded now.
      await SplashScreen.hideAsync();
    }
  }, [loaded]);

  if (!loaded) {
    return null;
  }

  return (
    // Make your view in Splash Screen here.
    <View
      style={{ flex: 1, alignItems: 'center', justifyContent: 'center' }}>
      <Image
        source={splashScreenImage}
        style={{ flex: 1, alignItems: 'center', width: 100, height: 100 }}
        borderRadius={10}
        resizeMode="cover" />
    </View>
  );
}
Finally, import the file from your App.js and call our SplashScreen function there.
import React from 'react';
import { StyleSheet, View, Text } from 'react-native';
//import our component here
import SplashScreen from './SplashScreen.js';

export default class Main extends React.Component {
  render() {
    return (
    //place our component here.
      <SplashScreen/>
      <View style={styles.title}>
        <Text style={styles.title_txt}>My First App</Text>
      </View>
    );
  }
}
Start your app and see the Expo’s client app for the results!

When it’s time to release the app into the stores, you’ll be offered a few options to select.
#Build command
expo build:[ios|android]
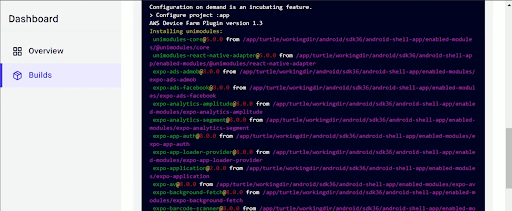
This command will start installing a package on the cloud rather than locally, eliminating the need for a high-performance laptop or PC. It’s also fine if you’re a Windows user because you’ve never used Xcode. Simply wait for the build to complete, and you’re all done.
After the build has queued, you can exit from the terminal with no hesitation. If you need to know the status of the build, navigate to the URL below the “You can monitor the build at” text.


There, you’ll find a download button that will be available once the build is completed. In the meantime, you can wait in the terminal to get a direct connection to download the package.
Now, how do we upload it to stores? The easiest way to do this with Expo is to use the following command:
expo upload:[ios|android]
Great! You’re all set!
There have been multiple new features added to Expo in 2021. Here are some of the most popular ones.
Through the CLI, you can access the developer menu, inspect components, and track results. Simply run Expo start and click m to access the developer menu and shift+m to access the performance monitor or the element inspector in native applications.
It can be difficult to shake your machines every few minutes! By pressing r in the Terminal UI, you can reload attached computers, laptops, simulators, and browsers. This method is compatible with iOS, Android, the web, and all physical devices.
Because installing TypeScript can be a hassle, they have made it fully automatic. Simply generate a blank tsconfig.json file and execute the Expo start command, and Expo will handle the rest. You can find more details on this in the Expo docs under “TypeScript.”
No one likes bugs. So they’ve refined them in SDK 41 to be descriptive, useful, and practical. Only the most important stack traces are shown, and the errors and warnings are pinpointed. Source maps have also been updated, and generated code traces have been muted.
Now you can see the evaluated outcomes of app.config.js or app.json using the latest Expo config order. Use the expo config --type public command to see the app’s manifest file used in Expo.
Expo CLI provides connections to fix problems quickly, whereas other tools show a 401. If you need to make a payment change or sign a contract, you just have to resolve a few clicks and get back on developing.
In general, Expo is now faster, offers smart authentication, improved error management, and complete insight into dynamic problems directly from the console.
While there are plenty of impressive new features, you should also be aware of some of the limitations of Expo:
Despite the above limitations, Expo is valuable because it’s an entirely functioning platform with extensive support for prominent Android and iOS APIs. This means that it covers the majority of the features that are usually required by apps. As a result, it’s not necessary to look outside of Expo to enforce native features.
React Native is the most popular framework for developing native mobile applications. Expo simplifies that process even further with its SDK and developer tools. If you are a React Native developer, you should always keep an eye on Expo and learn about its advantages and limitations.
In this blog post, we created and published an app with Expo, and you can certainly extend this app by adding more features. In general, Expo SDK is a great collection of libraries targeting almost every feature you would want in a mobile app. Thanks for reading.

LogRocket's Galileo AI watches sessions for you and and surfaces the technical and usability issues holding back your React Native apps.
LogRocket also helps you increase conversion rates and product usage by showing you exactly how users are interacting with your app. LogRocket's product analytics features surface the reasons why users don't complete a particular flow or don't adopt a new feature.
Start proactively monitoring your React Native apps — try LogRocket for free.

@container scroll-state: Replace JS scroll listeners nowCSS @container scroll-state lets you build sticky headers, snapping carousels, and scroll indicators without JavaScript. Here’s how to replace scroll listeners with clean, declarative state queries.

Russ Miles, a software development expert and educator, joins the show to unpack why “developer productivity” platforms so often disappoint.

Discover what’s new in The Replay, LogRocket’s newsletter for dev and engineering leaders, in the February 18th issue.

Learn how to recreate Claude Skills–style workflows in GitHub Copilot using custom instruction files and smarter context management.
Hey there, want to help make our blog better?
Join LogRocket’s Content Advisory Board. You’ll help inform the type of content we create and get access to exclusive meetups, social accreditation, and swag.
Sign up now