Many start-ups, businesses, and aspiring entrepreneurs are faced with the challenge of promoting their product(s), especially when they need to promote their product by creating a web app or a mobile app, which can be expensive and time-consuming, especially if they’re not a developer.

But, personally, I managed to achieve this using a low-code development platform called Budibase. Low-code development platforms such as Budibase help create web and mobile applications without coding and instead, rely on graphical user interface and configuration.
But what exactly is Budibase and how do you use it? Let’s dig in.
Budibase is a low-code development platform that helps you build a business software app in minutes — 50x faster than development!
It’s a completely open-source project and you can write some code to improve and build a better web app.
Also, it’s free, although, you might pay for hosting and workflows, depending on your usage. You can check the price here.
Budibase has great documentation and a hard-working community.
Here are some of its best features:
Budibase is a powerful platform for various of businesses from start-ups to large enterprises. You can use it for:
Now, let’s create a simple Budibase project together.
First, we should create an account on Budibase and answer several questions. Upon successful sign-up, you’ll navigate to Budibase Hosting Portal:
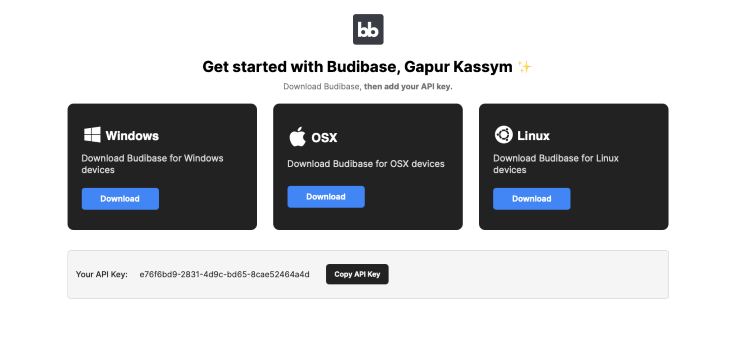
Let’s download a specific builder for your OS and copy API Key to deploy your app.
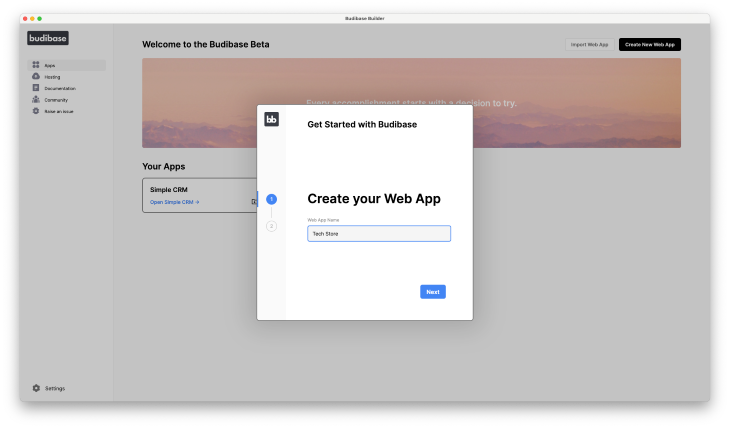
Next, open the builder and create a new Budibase app by clicking the button Create New Web App on the top right side. Let’s create the simple tech store web app.
Lastly, we are going to create the first user for our web app. If we don’t add the user, we can’t log into our system, so add a user with the email “[email protected]” and role “admin.”
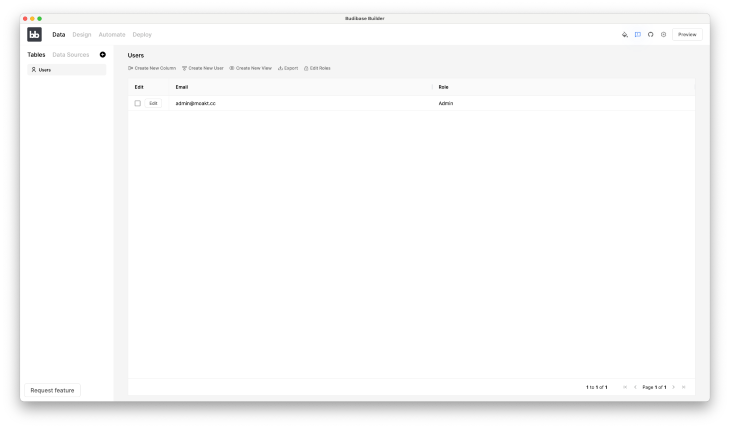
Above, when we added a new user to our system, we already created a Users table. Budibase will store all users’ data here.
On the top side of the Budibase builder, you’ll see four main sections to work with a web app:
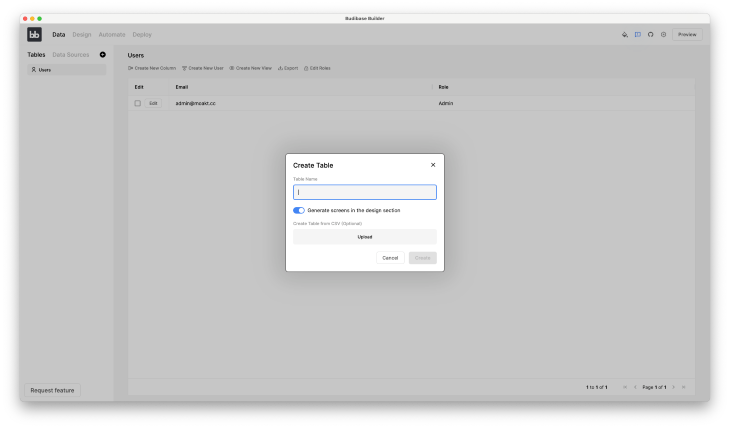
Before developing a user interface, we should create a database structure. Our tech store will store and display technical products.
First, create a Products table with columns:
TextNumberOptions. It is the incredible type with string/text selectionAttachment for static filesBoolean type for available in the storeLet’s click the create table button:
Budibase builder has a left, middle, and right panel section.
The left panel contains your screens and layouts, and screens contain all of our screens. When we create the Products table, the Budibase generates four screens for us:
home: main screenproducts/:id : edit product row screenproducts/new/row: create new product screenproducts: all products list screen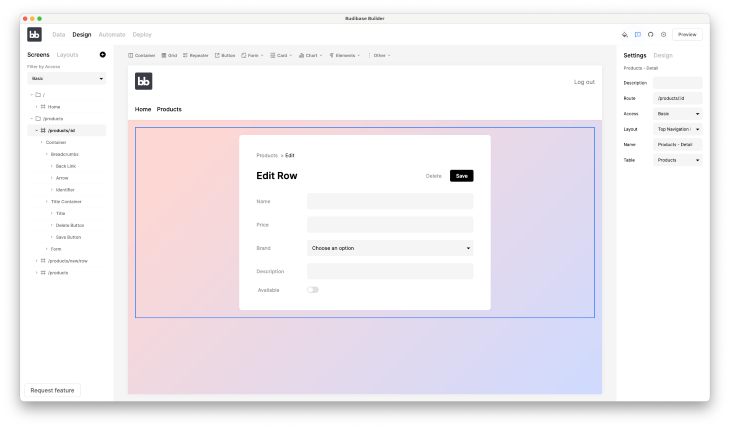
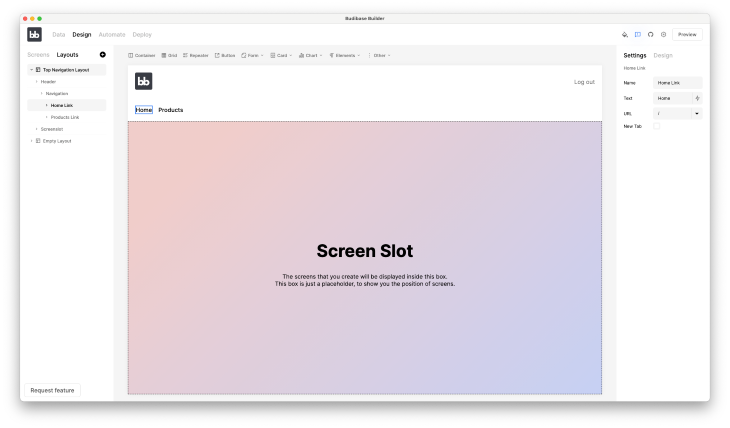
The layout is a master template where your content is consistent throughout your app.
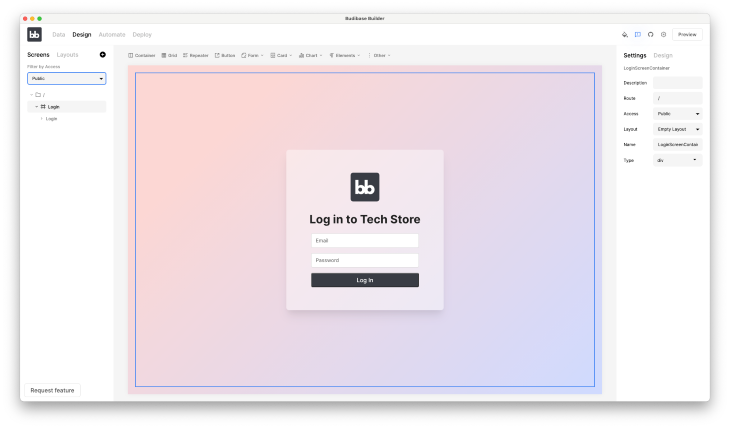
Budibase’s design has a public and private side. The private side are pages you work after logging in. The public side is a screen everyone has access to. For example, our app has a login page.
The middle panel shows your page with components, while the right panel manages your page and component styles and settings.
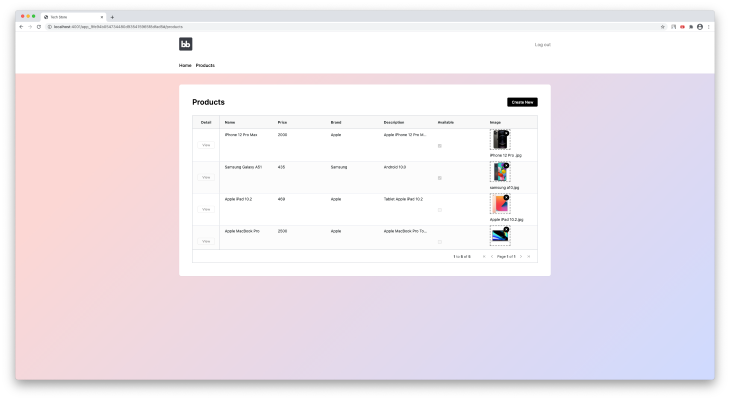
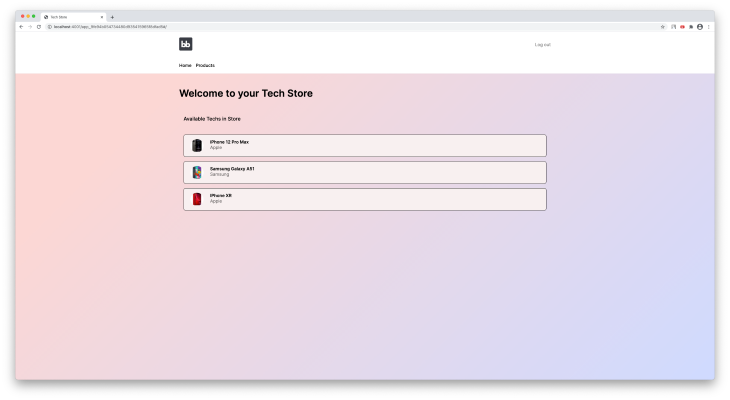
Let’s click the Preview button on the top right side and add several products to the database via our web app.
Next, let’s change the home screen and remove the Video Container component and display all available products. So how we can do that? Fortunately, Budibase has View virtual tables. We can get data without changing the data within database. Budibase manipulates data via:
It may seem complicated the first time, but if you read the docs and practice, it’ll become easier.
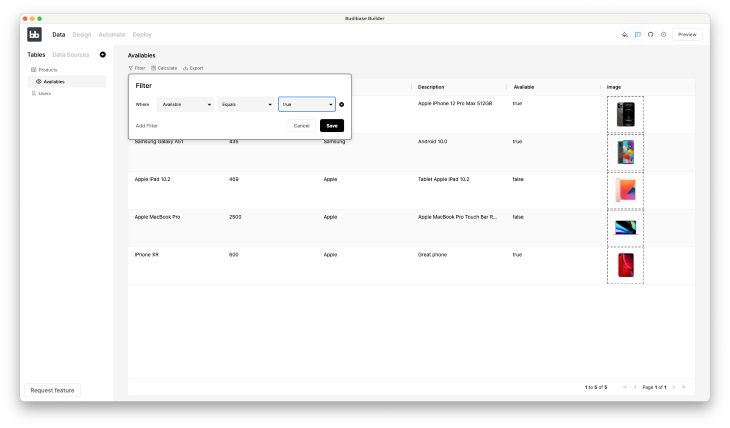
Now, let’s create the Availables view with the filter Available equal true.
When Availables view is ready, add the Repeater component with Stacked List.
Above, we’ve updated Stacked List borders, padding, and background properties. It is simple. You can make different styles via powerful tools and settings. Feel free to play around and trust your imagination!
Great! We have completed our first Budibase web app. Now, we need to deploy our web app. When we deploy it, Budibase hosts it on AWS. Deploying with Budibase is simple.
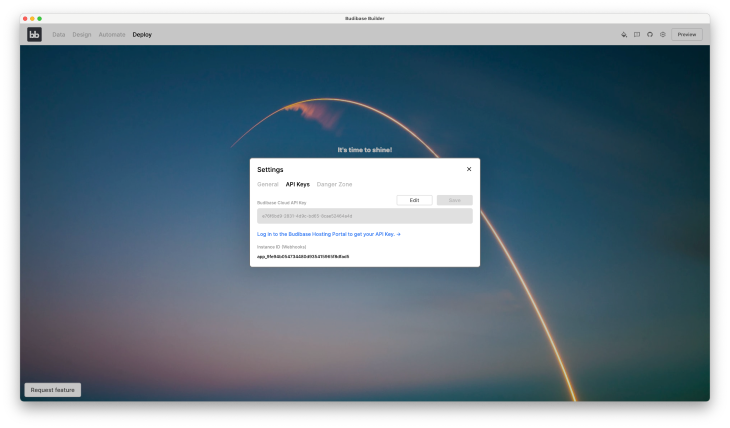
First, open a hosting portal and copy API Key for your deployment. Then open the settings modal window by clicking on the top right side Settings icon and past key.
Next, click the Deploy App button. That’s it.
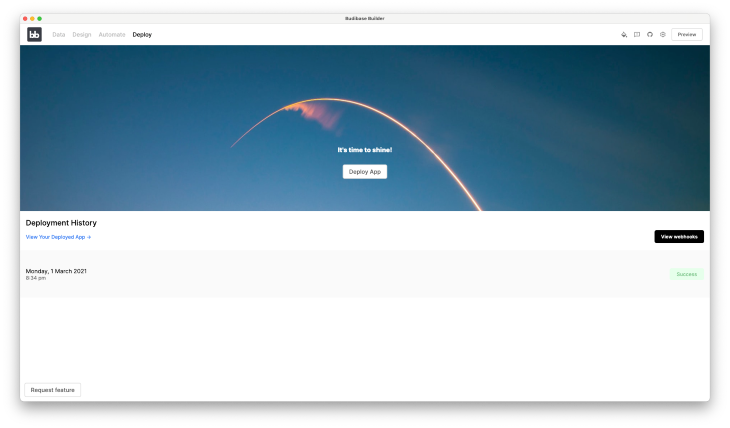
Congratulations! Your first Budibase web app is now live.
If you need to build a web application in minutes without knowledge of software development, Budibase is the best way for you. It’s an incredible, low-code open-source platform for building web applications.
Thanks for reading. I hope you found this piece useful. Happy coding!
Install LogRocket via npm or script tag. LogRocket.init() must be called client-side, not
server-side
$ npm i --save logrocket

// Code:

import LogRocket from 'logrocket';
LogRocket.init('app/id');
// Add to your HTML:

<script src="https://cdn.lr-ingest.com/LogRocket.min.js"></script>
<script>window.LogRocket && window.LogRocket.init('app/id');</script>
Would you be interested in joining LogRocket's developer community?
Join LogRocket’s Content Advisory Board. You’ll help inform the type of content we create and get access to exclusive meetups, social accreditation, and swag.
Sign up now
Discover how the Interface Segregation Principle (ISP) keeps your code lean, modular, and maintainable using real-world analogies and practical examples.

<selectedcontent> element improves dropdowns

Learn how to implement an advanced caching layer in a Node.js app using Valkey, a high-performance, Redis-compatible in-memory datastore.

Learn how to properly handle rejected promises in TypeScript using Angular, with tips for retry logic, typed results, and avoiding unhandled exceptions.


