
The Replay is a weekly newsletter for dev and engineering leaders.
Delivered once a week, it's your curated guide to the most important conversations around frontend dev, emerging AI tools, and the state of modern software.
Although Stripe is only the second most popular payment gateway (PayPal remains the first), it is enjoying steadily increasing usage from new and existing companies around the world. Stripe has reportedly processed over $200 billion worth of transactions.

Although there are lots of other payment processors out there, Stripe makes it easy to handle international transactions, especially when you look to accept payment in dollars, pounds, euros, or any other international currency.
Accepting payment or setting up a subscription via Stripe in your React Native App just got easier following the release of the official Stripe React Native SDK. While the SDK is still in beta, it is pertinent to dive in and explore what this SDK has to offer and how it reduces the integration time and enhances UI/UX.
In this tutorial, I’ll show you how to accept payment using the newly released, official Stripe React Native SDK.
Here’s what we’ll cover:
To follow along with this React Native styling tutorial, you should have:
Stripe is a financial and software service that helps software developers and ecommerce companies to realize seamless payment through its API. You could call Stripe a software as a service (SaaS) company.
As fintech continues to gain patronage from new and existing SaaS companies around the world, one out of three paid services released online uses Stripe as a payment option. Having an in-depth knowledge of how to integrate Stripe in your React Native app will be the best way to reduce the hassle of payment integration in your iOS and Android apps.
Now that you have an understanding of what Stripe is all about, the best way to get started with the Stripe API would be to read through the official Stripe documentation here.
But guess what? The Stripe React Native SDK can reduce that process by about 60%.
Let’s explore the Stripe React Native SDK and see what it has to offer. Below is a list of the features shipped with its v0.1.2 release.
The Stripe React Native SDK helps you collect sensitive data such as credit card numbers, and securely accepts payment by sending the data to Stripe’s API instead of passing them through your backend server.
The SDK features support for multiple payment options, such as bank transfers, debits, and redirects; credit cards; buy now, pay later; vouchers; and digital wallets. It also has opt-in support for Apple Pay. You can read Stripe’s official documentation on integrating Apple pay here, and how to integrate other payment methods here.
The SDK by default performs a 3D authentication in compliance with Strong Customer Authentication offered by Stripe. Read more about card authentication and 3D secure in Stripe here.
The Stripe React Native SDK ships with native screens and elements to securely accept payment in Android and iOS.
The SDK has support for pre-built payment UIs offered by Stripe. This feature is in beta, with support for Apple Pay, Google Pay, and card payment UIs. However, there are plans to build support for more payment options in the future. You can read about Stripe payment UIs here.
In these tutorials, we’ll explore some of the features listed above by building and testing a payment screen in our React Native App. Let’s get started in the next section.
Every SDK requires personal access keys, and Stripe isn’t an exemption. To continue with this React Native tutorial, we have to create a Stripe account and obtain our personal keys in order to accept payment.
The first step is to visit https://dashboard.stripe.com/register, create an account, or log in to your existing account.
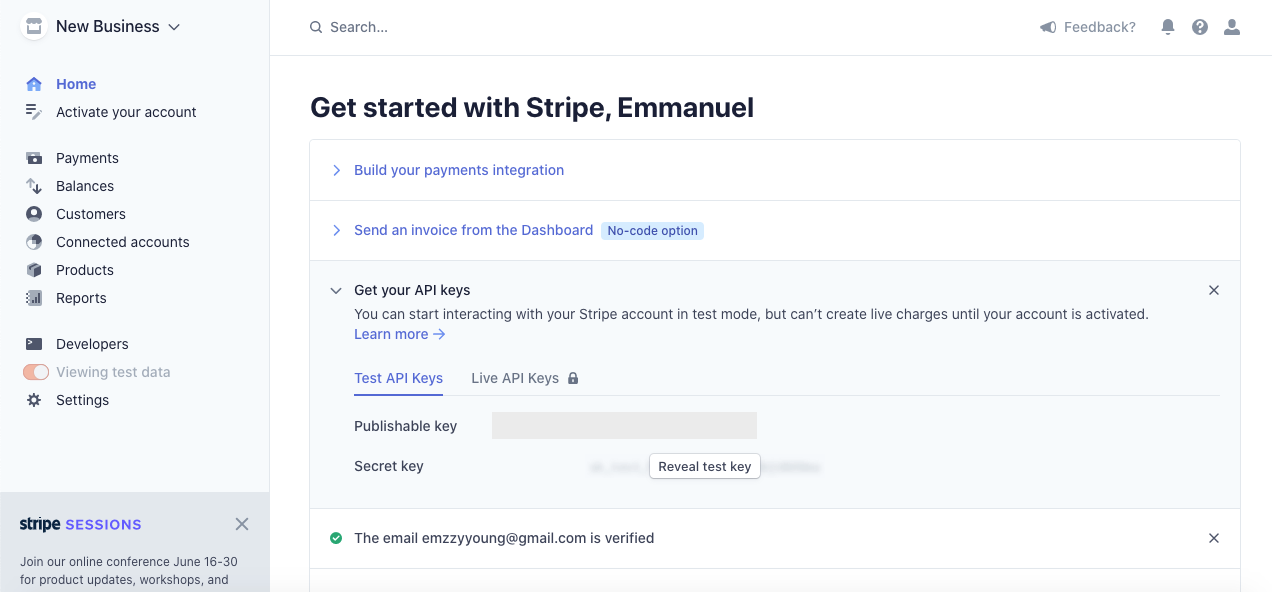
Next, obtain your public key. Be sure to keep your key private; it is the access key to your Stripe account.
The screenshot below shows where you can find your public key in your Stripe account:
Now that you’ve created your Stripe account and obtained your public key, let’s initialize a new React Native app and install the Stripe React Native SDK.
Navigate into your development directory and paste the command below to install a fresh React Native app:
npx react-native StripeReactNative
Once installation completes, navigate into StripeReactNative via the terminal, and paste the code below to install the Stripe React Native SDK package in your app:
yarn add @stripe/stripe-react-native
or
npm install @stripe/stripe-react-native
The Stripe React Native SDK has some requirements for support on Android and iOS. You can reference them here:
Android
iOS
Installing the Stripe React Native SDK in iOS is a bit more complicated than in Android.
To avoid errors after installing the package via npm, open your StripeReactNative.xcworkspace in XCode and set your deployment target to iOS 11.0. See screenshot below for an example:
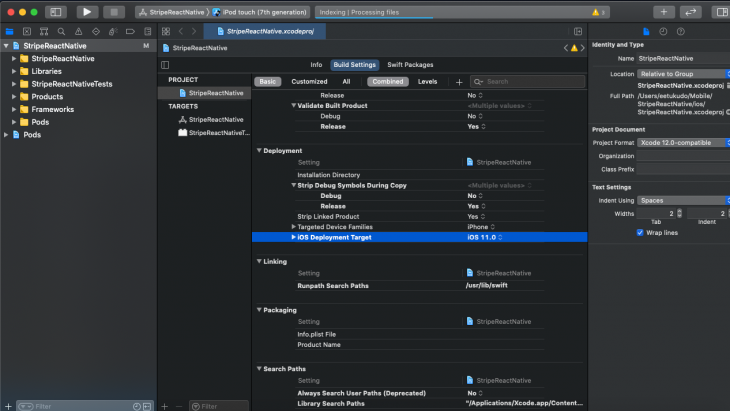
Run your project from Xcode to ensure all changes are applied, then navigate into the iOS folder. Open podfile, update platform :ios, '10.0' to platform :ios, '11.0', and run pod install. This will install the Stripe native dependences for iOS.
Next, let’s get rid of the default React Native code from App.js. Update the App.js file with the code below:
/**
 * Sample React Native App
 * https://github.com/facebook/react-native
 *
 * @format
 * @flow strict-local
 */
import React from 'react';
import {
  SafeAreaView,
  StyleSheet,
} from 'react-native';


const App = ()  => {
  return (
    <SafeAreaView>
    </SafeAreaView>
  );
};
const styles = StyleSheet.create({
});
export default App;
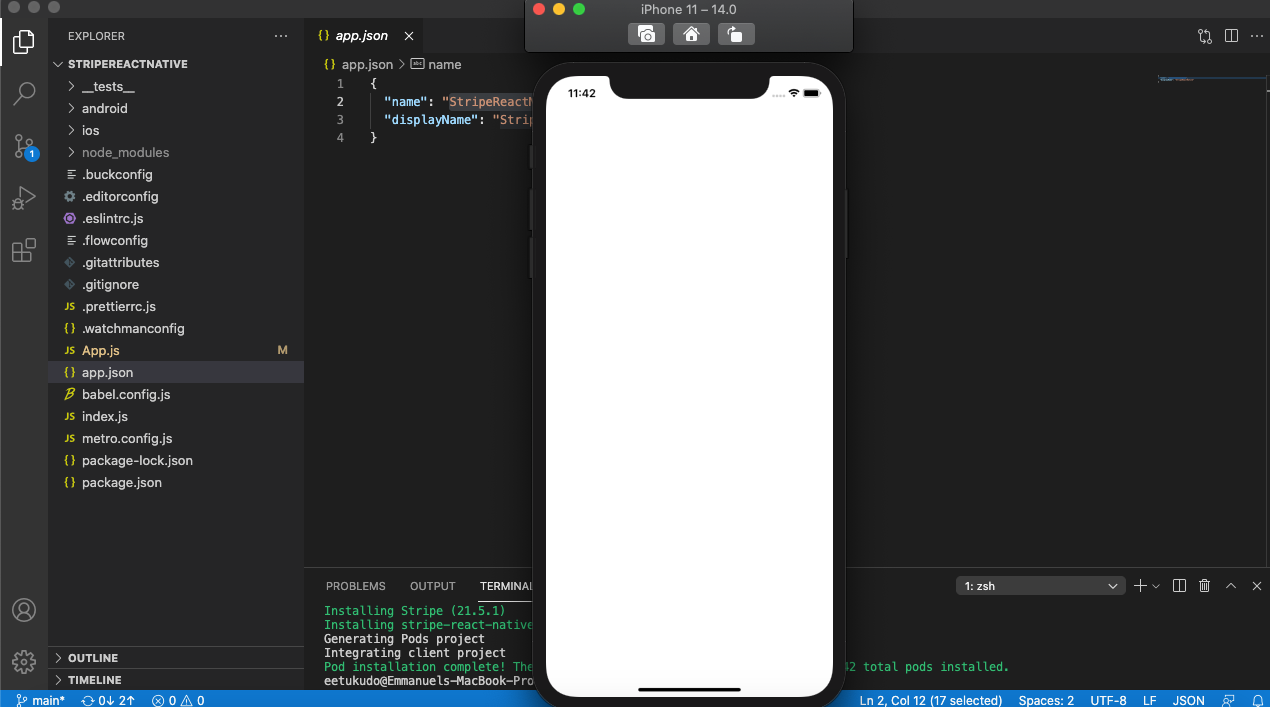
If you run the app, you should see a blank screen similar to the one below:
Now that we have the SDK installed successfully, let’s proceed to build our first payment screen.
To begin, create a new folder named screens within the root directory of your React Native app.
Navigate into the folder and create a new file called paymentScreen.js, then paste in the code below:
import React, {useState} from "react";
import {
    CardField,
    CardFieldInput,
    useStripe,
  } from '@stripe/stripe-react-native';

  export default PaymentScreen = () => {
    const [card, setCard] = useState(CardFieldInput.Details | null);
    const {confirmPayment, handleCardAction} = useStripe()
    return(
        <CardField
      postalCodeEnabled={true}
      placeholder={{
        number: '4242 4242 4242 4242',
      }}
      cardStyle={{
        backgroundColor: '#FFFFFF',
        textColor: '#000000',
      }}
      style={{
        width: '100%',
        height: 50,
        marginVertical: 30,
      }}
      onCardChange={(cardDetails) => {
        setCard(cardDetails);
      }}
      onFocus={(focusedField) => {
        console.log('focusField', focusedField);
      }}
    />
    )
  }
Next, let’s import the paymentScreen.js into the root of our project.
Open App.js and update its code to look like the one below:
/**
 * Sample React Native App
 * https://github.com/facebook/react-native
 *
 * @format
 * @flow strict-local
 */
import React from 'react';
import {
  SafeAreaView,
  StyleSheet,
} from 'react-native';
import { StripeProvider } from '@stripe/stripe-react-native';
import PaymentScreen from "./screens/paymentScreen";
const App = ()  => {
  const publishableKey = "pk_test_AtN3VLAFhzbLNqf3Y9z50iNQ";
  return (
    <StripeProvider
      publishableKey={publishableKey}
    >
      <PaymentScreen />
    </StripeProvider>
  );
};
const styles = StyleSheet.create({
});
export default App;
Let’s run our app to test what we’ve built so far. Run npx react-native run-ios to run a build for iOS.
You will likely run into an undefined symbols for architecture x86_64 error, but don’t panic! To fix the error, follow the steps below:
LIBRARY_SEARCH_PATHS = (
remove: "\"$(TOOLCHAIN_DIR)/usr/lib/swift/$(PLATFORM_NAME)\"",
remove: "\"$(TOOLCHAIN_DIR)/usr/lib/swift-5.0/$(PLATFORM_NAME)\"",
"\"$(inherited)\"",
);
Open your project in Xcode and create a new Swift file (File > New > File > Swift). Name the file anything (e.g., Fix.swift), and select create a bridging header when prompted by Xcode.
Run npx react-native run-ios again and the error should be fixed. If you are successful, your app should look like the screenshot below after load:
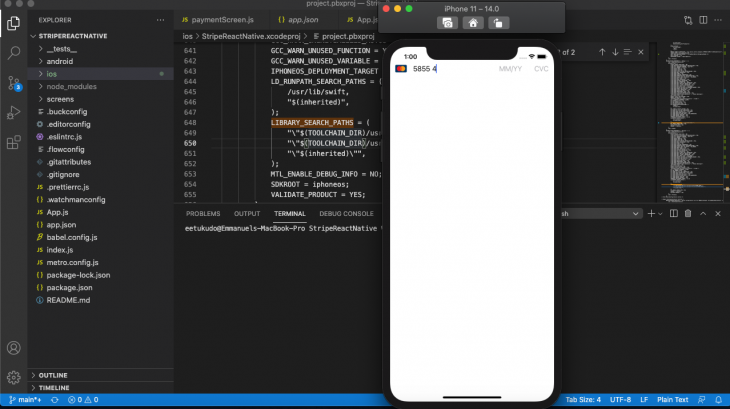
We just created a simple card component that sends the card details directly to the Stripe server for real-time validation and subsequently stores the component’s state.
This feature is a combination of all of the steps involved in accepting payment in Stripe using credit card details. This integration requires an endpoint that communicates with the Stripe API from your server.
To set up a server to communicate with Stripe from React Native, we need to initialize a new node.js app with install express body-parser and dotenv.
Create a new folder named server, navigate into the folder, run npm init -y, and follow the instructions to create a new Node app. Then, run npm i express body-parser dotenv.
Finally, create a server.js file at the root level of the server folder, and paste the code below into the file:
require("dotenv").config();
const express = require("express");
const app = express();
const { resolve } = require("path");
const stripe = require("stripe")(process.env.secret_key); // https://stripe.com/docs/keys#obtain-api-keys
app.use(express.static("."));
app.use(express.json());
// An endpoint for your checkout
app.post("/checkout", async (req, res) => {
  // Create or retrieve the Stripe Customer object associated with your user.
  let customer = await stripe.customers.create(); // This example just creates a new Customer every time

  // Create an ephemeral key for the Customer; this allows the app to display saved payment methods and save new ones
  const ephemeralKey = await stripe.ephemeralKeys.create(
    {customer: customer.id},
    {apiVersion: '2020-08-27'}
  );

  // Create a PaymentIntent with the payment amount, currency, and customer
  const paymentIntent = await stripe.paymentIntents.create({
    amount: 973,
    currency: "usd",
    customer: customer.id
  });

  // Send the object keys to the client
  res.send({
    publishableKey: process.env.publishable_key, // https://stripe.com/docs/keys#obtain-api-keys
    paymentIntent: paymentIntent.client_secret,
    customer: customer.id,
    ephemeralKey: ephemeralKey.secret
  });
});

app.listen(process.env.PORT, () =>
  console.log(`Node server listening on port ${process.env.PORT}!`)
);
Don’t forget to create a .env file with the code below:
secret_key=Your_Secret_Key
PORT=8000
Next, update the paymentScreen.js with the code below to add a checkout button to the app:
import React, { useState, useEffect } from "react";
import { StyleSheet, Button, View} from 'react-native';
import {
  CardField,
  CardFieldInput,
  useStripe,
} from '@stripe/stripe-react-native';

export default PaymentScreen = () => {
  const [card, setCard] = useState(CardFieldInput.Details | null);
  const { confirmPayment, handleCardAction } = useStripe()
  const API_URL = "http://localhost:8000";
  const { initPaymentSheet, presentPaymentSheet } = useStripe();
  const [loading, setLoading] = useState(false);

  const fetchPaymentSheetParams = async () => {
    const response = await fetch(`${API_URL}/checkout`, {
      method: 'POST',
      headers: {
        'Content-Type': 'application/json',
      },
    });
    const { paymentIntent, ephemeralKey, customer } = await response.json();
    return {
      paymentIntent,
      ephemeralKey,
      customer,
    };
  };
  const initializePaymentSheet = async () => {
    const {
      paymentIntent,
      ephemeralKey,
      customer,
    } = await fetchPaymentSheetParams();
    const { error } = await initPaymentSheet({
      customerId: customer,
      customerEphemeralKeySecret: ephemeralKey,
      paymentIntentClientSecret: paymentIntent,
    });
    if (!error) {
      setLoading(true);
    }
  };
  const openPaymentSheet = async () => {
    const { error } = await presentPaymentSheet({ clientSecret });
    if (error) {
      Alert.alert(`Error code: ${error.code}`, error.message);
    } else {
      Alert.alert('Success', 'Your order is confirmed!');
    }
  };
  useEffect(() => {
    initializePaymentSheet();
  }, []);
  return (
    <View style={styles.container}>
      <CardField
        postalCodeEnabled={false}
        placeholder={{
          number: '4242 4242 4242 4242',
        }}
        cardStyle={{
          backgroundColor: '#FFFFFF',
          textColor: '#000000',
        }}
        style={{
          width: '100%',
          height: 50,
          marginVertical: 30,
        }}
        onCardChange={(cardDetails) => {
          setCard(cardDetails);
        }}
        onFocus={(focusedField) => {
          console.log('focusField', focusedField);
        }}
      />
        <Button
          style={styles.button}
          disabled={!loading}
          title="Checkout"
          color="#841584"
          onPress={openPaymentSheet}
        />
        </View>
  )
}
const styles = StyleSheet.create({
  container: {
     flex: 1,
     padding: 20,
     marginHorizontal: 10,
     marginVertical: 10,
  },
  button: {
     backgroundColor: '#00aeef',
     borderColor: 'red',
     borderWidth: 5,
     borderRadius: 15
  }
})
As seen above, create a separate node.js project, and set up the server with port 8000. From React Native, send a request to the /checkout endpoint at the server. Once the request succeeds, the initializePaymentSheet will be called using the useEffect hook.
During this process the button remains disabled until a response is received from the back end. Note that your backend server must be up and running as long as you intend to communicate to it.
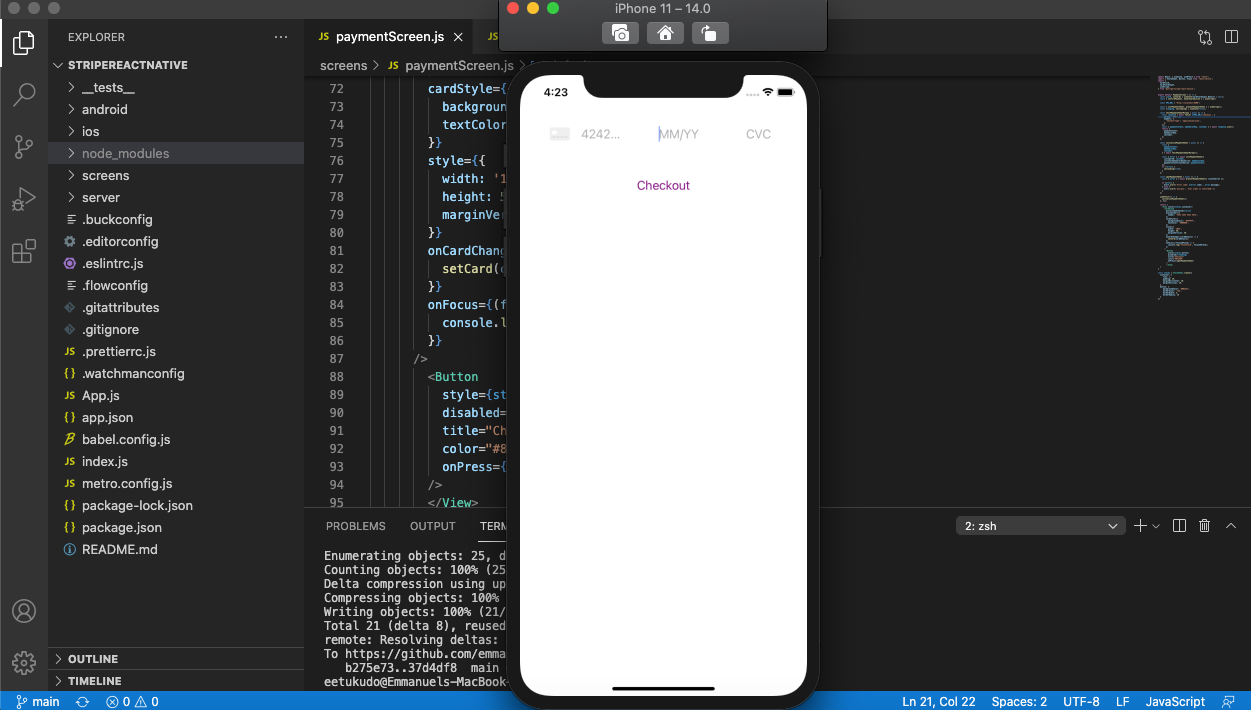
At this point, your app should look similar to the screenshot below:
The Stripe React Native SDK by Stripe is very easy to implement. With support for prebuilt UIs (including plans for future support for more pre-built UIs) and payment options, it is becoming a favorite for developers.

LogRocket's Galileo AI watches sessions for you and and surfaces the technical and usability issues holding back your React Native apps.
LogRocket also helps you increase conversion rates and product usage by showing you exactly how users are interacting with your app. LogRocket's product analytics features surface the reasons why users don't complete a particular flow or don't adopt a new feature.
Start proactively monitoring your React Native apps — try LogRocket for free.
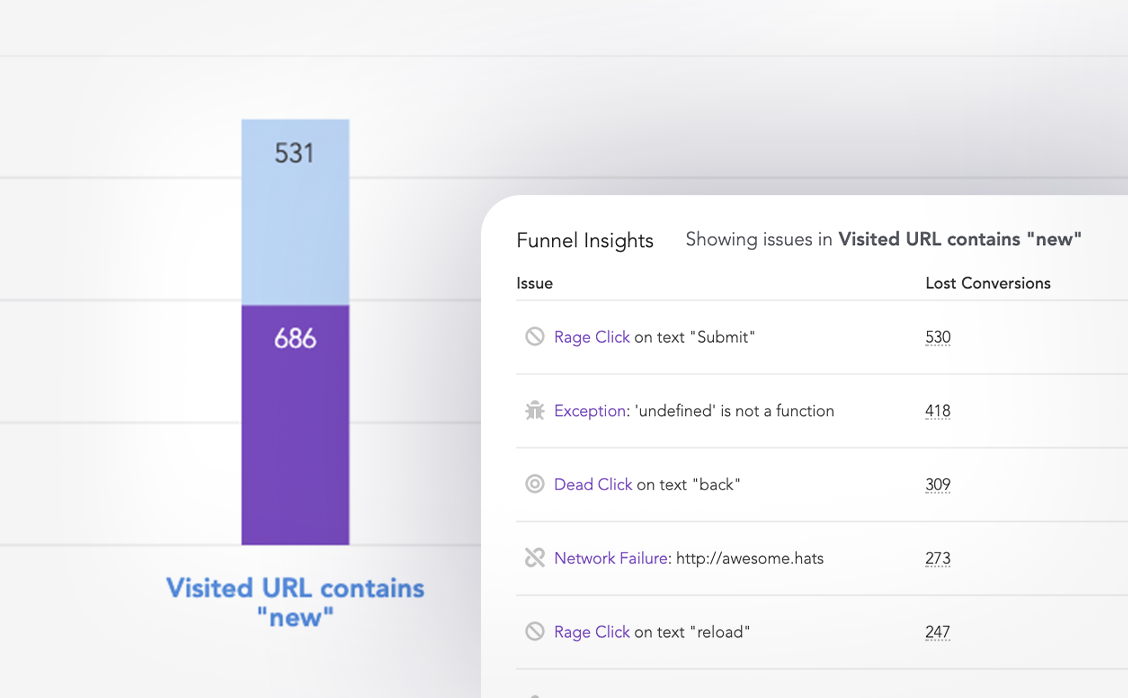
LogRocket lets you replay user sessions, eliminating guesswork around why users don't convert by showing exactly what users experienced. It captures console logs, errors, network requests, and pixel-perfect DOM recordings — compatible with all frameworks.
LogRocket's Galileo AI watches sessions for you, instantly identifying and explaining user struggles with automated monitoring of your entire product experience.
Start proactively monitoring your ecommerce apps — try LogRocket for free.

Russ Miles, a software development expert and educator, joins the show to unpack why “developer productivity” platforms so often disappoint.

Discover what’s new in The Replay, LogRocket’s newsletter for dev and engineering leaders, in the February 18th issue.

Learn how to recreate Claude Skills–style workflows in GitHub Copilot using custom instruction files and smarter context management.

Claude Code is deceptively capable. Point it at a codebase, describe what you need, and it’ll autonomously navigate files, write […]
Hey there, want to help make our blog better?
Join LogRocket’s Content Advisory Board. You’ll help inform the type of content we create and get access to exclusive meetups, social accreditation, and swag.
Sign up now
2 Replies to "Exploring the new Stripe React Native SDK"
Is it possible to do this via firebase aswell?
Thank you for the tutroail @Emmanuel Etukudo! It was so helpful.
I was getting errors because the merchantDisplayName attribute was missing from initPaymentSheet method, solved it by doing the following:
const { error } = await initPaymentSheet({
customerId: customer,
customerEphemeralKeySecret: ephemeralKey,
merchantDisplayName: ‘Ahmad M’, <<———- Added this
paymentIntentClientSecret: paymentIntent,
});