If you’ve been building JavaScript applications for a while, you’ve probably used utility libraries like Lodash. These libraries are packed with useful functions that make coding in JavaScript easier and more efficient. But as your project grows and you start using more utility functions, you might notice that your bundle size also starts increasing.

This is especially true when you rely on heavy libraries like Lodash, which makes you wonder if there is a better alternative.
That’s where es-toolkit comes in — a modern, high-performance JavaScript utility library that’s lightweight and comes with solid TypeScript support, making it a great alternative to popular libraries like Lodash.
These are the main comparisons between es-toolkit and Lodash:
Let’s get into the nitty-gritty about these differences and see how you can use es-toolkit in your JavaScript projects.
Here’s a quick look at what es-toolkit brings to the table:
memoize to cache function results and debounce to limit how often a function is calleduniq to filter out duplicates and difference to find what’s different between arrayscloneDeep for deep cloning and flattenObject to transform nested objects into a flat structurekebabCase to convert strings to kebab-caserandom for generating random numbers and round for rounding them offisNil to easily check for null or undefined valuesdelay to pause execution for a bitTo truly understand the benefits of es-toolkit, let’s compare its performance and bundle size to Lodash.
es-toolkit’s functions are often faster than Lodash’s because they use modern JavaScript APIs in their implementations. For example, es-toolkit’s omit function is about 11.8 times faster than lodash’s omit function.
Here’s a table comparing the performance of es-toolkit and lodash-es for various functions:
| Function | [email protected] | [email protected] | Difference |
|---|---|---|---|
| omit | 4,767,360 times | 403,624 times | 11.8× |
| pick | 9,121,839 times | 2,663,072 times | 3.43× |
| differenceWith | 9,291,897 times | 4,275,222 times | 2.17× |
| difference | 10,436,101 times | 5,155,631 times | 2.02× |
| intersectionWith | 8,074,722 times | 3,814,479 times | 2.12× |
| intersection | 9,999,571 times | 4,630,316 times | 2.15× |
| unionBy | 6,435,983 times | 3,794,899 times | 1.69× |
| union | 5,059,209 times | 4,771,400 times | 1.06× |
| dropRightWhile | 7,529,559 times | 5,606,439 times | 1.34× |
| groupBy | 5,000,235 times | 5,206,286 times | 0.96× |
When it comes to bundle size, es-toolkit really shines. A smaller bundle size means your web applications will load faster and perform better, especially on slower networks.
Here’s a comparison of the bundle sizes for some common functions in es-toolkit and lodash-es:
| Function | [email protected] | [email protected] | Difference |
|---|---|---|---|
| sample | 88 bytes | 2,000 bytes | -95.6 percent |
| difference | 91 bytes | 3,190 bytes | -97.2 percent |
| sum | 152 bytes | 413 bytes | -63.2 percent |
| debounce | 144 bytes | 1,400 bytes | -89.7 percent |
| throttle | 110 bytes | 1,460 bytes | -92.5 percent |
| pick | 657 bytes | 3,860 bytes | -83.0 percent |
| zip | 797 bytes | 1,790 bytes | -55.5 percent |
es-toolkit’s functions are much smaller compared to their Lodash counterparts. For instance, the sample function in es-toolkit is only 88 bytes, whereas the same function in Lodash is 2,000 bytes — nearly 96 percent smaller!
Let’s look into some examples to see how easy it is to use es-toolkit in a JavaScript application. In this section, we’ll explore how es-toolkit handles common tasks like debouncing, throttling, picking specific properties from objects, and removing duplicates from an array.
And guess what? To make things even easier, I’ve put together a starter code repository on GitHub that you can clone and start experimenting with right away. You’ll find the HTML and CSS code for all the examples we will cover, along with everything you need to get started. Check out the repo here and follow along.
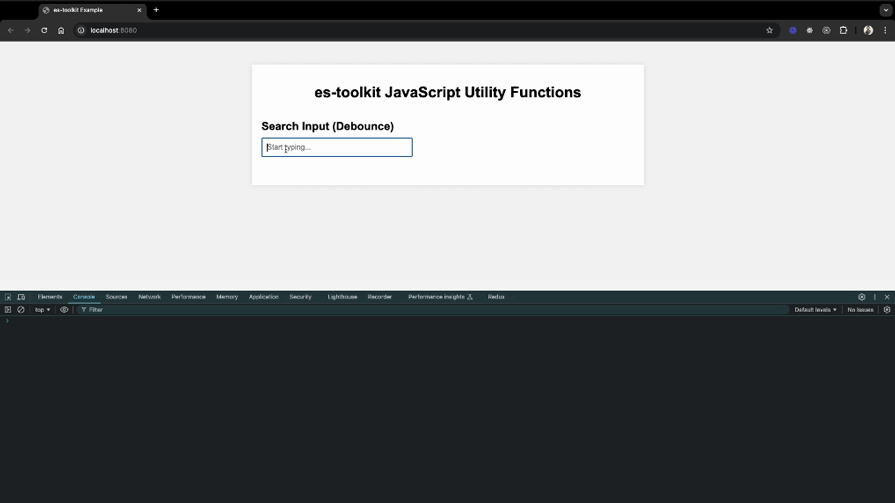
Let’s say you’re building a search feature for a website where users can look up information on different topics.
You want to fetch data as the user types but without sending a request for every single keystroke; otherwise, you might flood the API with too many calls. That’s where the debounce function from es-toolkit comes in handy.
Here’s how it works:
import { debounce } from "es-toolkit";

// a function that simulates an API call
function fetchData(query) {
  console.log(`Fetching data for: ${query}`);
}

// Using es-toolkit debounce function
const debouncedFetchData = debounce(fetchData, 1000);

document.getElementById("search-input").addEventListener("input", (event) => {
    const query = event.target.value;
    debouncedSearch(query);
});
In the below demo, even though I typed out five letters, the fetchData function only gets called after I’ve stopped typing for a second. This way, we can avoid making unnecessary API requests on every keypress using the debounce function.
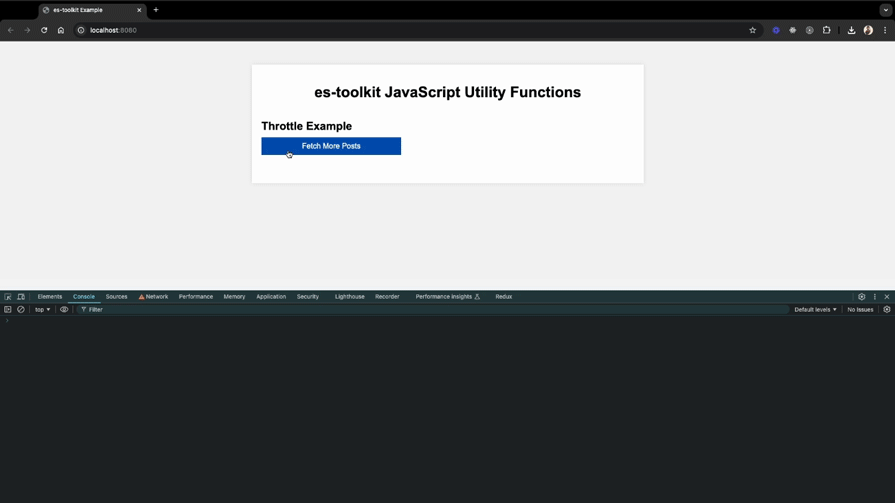
Suppose you have a button on your webpage that loads more posts when clicked. To prevent multiple API calls if the button is clicked too quickly, you can use the throttle function from es-toolkit. It ensures the API call happens only at set intervals, even if the button is clicked several times.
Here’s how you can use it:
// Throttle Example
import { throttle } from "es-toolkit";

// Function to fetch posts from an API
async function fetchPosts() {
  console.log("Fetching new posts...");
  const response = await fetch("https://jsonplaceholder.typicode.com/posts");
  const posts = await response.json();
  console.log("Posts fetched:", posts);
}
// Create a throttled version of fetchPosts
const throttledFetchPosts = throttle(fetchPosts, 2000);

// Set up an event listener on the button
document.getElementById("fetch-more-posts").addEventListener("click", () => {
  console.log("button clicked");
  throttledFetchPosts();
});
In this example, even if a user clicks the “Fetch More Posts” button rapidly, the fetchPosts function will only be triggered once every two seconds, as shown in the demo below.
Let’s say you have detailed user profile data, but you only want to display specific properties like username, email, and age in the user summary component. The pick function helps you extract these properties easily.
Here’s a demonstration of how it works:
// Pick Example
import { pick } from "es-toolkit";

// dummy user data
const user = {
  id: 1,
  username: "johndoe",
  firstName: "John",
  lastName: "Doe",
  email: "[email protected]",
  age: 30,
  address: {
    street: "123 Main St",
    city: "Anytown",
    country: "USA",
  },
  phoneNumber: "1234-5678",
};

// Use pick to select specific properties
const pickedUser = pick(user, ["username", "email", "age"]);

console.log("pickedUser", pickedUser)
In this example, the pick function extracts the username, email, and age properties from the user object. The console log will output:
pickedUser: { username: 'johndoe', email: '[email protected]', age: 30 }
Imagine you’re running a blog where users can add tags to categorize their posts. You want to make sure that each tag only appears once. This is where the uniq function from es-toolkit is super useful. It helps you filter out duplicates from an array and get a list of unique tags.
Here’s a practical example:
import { uniq } from "es-toolkit";

// Array of tags with some duplicates
const tags = [
  "javascript",
  "coding",
  "webdev",
  "programming",
  "javascript",
  "react",
  "nodejs",
  "coding",
  "html",
  "css",
  "webdev",
  "frontend",
];

// Use uniq to filter out duplicate tags
const uniqueTags = uniq(tags);

console.log("uniqueTags", uniqueTags);
In the above example, the uniq function removes duplicates from the tags array. The console log will output:
uniqueTags: ['javascript', 'coding', 'webdev', 'programming', 'react', 'nodejs', 'html', 'css', 'frontend']
You might be curious about how es-toolkit tackles these challenges. Under the hood, es-toolkit leverages modern JavaScript APIs to deliver faster performance and significantly smaller bundle sizes.
On top of that, es-toolkit uses TypeScript, which helps cut out a lot of the extra defensive code that usually checks argument types at runtime. This not only makes the code run more efficiently but also minimizes any unnecessary overhead that can slow things down.
Another key difference is that Lodash utility functions are often interdependent, meaning that importing one function can drag in many others along with it. In contrast, es-toolkit functions are mostly standalone, which helps keep your bundle lightweight.
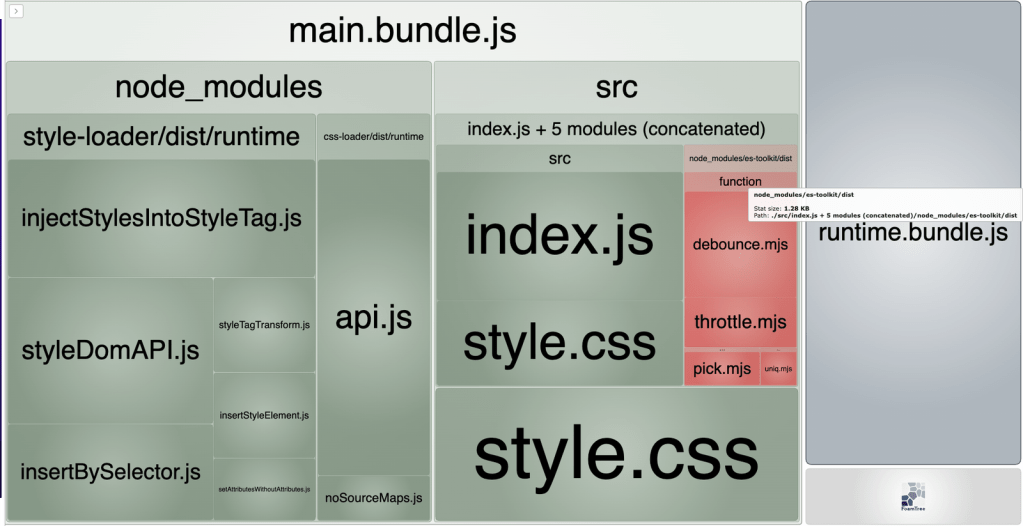
To really see the difference, you can use webpack-bundle-analyzer to visualize the size of your bundle. I’ve set everything up for you, so all you need to do is checkout to main branch and run npm i && npm run build from the root of the cloned repository, and it will open a page with all the details about your bundle.
The image below shows the bundle size when using es-toolkit. You can see that most es-toolkit functions are standalone, which results in smaller bundle sizes.
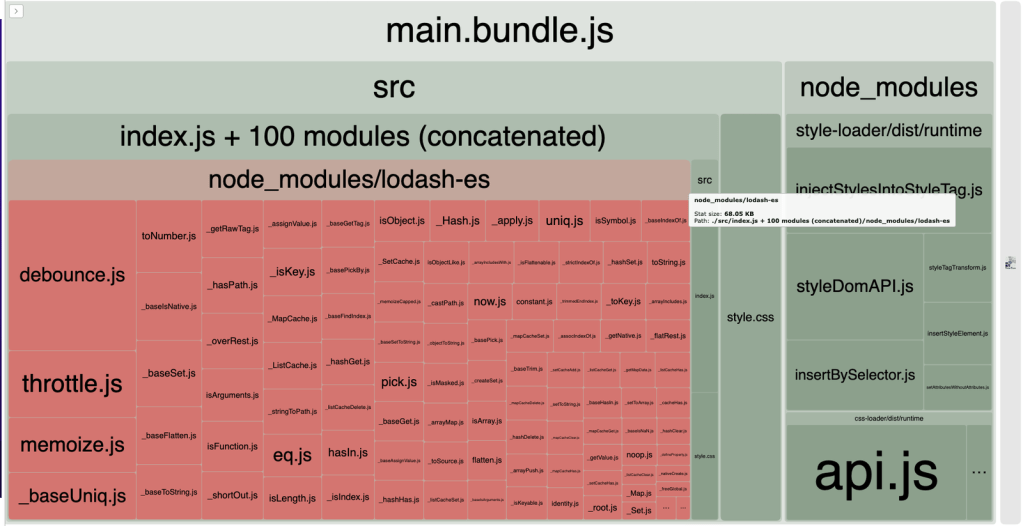
Now, let’s replace es-toolkit with lodash-es in the import statements from the examples above and run npm run build again to check the lodash-es bundle size.
The image below shows that Lodash functions are mostly interdependent, pulling in many other utilities when importing just one:
es-toolkit can be a great alternative to utility libraries like Lodash, especially when performance and bundle size are key considerations. Its small bundle size, modern JavaScript features usage, and solid TypeScript support make it an excellent choice for developers.
I hope you found this exploration of es-toolkit helpful for your JavaScript projects, but don’t stop here! I encourage you to try out es-toolkit in your own applications and share your experiences with us in the comments below. Happy coding!
There’s no doubt that frontends are getting more complex. As you add new JavaScript libraries and other dependencies to your app, you’ll need more visibility to ensure your users don’t run into unknown issues.
LogRocket is a frontend application monitoring solution that lets you replay JavaScript errors as if they happened in your own browser so you can react to bugs more effectively.

LogRocket works perfectly with any app, regardless of framework, and has plugins to log additional context from Redux, Vuex, and @ngrx/store. Instead of guessing why problems happen, you can aggregate and report on what state your application was in when an issue occurred. LogRocket also monitors your app’s performance, reporting metrics like client CPU load, client memory usage, and more.
Build confidently — start monitoring for free.

Learn how to protect full-stack projects from NPM supply chain attacks with a practical security checklist.

Explore 15 essential MCP servers for web developers to enhance AI workflows with tools, data, and automation.

Learn how contrast-color() automatically picks accessible text colors using native CSS, without JavaScript.

Learn how to build a harness-style AI workflow using Claude Code with specialized Dev, QE, and Ops subagents, gated handoffs, MCP telemetry, and LEARNING.md.
Hey there, want to help make our blog better?
Join LogRocket’s Content Advisory Board. You’ll help inform the type of content we create and get access to exclusive meetups, social accreditation, and swag.
Sign up now

