Among the many cool features Deno comes with is a set of standard modules designed to make developers’ lives easier. Largely inspired by existing languages such as Go and Python, these modules are Deno-approved and do not have any external dependencies.

The Replay is a weekly newsletter for dev and engineering leaders.
Delivered once a week, it's your curated guide to the most important conversations around frontend dev, emerging AI tools, and the state of modern software.
The intention of Deno’s standard library is to provide a comprehensive collection of high-quality code that all Deno projects can use seamlessly.
In this tutorial, we’ll explore four of the core standard libraries that can help you take your Deno app to the next level:
http, for setting up an HTTP serverhash, a crypto library for Denofs, Deno’s file management systemuuid, for generating unique IDsBefore we start, let’s quickly walk through how to install Deno on your local machine.
To install Deno on our windows computer, open up the terminal and run this command:
iwr https://deno.land/x/install/install.ps1 -useb | iex
If you have Chocolatey installed on your machine, you could also run:
choco install deno
You can use Homebrew to install Deno on a Mac machine by running:
brew install deno
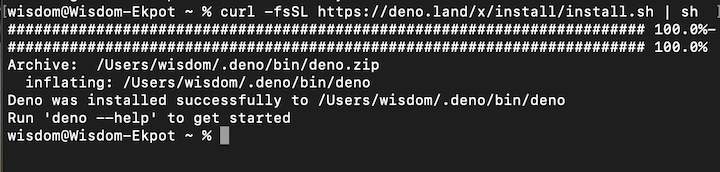
You can also install Deno using curl:
curl -fsSL https://deno.land/x/install/install.sh | sh
If Deno is properly installed, running the above command will generate the following output.
After installation, run the following command to confirm that Deno was properly installed on your local machine.
deno run https://deno.land/std/examples/welcome.ts
This very simple Deno command will print Welcome to Deno 🦕 on the terminal.
Now that we have Deno installed, let’s zoom in on four of the most popular and useful modules in Deno’s standard library.
httpThis library provides a simple way to set up a server.
First, bring the server instance into the application. Then, use the server instance to connect to a PORT.
import { serve } from "https://deno.land/std/http/server.ts";
const s = serve({ port: 8000 });
for await (const req of s) {
  req.respond({ body: "Hi,I'm Wisdom Ekpot" });
}
To start up your server, run:
deno run --allow-net http.ts
Due to Deno’s security, you’ll need to pass the --allow-net flag.
There are other ways to connect to a server in Deno, such as using Abc, which enables you to create chain routes using a single instance of the app method.
To create a server using Abc, add this to your http.ts file:
import { Application } from "https://deno.land/x/[email protected]/mod.ts";
const app = new Application();
const PORT = 8000;
let homepage = () => {
  return "This is the home page";
};
let contactPage = () => {
  return "You can contact Wisdom Ekpot with this contact Page";
};
app
  .get("/", homepage)
  .get("/contact", contactPage)
  .start({ port: PORT });
console.log(`🔤 Abc server running at http://localhost:${PORT}`);
Now you can create different routes for your application.
At the time of writing, https://deno.land/x/[email protected]/mod.ts is the latest version of Abc. Be sure to check the official docs for the latest version.
hashJust like Node.js, Deno comes with its own hashing library. The hash module comes in handy when you want to implement things such as hashing of passwords or messages.
To use this module, you’ll need to import the instance of createHash, then create a variable to store this instance. This instance takes in an algorithm type:
import { createHash } from "https://deno.land/std/hash/mod.ts";
const hash = createHash("md5");
hash.update("All You need to know about deno");
const final = hash.digest();
console.log(final);
To run this application, run deno run <name of file>. This code will log the hashed data in an ArrayBuffer format.
You can pass the hashing algorithm in the createHash instance as a param.
fsDeno comes with its own file system manager. With the fs module, you can write, read, copy, and perform any kind of file manipulation you want.
You can read the content of a file in Deno using the Deno.open() method. This method takes in a parameter, which is the name (path) of the file you want to read.
Create a file.txt file and store some dummy content there. We’ll be reading contents from this file:
const file = await Deno.open("file.txt");
const decoder = new TextDecoder("utf-8");
const text = decoder.decode(await Deno.readAll(file));
console.log(text);
The Deno.open() method returns a promise. This code creates a decoder instance, which decodes the data into human-readable format, and the readAll method returns the text stored in the file.txt file.
To start the application, run:
deno run --allow-read
Without passing the --allow-read flag, Deno won’t let you read the file.
You can use the Deno.writeTextFile() method to write text to a file. This method takes in two params: the path of the file to which you’re writing and the content you want to write to it.
const file_path = "file.txt";
const data = "This is the new content in my filex";
await Deno.writeTextFile(file_path, data);
// Read the file data
console.log(await Deno.readTextFile(file_path));
Deno will automatically create a file if the define path stored in the variable doesn’t exist.
To run this program, you’ll need to pass two flags — --allow-write and --allow-read — because you’re writing and reading to the file to see if the content has actually changed. You can add another param in the writeTextFile method to append data to a file:
await Deno.writeTextFile(file_path, data, {"append": true});
You can also do other things, such as copy file data from one file to another. You’ll need to import the copy instance in from the fs module:
import { copy } from "https://deno.land/std/fs/mod.ts";
copy("file.txt", "new.txt"); // void
To run the code, first run deno run --allow-write --allow-read --unstable fs.ts to create a new.txt file and store the content. To copy the file into an existing file, you’ll need to pass a param { overwrite: true } to overwrite the existing content of that file.
import { copy } from "https://deno.land/std/fs/mod.ts";
copy("file.txt", "test.txt", {
  overwrite: true,
});
UUIDDeno also comes with its own universally unique identifier. You can use this library to generate and validate unique IDs.
import { v4 } from "https://deno.land/std/uuid/mod.ts";
const generatedID = v4.generate();
const isValid = v4.validate(generatedID);
console.log(isValid);
This method will log true on the console because it’s a valid UUID. If you were to hardcode it, it would return false on the console.
Deno comes with lots of cool standard libraries and third-party modules that enhance the developer experience. You can use these modules to write complex logic in your Deno application, such as hashing passwords and generating IDs in the database.
What Deno standard library modules are you most excited to use in your next project?
Install LogRocket via npm or script tag. LogRocket.init() must be called client-side, not
server-side
$ npm i --save logrocket

// Code:

import LogRocket from 'logrocket';
LogRocket.init('app/id');
// Add to your HTML:

<script src="https://cdn.lr-ingest.com/LogRocket.min.js"></script>
<script>window.LogRocket && window.LogRocket.init('app/id');</script>

A step-by-step guide to building your first MCP server using Node.js, covering core concepts, tool design, and upgrading from file storage to MySQL.

Using security headers in your Next.js apps is a highly effective way to secure websites from common security threats.

A deep dive into April 2026’s AI model and tool rankings. We break down performance, usability, pricing, and real-world capabilities across 50+ features to help you pick the right tools for your development workflow.

A practical guide to Agent Browser CLI. Learn how AI agents navigate, snapshot, and interact with web pages using stable references, enabling efficient automation and exploratory testing.
Hey there, want to help make our blog better?
Join LogRocket’s Content Advisory Board. You’ll help inform the type of content we create and get access to exclusive meetups, social accreditation, and swag.
Sign up now

