A utility-based CSS framework like Tailwind CSS paired with a JavaScript framework like Next.js is a robust frontend development stack.

As you might already know, Next.js is a JavaScript framework used to create flexible React apps. Even with just beginner-level knowledge of React, you can start building apps with Next. Luckily, Next is trending these days, and using Tailwind CSS with it can save you a lot of time working on the UI of your apps.
However, there can be times when Tailwind CSS doesn’t work as expected with a Next.js setup. It could be a variety of reasons, so in this article, we’ll take a look and learn how to solve them so you can continue making performant applications.
The Replay is a weekly newsletter for dev and engineering leaders.
Delivered once a week, it's your curated guide to the most important conversations around frontend dev, emerging AI tools, and the state of modern software.
There are two categories of problems that we may face while setting up Tailwind with Next. The first problem is the incorrect usage of Tailwind features and functionalities. It includes any of the following:
The second category of issues stems from the improper or incomplete configuration of Tailwind or Next.js. If you have used Tailwind before, you may already know about the configuration files created when we run the Tailwind init command.
Some options in the Next.js config file could also be causing the problem. These configuration issues could include any or all of the following:
In this tutorial, we’ll learn the correct ways to fix all these problems.
Let’s keep it step-by-step and start with the standard way to install Next. After confirming you are in the right install location, run the below given standard command to install Next:
npx create-next-app@latest
Note that if you use a modern packaging system like yarn or npm, there are separate sets of installation commands.
You’ll get asked to pick a name for the app, and a few more options like installing support for TypeScript. Make suitable choices and wait while things finish setting up. This process may take some time, depending on your internet connection.
After the installation finishes, let’s cd into our project directory, run our app and see if it’s working as expected:
cd debug-twcss
yarn dev
It’s working!
Now, let’s pause to install Tailwind and its prerequisites in our existing Next app using the below commands:
npm i -D tailwindcss@latest postcss@latest autoprefixer@latest
Alternatively, you can use the yarn add ... command to install all these packages. After the packages get installed, generate Tailwind configuration files with the following command:
npx tailwindcss init -p
The above command will add the tailwind.config.js and postcss.config.jsfiles to the root of our project. Tailwind uses PostCSS extensively to function and recommends not to use any preprocessor alongside.
We have completed the primary phase of installing Tailwind CSS. Let’s add some of its utility classes to our index page and run the app.
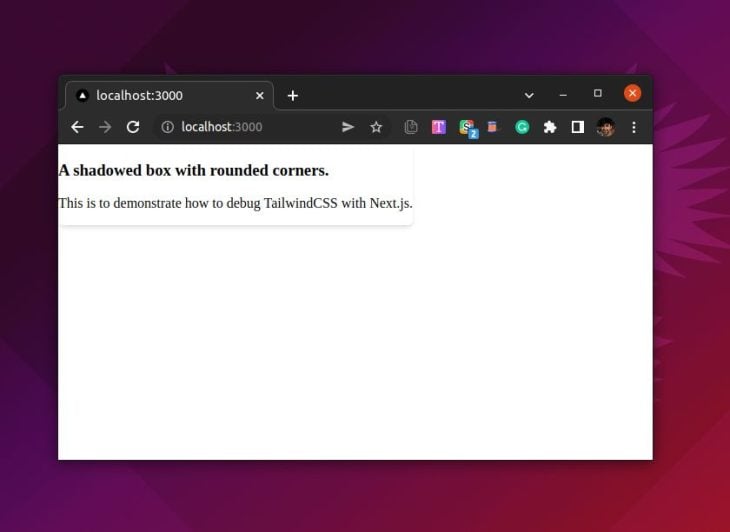
It doesn’t seem to work. There are some styles visible like box-shadow, but it’s not even close to what we expected. Here’s a bit more on why this happens.
The next few steps will cover how to get it working by fixing the usual problems and configuration issues, one at a time.
The first step is to ensure the global CSS file in our styles directory contains all the Tailwind directives.
Without these directives, Tailwind doesn’t know what base, utility, and component classes it should provide to the finished CSS based on their use in the content-path files:
/* debug-twcss/styles/global.css */
@tailwind base;
@tailwind utilities;
@tailwind components;
We can assign CSS classes in Next.js the same as we do in React. When adding CSS classes to elements, make sure to use className and not class in the JSX.
There may be incorrect class names that can cause problems and keep you wondering for hours. Always double check that Tailwind class names have no typographical errors.
Visual Studio Code users can easily avoid these errors with the official Tailwind CSS IntelliSense extension. Here is a glimpse of the extension in action.
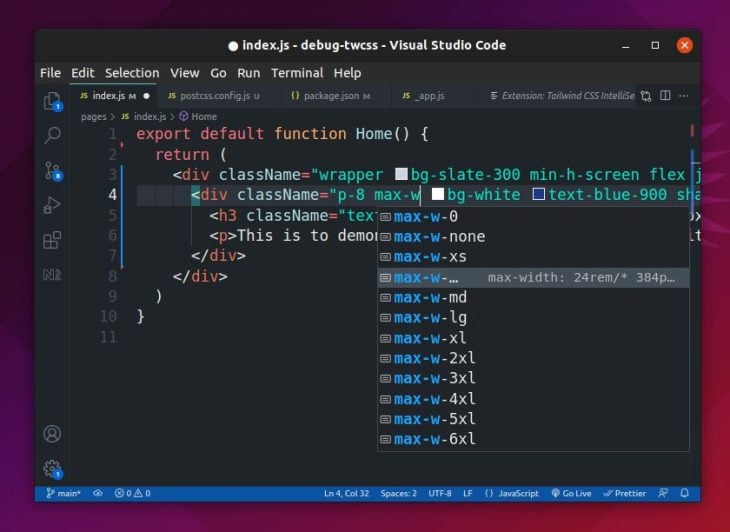
This extension will not only show you a list of autocomplete suggestions as you type class names in your project files, but also provides linting and syntax highlighting support for Tailwind-specific things.
Let’s assume you use the typography utility extension provided by Tailwind, but you missed installing the required plugin:
// debug-twcss/pages/post.js
export default function Post() {
  return (
    <article className="entry p-16 [ prose md:prose-md lg:-prose-lg ]">
     <p>...</p>
     <p>...</p>
     <p>...</p>
    </article>
  )
}
You won’t be able to see any prose class in action in the front end unless you install the required extension. Let’s install the typography plugin now:
npm i -D @tailwindcss/typography
It’s not over yet. Let’s also specify the freshly-installed typography plugin in the plugins option of the configuration file:
// debug-twcss/tailwind.config.js
module.exports = {
 content: ['./pages/**/*.html'],
 theme: {
  extend: {},
 },
 plugins: [
  require('@tailwindcss/typography'),
 ],
}
content instead of purgeIf you are used to the purge option from older versions of Tailwind and are using the same with a recent version, this could be why your project isn’t working.
Tailwind from v3 onwards provides the content property to add file paths.
If you’re wondering why purge or content is required, it helps the Tailwind CSS engine decide which pages to process and export their CSS classes to the final CSS file.
Here’s how easy it is to switch from purge to content with the latest version of Tailwind:
// debug-twcss/tailwind.config.js
module.exports = {
 content: ['...'],
 theme: {
  extend: {},
 }
}
If you configure the content paths with Next the way you did with a React app, it will still not work. This is because Next offers a slightly different project structure compared to a traditional react project.
Unlike a traditional React project, there is no default src directory in a Next project. We have a default pages directory instead, where the page templates of our app reside.
More such directories can help keep things well-organized in future development. The component directory fits best as an example here.
Therefore, we need to provide the path to the templates stored in the pages and the component folders in the content variable of the Tailwind configuration file:
// debug-twcss/tailwind.config.js
module.exports = {
 content: [
    "./pages/**/*.{js,ts,jsx,tsx}",
    "./components/**/*.{js,ts,jsx,tsx}",
  ],
  theme: {
  extend: {},
 }
}
As you can see, the glob pattern in the content option is not so different, but providing the appropriate directory name is the key here.
N.B., if you still are using an src directory in your Next.js project for some reason, make sure to add that to the content variable inside the Tailwind CSS configuration
There is a reason why some of the Tailwind utilities will work even if you don’t set anything up in the content option. That is because the actual purging happens only during the production build. Best practice is to set things up correctly only during development.
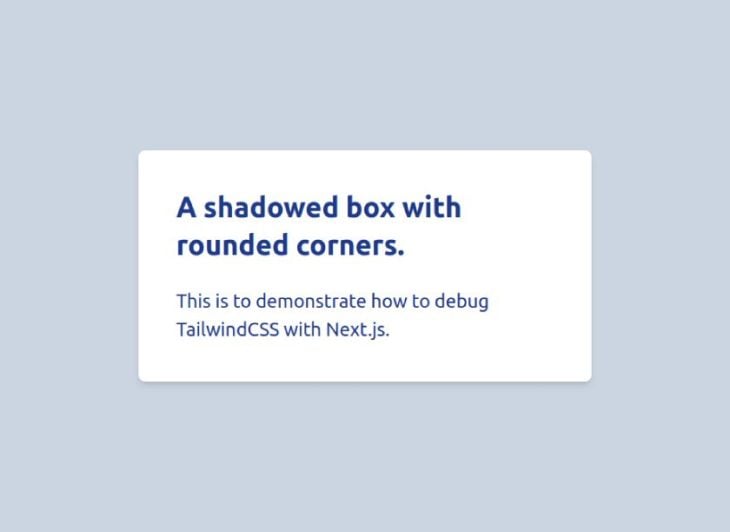
If we run the app now, chances are it will run perfectly, as we have already fixed the most common issues.
If none of the previous suggestions have worked for you, there’s another option you can try.
Next.js offers an example project template that comes with Tailwind CSS pre-installed. If you still can’t figure out what’s going wrong in your regular Next.js project setup, install this example project using the following command:
npx create-next-app --example with-tailwindcss with-tailwindcss-app
This example project has ready-made installation and configuration files for Tailwind CSS, so there’s little to no chance of any errors. You can then verify and correct the configuration settings of your project from here.
There can be problems that occur when implementing Tailwind’s dark mode with its typography plugin, that may not be directly related to Next.
The following primer will explain how to configure Next.js and Tailwind CSS to work correctly with dark mode.
To install the Typography plugin for Tailwind CSS, cd into your project folder and run the following command:
npm i -D @tailwindcss/typography
The next step is to add the plugin details to tailwind.config.js. You must specify the darkMode property as class if you wish to toggle it manually.
/** @type {import('tailwindcss').Config} */
module.exports = {
  darkMode: "class", // Specify this only when you want to toggle modes manually
  content: [
    "./pages/**/*.{js,ts,jsx,tsx}",
    "./components/**/*.{js,ts,jsx,tsx}",
  ],
  plugins: [require("@tailwindcss/typography")],
};
Let’s also apply the typography classes to our desired section.
import type { NextPage } from "next";
import Head from "next/head";
const Prose: NextPage = () => {
  return (
    <div className="flex min-h-screen flex-col items-center justify-center py-2">
      <Head>
        <title>Testing Prose</title>
      </Head>
      { # The `prose` and `lg:prose-lg` classes are responsible to add typography features using the Typography Plugin of Tailwind CSS }
      <main className="flex prose lg:prose-lg flex-1 flex-col items-center justify-center p-20">
        <h1 className="text-6xl font-bold">
          Lorem ipsum dolor sit amet consectetur, adipisicing elit. Ullam, rem!
        </h1>
      </main>
   </div>
  )
}

export default Prose;
We typically apply dark mode styles to elements when we add color utilities. Here’s a quick example to give you a sense of what it looks like.
<div
  className="bg-gray-200 dark:bg-gray-900
             text-gray-900 dark:text-gray-200"
  >
  ...
</div>
The above setup is not possible in the case of a typography prose section. In Tailwind v3 and later, you can add an inverted class for prose, as shown below.
...

const Prose: NextPage = () => {
  return (
    ...
      <main className="flex prose lg:prose-lg dark:prose-invert flex-1 flex-col items-center justify-center p-20">
        <h1 className="text-6xl font-bold">
          Lorem ipsum dolor sit amet consectetur, adipisicing elit. Ullam, rem!
        </h1>
      </main>
    ...
  )
}
The above code applies the default dark mode color palette to the prose section, but what if you want to use different colors?
It is possible to apply different colors to this “inverted” mode by extending the typography configuration and adding different settings for prose colors as shown below.
/** @type {import('tailwindcss').Config} */
module.exports = {
  darkMode: "class",
  content: [
    "./pages/**/*.{js,ts,jsx,tsx}",
    "./components/**/*.{js,ts,jsx,tsx}",
  ],
  theme: {
    extend: {
      typography: ({ theme }) => ({
        invert: {
          css: {
            "--tw-prose-body": theme("colors.pink[800]"),
            "--tw-prose-headings": theme("colors.pink[900]"),
            "--tw-prose-invert-body": theme("colors.red[500]"),
            "--tw-prose-invert-headings": theme("colors.red[200]"),
          },
        },
      }),
    },
  },
  plugins: [require("@tailwindcss/typography")],
};
If your Next app is a part of a monorepo, you will have to optimize the path definitions in the config files to get Tailwind working.
A monorepo is a repository of many independent projects that may also share global utilities like Tailwind CSS. Having Tailwind work on a monorepo is a bit complicated, though.
Let’s see how to install or debug Tailwind CSS on a modern build system like Nx.
The installation process is nearly the same as we discussed previously, but you should be sure to install the packages in the workspace root and not in apps or libs.
Initializing Tailwind for this configuration is also the same; you just need to cd into the directory in which you want to use Tailwind:
cd apps/debug-twcss
npx tailwindcss init -p
Now, we have both the Tailwind CSS and PostCSS config files created in our project’s root. We need to tell these files what project from the apps folder should use the Tailwind features:
// apps/debug-twcss/postcss.config.js
const { join } = require('path');
module.exports = {
 plugins: {
   tailwindcss: {
     config: join(__dirname, 'tailwind.config.js'),
   },
   autoprefixer: {},
 },
};
The --dirname variable, in this case, specifies the absolute path to the current directory dynamically.
We can do something similar with the tailwind.config.js, and it will work, but let’s consider the project dependencies before going further.
The libs directory in our Nx workspace contains project dependencies (like shared components) that might also be using Tailwind utilities. There’s a way to specify all these dependencies automatically in the config’s content option using an inbuilt Nx function:
// apps/debug-twcss/tailwindcss.config.js
const { createGlobPatternsForDependencies } = require('@nrwl/next/tailwind');
const { join } = require('path');

module.exports = {
 content: [
   join(__dirname, 'pages/**/*.{js,ts,jsx,tsx,html}'),
   ...createGlobPatternsForDependencies(__dirname),
 ],
 theme: {
   extend: {},
 },
 plugins: [],
};
The Tailwind engine will automatically observe all the project dependencies with the above additions to the config file.
If you have many of your projects in a monorepo using the same Tailwind settings, you may create a preset file with those settings in the workspace root and access it with the preset option of the Tailwind config in your projects.
Finally, it‘s possible that’ some experimental features are messing with Tailwind and other packages you have installed within your Next.js app.
If you are using any such features, try turning them off by setting the concurrentFeatures option to false in the next.config.js file:
// debug-twcss/next.config.js
/** @type {import('next').NextConfig} */
const nextConfig = {
  swcMinify: true,
  reactStrictMode: true,
  experimental: {
    concurrentFeatures: false, // <- Turn this option to false
    serverComponents: true,
  },
}
module.exports = nextConfig
You might need to restart and rebuild the project to observe changes.
In this article, we learned about the different scenarios of debugging Tailwind CSS issues with Next. The problems we discussed were mostly the configuration and usage issues.
I’m sure the solutions we discussed above will fix most of your problems. If you think something is missing or you are still experiencing a problem setting up Tailwind CSS, let me know in the comments.
Debugging Next applications can be difficult, especially when users experience issues that are difficult to reproduce. If you’re interested in monitoring and tracking state, automatically surfacing JavaScript errors, and tracking slow network requests and component load time, try LogRocket.
LogRocket captures console logs, errors, network requests, and pixel-perfect DOM recordings from user sessions and lets you replay them as users saw it, eliminating guesswork around why bugs happen — compatible with all frameworks.
LogRocket's Galileo AI watches sessions for you, instantly identifying and explaining user struggles with automated monitoring of your entire product experience.
The LogRocket Redux middleware package adds an extra layer of visibility into your user sessions. LogRocket logs all actions and state from your Redux stores.


Modernize how you debug your Next.js apps — start monitoring for free.

A side-by-side look at Astro and Next.js for content-heavy sites, breaking down performance, JavaScript payload, and when each framework actually makes sense.

AI-generated tests can speed up React testing, but they also create hidden risks. Here’s what broke in a real app.re

Why the future of DX might come from the web platform itself, not more tools or frameworks.

A hands-on test of Claude Code Review across real PRs, breaking down what it flagged, what slipped through, and how the pipeline actually performs in practice.
Would you be interested in joining LogRocket's developer community?
Join LogRocket’s Content Advisory Board. You’ll help inform the type of content we create and get access to exclusive meetups, social accreditation, and swag.
Sign up now

