Badges are effective tools for alerting users about important developments relating to applications. They can display the number of pending notifications for an app, show the days until a certain deadline, alert a user of a comment, and more.
In this article, we will learn how to integrate notification badge components into a React Native project and explore how badges improve UX and drive engagement. We will also learn about Notifee, various ways to set a badge count, and how to clear the badge count dynamically. We’ll also briefly look at how push notifications enable the badge counter to be triggered dynamically. To learn more about React Native, check out the React Native archives.
Jump ahead:
UNNNotificationServiceExtension
To follow along with this tutorial, you’ll need:
Let’s explore the different methods for setting and manipulating notification badges in iOS using the notification library Notifee. First, refer to React Native docs to create the React Native app by setting up the development environment.
Now, with the React Native CLI, let’s create our project with the following command:
$ npx react-native init reactBadge --template react-native-template-typescript
Once the project is created, cd into the project directory in the terminal window.
$ cd
$ yarn start
Run the command below to add the Notifee package:
$ yarn add @notifee/react-native
Once that is done, cd into iOS.
$ cd ios
$ pod install
For this tutorial, I used a machine with Mac M1 architecture. However, CocoaPods isn’t compatible with that architecture, so keep in mind that the following commands would vary on other Macs. If you are not using M1 architecture, you can run pod install after cd in iOS.
If using a machine with Mac M1, run the following command:
$ cd ios
$ sudo arch -x86_64 gem install ffi
$ arch -x86-64 pod install
These commands install ffi, which loads dynamically linked libraries and enables Mac M1 to run pod install hassle-free.
Now open Xcode and click on Open a project or file.
Navigate to the folder directory that holds reactBadge and open the iOS folder. Then, double-click reactBadge.xcworkspace to open our iOS project in Xcode.
![]()
Once that is done, our folder structure should look like the image above. Click Play at the top to build our iOS app in the simulator.
To set up a badge count, import notifee into App.tsx.
import notifee from '@notifee/react-native';
Notifications are the key to building a badge notification system in mobile devices because the badge count depends on the number of received and cleared notifications. Let’s look at how to trigger a notification in React Native using Notifee.
For iOS devices, we must request user permission before triggering a notification, and for Android devices, we have to create a channel. Thankfully, Notifee comes with two useful functions for overcoming these challenges:
notifee.requestPermission() requests permission for iOS devices before displaying notifications or badge counts on their appsnotifee.createChannel({})creates a channelId for Android device appsLet’s dive into the code. First, in App.tsx, we’ll create an asynchronous function used for displaying notifications. When clicked, this serves two purposes: to request permission to display notifications or create a channel, and to display our created app.
To do this, paste the code block into App.tsx.
const App = () => {
 const isDarkMode = useColorScheme() === 'dark';

 const backgroundStyle = {
   backgroundColor: isDarkMode ? Colors.darker : Colors.lighter,
 };

 async function onDisplayNotification() {
   // Request permissions (required for iOS)
   await notifee.requestPermission();

   // Create a channel (required for Android)
   const channelId = await notifee.createChannel({
     id: 'default',
     name: 'Default Channel',
   });

   // Display a notification
   await notifee.displayNotification({
     title: 'Notification Title',
     body: 'Display a notification using notifee',
     android: {
       channelId,
       smallIcon: 'name-of-a-small-icon', // optional, defaults to 'ic_launcher'.
       // pressAction is needed if you want the notification to open the app when pressed
       pressAction: {
         id: 'default',
       },
     },
   });
 }
Now we need to trigger the notification using Button from React Native.
import {Button} from 'react-native';
Once the button is imported, we will pass onDisplayNotification into the onPress handler of the Button component.
return (
   <SafeAreaView style={backgroundStyle}>
     <StatusBar barStyle={isDarkMode ? 'light-content' : 'dark-content'} />
     <ScrollView
       contentInsetAdjustmentBehavior="automatic"
       style={backgroundStyle}>
       <Header />
       <View
         style={{
           backgroundColor: isDarkMode ? Colors.black : Colors.white,
         }}>
         <Section title="Step One">
           <Text style={styles.highlight}>Set badge count</Text>
         </Section>
         <Button
           title="Display Notification"
           onPress={() => onDisplayNotification()}
         />
       </View>
     </ScrollView>
   </SafeAreaView>
 );
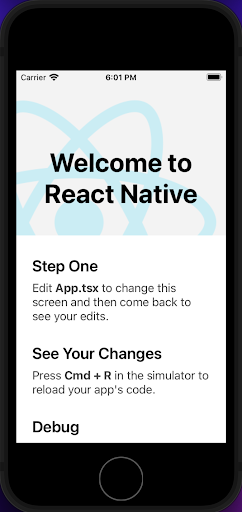
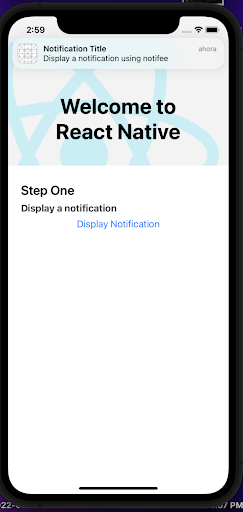
When we click Display Notification, it will trigger and display our created notification.
In iOS devices, the app icon on the device home screen displays a badge count as a red circle with a number on the top right corner of the icon. This number represents how many unread notifications the user has.
![]()
To create a function to set the badge count, we’ll use setBadgeCount. In App.tsx, create setBadgeCount, as shown below:
 async function setBadgeCount() {
   // Set badge count
   notifee.setBadgeCount(53).then(() => console.log('Badge count set'));
 }
From there, pass setBadgeCount into the onPress handler to trigger setting the badge count.
     <View
         style={{
           backgroundColor: isDarkMode ? Colors.black : Colors.white,
         }}>
         <Section title="Step One">
           <Text style={styles.highlight}>Display a notification</Text>
         </Section>
         <Button
           title="Display Notification"
           onPress={() => onDisplayNotification()}
         />
         <Section title="Step Two">
           <Text style={styles.highlight}>Set badge count</Text>
         </Section>
         <Button title="Set badge count" onPress={() => setBadgeCount()} />
       </View>
![]()
Upon clicking setBadgeCount, whichever integer passed through the method will be displayed as the badgeCount.
![]()
UX is important to consider when creating our notifications. To create a better UX, we want badgeCount to clear when the app is opened. To do this, we’ll use useEffect by pasting the code block into App.tsx.
React.useEffect(() => {
   // App launched, remove the badge count
   notifee.setBadgeCount(0).then(() => console.log('Badge count removed'));
 }, []);
![]()
Enabling remote push notifications in iOS apps is another way to dynamically trigger the badge counter and removes the need for a user action. Remote push notifications are best at triggering our badge counts, thus, offering a better UX. They also contain small amounts of data and push that data to our apps, even when the device isn’t running.
On iOS devices, there are four key components needed to deliver notifications:
The company’s server creates remote notifications to determine what notifications to send and the time to send them, then creates the notification request. This contains the notification data and a unique identifier for the user’s device that is then forwarded to the APNs, which handle the delivery to the user.
However, other actions, such as setting up a provider server and configuring the app to handle notifications, are the developer’s responsibility.
To learn about setting up a remote push notification service in iOS, check out this article on implementing push notifications in React Native with OneSignal. For developers looking to set up push notifications for Android, refer to this practical guide on push notifications with React and Firebase.
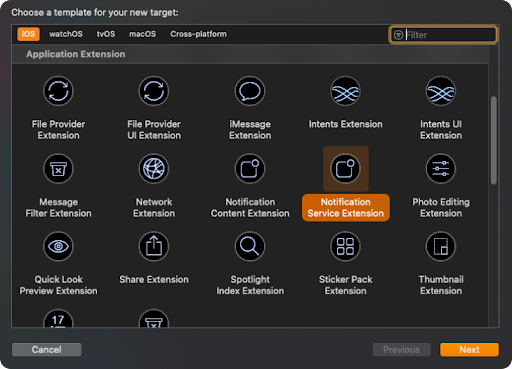
For this article, we’ll explore the use of the Notification Service Extension, which enables the modification of the original notification.
UNNotificationServiceExtensionThe UNNotificationServiceExtension object provides an entry point for the notification service app extension. This extension is launched when the system delivers a notification to the user’s device. Xcode provides a template for the notification service extension target and provides the subclass that we will modify. When our app receives a remote notification, the system loads out the extension and calls the didReceive(_:withContentHandler:) method under the following conditions.
aps dictionary includes mutable-content with a value set to 1.In this section, we will modify the content of the received push notification and increment the badge count when a new push notification is received.
Let’s get into it.
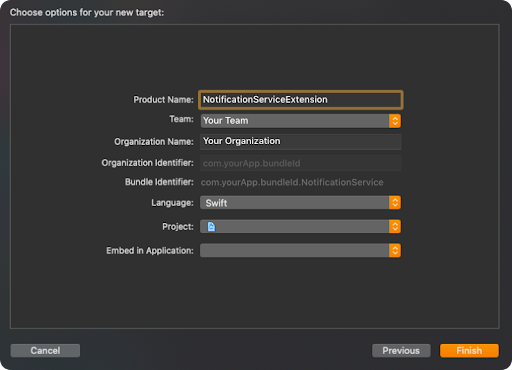
First, add UNNotificationServiceExtension in the iOS app in our React Native project inside Xcode.
Then, add a product name suitable for your project.
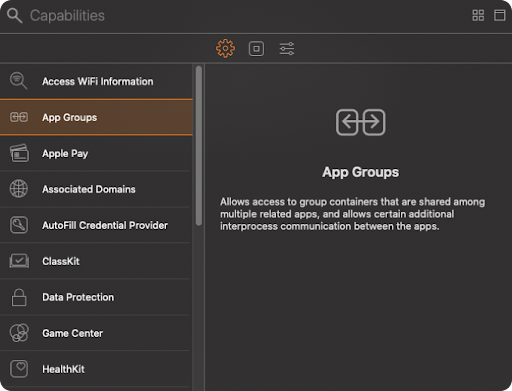
To set up app groups, we need to navigate to Xcode and select Project -> Targets -> Your app Target -> Signing & Capabilities -> [+] -> App Groups.

Now, in the App Groups section, select [+] -> Add a new container -> Enter group name -> OK.
![]()
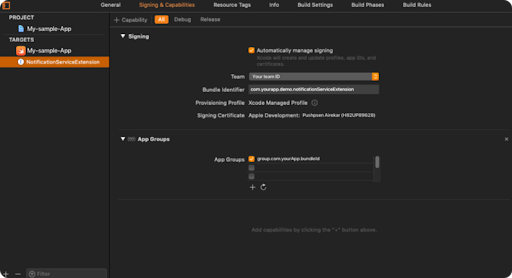
Ensure that the selected app group created earlier is selected.

Finally, it’s time to create the App Group for our NotificationServiceExtension.
In the Project directory of our Xcode, click Targets -> Notification Service Extension Target -> Signing and Capabilities -> [+] -> App Groups.
Select the same App Group that was created earlier in the App Target.
usersuite to store badge countWe will need to create a usersuite to pass data between our app target and the notification service target. To do this, follow below:
Paste the code block into the AppDelegate.swift folder.
func applicationWillEnterForeground(_ application: UIApplication) {

 UserDefaults(suiteName: "group.com.yourApp.bundleId")?.set(1, forKey: "count")      UIApplication.shared.applicationIconBadgeNumber = 0

}
Next, we’ll create the logic for incrementing our badge count on received notifications.
import UserNotifications

class NotificationService: UNNotificationServiceExtension {

    var contentHandler: ((UNNotificationContent) -> Void)?
    var bestAttemptContent: UNMutableNotificationContent?
    let defaults = UserDefaults(suiteName: "group.com.yourApp.bundleId")

    override func didReceive(_ request: UNNotificationRequest, withContentHandler contentHandler: @escaping (UNNotificationContent) -> Void) {
        self.contentHandler = contentHandler
        bestAttemptContent = (request.content.mutableCopy() as? UNMutableNotificationContent)
        var count: Int = defaults?.value(forKey: "count") as! Int
        if let bestAttemptContent = bestAttemptContent {
            bestAttemptContent.title = "\(bestAttemptContent.title) "
            bestAttemptContent.body = "\(bestAttemptContent.body) "
            bestAttemptContent.badge = count as? NSNumber
            count = count + 1
            defaults?.set(count, forKey: "count")
            contentHandler(bestAttemptContent)
        }
    }

    override func serviceExtensionTimeWillExpire() {

        if let contentHandler = contentHandler, let bestAttemptContent =  bestAttemptContent {
            contentHandler(bestAttemptContent)
        }
    }
}
Now, we can run the application and see the badge count increment after receiving each notification.
![]()
In this article, we integrated notification badges into a React Native project and learned how to enable badges to improve UX and guide the user to the app to drive engagement. We also looked at how Notifee and other techniques can set and dynamically clear a badge count.

LogRocket's Galileo AI watches sessions for you and and surfaces the technical and usability issues holding back your React Native apps.
LogRocket also helps you increase conversion rates and product usage by showing you exactly how users are interacting with your app. LogRocket's product analytics features surface the reasons why users don't complete a particular flow or don't adopt a new feature.
Start proactively monitoring your React Native apps — try LogRocket for free.

Learn how to use Fallow to analyze AI-generated code, detect dead code, duplicate logic, and complexity issues, and integrate automated code quality checks into your AI-assisted development workflow.

Learn how to protect full-stack projects from NPM supply chain attacks with a practical security checklist.

Explore 15 essential MCP servers for web developers to enhance AI workflows with tools, data, and automation.

Learn how contrast-color() automatically picks accessible text colors using native CSS, without JavaScript.
Would you be interested in joining LogRocket's developer community?
Join LogRocket’s Content Advisory Board. You’ll help inform the type of content we create and get access to exclusive meetups, social accreditation, and swag.
Sign up now

