Creating dynamic and responsive table components can be challenging for web developers and most times, the standard HTML tables may not be enough for complex situations. JavaScript comes with many solutions to create dynamic and user-friendly tables.

In this tutorial, we’ll explore Tabulator, a JavaScript table library with improved table rendering performance and many advanced features. While creating tables using Tabulator, we will integrate it into a demo React application, explore bulk data submission, and compare it to other JavaScript table packages. The complete code for this demo can be found in this GitHub repository.
The Replay is a weekly newsletter for dev and engineering leaders.
Delivered once a week, it's your curated guide to the most important conversations around frontend dev, emerging AI tools, and the state of modern software.
Tabulator is a modern and feature-packed JavaScript library for seamlessly creating tables. It offers features like search functionality, pagination, sorting, improved table rendering performance, nested tables, multi-sheet spreadsheets, and much more.
We will initialize our app with Vite for this project, but other build tools would work fine.
In your command line, navigate to the folder in which you want to create your project and run the following command to initialize a React project:
npm create vite@latest
Then, follow the prompts and select React.
Next, navigate to the project folder in your command line and run the command below to install npm packages:
npm install
After that, run the following command to start the development server:
npm run dev
Next, install Tabulator. In your terminal, run the following command in the project root folder:
npm install react-tabulator
Then, replace the contents of the App.jsx file with the following:
//App.jsx

import "react-tabulator/css/tabulator.min.css";
import { ReactTabulator} from "react-tabulator";

export default function App() {

  const columns = [
    { title: "Name", field: "name" },
    { title: "Age", field: "age" },
    { title: "Country", field: "country" },
  ];

let data = [
    { id: 1, name: "Adewale Kunle", age: "31", country: "Nigeria" },
    { id: 2, name: "Mary Smith", age: "1", country: "Peru" },
    {
      id: 3,
      name: "Leopold Vicktor",
      age: "24",
      country: "Romania",
    },
    {
      id: 4,
      name: "Brendon Philips",
      age: "81",
      country: "Sweden",
    },
    {
      id: 5,
      name: "Margret Marmajuke",
      age: "22",
      country: "France",
    },
    {
      id: 4,
      name: "Brendon Philips",
      age: "81",
      country: "Sweden",
    },
    {
      id: 5,
      name: "Margret Marmajuke",
      age: "22",
      country: "France",
    },
    {
      id: 4,
      name: "Brendon Philips",
      age: "81",
      country: "Sweden",
    },
    {
      id: 5,
      name: "Margret Marmajuke",
      age: "22",
      country: "France",
    },
    {
      id: 4,
      name: "Brendon Philips",
      age: "81",
      country: "Sweden",
    },
    {
      id: 5,
      name: "Margret Marmajuke",
      age: "22",
      country: "France",
    },
    {
      id: 4,
      name: "Brendon Philips",
      age: "81",
      country: "Sweden",
    },
    {
      id: 5,
      name: "Margret Marmajuke",
      age: "22",
      country: "France",
    },
    {
      id: 4,
      name: "Brendon Philips",
      age: "81",
      country: "Sweden",
    },
    {
      id: 5,
      name: "Margret Marmajuke",
      age: "22",
      country: "France",
    },
    {
      id: 4,
      name: "Brendon Philips",
      age: "81",
      country: "Sweden",
    },
    {
      id: 5,
      name: "Margret Marmajuke",
      age: "22",
      country: "France",
    },
    {
      id: 4,
      name: "Brendon Philips",
      age: "81",
      country: "Sweden",
    },
    {
      id: 5,
      name: "Margret Marmajuke",
      age: "22",
      country: "France",
    },
    {
      id: 4,
      name: "Brendon Philips",
      age: "81",
      country: "Sweden",
    },
    {
      id: 5,
      name: "Margret Marmajuke",
      age: "22",
      country: "France",
    },
    {
      id: 4,
      name: "Brendon Philips",
      age: "81",
      country: "Sweden",
    },
    {
      id: 5,
      name: "Margret Marmajuke",
      age: "22",
      country: "France",
    },
  ];

  return (
    <>
      <h1>Tabulator Demo</h1>

      <ReactTabulator
        data={data}
        columns={columns}
      />

    </>
  );
}
In the above code, we imported the Tabulator CSS file for styling and the ReactTabulator component from the react-tabulator component we installed a moment ago.
To get Tabulator working, it needs to receive the following props:
Columns: Describes what you want your table to look likeData: The data you want Tabulator to displayOptions: Holds the configurations of the table displayIn the code above, we have the columns array, which describes what we want our table to look like.
Our data is an array of objects containing an ID, name, age, and country. data can also come from an external source like an API.
Tabulator needs one more piece to become functional in our project. In the return, we called the ReactTabulator component that we imported to make it functional, passing in data and columns as props:
//App.jsx

<ReactTabulator data={data} columns={columns} />
If you didn’t start your development server before now, run the following in your terminal:
npm run dev
Viola! Our basic React Tabulator is ready.
So far, we have successfully set up a basic React Tabulator component. Let’s take it a step further to add pagination and search functionality.
To get pagination working, we will pass the options prop into the ReactTabulator component. In the App.jsx file, add the following code:
 //App.jsx
 const options = {
    pagination: 'remote', // or 'local'
    paginationSize: 10, // number of rows per page
  };
Next, in your ReactTabulator return, pass the options object into it as props like so:
options={options}
You will be left with code that looks like this:
 //App.jsx
<ReactTabulator
  data={data}
  columns={columns}
  options={options}
/>
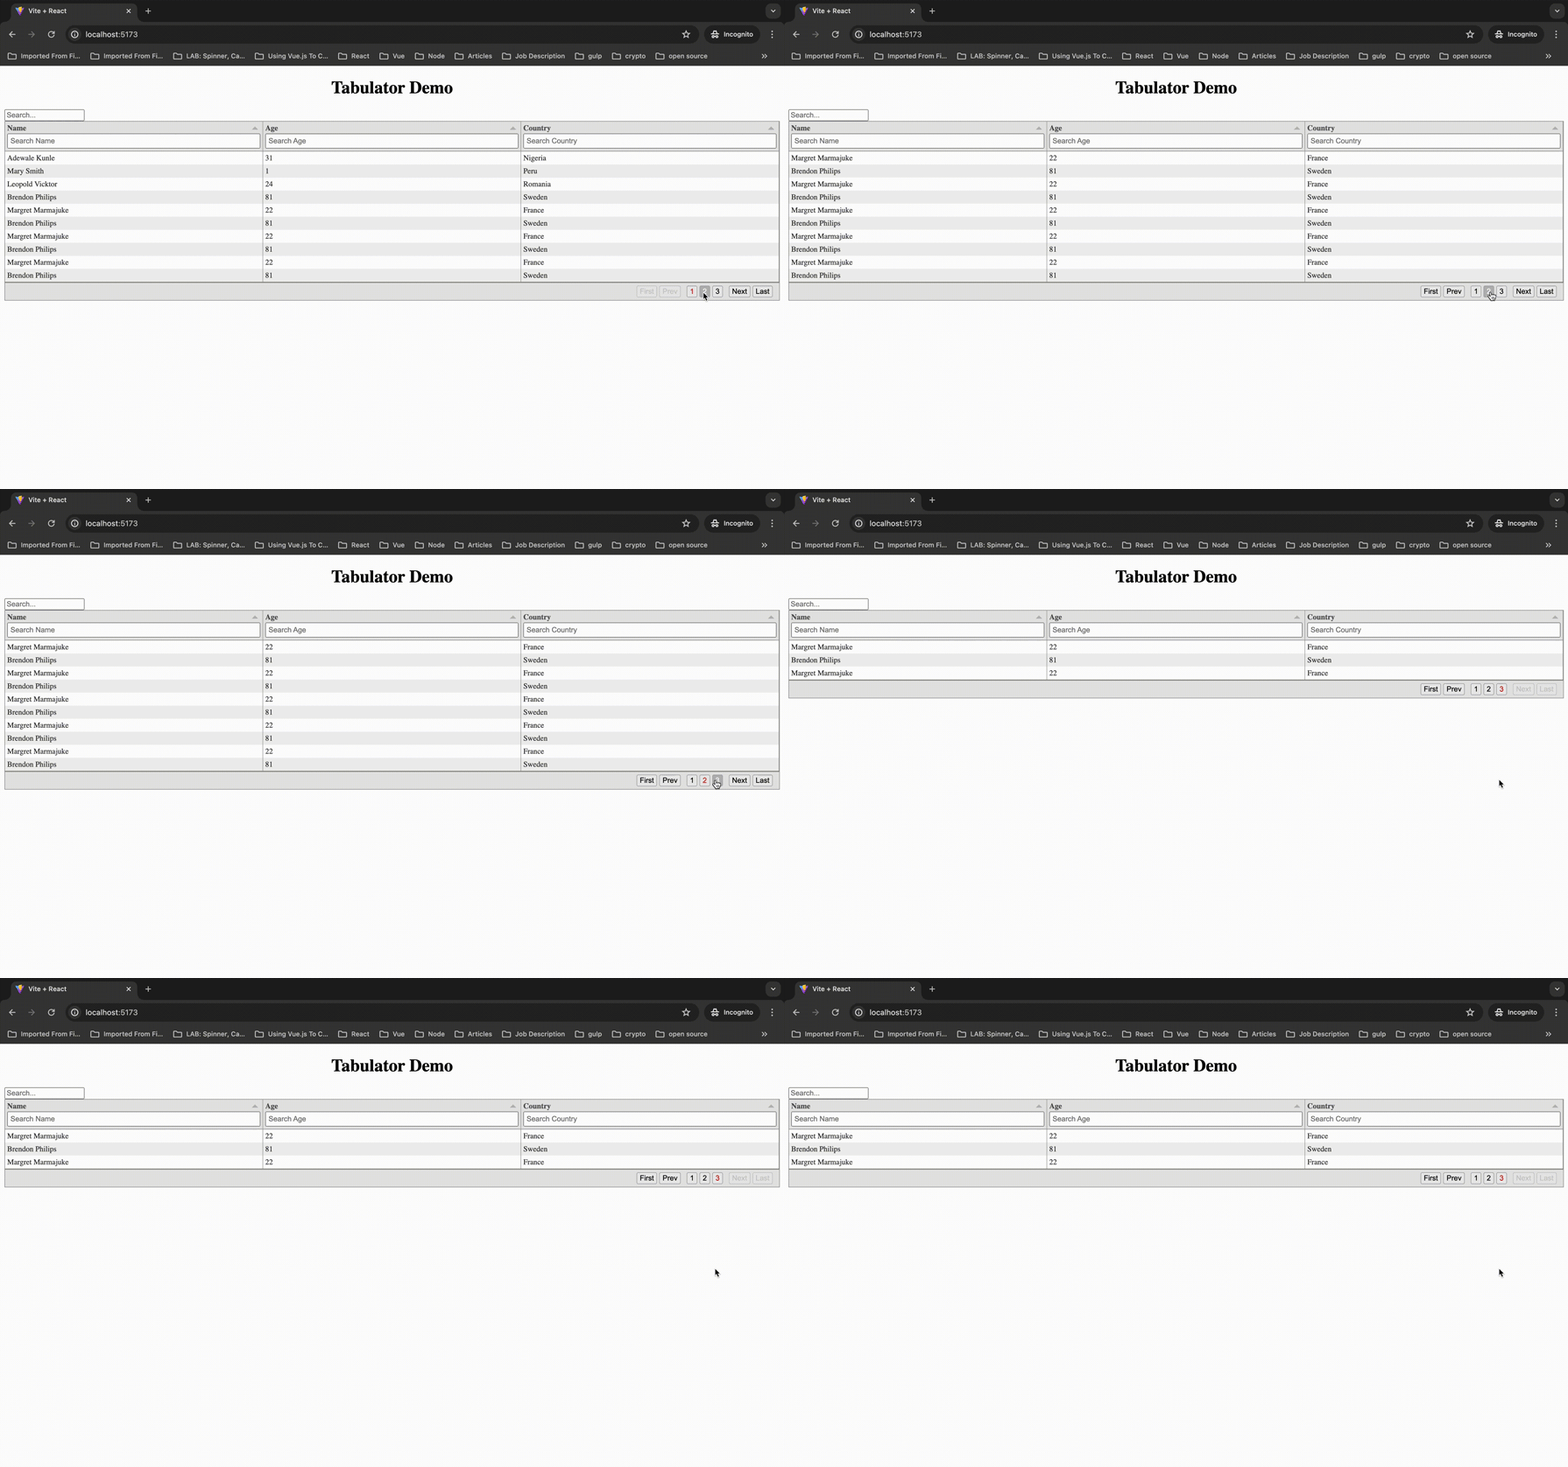
Check it out in your browser and your table should now have pagination just like the output below:

Tabulator also offers a way to search through table contents or table data. First, there is a column search that, just as the name suggests, searches through data in a particular column and returns results.
To enable this search, update the columns array as follows:
[
    {
      title: "Name",
      field: "name",
      headerFilter: "input",
      headerFilterPlaceholder: "Search Name",
      headerFilterFunc: "like",
      headerFilterLiveFilter: true,
    },
    {
      title: "Age",
      field: "age",
      headerFilter: "input",
      headerFilterPlaceholder: "Search Age",
      headerFilterFunc: "like",
      headerFilterLiveFilter: true,
    },
    {
      title: "Country",
      field: "country",
      headerFilter: "input",
      headerFilterPlaceholder: "Search Country",
      headerFilterFunc: "like",
      headerFilterLiveFilter: true,
    },
  ];
The code above tells Tabulator that we need:
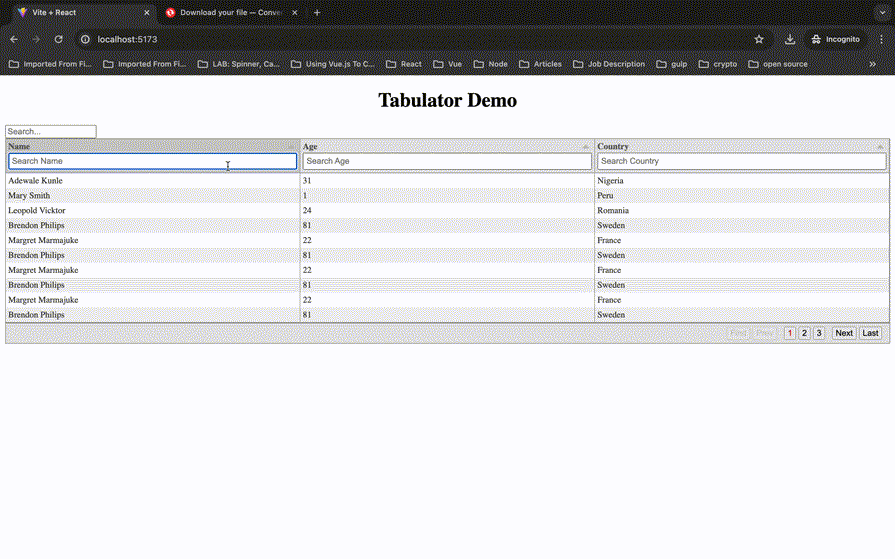
headerFilter inputheaderFilterPlaceholder of Search by NameheaderFilterFunc set to likeheaderFilterLiveFilter set to trueAge and Country objectsNow, let’s check it out in the browser. We have successfully added a column search to our project:

While column search may be sufficient in some situations, sometimes, you need to search through the entire table.
In the App.jsx file, copy and paste the following code:
//App.jsx
import  { useState, useMemo } from 'react';
We’ll use the useState Hook to keep track of the state of our table data when we search and useMemo to cache the search result so that it does not need to be recalculated.
Next, set up useState to keep track of the data changes:
//App.jsx
const [searchQuery, setSearchQuery] = useState('');
Then, create the handleSearch function to update the searchQuery value:
//App.jsx

const handleSearch = (e) => {
  setSearchQuery(e.target.value);
};
Now, we’ll create the filteredData function to cache the search result so that it does not need to be recalculated when the component re-renders:
const filteredData = useMemo(() => {
  if (!searchQuery.trim()) {
    return data; // Return all data if no search query
  }
  return data.filter((row) =>
    Object.values(row).some(
      (value) =>
        value &&
        value.toString().toLowerCase().includes(searchQuery.toLowerCase())
    )
  );
}, [searchQuery]);
There needs to be an input element to get data for the search. Add the following to the JSX:
 <input
    type="text"
    name="search"
    placeholder="Search..."
    value={searchQuery}
    onChange={handleSearch}
  />
And finally, add the following to the ReactTabulator component:
//App.jsx
data={filteredData}
Our updated code now looks like this:
//App.jsx

import { useState } from "react"; // for search functionality
import "./App.css";
import "react-tabulator/css/tabulator.min.css";
import { ReactTabulator } from "react-tabulator";

const options = {
    pagination: "remote", // or 'local'
    paginationSize: 10, // number of rows per page
  };

  const columns = [
    {
      title: "Name",
      field: "name",
      headerFilter: "input",
      headerFilterPlaceholder: "Search Name",
      headerFilterFunc: "like",
      headerFilterLiveFilter: true,
    },
    {
      title: "Age",
      field: "age",
      headerFilter: "input",
      headerFilterPlaceholder: "Search Age",
      headerFilterFunc: "like",
      headerFilterLiveFilter: true,
    },
    {
      title: "Country",
      field: "country",
      headerFilter: "input",
      headerFilterPlaceholder: "Search Country",
      headerFilterFunc: "like",
      headerFilterLiveFilter: true,
    },
  ];

  let data = [
    { id: 1, name: "Adewale Kunle", age: "31", country: "Nigeria" },
    { id: 2, name: "Mary Smith", age: "1", country: "Peru" },
    {
      id: 3,
      name: "Leopold Vicktor",
      age: "24",
      country: "Romania",
    },
    {
      id: 4,
      name: "Brendon Philips",
      age: "81",
      country: "Sweden",
    },
    {
      id: 5,
      name: "Margret Marmajuke",
      age: "22",
      country: "France",
    },
    {
      id: 4,
      name: "Brendon Philips",
      age: "81",
      country: "Sweden",
    },
    {
      id: 5,
      name: "Margret Marmajuke",
      age: "22",
      country: "France",
    },
    {
      id: 4,
      name: "Brendon Philips",
      age: "81",
      country: "Sweden",
    },
    {
      id: 5,
      name: "Margret Marmajuke",
      age: "22",
      country: "France",
    },
    {
      id: 4,
      name: "Brendon Philips",
      age: "81",
      country: "Sweden",
    },
    {
      id: 5,
      name: "Margret Marmajuke",
      age: "22",
      country: "France",
    },
    {
      id: 4,
      name: "Brendon Philips",
      age: "81",
      country: "Sweden",
    },
    {
      id: 5,
      name: "Margret Marmajuke",
      age: "22",
      country: "France",
    },
    {
      id: 4,
      name: "Brendon Philips",
      age: "81",
      country: "Sweden",
    },
    {
      id: 5,
      name: "Margret Marmajuke",
      age: "22",
      country: "France",
    },
    {
      id: 4,
      name: "Brendon Philips",
      age: "81",
      country: "Sweden",
    },
    {
      id: 5,
      name: "Margret Marmajuke",
      age: "22",
      country: "France",
    },
    {
      id: 4,
      name: "Brendon Philips",
      age: "81",
      country: "Sweden",
    },
    {
      id: 5,
      name: "Margret Marmajuke",
      age: "22",
      country: "France",
    },
    {
      id: 4,
      name: "Brendon Philips",
      age: "81",
      country: "Sweden",
    },
    {
      id: 5,
      name: "Margret Marmajuke",
      age: "22",
      country: "France",
    },
    {
      id: 4,
      name: "Brendon Philips",
      age: "81",
      country: "Sweden",
    },
    {
      id: 5,
      name: "Margret Marmajuke",
      age: "22",
      country: "France",
    },
  ];
export default function App() {
  const [searchQuery, setSearchQuery] = useState("");

  const handleSearch = (e) => {
    setSearchQuery(e.target.value);
  };

  const filteredData = useMemo(() => {
    if (!searchQuery.trim()) {
      return data; // Return all data if no search query
    }
    return data.filter((row) =>
      Object.values(row).some(
        (value) =>
          value &&
          value.toString().toLowerCase().includes(searchQuery.toLowerCase())
      )
    );
  }, [searchQuery]);

  return (
    <>
      <h1 className='Demo_header'>Tabulator Demo</h1>
      <input
        type='text'
        placeholder='Search...'
        value={searchQuery}
        name="search"
        onChange={handleSearch}
      />
      <ReactTabulator
        data={filteredData}
        columns={columns}
        options={options}
      />
    </>
  );
}
React Tabulator allows you to easily experiment with different themes with a single import statement.
Here are different themes you can try out:
// --- Comment out the Theme you want to try:
// import "react-tabulator/css/tabulator.min.css"; // default
// import "react-tabulator/css/tabulator_modern.min.css"; // default
// import "react-tabulator/css/bootstrap/tabulator_bootstrap.min.css"; // bootstrap
// import "react-tabulator/css/bulma/tabulator_bulma.min.css"; // bulma
import "react-tabulator/css/semantic-ui/tabulator_semantic-ui.min.css"; // semantic
// import "react-tabulator/css/materialize/tabulator_materialize.min.css"; // materialize
Manually updating large datasets can be tedious. For example, if we had 100 users rendered on a page and we needed to update each user’s information, a typical way to handle this would be to make a put request to the users/id endpoint for each user update. This can be time-consuming and less performant as we have to send over 100 requests to the server.
A better approach to handle this would be to implement bulk data modification on the server while the client sends an array of modified data to the server in one call.
Tabulator makes it easier and more user-friendly to implement bulk data modification on the client side:
export default function App() {
  const editableColumns = [
    {
      title: "Status",
      field: "field",
      editor: "input"
    },
    {
      title: "Designed",
      field: "designed",
      align: "center",
      formatter: "tickCross",
      editor: true
    },
    {
      title: "Tested",
      field: "tested",
      align: "center",
      formatter: "tickCross",
      editor: true
    },
    {
      title: "Manufactured",
      field: "manufactured",
      align: "center",
      formatter: "tickCross",
      editor: true
    },
    {
      title: "Shipped",
      field: "shipped",
      align: "center",
      formatter: "tickCross",
      editor: true
    },
    {
      title: "Available",
      field: "available",
      align: "center",
      formatter: "tickCross",
      editor: true
    }
  ];

  const initialData = [
    {
      field: "Closed",
      designed: true,
      tested: true,
      manufactured: true,
      shipped: true,
      available: true
    },
    {
      field: "Booked",
      designed: false,
      tested: true,
      manufactured: true,
      shipped: true,
      available: true
    },
    {
      field: "Purchased",
      designed: false,
      tested: false,
      manufactured: true,
      shipped: true,
      available: true
    },
    {
      field: "Pending",
      designed: false,
      tested: false,
      manufactured: true,
      shipped: true,
      available: true
    }
  ];

}
We define editableColumns to specify the columns for the table, including their titles, data fields, and editors (if any).
initialData holds the initial data entries for the table, with each entry representing a row and containing values for different columns:
export default function App() {
  const [dataA] = useState(initialData);

    const handleSetData = () => {
      alert("Reg Form Submitted\n" + JSON.stringify(dataA));
      //HTTP request to send data to server
    };

    return (
      <div style={{ paddingLeft: "16px" }}>
        <h3>Mapping Table</h3>
        <ReactTabulator
          columns={editableColumns}
          data={dataA}
        />
        <button
          onClick={handleSetData}
          style={{ marginTop: "16px", backgroundColor: "green" }}
        >
          Submit
        </button>
      </div>
    )
}
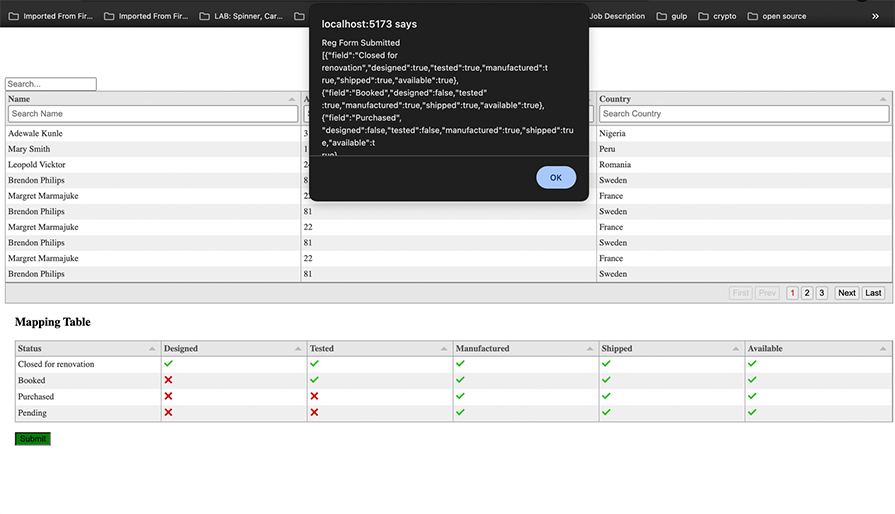
This component displays a table with editable cells using React Tabulator, along with a submit button to trigger an action with the table data. We can implement HTTP requests to send the bulk modified data to the server:

While Tabulator is a good choice for implementing tables in React applications, it’s important to acknowledge the variety of other table libraries available. In this section, we’ll compare Tabulator with two other popular table libraries in React: material-table and DataTables.
material-table is a simple but powerful data table for React based on Material-UI Table with additional features like custom column rendering, component overriding, sorting, search, and more.
At the basic level, React Tabulator and material-table solve the same issue, but some features set them apart. React Tabulator offers features like sorting, filtering, pagination, row selection, and cell. On the other hand, material-table comes with features like grouping, filtering, sorting, pagination, and editing. It also comes with a date picker right out of the box.
DataTables is a JavaScript and HTML table-enhancing library. It is a highly flexible tool, built upon the foundations of progressive enhancement, that adds advanced features to any HTML table.
DataTables, although originally a JQuery plugin, also works with React and other JavaScript libraries. It offers support for pagination, filtering, and sorting. Apart from the regular features, it also has a data export functionality that allows users to export table data in JSON, CSV, PDF, and Excel.
When exporting to CSV files, downloading doesn’t work out of the box with React Tabulator as you need to use this workaround.
React Tabulator offers reliable solutions to most of the challenges associated with tables in frontend applications. It not only streamlines the development of dynamic and responsive table components but also excels in handling large datasets with enhanced performance. It’s a great choice for developers seeking advanced table functionality and easy integration.
There’s no doubt that frontends are getting more complex. As you add new JavaScript libraries and other dependencies to your app, you’ll need more visibility to ensure your users don’t run into unknown issues.
LogRocket is a frontend application monitoring solution that lets you replay JavaScript errors as if they happened in your own browser so you can react to bugs more effectively.

LogRocket works perfectly with any app, regardless of framework, and has plugins to log additional context from Redux, Vuex, and @ngrx/store. Instead of guessing why problems happen, you can aggregate and report on what state your application was in when an issue occurred. LogRocket also monitors your app’s performance, reporting metrics like client CPU load, client memory usage, and more.
Build confidently — start monitoring for free.

@container scroll-state: Replace JS scroll listeners nowCSS @container scroll-state lets you build sticky headers, snapping carousels, and scroll indicators without JavaScript. Here’s how to replace scroll listeners with clean, declarative state queries.

Explore 10 Web APIs that replace common JavaScript libraries and reduce npm dependencies, bundle size, and performance overhead.

Russ Miles, a software development expert and educator, joins the show to unpack why “developer productivity” platforms so often disappoint.

Discover what’s new in The Replay, LogRocket’s newsletter for dev and engineering leaders, in the February 18th issue.
Would you be interested in joining LogRocket's developer community?
Join LogRocket’s Content Advisory Board. You’ll help inform the type of content we create and get access to exclusive meetups, social accreditation, and swag.
Sign up now