
Loading 3D models into a WebGL scene is one of the most complicated aspects of 3D rendering in the browser. While libraries like Three.js and Babylon.js provide powerful APIs that help ease the tension of working with WebGL, they are not immune from their own tedious processes, like creating shaders from scratch and reusing scene.add() when adding objects to the scene.
react-three-fiber is a React renderer for Three.js that eases working with 3D models on the web by handling imperative Three.js functionalities under the hood and providing access to primitive Three.js objects through Hooks.
R3F does not improve nor mitigate the base performance of Three.js; it remains the same because R3F is a library built on top of Three. They share the same characteristics, except for React’s component model, which R3F uses to balance complexity and performance.
Scaling performance on R3F is a lot easier compared to Three.js because it provides a comprehensive and simpler approach in mitigating WebGL’s expensive use of hardware resources. For example, implementing an on-demand rendering performance optimization in R3F is as easy as adding a frameloop prop and a demand value to the Canvas component:
<canvas frameloop="demand"></canvas>
Other performance optimizations include: instancing, reusing geometries and materials, reducing the level of details on materials, movement regression, etc.
In this article, we’ll cover how to render and configure 3D assets created in a 3D software program like Blender or Maya in a React project using react-three-fiber. By the end of this article, you’ll be able to render 3D models on your website.
To follow along with this tutorial, you’ll need a fundamental knowledge of React and Three.js’ architecture, including the lighting, geometry, and canvas. You’ll also need to have Node.js installed on your machine. Let’s get started!
The Replay is a weekly newsletter for dev and engineering leaders.
Delivered once a week, it's your curated guide to the most important conversations around frontend dev, emerging AI tools, and the state of modern software.
Out of the box, Three.js supports several 3D model formats. Due to the complexity and difficulty of most of these file formats, it’s recommended to use the glTF (GL Transmission Format) whenever possible.
Focused on runtime asset delivery, glTF assets are fast to load and can be compressed into a compact size for transmission. glTF assets are provided in both JSON .gltf and binary .glb formats. Each supported file format has a respective loader in Three.js. For example, you’d use the glTF loader to load a glTF or GLB file into a react-three-fiber scene.
To create your model, you can use the 3D modeling software of your choice, but in my experience, most people prefer Blender. If you’re like me, and you don’t have any experience with creating 3D models, you can outsource public-domain glTF files from a site like sketchfab.com.
Most of the free assets on these sites fall under the Creative Commons license, meaning you can use them in your project as long as you include attribution to the original creators. It’s wise to check for permission to use an asset before including it in your project.
If you plan to add actions like animation or event mapping to your model, you should design your asset in such a way that each part, or mesh, is properly grouped and separated. Unfortunately, few of the free assets available online have this implemented, so you’d need to purchase one or build your own.
In this tutorial, we’ll use the shoe asset as an example project, which is created by Yuri Artiukh. If you’re finding it hard to build or find a model, you can get one from the Three.js GitHub repo.
glTF is based on JSON, meaning some of its data is stored externally, for example, geometry, shaders, textures, and animation data. However, GLB stores this data internally, making its size considerably smaller than glTF. Therefore, the .glb binary format is best to use in your projects. Now, let’s walk through converting glTF files to GLB.
There are several tools you could use for this operation, however, the glTF-pipeline is one of the best choices. It is a flexible tool for optimizing glTF assets that has several extensions for performing common operations right from your command line tool, like GLB to glTF conversion, glTF compression, and more.
Alternately, you can use the official glTF tool extension for VS Code to preview, debug, and convert models right from the editor. You can also use this extension to edit and tweak glTF files. For example, if your model’s meshes aren’t named properly, you can edit the file and rename it however you want.
To begin the conversion process with glTF-pipeline, first, we need to install it globally on our machine with the following command:
npm install -g gltf-pipeline
Next, place the glTF file in an empty folder and open your command line tool. cd into the folder and run the command below:
gltf-pipeline -i <source file> -o <output file>
Replace the first placeholder in the command above with the name of the source file. Replace the second placeholder with your preferred output file name:
gltf-pipeline -i shoe.gltf -o shoe.glb
After running the command above, you should see a new GLB file in the folder alongside the previous glTF file. This process also works the other way around for converting GLB to glTF format.
To avoid degrading our site’s performance with the size of our 3D asset, we’ll compress it before loading it into our scene. It’s recommended that your file size not exceed one to two megabytes. We’ll use a glTF pipeline compression extension called Draco:
gltf-pipeline -i <source file> -o <output file> --draco.compressionLevel=10
The command above is similar to the one we used earlier during the conversion process, with the only difference being the compression level flag. Draco compression has a maximum value of ten and a minimum value of zero. Passing 10 into the compression level provides the maximum possible compression.
Now, we can set up a project, create a scene, and load our model.
First, let’s create a new React project with Create React App:
npx create-react-app react-three
Afterwards, install react-three-fiber with the command below:
npm install three @react-three/fiber
Once you’re done, go ahead and run the command below to install all the dependencies we need for the project:
npm i @react-three/drei react-colorful valtio
The command above will install the following dependencies:
Next, we’ll create a scene in an empty component. First, import and create an empty canvas as follows:
import React from "react";
import { Canvas } from "react-three-fiber";
import "./styles.css";
export default function App() {
  return <Canvas style={{ background: "#171717" }}></Canvas>;
}
Now, our project and scene are set up and ready for us to start loading our models! Before we can load our asset into the scene and configure it, we need to find an easy way to convert our model into a component.
Loading glTF models into a Three.js scene is a lot of work. Before we can configure or animate our model’s meshes, we need to iterate through each part of our model’s meshes and save them separately.
Luckily for us, react-three-fiber has a remarkable utility package called gltfjsx that breaks down the model and compiles it into a declarative and reusable JSX component.
To begin, open your command line tool, cd into the folder where your compressed glTF model is, and run the command below:
npx gltfjsx <glTF model source file>
Run the command above on the shoe model we downloaded earlier. Now, the code above will look like the following:
npx gltfjsx shoe-draco.gltf
The command above will return a JavaScript file that schemes out all the asset’s content in the format of a React functional component. The file’s content will look similar to the following code:
import React, { useRef } from 'react'
import { useGLTF } from '@react-three/drei/useGLTF'

function Shoe({ ...props }) {
 const group = useRef()
 const { nodes, materials } = useGLTF('/shoe-draco.glb')
 const snap = useSnapshot(state);
 return (
<group ref={group} {...props} dispose={null}>
  <group ref={group} {...props} dispose={null}>
    <mesh geometry={nodes.shoe.geometry} material={materials.laces}/>
    <mesh geometry={nodes.shoe_1.geometry} material={materials.mesh}/>
    <mesh geometry={nodes.shoe_2.geometry} material={materials.caps} />
    <mesh geometry={nodes.shoe_3.geometry} material={materials.inner} />
    <mesh geometry={nodes.shoe_4.geometry} material={materials.sole}/>
    <mesh geometry={nodes.shoe_5.geometry} material={materials.stripes}/>
    <mesh geometry={nodes.shoe_6.geometry} material={materials.band}/>
    <mesh geometry={nodes.shoe_7.geometry} material={materials.patch} />
   </group>
 </group>
)}
The nodes’ and materials’ values are being destructured by the useGLTF Hook, while the path to our model is being passed into the Hook as a parameter.
The destructured node is an object that contains all the information in our model, including the animation, texture, and geometry. In this case, the node is using the model’s restructured geometry and is passed into the mesh components as props.
You can either drop the newly created file into your project’s src folder as is, or you can copy and paste the code from inside the file into an existing component in your project.
To add the model to the scene, import it as you would any other React component:
import Shoe from './Shoe.js'
Next, move the glTF file you compressed earlier to the /public folder. Finally, add the component inside your canvas:
import React from "react";
import { Canvas } from "react-three-fiber";
import Shoe from './Shoe.js'
import "./styles.css";

export default function App() {
  return(
<Canvas style={{ background: "#171717" }}>
   <Shoe />
</Canvas>;
)};
You could also add it to your component as follows:
import React, { useRef } from "react"
import { Canvas } from "react-three-fiber"
import { useGLTF } from '@react-three/drei/useGLTF'
import "./styles.css";

function Shoe({ ...props }) {
 const group = useRef()
 const { nodes, materials } = useGLTF('/shoe-draco.glb')
 return (
<group ref={group} {...props} dispose={null}>
  <group ref={group} {...props} dispose={null}>
    <mesh geometry={nodes.shoe.geometry} material={materials.laces}/>
    <mesh geometry={nodes.shoe_1.geometry} material={materials.mesh}/>
    <mesh geometry={nodes.shoe_2.geometry} material={materials.caps} />
    <mesh geometry={nodes.shoe_3.geometry} material={materials.inner} />
    <mesh geometry={nodes.shoe_4.geometry} material={materials.sole}/>
    <mesh geometry={nodes.shoe_5.geometry} material={materials.stripes}/>
    <mesh geometry={nodes.shoe_6.geometry} material={materials.band}/>
    <mesh geometry={nodes.shoe_7.geometry} material={materials.patch} />
   </group>
 </group>
)}

export default function App() {
  return(
<Canvas style={{ background: "#171717" }}>
   <Shoe />
</Canvas>;
)};
At this point, if you start the development server, React will throw a compile error. The model component is asynchronous, therefore, we have to nest it within the <Suspense>component in the canvas, giving us control over intermediate loading fallbacks and error handling.
First, we need to import the model component from React, then wrap it around the model in the canvas:
 import React, { Suspense, useRef } from "react";
import { Canvas } from "react-three-fiber";
import { useGLTF } from '@react-three/drei/useGLTF'
import "./styles.css";

function Shoe({ ...props }) {
 const group = useRef()
 const { nodes, materials } = useGLTF('/shoe-draco.glb')
 return (
<group ref={group} {...props} dispose={null}>
  <group ref={group} {...props} dispose={null}>
    <mesh geometry={nodes.shoe.geometry} material={materials.laces}/>
    <mesh geometry={nodes.shoe_1.geometry} material={materials.mesh}/>
    <mesh geometry={nodes.shoe_2.geometry} material={materials.caps} />
    <mesh geometry={nodes.shoe_3.geometry} material={materials.inner} />
    <mesh geometry={nodes.shoe_4.geometry} material={materials.sole}/>
    <mesh geometry={nodes.shoe_5.geometry} material={materials.stripes}/>
    <mesh geometry={nodes.shoe_6.geometry} material={materials.band}/>
    <mesh geometry={nodes.shoe_7.geometry} material={materials.patch} />
   </group>
 </group>
)}

export default function App() {
  return(
<Canvas style={{ background: "#171717" }}>
  <Suspense fallback={null}>
     <Shoe />
  </Suspense>
</Canvas>;
)};
The code above will clear the error, and our model will be successfully displayed on the browser. However, whatever we load into our scene will appear only as a silhouette figure of the model.
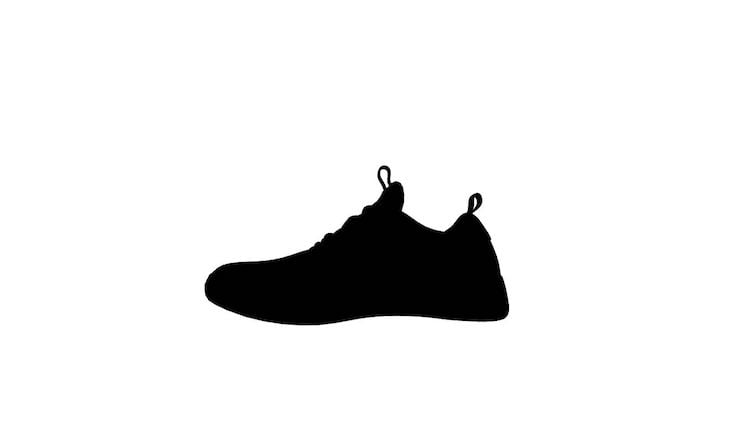
Currently, our scene doesn’t have a lighting source. A common solution is to simply add ambientLight and spotLight components just before <Suspense> in the canvas:
<Canvas style={{ background: "#171717" }}>
<ambientLight intensity={1} />
<spotLight intensity={0.5} angle={0.1} penumbra={1} position={[10, 15, 10]} castShadow />
  <Suspense fallback={null}>
      <Shoe />
   </Suspense>
</Canvas>;
Afterwards, the model will display properly:
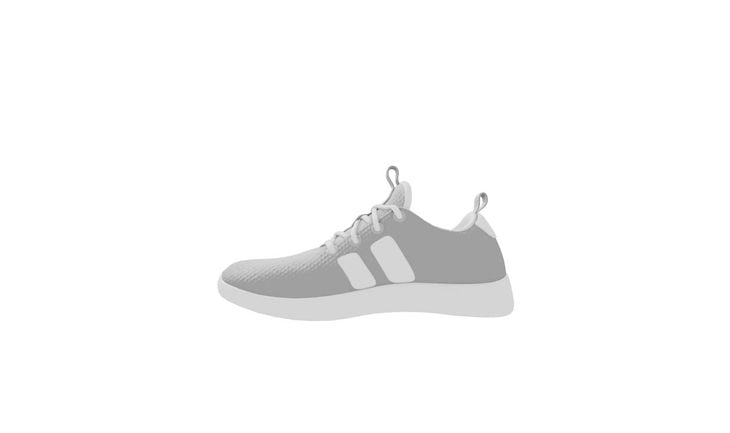
Go ahead and fiddle with the intensity, angle, and position of the lights. If you’re not satisfied with the result, you could also position the light by adding a positioning prop.
Now that our model is declarative, we have complete access to its meshes, meaning we can add, remove, and alter parts of our model.
For example, if the first mesh component in the code represents the shoe’s laces, and we delete or comment out that mesh, the shoe’s laces will disappear in the scene. You could decide to animate, add events, and even perform conditions on your model.
To alter the model, simply change the props. If we want to change the color of the first mesh to red, add material-color="Red" as a prop. In the scene, that part of the model will change to red:
<mesh material={materials.White} geometry={nodes['buffer-0-mesh-0'].geometry} material-color="Red"/>
We can do the same thing dynamically with React’s useState Hook, as well as any state management library that supports Suspense. In this case, we’ll use Valtio, which we installed earlier.
Go ahead and import proxy and useSnapshot from Valtio:
import {proxy, useSnapshot} from 'valtio'
Next, copy the code below and paste it just before your model component:
const state = proxy({
  current: null,
  items: {
    laces: "#ff3",
    mesh: "#3f3",
    caps: "#3f3",
    inner: "#3f3",
    sole: "#3f3",
    stripes: "#3f3",
    band: "#3f3",
    patch: "#3f3",
  },
})
We created an object with two keys, items and current. current has a value of null, while items has an object value with keys representing each part of our model and a hex color value. The object is then wrapped with the proxy.
To use the state inside the component, we’ll create a constant snap variable inside the model component and assign it useSnapshot. Afterwards, we’ll pass the state into the snapshot as a parameter:
import React, { useRef, Suspense} from 'react'
import { Canvas } from "react-three-fiber";
import "./styles.css";
import { useGLTF } from '@react-three/drei/useGLTF'
import {proxy, useSnapshot} from 'valtio';
const state = proxy({
current: null,
items: {
laces: "#ff3",
mesh: "#3f3",
caps: "#3f3",
inner: "#3f3",
sole: "#3f3",
stripes: "#3f3",
band: "#3f3",
patch: "#3f3",
},
})
function Shoe({ ...props }) {
const group = useRef()
const { nodes, materials } = useGLTF('/shoe-draco.glb')
const snap = useSnapshot(state);
return (
<group ref={group} {...props} dispose={null}>
<group ref={group} {...props} dispose={null}>
<mesh geometry={nodes.shoe.geometry} material={materials.laces}/>
<mesh geometry={nodes.shoe_1.geometry} material={materials.mesh}/>
<mesh geometry={nodes.shoe_2.geometry} material={materials.caps} />
<mesh geometry={nodes.shoe_3.geometry} material={materials.inner} />
<mesh geometry={nodes.shoe_4.geometry} material={materials.sole}/>
<mesh geometry={nodes.shoe_5.geometry} material={materials.stripes}/>
<mesh geometry={nodes.shoe_6.geometry} material={materials.band}/>
<mesh geometry={nodes.shoe_7.geometry} material={materials.patch} />
</group>
</group>
)}
export default function App() {
return <Canvas style={{ background: "#171717" }}>
<ambientLight intensity={1} />
<spotLight intensity={0.5} angle={0.1} penumbra={1} position={[10, 15, 10]} castShadow />
<Suspense fallback={null}>
<Shoe />
</Suspense>
</Canvas>;
}
Before we can use the state’s snapshots in the component, we have to set the material color of each mesh to the state variable color. To do so, we’ll add the material-color props to each mesh as we did previously. This time, we’ll pass it our state’s snapshot:
const state = proxy({
  current: null,
  items: {
    laces: "#ff3",
    mesh: "#3f3",
    caps: "#3f3",
    inner: "#3f3",
    sole: "#3f3",
    stripes: "#3f3",
    band: "#3f3",
    patch: "#3f3",
  },
})

function Shoe({ ...props }) {
 const group = useRef()
 const { nodes, materials } = useGLTF('/shoe-draco.glb')
 const snap = useSnapshot(state);
 return (
<group ref={group} {...props} dispose={null}>
  <group ref={group} {...props} dispose={null}>
    <mesh geometry={nodes.shoe.geometry} material={materials.laces} material-color={snap.items.laces}/>
    <mesh geometry={nodes.shoe_1.geometry} material={materials.mesh} material-color={snap.items.mesh}/>
    <mesh geometry={nodes.shoe_2.geometry} material={materials.caps} material-color={snap.items.caps}/>
    <mesh geometry={nodes.shoe_3.geometry} material={materials.inner} material-color={snap.items.inners}/>
    <mesh geometry={nodes.shoe_4.geometry} material={materials.sole} material-color={snap.items.sole}/>
    <mesh geometry={nodes.shoe_5.geometry} material={materials.stripes} material-color={snap.items.stripes}/>
    <mesh geometry={nodes.shoe_6.geometry} material={materials.band} material-color={snap.items.band}/>
    <mesh geometry={nodes.shoe_7.geometry} material={materials.patch} material-color={snap.items.patch}/>
   </group>
 </group>
  )
  }
Now, if we change any of the colors in our state items, that part of the model will update its color in the scene.
Instead of changing the state manually, we can add events to our model so that users can select each part of the shoe and change the color with a color picker.
First, we’ll add onPointerDown and onPointerMissed events to the model’s group component. We’ll create DOM event functions that set state to the part of the model that was clicked and null when nothing is selected:
<group ref={group} {...props} dispose={null}
 onPointerDown={(e) => {e.stopPropagation(); state.current = e.object.material.name }}
onPointerMissed={(e) =>{state.current = null} }
>
Now, we’ll import HexColorPicker from react-colorful. We’ll create a new component that will house the HexColorPicker component and a header tag that displays the name of the part of the model being clicked:
import {HexColorPicker} from 'react-colorful'


 function ColorPicker(){
 const snap = useSnapshot(state);
  return(
   <div>
     <HexColorPicker color={snap.items[snap.current]} onChange={(color)=>(state.items[state.current] = color)}/>
     <h1>{snap.current}</h1>
   </div>
    )
  }
Immediately after we save our code, a color picker GUI should appear on the browser that looks like the image below:
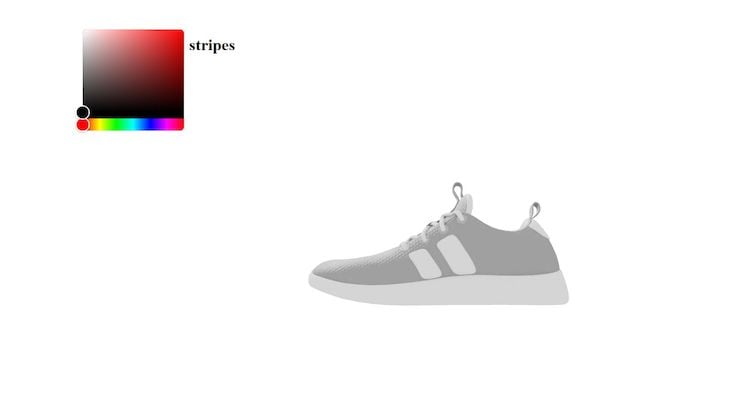
Now, to change the color of our model’s mesh, we can click it and select a color with the color picker. You can also add classNames to the color picker and an <H1> tag.
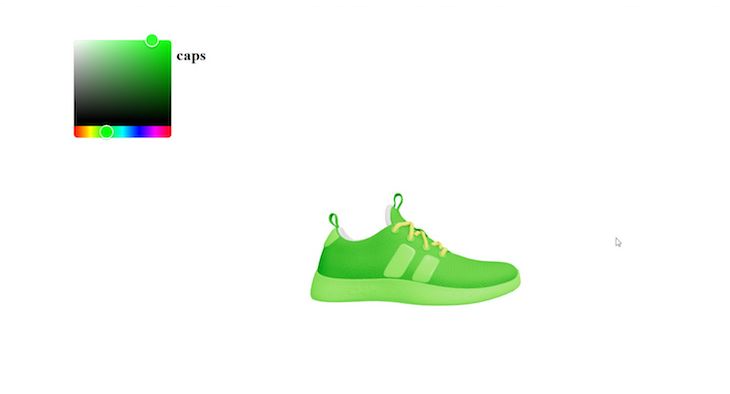
Right now, the model doesn’t feel like a 3D object. Specifically, it lacks depth and movement like a static image. We can fix this by adding an orbitControls component to the canvas:
export default function App() {
return (
<Canvas style={{ background: "#171717" }}>
<spotLight intensity={0.5} angle={0.1} penumbra={1} position={[10, 15, 10]} castShadow />
<ambientLight intensity={1} />
<Suspense fallback={null}>
<Shoe />
</Suspense>
<orbitControls />
</Canvas>;
)}
In react-three-fiber, models are animated with the useFrame Hook, which is similar to the JavaScript requestAnimationFrame() method. It returns a callback 60 times or more per second, depending on the display refresh rate.
If we set the value of our model’s rotation on the y-axis to "5.09" inside the useFrame callback, the model will translate up and down along the y-axis 60 times every second, creating the illusion of a floating object.
For an even more realistic animation, you can alter the rotation value of the z-axis and the x-axis in the useFrame Hook. To save time, we’ll use the code below:
useFrame( (state) => {
 const t = state.clock.getElapsedTime()
 ref.current.rotation.z = -0.2 - (1 + Math.sin(t / 1.5)) / 20
 ref.current.rotation.x = Math.cos(t / 4) / 8
 ref.current.rotation.y = Math.sin(t / 4) / 8
 ref.current.position.y = (1 + Math.sin(t / 1.5)) / 10
  })
Remember to import useFrame from react-three-fiber.
The complete code for our project is as follows:
import {HexColorPicker} from 'react-colorful'
import React, { useRef, Suspense} from 'react'
import { Canvas, useFrame } from "react-three-fiber";
import "./styles.css";
import { useGLTF } from '@react-three/drei/useGLTF'
import {proxy, useSnapshot} from 'valtio';

const state = proxy({
  current: null,
  items: {
    laces: "#ff3",
    mesh: "#3f3",
    caps: "#3f3",
    inner: "#3f3",
    sole: "#3f3",
    stripes: "#3f3",
    band: "#3f3",
    patch: "#3f3",
  },
})

function Shoe({ ...props }) {
 const group = useRef()

useFrame( (state) => {
 const t = state.clock.getElapsedTime()
 ref.current.rotation.z = -0.2 - (1 + Math.sin(t / 1.5)) / 20
 ref.current.rotation.x = Math.cos(t / 4) / 8
 ref.current.rotation.y = Math.sin(t / 4) / 8
 ref.current.position.y = (1 + Math.sin(t / 1.5)) / 10
  })

 const { nodes, materials } = useGLTF('/shoe-draco.glb')
 const snap = useSnapshot(state);
 return (
<group
ref={group}
{...props}
dispose={null}
onPointerDown={(e) => {e.stopPropagation(); state.current = e.object.material.name }}
onPointerMissed={(e) =>{state.current = null} }
>
  <group ref={group} {...props} dispose={null}>
    <mesh geometry={nodes.shoe.geometry} material={materials.laces}/>
    <mesh geometry={nodes.shoe_1.geometry} material={materials.mesh}/>
    <mesh geometry={nodes.shoe_2.geometry} material={materials.caps} />
    <mesh geometry={nodes.shoe_3.geometry} material={materials.inner} />
    <mesh geometry={nodes.shoe_4.geometry} material={materials.sole}/>
    <mesh geometry={nodes.shoe_5.geometry} material={materials.stripes}/>
    <mesh geometry={nodes.shoe_6.geometry} material={materials.band}/>
    <mesh geometry={nodes.shoe_7.geometry} material={materials.patch} />
   </group>
 </group>
)}

function ColorPicker(){
 const snap = useSnapshot(state);
  return(
   <div>
     <HexColorPicker color={snap.items[snap.current]} onChange={(color)=>(state.items[state.current] = color)}/>
     <h1>{snap.current}</h1>
   </div>
    )
  }

export default function App() {
  return (
  <>
<Canvas style={{ background: "#171717" }}>
<ambientLight intensity={1} />
<spotLight intensity={0.5} angle={0.1} penumbra={1} position={[10, 15, 10]} castShadow />
  <Suspense fallback={null}>
      <Shoe />
  </Suspense>
</Canvas>;
<ColorPicker />
</>
)}
Adding models to a Three.js scene is the first step of building a 3D experience on the web; a lot more effort goes into the process, and R3F makes managing the scene seamless, whether that’s for adding a 3D product viewer to an e-commerce site, VR/AR experience, or even games.
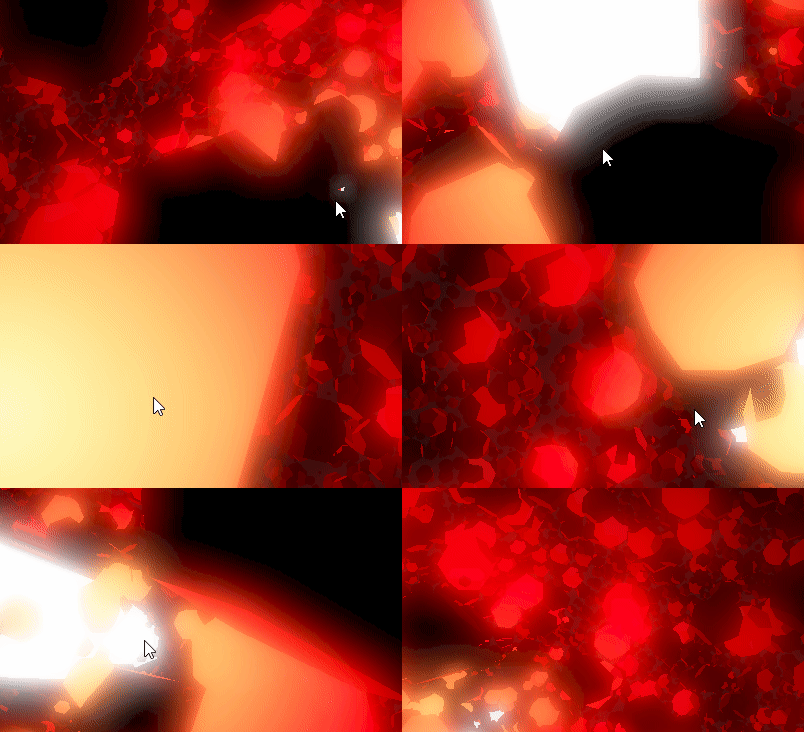
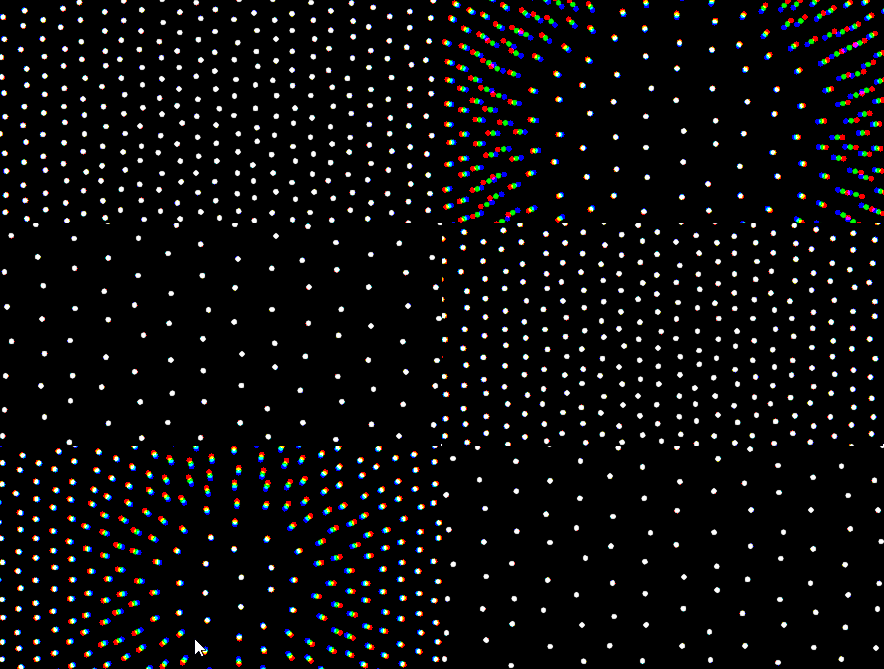
The limitation to what’s possible with R3F is one’s imagination. Below are some example projects that showcase what’s possible with react-three-fiber:

In this article, we covered how to configure 3D models for the web and how to map events to models with Valtio state management. We clarified the difference between glTF and GLB files, determining which was the best to use in our project.
We added events to our model, allowing us to create customization tools like a color picker and a lighting source. You can challenge yourself to add more elements to your model, like a shadow caster or a hover event.
Hopefully, this article will serve as a useful resource for incorporating 3D models into your website. Happy coding!
Install LogRocket via npm or script tag. LogRocket.init() must be called client-side, not
server-side
$ npm i --save logrocket

// Code:

import LogRocket from 'logrocket';
LogRocket.init('app/id');
// Add to your HTML:

<script src="https://cdn.lr-ingest.com/LogRocket.min.js"></script>
<script>window.LogRocket && window.LogRocket.init('app/id');</script>

@container scroll-state: Replace JS scroll listeners nowCSS @container scroll-state lets you build sticky headers, snapping carousels, and scroll indicators without JavaScript. Here’s how to replace scroll listeners with clean, declarative state queries.

Explore 10 Web APIs that replace common JavaScript libraries and reduce npm dependencies, bundle size, and performance overhead.

Russ Miles, a software development expert and educator, joins the show to unpack why “developer productivity” platforms so often disappoint.

Discover what’s new in The Replay, LogRocket’s newsletter for dev and engineering leaders, in the February 18th issue.
Hey there, want to help make our blog better?
Join LogRocket’s Content Advisory Board. You’ll help inform the type of content we create and get access to exclusive meetups, social accreditation, and swag.
Sign up now
8 Replies to "Configure 3D models with react-three-fiber"
Video tutorial: https://www.youtube.com/watch?v=xy_tbV4pC54
gives the credit to the content author, bro!
I have, thank you for pointing it out!
I have, thanks for pointing it out.
Hi, I don’t find useGLTF in react-three/drei no more. Do you have any work around ?
Hi Amo, try updating React, fiber and drei to the latest versions.
Great article David, thanks, you saved me a tonne of work, I was going to do an old style of loading my .glb objects into an array to instance them, but your article showed a better way. Thanks again.
Thank you, I am happy the article was helpful to you.