
The world and businesses are both online. Consumers desire convenience, and it is up to providers to give services at the click of a button, which can be done via a website or a mobile app.

The benefit of having an ecommerce website or a mobile app is that businesses may present more options for visitors to see, which is not always achievable in a physical store due to space constraints. Keeping in mind where the world is and where it is heading, businesses will require an increasing number of developers to create applications for their stores.
That is why today we’re creating a simple shopping cart application with two screens; there’s nothing fancy about the UI because our major focus here is the operation and functionality of a shopping cart.
We will be using SQFlite and SharedPreferences in our application to store the data locally on the device itself. SQFlite and SharedPreferences store data, while Provider manages the application’s state.
The Replay is a weekly newsletter for dev and engineering leaders.
Delivered once a week, it's your curated guide to the most important conversations around frontend dev, emerging AI tools, and the state of modern software.
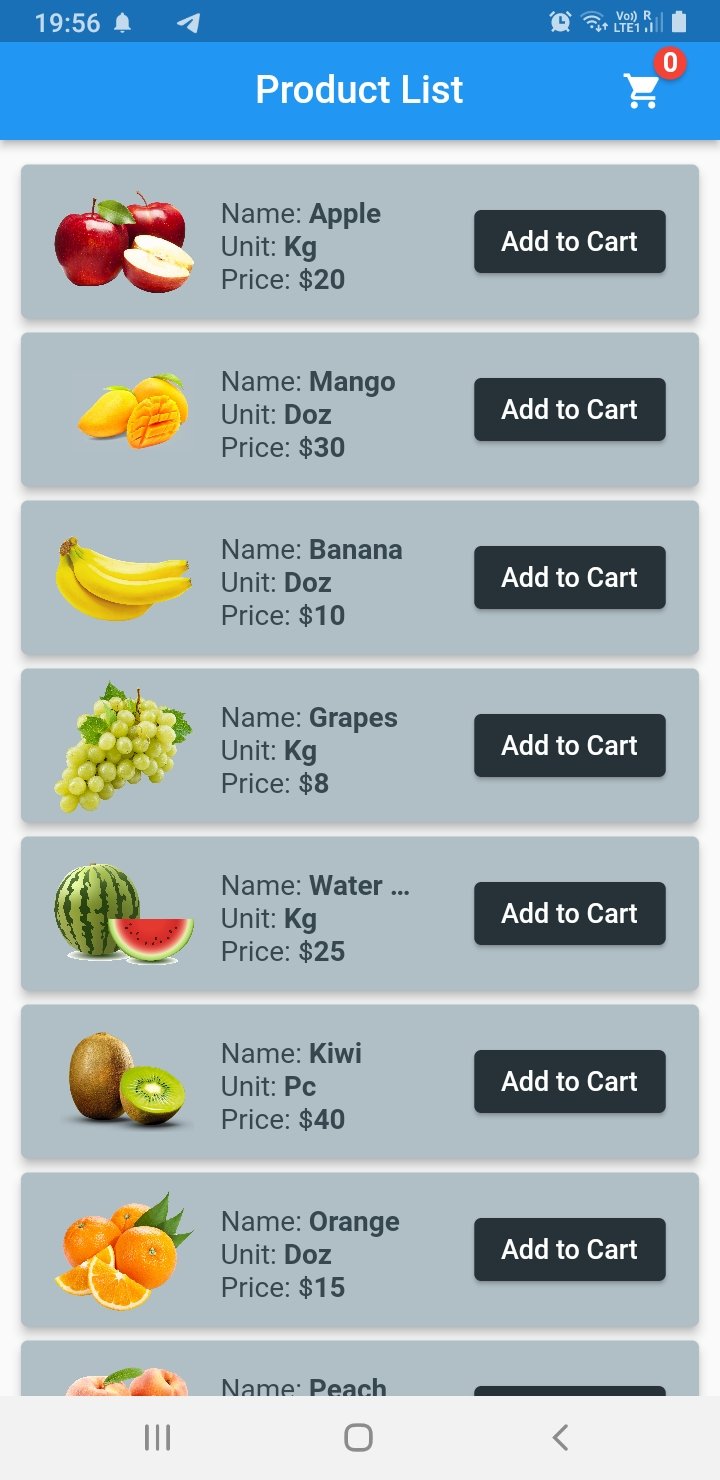
As I previously stated, we have two screens. The first is a product screen, which displays a list of fruits along with photos, the name of the fruit, and the price. Each list item includes a button that allows you to add it to your shopping basket.
The AppBar includes a shopping cart icon with a badge that updates the item count whenever a user presses the Add to Cart button.
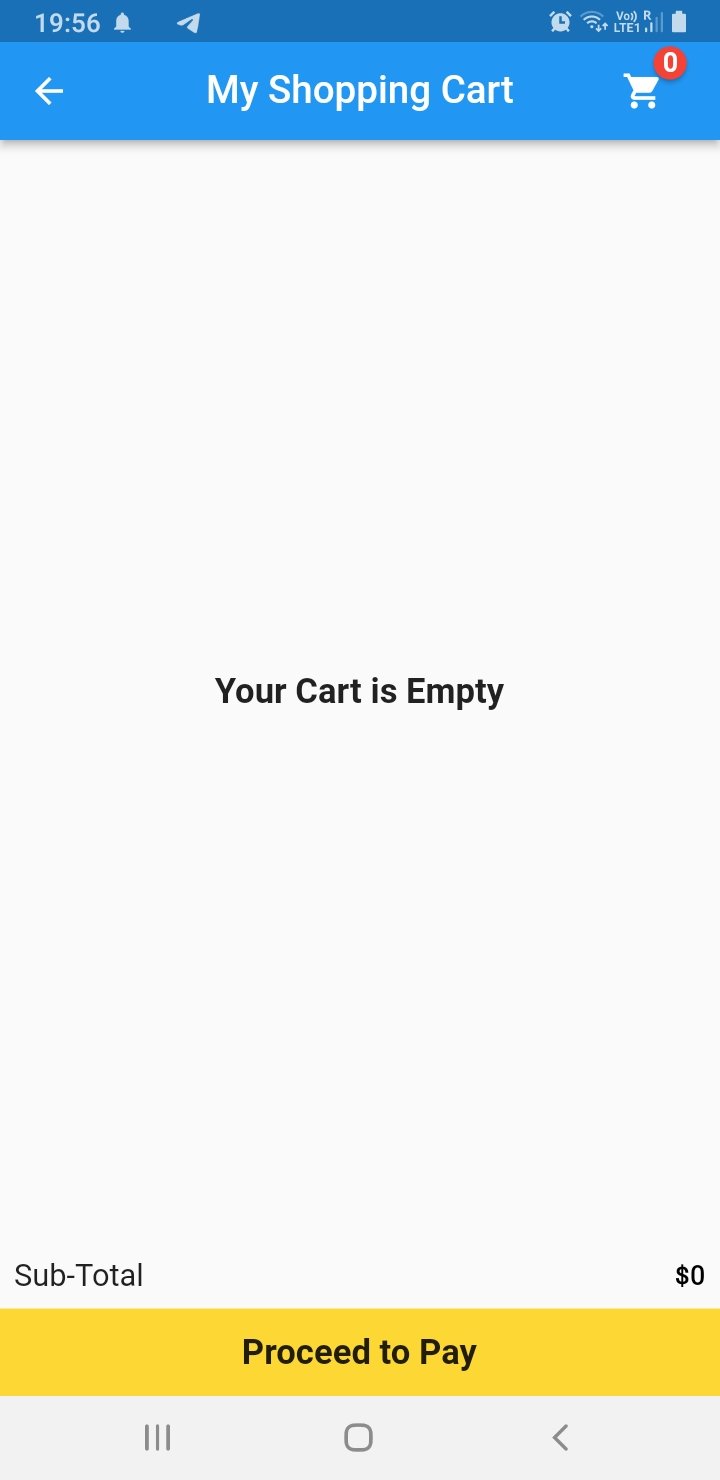
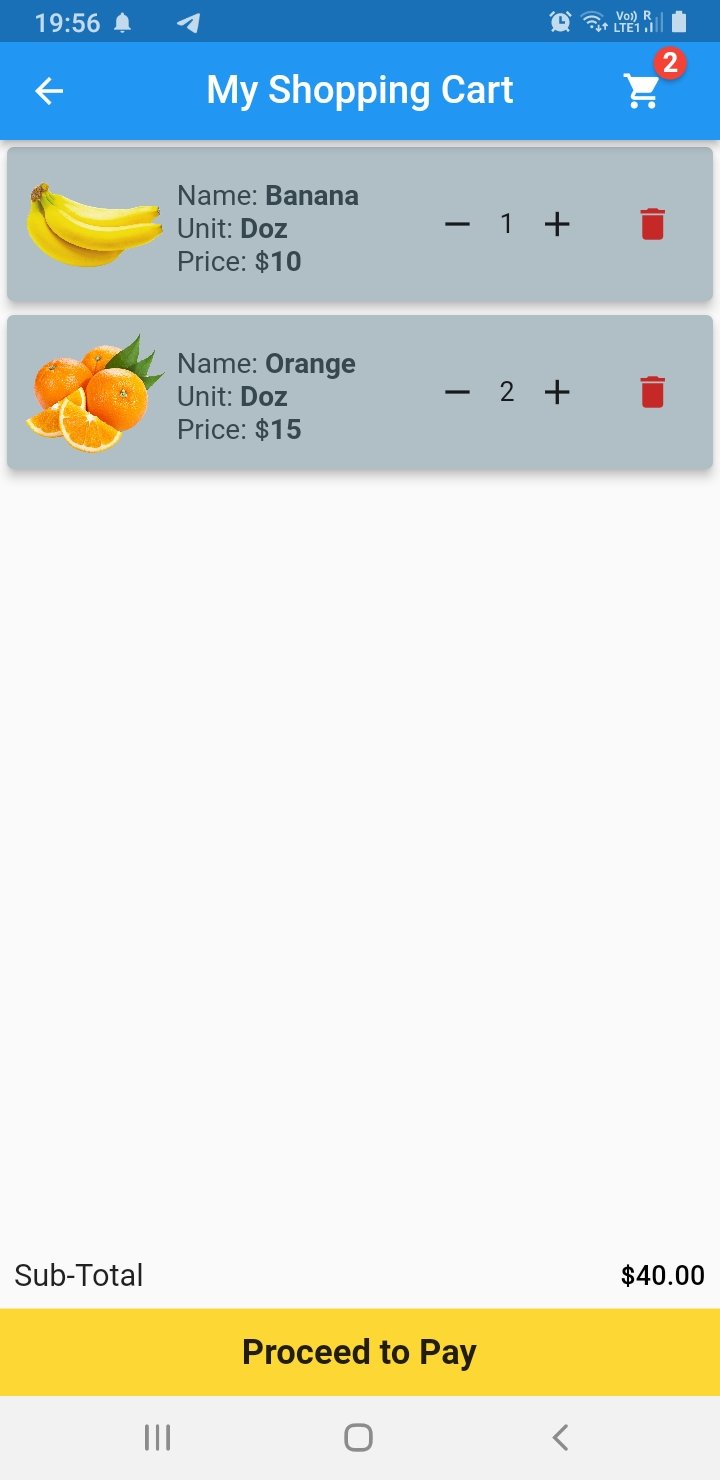
The second screen, the shopping cart screen, displays a list of the things that the user added to it. If the user decides to remove it from the cart, a delete button removes the item from the cart screen.
The entire cost is shown at the bottom of the screen. A button that, for the time being, displays a SnackBar confirming that the payment has been processed.
So, after a little introduction to the application we are developing, let us get started on programming it.
First let us step up our pubspec.yaml file by entering all the necessary dependencies that we are going to use to build our app:
shared_preferences: ^2.0.15
path_provider: ^2.0.10
sqflite: ^2.0.2+1
badges: ^2.0.2
provider: ^6.0.3
You will also need to add images so make sure that you have uncommented the assets and added the images folder under the assets.
Next we are going to start off with creating our Model classes named Cart and Item. So, create a new Dart file and name it cart_model, or you can also name it per your requirements. Enter the code given below for the Model class:
class Cart {
 late final int? id;
 final String? productId;
 final String? productName;
 final int? initialPrice;
 final int? productPrice;
 final ValueNotifier<int>? quantity;
 final String? unitTag;
 final String? image;

 Cart(
     {required this.id,
     required this.productId,
     required this.productName,
     required this.initialPrice,
     required this.productPrice,
     required this.quantity,
     required this.unitTag,
     required this.image});

 Cart.fromMap(Map<dynamic, dynamic> data)
     : id = data['id'],
       productId = data['productId'],
       productName = data['productName'],
       initialPrice = data['initialPrice'],
       productPrice = data['productPrice'],
       quantity = ValueNotifier(data['quantity']),
       unitTag = data['unitTag'],
       image = data['image'];

 Map<String, dynamic> toMap() {
   return {
     'id': id,
     'productId': productId,
     'productName': productName,
     'initialPrice': initialPrice,
     'productPrice': productPrice,
     'quantity': quantity?.value,
     'unitTag': unitTag,
     'image': image,
   };
 }
}
Create another Dart file and enter item_model and the code given below:
class Item {
 final String name;
 final String unit;
 final int price;
 final String image;

 Item({required this.name, required this.unit, required this.price, required this.image});

 Map toJson() {
   return {
     'name': name,
     'unit': unit,
     'price': price,
     'image': image,
   };
 }
}
As I previously stated, we will be utilizing SQFlite, which is essentially SQLite for Flutter, and we will save the data locally within the phone memory. We are not uploading or retrieving data from the cloud because the objective of this post is to learn the fundamental operation of a cart screen.
So, using the SQFlite package, we’re constructing a database class called DBHelper:
import 'package:sqflite/sqflite.dart';
import 'package:path_provider/path_provider.dart';
import 'package:path/path.dart';
import 'dart:io' as io;
import 'package:shopping_cart_app/model/cart_model.dart';

class DBHelper {
 static Database? _database;

 Future<Database?> get database async {
   if (_database != null) {
     return _database!;
   }
   _database = await initDatabase();
   return null;
 }

 initDatabase() async {
   io.Directory directory = await getApplicationDocumentsDirectory();
   String path = join(directory.path, 'cart.db');
   var db = await openDatabase(path, version: 1, onCreate: _onCreate);
   return db;
 }
// creating database table
 _onCreate(Database db, int version) async {
   await db.execute(
       'CREATE TABLE cart(id INTEGER PRIMARY KEY, productId VARCHAR UNIQUE, productName TEXT, initialPrice INTEGER, productPrice INTEGER, quantity INTEGER, unitTag TEXT, image TEXT)');
 }
// inserting data into the table
 Future<Cart> insert(Cart cart) async {
   var dbClient = await database;
   await dbClient!.insert('cart', cart.toMap());
   return cart;
 }
// getting all the items in the list from the database
 Future<List<Cart>> getCartList() async {
   var dbClient = await database;
   final List<Map<String, Object?>> queryResult =
       await dbClient!.query('cart');
   return queryResult.map((result) => Cart.fromMap(result)).toList();
 }
Future<int> updateQuantity(Cart cart) async {
 var dbClient = await database;
 return await dbClient!.update('cart', cart.quantityMap(),
     where: "productId = ?", whereArgs: [cart.productId]);
}

// deleting an item from the cart screen
 Future<int> deleteCartItem(int id) async {
   var dbClient = await database;
   return await dbClient!.delete('cart', where: 'id = ?', whereArgs: [id]);
 }
}
Provider classThe next step will be to develop our Provider class, which will include all of our methods and will separate our UI from the logic that will eventually manage our entire application.
We use SharedPreferences in addition to SqFlite. The reason for using SharedPreferences is because it wraps platform-specific persistence to store simple data such as the item count and total price, so that even if the user exits the application and returns to it, that information will still be available.
Create a new class called CartProvider and paste the code below into it:
class CartProvider with ChangeNotifier {
 DBHelper dbHelper = DBHelper();
 int _counter = 0;
 int _quantity = 1;
 int get counter => _counter;
 int get quantity => _quantity;

 double _totalPrice = 0.0;
 double get totalPrice => _totalPrice;

 List<Cart> cart = [];

 Future<List<Cart>> getData() async {
   cart = await dbHelper.getCartList();
   notifyListeners();
   return cart;
 }

 void _setPrefsItems() async {
   SharedPreferences prefs = await SharedPreferences.getInstance();
   prefs.setInt('cart_items', _counter);
   prefs.setInt('item_quantity', _quantity);
   prefs.setDouble('total_price', _totalPrice);
   notifyListeners();
 }

 void _getPrefsItems() async {
   SharedPreferences prefs = await SharedPreferences.getInstance();
   _counter = prefs.getInt('cart_items') ?? 0;
   _quantity = prefs.getInt('item_quantity') ?? 1;
   _totalPrice = prefs.getDouble('total_price') ?? 0;
 }

 void addCounter() {
   _counter++;
   _setPrefsItems();
   notifyListeners();
 }

 void removeCounter() {
   _counter--;
   _setPrefsItems();
   notifyListeners();
 }

 int getCounter() {
   _getPrefsItems();
   return _counter;
 }

 void addQuantity(int id) {
   final index = cart.indexWhere((element) => element.id == id);
   cart[index].quantity!.value = cart[index].quantity!.value + 1;
   _setPrefsItems();
   notifyListeners();
 }

 void deleteQuantity(int id) {
   final index = cart.indexWhere((element) => element.id == id);
   final currentQuantity = cart[index].quantity!.value;
   if (currentQuantity <= 1) {
     currentQuantity == 1;
   } else {
     cart[index].quantity!.value = currentQuantity - 1;
   }
   _setPrefsItems();
   notifyListeners();
 }

 void removeItem(int id) {
   final index = cart.indexWhere((element) => element.id == id);
   cart.removeAt(index);
   _setPrefsItems();
   notifyListeners();
 }

 int getQuantity(int quantity) {
   _getPrefsItems();
   return _quantity;
 }

 void addTotalPrice(double productPrice) {
   _totalPrice = _totalPrice + productPrice;
   _setPrefsItems();
   notifyListeners();
 }

 void removeTotalPrice(double productPrice) {
   _totalPrice = _totalPrice - productPrice;
   _setPrefsItems();
   notifyListeners();
 }

 double getTotalPrice() {
   _getPrefsItems();
   return _totalPrice;
 }
}
Now let us start building our UI for our product list screen. First we are going to add data to our Item model that we created. We are adding the data by creating a List of products in our Item model class:
List<Item> products = [
 Item(
     name: 'Apple', unit: 'Kg', price: 20, image: 'assets/images/apple.png'),
 Item(
     name: 'Mango',
     unit: 'Doz',
     price: 30,
     image: 'assets/images/mango.png'),
 Item(
     name: 'Banana',
     unit: 'Doz',
     price: 10,
     image: 'assets/images/banana.png'),
 Item(
     name: 'Grapes',
     unit: 'Kg',
     price: 8,
     image: 'assets/images/grapes.png'),
 Item(
     name: 'Water Melon',
     unit: 'Kg',
     price: 25,
     image: 'assets/images/watermelon.png'),
 Item(name: 'Kiwi', unit: 'Pc', price: 40, image: 'assets/images/kiwi.png'),
 Item(
     name: 'Orange',
     unit: 'Doz',
     price: 15,
     image: 'assets/images/orange.png'),
 Item(name: 'Peach', unit: 'Pc', price: 8, image: 'assets/images/peach.png'),
 Item(
     name: 'Strawberry',
     unit: 'Box',
     price: 12,
     image: 'assets/images/strawberry.png'),
 Item(
     name: 'Fruit Basket',
     unit: 'Kg',
     price: 55,
     image: 'assets/images/fruitBasket.png'),
];
So, starting from the top that is the AppBar, we have added an IconButton wrapped with our Badge package that we added to our application. The Icon is of a shopping cart and the badge over it shows how many items have been added to our cart.
Please have a look at the image and code below. We have wrapped the Text widget with a Consumer widget because every time a user clicks on the Add to Cart button, the whole UI does not need to get rebuilt when the Text widget has to update the item count. And the Consumer widget does exactly that for us:

AppBar(
 centerTitle: true,
 title: const Text('Product List'),
 actions: [
   Badge(
     badgeContent: Consumer<CartProvider>(
       builder: (context, value, child) {
         return Text(
           value.getCounter().toString(),
           style: const TextStyle(
               color: Colors.white, fontWeight: FontWeight.bold),
         );
       },
     ),
     position: const BadgePosition(start: 30, bottom: 30),
     child: IconButton(
       onPressed: () {
         Navigator.push(
             context,
             MaterialPageRoute(
                 builder: (context) => const CartScreen()));
       },
       icon: const Icon(Icons.shopping_cart),
     ),
   ),
   const SizedBox(
     width: 20.0,
   ),
 ],
),
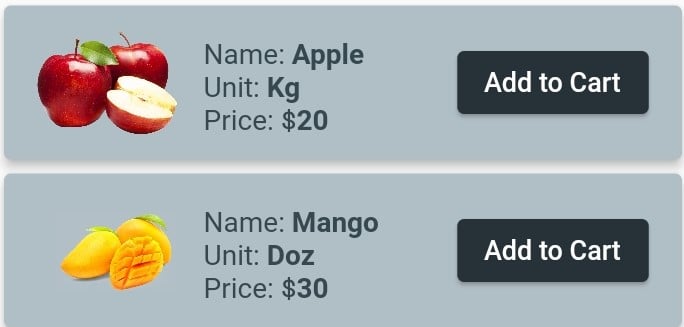
The Scaffold‘s body is a ListView builder that returns a Card widget with the information from the lists we created, the name of the fruit, unit, and price per unit, and a button to add that item to the cart. Please see the image and code provided below:
ListView.builder(
   padding: const EdgeInsets.symmetric(vertical: 10.0, horizontal: 8.0),
   shrinkWrap: true,
   itemCount: products.length,
   itemBuilder: (context, index) {
     return Card(
       color: Colors.blueGrey.shade200,
       elevation: 5.0,
       child: Padding(
         padding: const EdgeInsets.all(4.0),
         child: Row(
           mainAxisAlignment: MainAxisAlignment.spaceEvenly,
           mainAxisSize: MainAxisSize.max,
           children: [
             Image(
               height: 80,
               width: 80,
               image: AssetImage(products[index].image.toString()),
             ),
             SizedBox(
               width: 130,
               child: Column(
                 crossAxisAlignment: CrossAxisAlignment.start,
                 children: [
                   const SizedBox(
                     height: 5.0,
                   ),
                   RichText(
                     overflow: TextOverflow.ellipsis,
                     maxLines: 1,
                     text: TextSpan(
                         text: 'Name: ',
                         style: TextStyle(
                             color: Colors.blueGrey.shade800,
                             fontSize: 16.0),
                         children: [
                           TextSpan(
                               text:
                                   '${products[index].name.toString()}\n',
                               style: const TextStyle(
                                   fontWeight: FontWeight.bold)),
                         ]),
                   ),
                   RichText(
                     maxLines: 1,
                     text: TextSpan(
                         text: 'Unit: ',
                         style: TextStyle(
                             color: Colors.blueGrey.shade800,
                             fontSize: 16.0),
                         children: [
                           TextSpan(
                               text:
                                   '${products[index].unit.toString()}\n',
                               style: const TextStyle(
                                   fontWeight: FontWeight.bold)),
                         ]),
                   ),
                   RichText(
                     maxLines: 1,
                     text: TextSpan(
                         text: 'Price: ' r"$",
                         style: TextStyle(
                             color: Colors.blueGrey.shade800,
                             fontSize: 16.0),
                         children: [
                           TextSpan(
                               text:
                                   '${products[index].price.toString()}\n',
                               style: const TextStyle(
                                   fontWeight: FontWeight.bold)),
                         ]),
                   ),
                 ],
               ),
             ),
             ElevatedButton(
                 style: ElevatedButton.styleFrom(
                     primary: Colors.blueGrey.shade900),
                 onPressed: () {
                   saveData(index);
                 },
                 child: const Text('Add to Cart')),
           ],
         ),
       ),
     );
   }),
We have initialized our CartProvider class and created a function that will save data to the database when the Add to Cart button is clicked. It also updates the Text widget badge in the AppBar and add total price to the Database that will eventually show up in the Cart screen:
final cart = Provider.of<CartProvider>(context);
void saveData(int index) {
 dbHelper
     .insert(
   Cart(
     id: index,
     productId: index.toString(),
     productName: products[index].name,
     initialPrice: products[index].price,
     productPrice: products[index].price,
     quantity: ValueNotifier(1),
     unitTag: products[index].unit,
     image: products[index].image,
   ),
 )
     .then((value) {
   cart.addTotalPrice(products[index].price.toDouble());
   cart.addCounter();
   print('Product Added to cart');
 }).onError((error, stackTrace) {
   print(error.toString());
 });
}
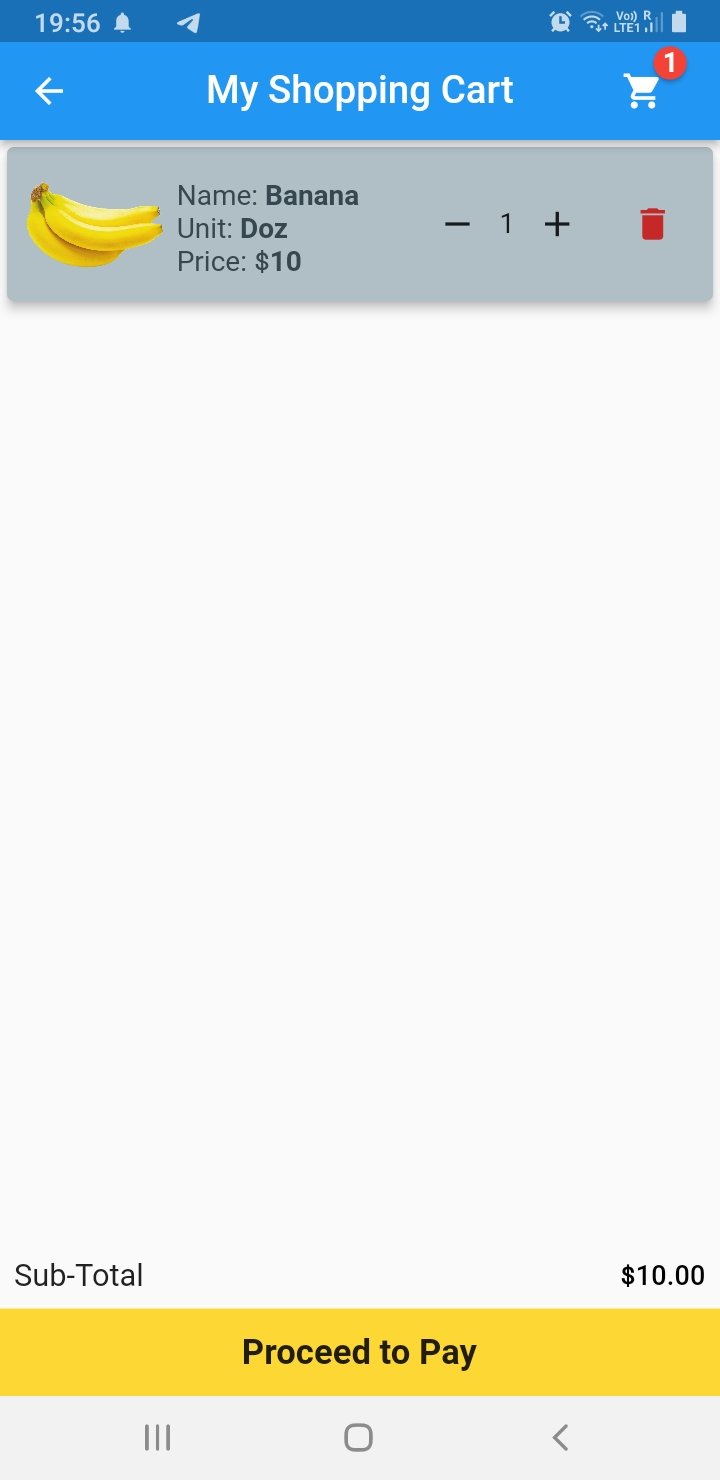
Moving on to the cart screen, the layout is similar to the product list screen. When the user clicks the Add to Cart button, the entire information is carried onto the cart screen.
The implementation is similar to what we’ve seen with other ecommerce applications. The primary distinction between the two layouts is that the cart screen includes an increment and decrement button for increasing and decreasing the quantity of the item.
When users click the plus sign, the quantity increases, and when they click the minus sign, the quantity decreases. The total price of the cart is added or subtracted when the plus and minus buttons are pressed. The delete button deletes the item from the cart list and also subtracts the price from the total price. Again we have wrapped our ListView builder with the Consumer widget because only parts of the UI need to be rebuilt and updated, not the whole page.
class CartScreen extends StatefulWidget { const CartScreen({
Key? key,
}) : super(key: key);
@override
State<CartScreen> createState() => _CartScreenState();
}
class _CartScreenState extends State<CartScreen> {
DBHelper? dbHelper = DBHelper();
@override
void initState() {
super.initState();
context.read<CartProvider>().getData();
}
@override
Widget build(BuildContext context) {
final cart = Provider.of<CartProvider>(context);
return Scaffold(
appBar: AppBar(
centerTitle: true,
title: const Text('My Shopping Cart'),
actions: [
Badge(
badgeContent: Consumer<CartProvider>(
builder: (context, value, child) {
return Text(
value.getCounter().toString(),
style: const TextStyle(
color: Colors.white, fontWeight: FontWeight.bold),
);
},
),
position: const BadgePosition(start: 30, bottom: 30),
child: IconButton(
onPressed: () {},
icon: const Icon(Icons.shopping_cart),
),
),
const SizedBox(
width: 20.0,
),
],
),
body: Column(
children: [
Expanded(
child: Consumer<CartProvider>(
builder: (BuildContext context, provider, widget) {
if (provider.cart.isEmpty) {
return const Center(
child: Text(
'Your Cart is Empty',
style:
TextStyle(fontWeight: FontWeight.bold, fontSize: 18.0),
));
} else {
return ListView.builder(
shrinkWrap: true,
itemCount: provider.cart.length,
itemBuilder: (context, index) {
return Card(
color: Colors.blueGrey.shade200,
elevation: 5.0,
child: Padding(
padding: const EdgeInsets.all(4.0),
child: Row(
mainAxisAlignment: MainAxisAlignment.spaceEvenly,
mainAxisSize: MainAxisSize.max,
children: [
Image(
height: 80,
width: 80,
image:
AssetImage(provider.cart[index].image!),
),
SizedBox(
width: 130,
child: Column(
crossAxisAlignment:
CrossAxisAlignment.start,
children: [
const SizedBox(
height: 5.0,
),
RichText(
overflow: TextOverflow.ellipsis,
maxLines: 1,
text: TextSpan(
text: 'Name: ',
style: TextStyle(
color: Colors.blueGrey.shade800,
fontSize: 16.0),
children: [
TextSpan(
text: '${provider.cart[index].productName!}\n',
style: const TextStyle(
fontWeight:
FontWeight.bold)),
]),
),
RichText(
maxLines: 1,
text: TextSpan(
text: 'Unit: ',
style: TextStyle(
color: Colors.blueGrey.shade800,
fontSize: 16.0),
children: [
TextSpan(
text:
'${provider.cart[index].unitTag!}\n',
style: const TextStyle(
fontWeight:
FontWeight.bold)),
]),
),
RichText(
maxLines: 1,
text: TextSpan(
text: 'Price: ' r"$",
style: TextStyle(
color: Colors.blueGrey.shade800,
fontSize: 16.0),
children: [
TextSpan(
text:
'${provider.cart[index].productPrice!}\n',
style: const TextStyle(
fontWeight:
FontWeight.bold)),
]),
),
],
),
),
ValueListenableBuilder<int>(
valueListenable:
provider.cart[index].quantity!,
builder: (context, val, child) {
return PlusMinusButtons(
addQuantity: () {
cart.addQuantity(
provider.cart[index].id!);
dbHelper!
.updateQuantity(Cart(
id: index,
productId: index.toString(),
productName: provider
.cart[index].productName,
initialPrice: provider
.cart[index].initialPrice,
productPrice: provider
.cart[index].productPrice,
quantity: ValueNotifier(
provider.cart[index]
.quantity!.value),
unitTag: provider
.cart[index].unitTag,
image: provider
.cart[index].image))
.then((value) {
setState(() {
cart.addTotalPrice(double.parse(
provider
.cart[index].productPrice
.toString()));
});
});
},
deleteQuantity: () {
cart.deleteQuantity(
provider.cart[index].id!);
cart.removeTotalPrice(double.parse(
provider.cart[index].productPrice
.toString()));
},
text: val.toString(),
);
}),
IconButton(
onPressed: () {
dbHelper!.deleteCartItem(
provider.cart[index].id!);
provider
.removeItem(provider.cart[index].id!);
provider.removeCounter();
},
icon: Icon(
Icons.delete,
color: Colors.red.shade800,
)),
],
),
),
);
});
}
},
),
),
Consumer<CartProvider>(
builder: (BuildContext context, value, Widget? child) {
final ValueNotifier<int?> totalPrice = ValueNotifier(null);
for (var element in value.cart) {
totalPrice.value =
(element.productPrice! * element.quantity!.value) +
(totalPrice.value ?? 0);
}
return Column(
children: [
ValueListenableBuilder<int?>(
valueListenable: totalPrice,
builder: (context, val, child) {
return ReusableWidget(
title: 'Sub-Total',
value: r'$' + (val?.toStringAsFixed(2) ?? '0'));
}),
],
);
},
)
],
),
bottomNavigationBar: InkWell(
onTap: () {
ScaffoldMessenger.of(context).showSnackBar(
const SnackBar(
content: Text('Payment Successful'),
duration: Duration(seconds: 2),
),
);
},
child: Container(
color: Colors.yellow.shade600,
alignment: Alignment.center,
height: 50.0,
child: const Text(
'Proceed to Pay',
style: TextStyle(
fontSize: 18.0,
fontWeight: FontWeight.bold,
),
),
),
),
);
}
}
class PlusMinusButtons extends StatelessWidget {
final VoidCallback deleteQuantity;
final VoidCallback addQuantity;
final String text;
const PlusMinusButtons(
{Key? key,
required this.addQuantity,
required this.deleteQuantity,
required this.text})
: super(key: key);
@override
Widget build(BuildContext context) {
return Row(
children: [
IconButton(onPressed: deleteQuantity, icon: const Icon(Icons.remove)),
Text(text),
IconButton(onPressed: addQuantity, icon: const Icon(Icons.add)),
],
);
}
}
class ReusableWidget extends StatelessWidget {
final String title, value;
const ReusableWidget({Key? key, required this.title, required this.value});
@override
Widget build(BuildContext context) {
return Padding(
padding: const EdgeInsets.all(8.0),
child: Row(
mainAxisAlignment: MainAxisAlignment.spaceBetween,
children: [
Text(
title,
style: Theme.of(context).textTheme.subtitle1,
),
Text(
value.toString(),
style: Theme.of(context).textTheme.subtitle2,
),
],
),
);
}
}
Look towards the end of the code, just before the bottom navigation bar, for a Consumer widget that returns ValueNotifierBuilder from within the Column widget. It is responsible for updating the quantity for the specific item when the user clicks either the plus or minus button on the cart screen. There is a bottom navigation bar with a button at the bottom of the screen.
The payment option has not been established because it is beyond the scope of this article, but you can look at another article for in-app purchase options in Flutter of the Flutter Stripe SDK.
To complete the UI of the cart screen, I included that button at the bottom that, when pressed, brings up a SnackBar confirming that payment has been completed by the user. After that, we have two custom-made widgets for the increment and decrement button and for displaying the total price at the bottom of the screen.
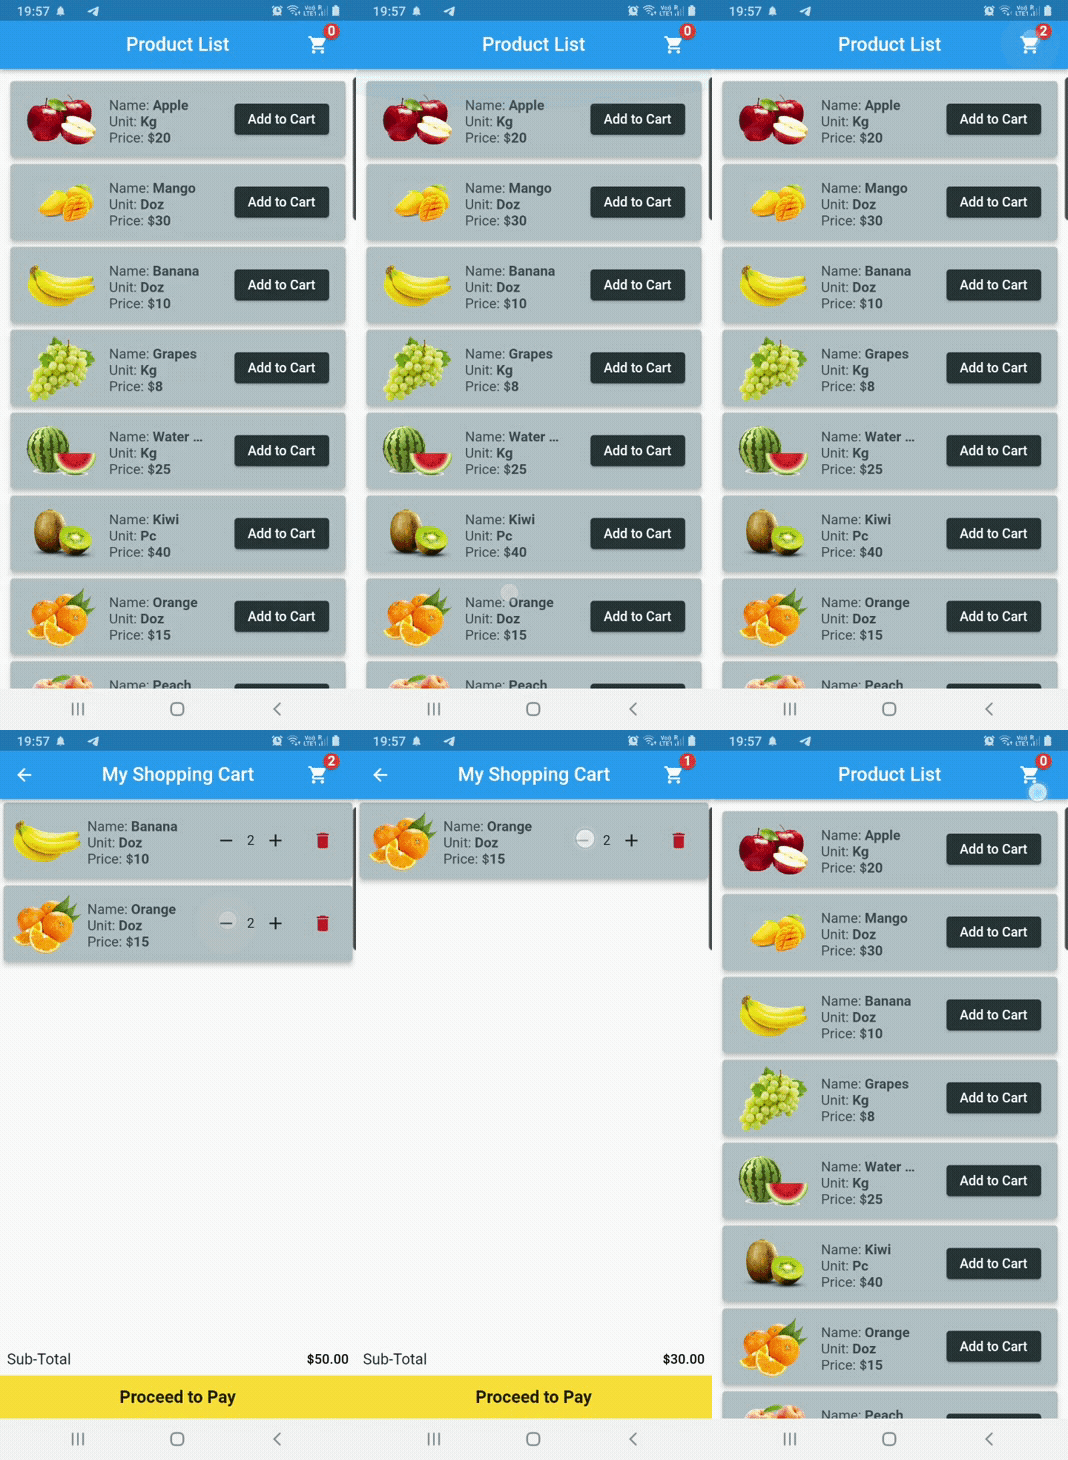
Here is the working of the whole application along with the GitHub link to the source code.
That is all for this article. Hope you enjoyed reading it and learned something new from it too! I would like to thank a friend of mine, Rohit Goswami, a Flutter developer, who helped me debug the code in this application. Cheers to him!
Thank you! Take care and stay safe.
Install LogRocket via npm or script tag. LogRocket.init() must be called client-side, not
server-side
$ npm i --save logrocket

// Code:

import LogRocket from 'logrocket';
LogRocket.init('app/id');
// Add to your HTML:

<script src="https://cdn.lr-ingest.com/LogRocket.min.js"></script>
<script>window.LogRocket && window.LogRocket.init('app/id');</script>

@container scroll-state: Replace JS scroll listeners nowCSS @container scroll-state lets you build sticky headers, snapping carousels, and scroll indicators without JavaScript. Here’s how to replace scroll listeners with clean, declarative state queries.

Explore 10 Web APIs that replace common JavaScript libraries and reduce npm dependencies, bundle size, and performance overhead.

Russ Miles, a software development expert and educator, joins the show to unpack why “developer productivity” platforms so often disappoint.

Discover what’s new in The Replay, LogRocket’s newsletter for dev and engineering leaders, in the February 18th issue.
Would you be interested in joining LogRocket's developer community?
Join LogRocket’s Content Advisory Board. You’ll help inform the type of content we create and get access to exclusive meetups, social accreditation, and swag.
Sign up now
5 Replies to "Building a shopping cart in Flutter"
how to add quantity of item by 1 when clicked on same item in sqlite in flutter to cart
I am not sure what you are trying to ask here. We are adding item from main screen and item count can be updated from cart screen.
What he meant was *What will happen if someone clicks on ADD TO CART multiple times* on the same item? For example, on Oranges, what happens if you click on add to cart multiple times from the product list?
Hello.I did exactly the same thing you did but when i cliclk on “Add to Cart” it doesnt reflect on that IconButton in the appBar.
This one perfectly works for me . Thank you