In this tutorial, we’ll introduce you to the Flutter SnackBar class, one of the many widgets that implement Material Design in Flutter. We’ll go over some of the widget’s most important features, outline steps for customizing and displaying a SnackBar in a Flutter app, and go over some real-world examples to show how SnackBar works in practice.

To follow along, you should have a basic understanding of Flutter app development and some experience using the SDK to build cross-platform applications.
Without further ado, let’s get started!
SnackBar is a Flutter widget that enables you to temporarily display a pop-up message in your app. It usually appears at the bottom of the app’s screen.
For example, you might use the SnackBar widget to let the user know when a selected item has been added to cart or deleted, or to indicate that a form was sent or an image uploaded successfully.
When implementing a SnackBar, you should consider the following features and/or functions:
This entails how long a SnackBar is displayed in the app. Always keep in mind that the SnackBar shouldn’t distract the end user from the main goal of the app.
This is one reason why a SnackBar is typically placed at the bottom of the app screen. The recommended duration for a SnackBar to display in a Flutter app is four to 10 seconds — no longer.
Though, as mentioned previously, a SnackBar may disappear from the app’s screen after a certain duration without the user’s interaction, it’s a good practice to implement some kind of interactive element to accompany your message.
For example, you might create an action button with a label such as “Dismiss” or “Try again” and attach it to the SnackBar widget.
One of the most common and crucial use cases for the SnackBar widget in a Flutter app is to convey important information about the app’s processes. For a simple example, the SnackBar might show a message like “Successful” when the user clicks a button to submit a form, upload a file, etc.
To get started building, displaying, and styling your SnackBar, first complete the following steps:
NOTE: If you run into the “Null safety features” error while trying to compile and run the code, you can fix it by upgrading Flutter to version 2.12 or higher.
To upgrade to the latest version of Flutter, click on the terminal tab in Android Studio and run the following command:
flutter upgrade
Next, clear out the code except for void main() => runApp(MyApp());, which is what Flutter generates when a new project is created. We’re doing this because we want to build from the ground up.
You should now have something like this in your editor:
import 'package:flutter/material.dart';

void main() => runApp(MyApp());
Now, change MyApp() to const SnackBarDisplay():
void main() => runApp(SnackBarDisplay());
void main() is the main entry point for Dart programs. Flutter uses the runApp() function or method as the root widget of the app.
Here, we are creating a widget, which we’ll name SnackBarDisplay. This will be the root of our app.
Input the code below after void man(). The SnackBarDisplay extends the StatelessWidget, making SnackBarDisplay a widget.
class SnackBarDisplay extends StatelessWidget {
  const SnackBarDisplay({Key? key}) : super(key: key);

  @override
  Widget build(BuildContext context) {
    return MaterialApp(
      title: 'Displaying a SnackBar',
      home: Scaffold(
        backgroundColor: (Colors.grey),
        appBar: AppBar(
          title: const Text('Displaying a SnackBar'),
          backgroundColor: Colors.black12,
        ),
        body: const SnackBarPage(),
      ),
    );
  }
}
We are making use of the Material Design library to create the app’s structure. Material is an open-source design system owned by Google for customizing Android, Flutter, iOS, and web apps. As mentioned previously, Flutter has a wide variety of Material widgets.
The Scaffold widget provides the default app bar, a title, and a body property, which holds the widget tree for our home screen, home: Scaffold(). The Scaffold widget is required to display a SnackBar.
backgroudColor: (Colors.grey) is used to change the default background of the Flutter app.
Next, create the SnackBar section by using the code below. Here when the user clicks on the button, the SnackBar is displayed:
class SnackBarPage extends StatelessWidget {
  const SnackBarPage({Key? key}) : super(key: key);

  @override
  Widget build(BuildContext context) {
    return Center(
      child: ElevatedButton(
        onPressed: () {
          final snackBar = SnackBar(
            content: const Text('Hi, I am a SnackBar!'),
            backgroundColor: (Colors.black12),
            action: SnackBarAction(
              label: 'dismiss',
              onPressed: () {
              },
            ),
          );
          ScaffoldMessenger.of(context).showSnackBar(snackBar);
        },
        child: const Text(
          'Click to Display a SnackBar',
        ),
      ),
    );
  }
}
In the code above, we have the build widget — Widget build(BuildContext context) — and what’s worth nothing here is the BuildContext argument, which specifies where the widget is built.
In this example, we’re building a custom widget button, ElevatedButton, which will be on the center of the app’s screen. The ElevatedButton is a child widget placed on the return Center.
Then, we use the ScaffoldMessenger class to display the SnackBar.
Finally, run the program. You should see something like this:
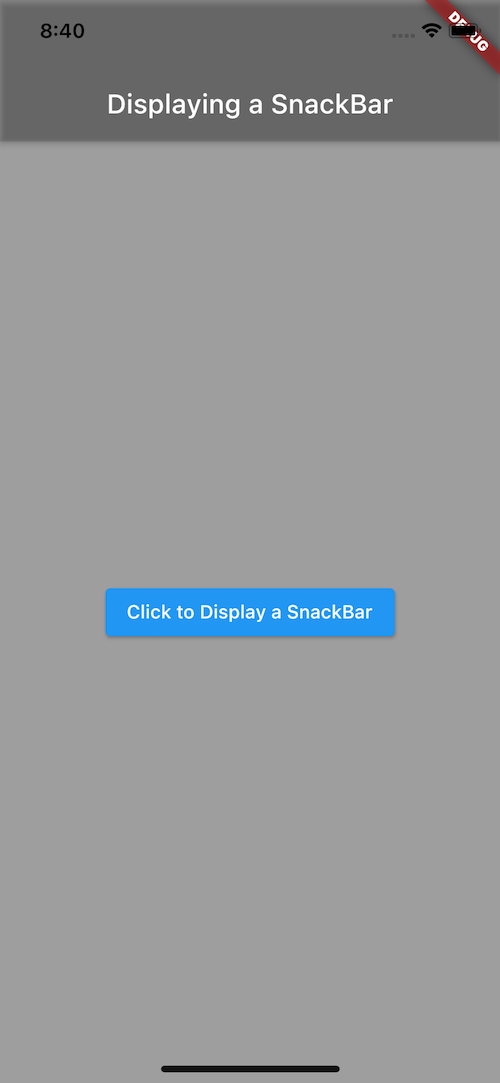
Clicking on the button will show the SnackBar with the following message: “Hi, I am a SnackBar!”

I hope you found this tutorial insightful. Flutter makes it easy to build apps across mobile platforms and the web. At the core of Flutter is widgets. The SnackBar widget makes it easy to share important and informative messages with your users to help them get the most out of your Flutter app.
You can learn more about Flutter by browsing through our collection of Flutter articles and tutorials.
Happy coding!
Install LogRocket via npm or script tag. LogRocket.init() must be called client-side, not
server-side
$ npm i --save logrocket

// Code:

import LogRocket from 'logrocket';
LogRocket.init('app/id');
// Add to your HTML:

<script src="https://cdn.lr-ingest.com/LogRocket.min.js"></script>
<script>window.LogRocket && window.LogRocket.init('app/id');</script>
Would you be interested in joining LogRocket's developer community?
Join LogRocket’s Content Advisory Board. You’ll help inform the type of content we create and get access to exclusive meetups, social accreditation, and swag.
Sign up now
This guide walks you through creating a web UI for an AI agent that browses, clicks, and extracts info from websites powered by Stagehand and Gemini.

This guide explores how to use Anthropic’s Claude 4 models, including Opus 4 and Sonnet 4, to build AI-powered applications.

Which AI frontend dev tool reigns supreme in July 2025? Check out our power rankings and use our interactive comparison tool to find out.

Learn how OpenAPI can automate API client generation to save time, reduce bugs, and streamline how your frontend app talks to backend APIs.


