Build tools are valuable assets for any web developer. Currently, many great build tools are available for all of the leading JavaScript frameworks. Nx, a build framework that allows you to build monorepos and scaffold full applications in place, is one such example that has recently been growing in popularity.
Nx automates many of the steps that developers must typically perform manually when building applications. It includes features like computation caching, dependency graphs, and build automation, and it also includes a plugin integration with Cypress.
In this post, we’ll walk through using Nx with React to build a simple to-do list application. To follow along, check out my sample project on GitHub.
Let’s get started!
To get started, you’ll need to create a Nx workspace. You can use npx to do so by running the following code:
npx create-nx-workspace@latest
You can also install Nx globally.
When the CLI runs, it creates a workspace, which is basically a container for your project. When we’re finished, this container will become a monorepo.
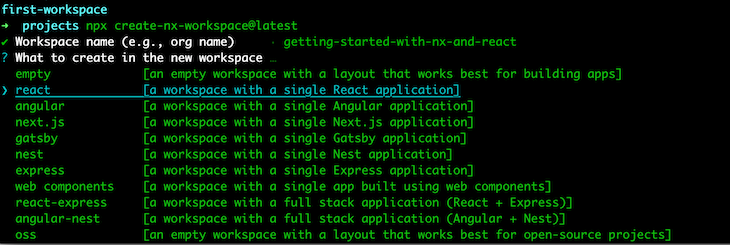
The CLI will ask you a series of questions before scaffolding out the main skeleton of your project. We’re building a React application, so the file structure looks like the code block below:
├── README.md
├── apps
│   ├── first-project
│   └── first-project-e2e
├── babel.config.json
├── jest.config.js
├── jest.preset.js
├── libs
├── nx.json
├── package-lock.json
├── package.json
├── tools
│   ├── generators
│   └── tsconfig.tools.json
├── tsconfig.base.json
└── workspace.json
The file structure includes an apps directory that has two folders. One is for the project itself, and the other is for running end-to-end tests with Cypress.
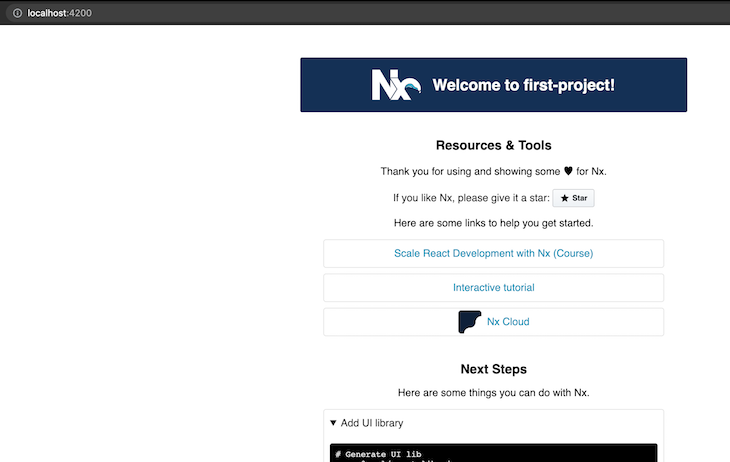
Now that you have a scaffolded application, you can run it using npx nx serve first-project.
You’ll receive the following output:
Let’s create an API alongside our React project that we can use for performing any REST calls. One cool feature of Nx is its ability to add an API to your project in a single command.
We’ll create an API using Express. First, you need to install the express plugin with the Nx CLI:
npm install --save-dev @nrwl/express
Now, you can create the API with the following command:
npx nx g @nrwl/express:app api --frontendProject=first-project
The folder structure should look like the code below:
├── README.md
├── apps
│   ├── api
│   ├── first-project
│   └── first-project-e2e
├── babel.config.json
├── jest.config.js
├── jest.preset.js
├── libs
├── nx.json
├── package-lock.json
├── package.json
├── tools
│   ├── generators
│   └── tsconfig.tools.json
├── tsconfig.base.json
└── workspace.json
Now that we have the building blocks in place, let’s look at what we’ve built so far! If you look in the apps folder, you’ll see the following code:
├── api
│   ├── jest.config.js
│   ├── src
│   │   ├── app
│   │   ├── assets
│   │   ├── environments
│   │   └── main.ts
│   ├── tsconfig.app.json
│   ├── tsconfig.json
│   └── tsconfig.spec.json
├── first-project
│   ├── jest.config.js
│   ├── proxy.conf.json
│   ├── src
│   │   ├── app
│   │   ├── assets
│   │   ├── environments
│   │   ├── favicon.ico
│   │   ├── index.html
│   │   ├── main.tsx
│   │   ├── polyfills.ts
│   │   └── styles.scss
│   ├── tsconfig.app.json
│   ├── tsconfig.json
│   └── tsconfig.spec.json
└── first-project-e2e
    ├── cypress.json
    ├── src
    │   ├── fixtures
    │   ├── integration
    │   ├── plugins
    │   └── support
    ├── tsconfig.e2e.json
    └── tsconfig.json
The api project is a full Express app scaffolded with main.ts, an entrypoint file:
/**
 * This is not a production server yet!
 * This is only a minimal backend to get started.
 */
import * as express from 'express';
const app = express();
app.get('/api', (req, res) => {
  res.send({ message: 'Welcome to api!' });
});
const port = process.env.port || 3333;
const server = app.listen(port, () => {
  console.log(`Listening at http://localhost:${port}/api`);
});
server.on('error', console.error);
Go in the first-project folder. You’ll see the React app built with the traditional folder structure commonly seen in assets, styles, index, main, and app files:
import { StrictMode } from 'react';
import * as ReactDOM from 'react-dom';
import App from './app/app';
ReactDOM.render(
  <StrictMode>
    <App />
  </StrictMode>,
  document.getElementById('root')
);
Finally, if you look in the first-project-e2e folder, you’ll see the Cypress project with the traditional structure of any Cypress test suite:
├── cypress.json
├── src
│   ├── fixtures
│   ├── integration
│   ├── plugins
│   └── support
├── tsconfig.e2e.json
└── tsconfig.json
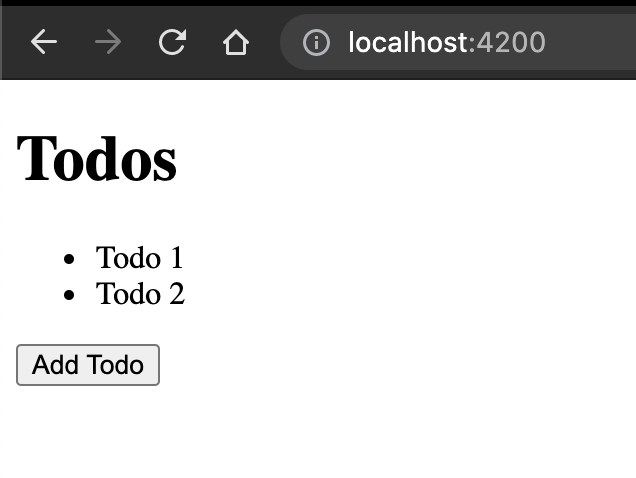
So far, we’ve built a scaffolded app. Now, let’s add a feature that shows the CLI in action! I’m going to build a simple to-do application with React and Nx.
First, copy the following code into the apps/first-project/src/app/app.tsx folder:
import React, { useState } from 'react';
interface Todo {
  title: string;
}
export const App = () => {
  const [todos, setTodos] = useState<Todo[]>([
    { title: 'Todo 1' },
    { title: 'Todo 2' },
  ]);
  function addTodo() {
    setTodos([
      ...todos,
      {
        title: `New todo ${Math.floor(Math.random() * 1000)}`,
      },
    ]);
  }
  return (
    <>
      <h1>Todos</h1>
      <ul>
        {todos.map((t) => (
          <li className={'todo'}>{t.title}</li>
        ))}
      </ul>
      <button id={'add-todo'} onClick={addTodo}>
        Add Todo
      </button>
    </>
  );
};
export default App;
If you run npm run start from the project root, you’ll see the following:
So far, so good! We can improve our code by integrating a call to the API project. First, create a file called apps/api/src/app/todos.ts and add the following code to it:
import { Express } from 'express';

interface Todo {
  title: string;
}

const todos: Todo[] = [{ title: 'Todo 1' }, { title: 'Todo 2' }];

export function addTodoRoutes(app: Express) {
  app.get('/api/todos', (req, resp) => resp.send(todos));
  app.post('/api/addTodo', (req, resp) => {
    const newTodo = {
      title: `New todo ${Math.floor(Math.random() * 1000)}`,
    };
    todos.push(newTodo);
    resp.send(newTodo);
  });
}
The code above creates many of the routes we’ll need for our API. Now, we’ll register the routes with our API by modifying the apps/api/src/main.ts file to look like the following code block:
import * as express from 'express';
import { addTodoRoutes } from './app/todos';
const app = express();
app.get('/api', (req, res) => {
  res.send({ message: 'Welcome to api!' });
});
addTodoRoutes(app);
const port = process.env.port || 3333;
const server = app.listen(port, () => {
  console.log(`Listening at http://localhost:${port}/api`);
});
server.on('error', console.error);
Run npx nx serve api and hit http://localhost:3333/api/todos. You’ll see the following:
[{"title":"Todo 1"},{"title":"Todo 2"}]
Now, let’s call the API from our app. We’ll set up a proxy so that the API calls from our React app call the API directly.
Look at the workspace.json file that is at the project root, where you’ll find configuration for your entire application.
Next, we need to locate the proxyConfig in the serve target of our first-project React app, which should look like the following code block:
{
  "serve": {
    "builder": "@nrwl/web:dev-server",
    "options": {
      "buildTarget": "first-project:build",
      "proxyConfig": "apps/first-project/proxy.conf.json"
    },
    "configurations": {
      "production": {
        "buildTarget": "first-projects:build:production"
      }
    }
  }
}
Open the file at the proxyConifg setting at apps/first-project/proxy.conf.json and add the following code. It will proxy all API calls to call your API project:
{
  "/api": {
    "target": "http://localhost:3333",
    "secure": false
  }
}
Now, if we modify the main.ts file in the first-rproject folder, we can call the API instead of using the local state that we had set up originally. Modify apps/first-project/src/app/app.tsx to look like the following code block:
import React, { useEffect, useState } from 'react';

interface Todo {
  title: string;
}

const App = () => {
  const [todos, setTodos] = useState<Todo[]>([]);

  useEffect(() => {
    fetch('/api/todos')
      .then((_) => _.json())
      .then(setTodos);
  }, []);

  function addTodo() {
    fetch('/api/addTodo', {
      method: 'POST',
      body: '',
    })
      .then((_) => _.json())
      .then((newTodo) => {
        setTodos([...todos, newTodo]);
      });
  }

  return (
    <>
      <h1>Todos</h1>
      <ul>
        {todos.map((t) => (
          <li className={'todo'}>{t.title}</li>
        ))}
      </ul>
      <button id={'add-todo'} onClick={addTodo}>
        Add Todo
      </button>
    </>
  );
};

export default App;
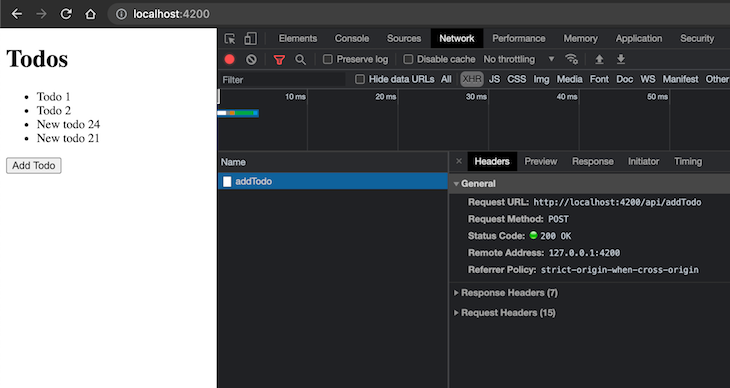
Now, our React app is calling the API instead of relying on the local state.
Let’s run the API and the frontendProject! You can use npx nx serve first-project and npx nx serve api. You can also use an npm package, like Concurrently and start-server-and-test, to run the API automatically using scripts.
As mentioned, Nx comes with Cypress tests built in when the app is scaffolded.
To see testing in action, modify the test file at apps/first-project-e2e/src/support/app.po.ts to include the following:
export const getTodos = () => cy.get('li.todo');
export const getAddTodoButton = () => cy.get('button#add-todo');
Now, modify the file at apps/first-project-e2e/src/integration/app.spec.ts to look like the following code:
import { getAddTodoButton, getTodos } from '../support/app.po';

describe('TodoApps', () => {
  beforeEach(() => cy.visit('/'));

  it('should display todos', () => {
    getTodos().should((t) => expect(t.length).equal(2));
    getAddTodoButton().click();
    getTodos().should((t) => expect(t.length).equal(3));
  });
});
Run npx nx e2e first-project-e2e --watch to see your tests in action!
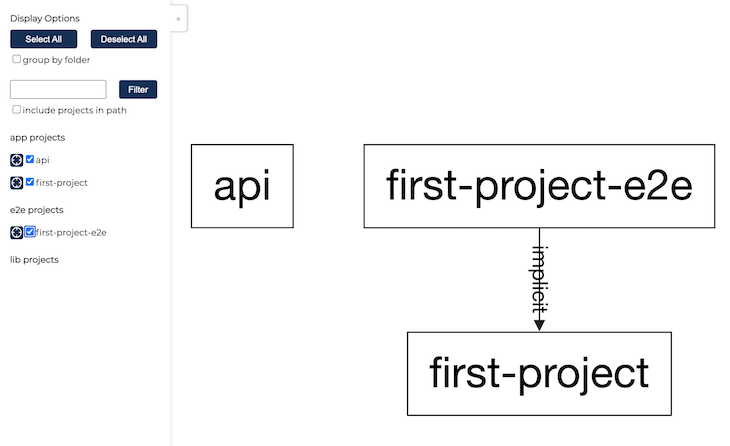
The Nx CLI has many features beyond what we’ve covered so far. One of the most useful is the ability to generate a dependency graph for your project, which simplifies complex projects through data visualizations. Our simple to-do application doesn’t need this, but it’s cool to see all the same!
Start by running the following code:
npx nx dep-graph
You’ll receive an output that looks like the image below:
Another really cool feature is Nx’s ability to detect changes and only rebuild parts that are impacted by the latest modifications to your project. Here are some sample commands that utilize this feature, sourced from the the Nx documentation.
nx affected:apps # prints affected apps
nx affected:libs # prints affected libs
nx affected:build # builds affected apps and libs
nx affected:lint # lints affected apps and libs
nx affected:test # tests affected apps and libs
nx affected:e2e # e2e tests affected apps
Finally, Nx allows you to create libraries and computation caching for performance. I highly recommend reading more on these and other features!
In this tutorial, we covered the basics of using React and Nx by scaffolding a simple to-do application. The next step for our project would be to build the assets and deploy them. Nx can automate builds for small projects, and also scale to larger projects with enterprise applications.
I hope you’ve enjoyed reading this post! I hope it has inspired you to check out Nx and use it with React. I definitely recommend checking out the Nx documentation and reading some of their guides for more information.
Follow me on andrewevans.dev and connect with me on Twitter at @AndrewEvans0102.
Install LogRocket via npm or script tag. LogRocket.init() must be called client-side, not
server-side
$ npm i --save logrocket

// Code:

import LogRocket from 'logrocket';
LogRocket.init('app/id');
// Add to your HTML:

<script src="https://cdn.lr-ingest.com/LogRocket.min.js"></script>
<script>window.LogRocket && window.LogRocket.init('app/id');</script>

I migrated 20 production-style components from Tailwind to StyleX. Here’s what the data showed about LOC, CSS bundle size, build time, and type safety.

A guide for using JWT authentication to prevent basic security issues while understanding the shortcomings of JWTs.

Discover how to build, render, and automate product demo videos with Remotion, replacing traditional screen recordings with reusable React code.

Chrome’s Modern Web Guidance embeds modern web platform skills into AI coding agents, helping them choose native HTML, CSS, and browser APIs over legacy patterns.
Hey there, want to help make our blog better?
Join LogRocket’s Content Advisory Board. You’ll help inform the type of content we create and get access to exclusive meetups, social accreditation, and swag.
Sign up now
