
Apple’s PencilKit API is a software framework that allows developers to incorporate the features and functionality of the Apple Pencil into their own applications. PencilKit provides a range of tools and techniques for developers to enable users to draw, sketch, write, and annotate within their apps using the Apple Pencil.
With features like stroke recognition, handwriting recognition, pressure sensitivity, and tilt detection, the PencilKit API enables a more natural and intuitive experience for users when creating digital drawings, notes, or other forms of hand-written content. PencilKit allows developers to customize the appearance and behavior of the Apple Pencil within their apps, including the type of strokes recognized, the thickness and opacity of lines, and the range of available colors and brushes.
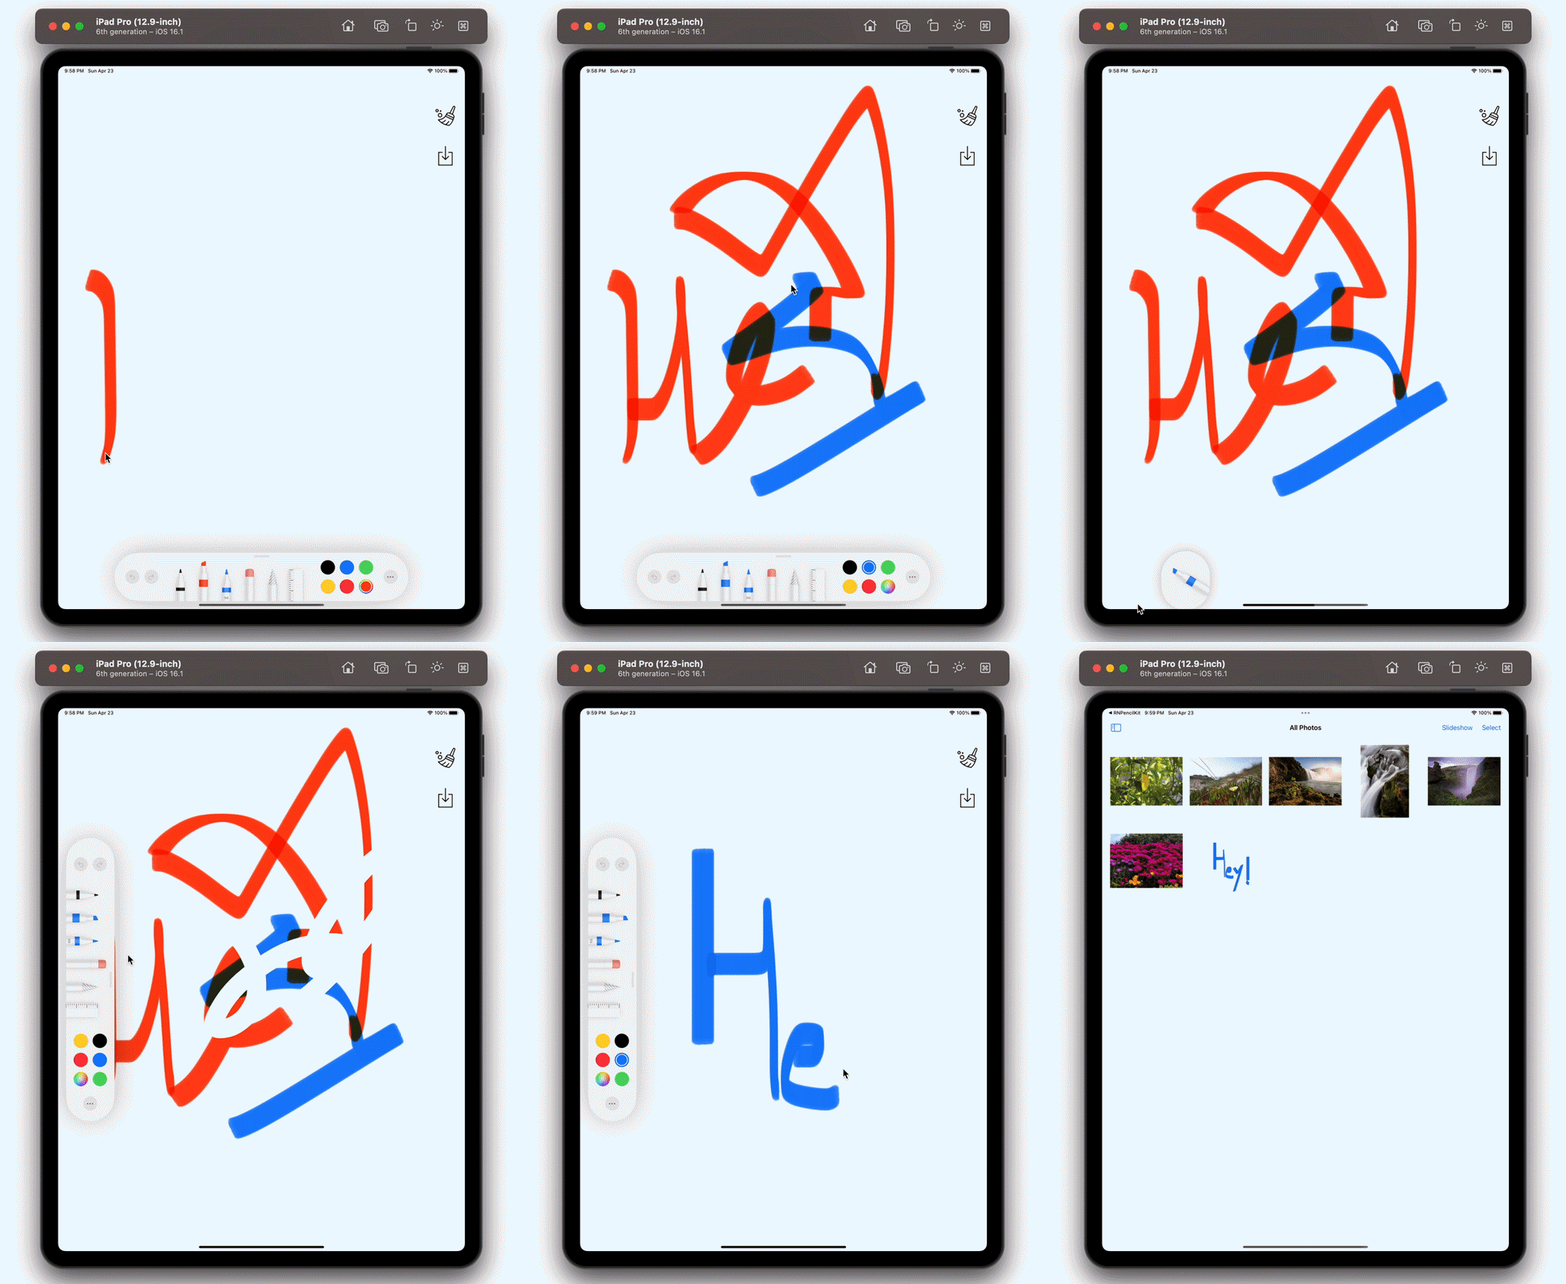
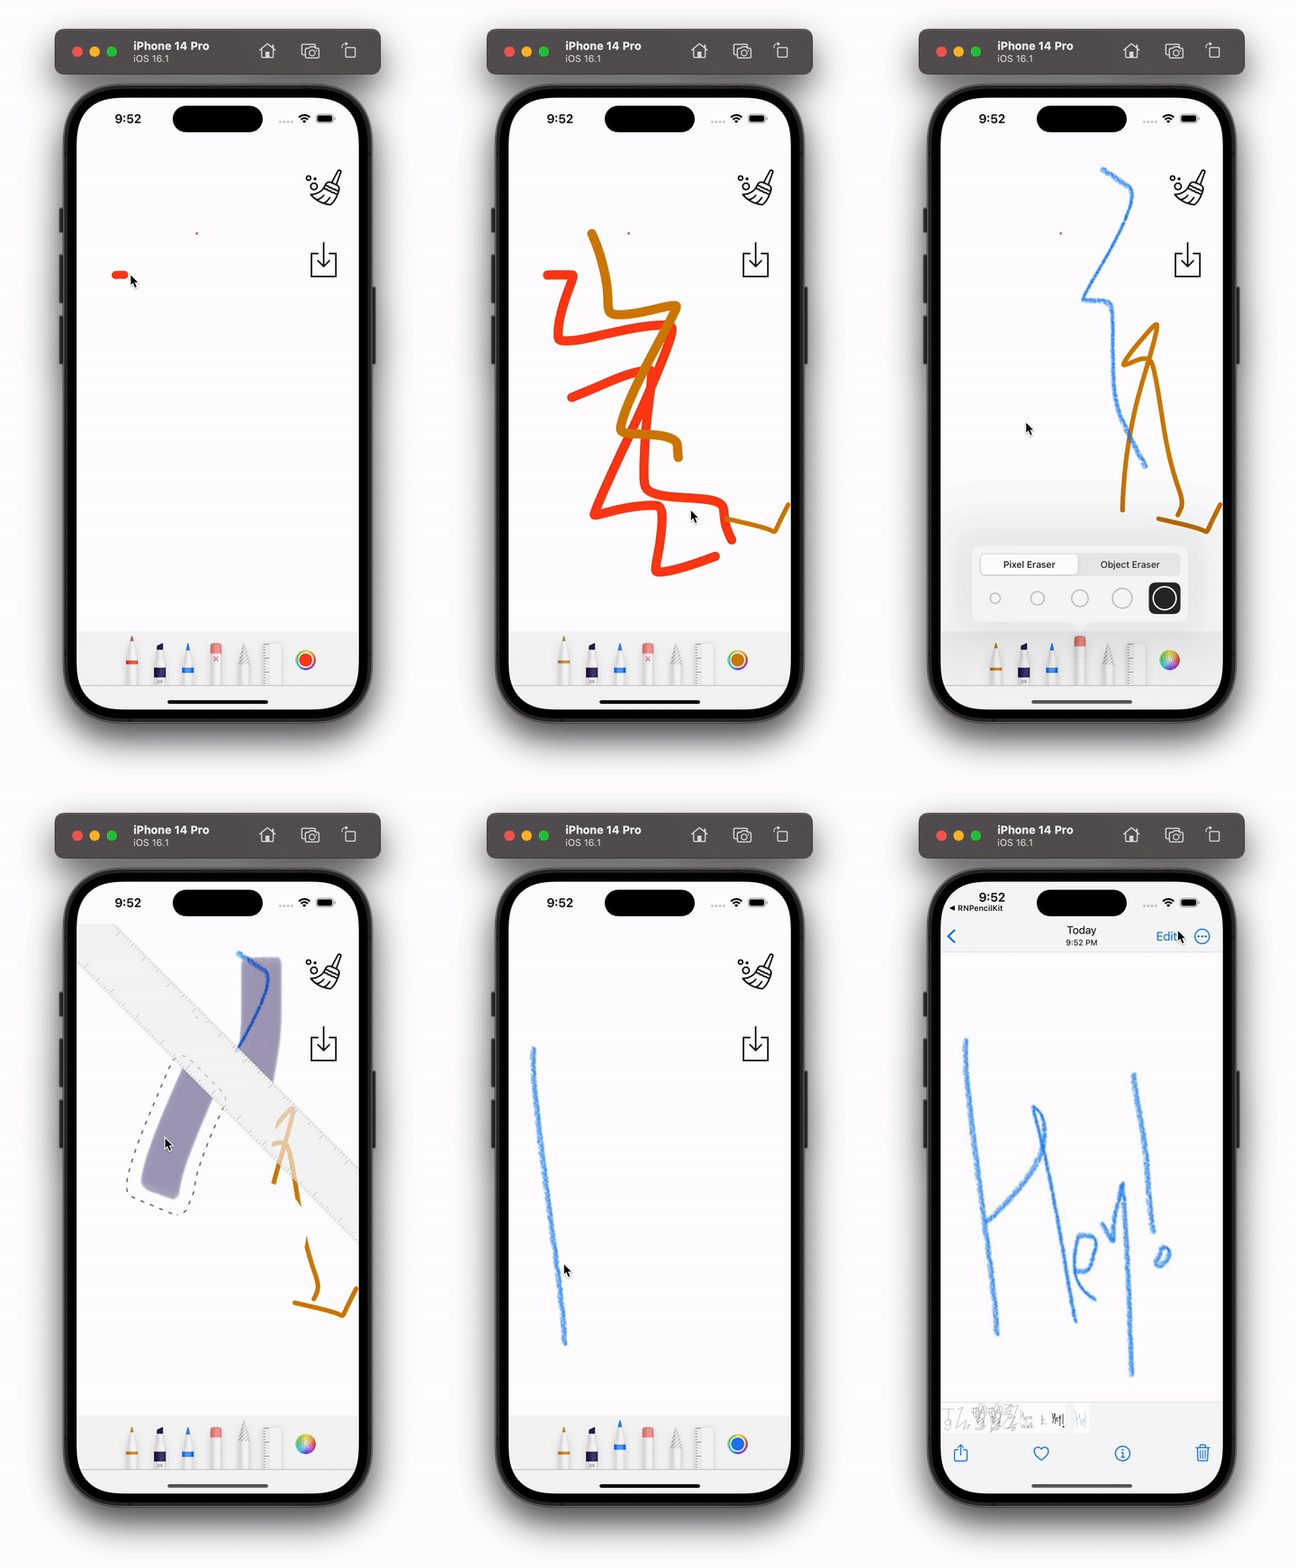
Unfortunately, we can’t use PencilKit directly with React Native. In this article, we’ll learn how to bridge native iOS code that implements PencilKit into our React Native application. Our final app will look like the images below. You can find the complete source code in the GitHub repository:
Jump ahead:
PKToolPicker to the canvasThe Replay is a weekly newsletter for dev and engineering leaders.
Delivered once a week, it's your curated guide to the most important conversations around frontend dev, emerging AI tools, and the state of modern software.
At the time of writing, PencilKit is only available for iOS, so let’s start by creating a React Native project and running it on an iOS simulator:
react-native init RNPencilKit
cd RNPencilKit
yarn && cd ios && pod install && cd ..
yarn ios
Next, we‘ll remove the boilerplate code from the App.tsx file. Replace the code in App.tsx with the code below:
import React from 'react';
import {
  SafeAreaView,
  StyleSheet,
  Text,
} from 'react-native';

const App: React.FC = () => {
  return (
    <SafeAreaView style={styles.container}>
      <Text>{'RNPencilKit'}</Text>
    </SafeAreaView>
  );
};

const styles = StyleSheet.create({
  container: {
    flex: 1,
    backgroundColor: '#fff',
  },
});
export default App;
Now that we’ve set up our JavaScript code, let’s move on to the native iOS code. We’ll create a UIView in iOS that displays PencilKit, then export it as a native UI component to the JavaScript layer. To create an iOS native UI component, we’ll do the following:
PencilKitViewManager class, which will have a subclass of RCTViewManagerRCT_EXPORT_MODULE macroview method, which will return a UIView with our PencilKit canvasGet started by opening the iOS project in Xcode, create a new file named PencilKitViewManager.m, and add the following code inside it:
//
//  PencilKitViewManager.m
//  RNPencilKit
//
//  Created by Rupesh Chaudhari on 22/04/23.
//
#import <React/RCTViewManager.h>
#import <React/RCTUIManager.h>
#import <PencilKit/PencilKit.h>

@interface PencilKitViewManager : RCTViewManager
@property PKCanvasView* canvasView;
@end

@implementation PencilKitViewManager

RCT_EXPORT_MODULE(PencilKit)

- (UIView *)view
{
  _canvasView = [[PKCanvasView alloc] init];
  _canvasView.drawingPolicy = PKCanvasViewDrawingPolicyAnyInput;
  _canvasView.overrideUserInterfaceStyle = UIUserInterfaceStyleLight;
  _canvasView.multipleTouchEnabled = true;
  return _canvasView;
}

@end
In the code above, we create a class called PenkilKitViewManager and add a subclass of RCTViewManager to it. The class also has a property named canvasView of type PKCanvasView, which is the canvas the user will draw on.
Then, we export this class using RCT_EXPORT_MODULE(PencilKit), making the module accessible to us on the JavaScript layer with the name PencilKit. In the view method, we initialize the canvasView and set some extra properties on it.
Next, we’ll access this component from the JavaScript side. But first, we’ll run the app from Xcode to update the native iOS code. In the root of your project, create a file named PencilKitView.tsx and paste the code below inside it:
import {ViewProps, requireNativeComponent} from 'react-native';
interface IProps extends ViewProps {
  // Other Props here
}
const PencilKitView = requireNativeComponent<IProps>('PencilKit');
export default PencilKitView;
In the code above, we use the requireNativeComponent method from React Native to access the native UI component we just created and export it as a JSX component. Now, let’s use the component in our App.tsx file and see if it’s working:
import React from 'react';
import {
  SafeAreaView,
  StyleSheet,
  Text,
  Platform,
} from 'react-native';
import PencilKitView from './PencilkitView';

const App: React.FC = () => {
  if (Platform.OS !== 'ios') {
    return (
      <SafeAreaView
        style={[
          styles.container,
          {
            justifyContent: 'center',
            alignItems: 'center',
          },
        ]}>
        <Text style={styles.text}>{'We only support iOS For Now 😔'}</Text>
      </SafeAreaView>
    );
  }
  return (
    <SafeAreaView style={styles.container}>
      <PencilKitView style={styles.container} />
    </SafeAreaView>
  );
};

const styles = StyleSheet.create({
  container: {
    flex: 1,
    backgroundColor: '#fff',
  },
  text: {
    fontSize: 24,
    fontWeight: '600',
    color: '#222',
  },
});
export default App;
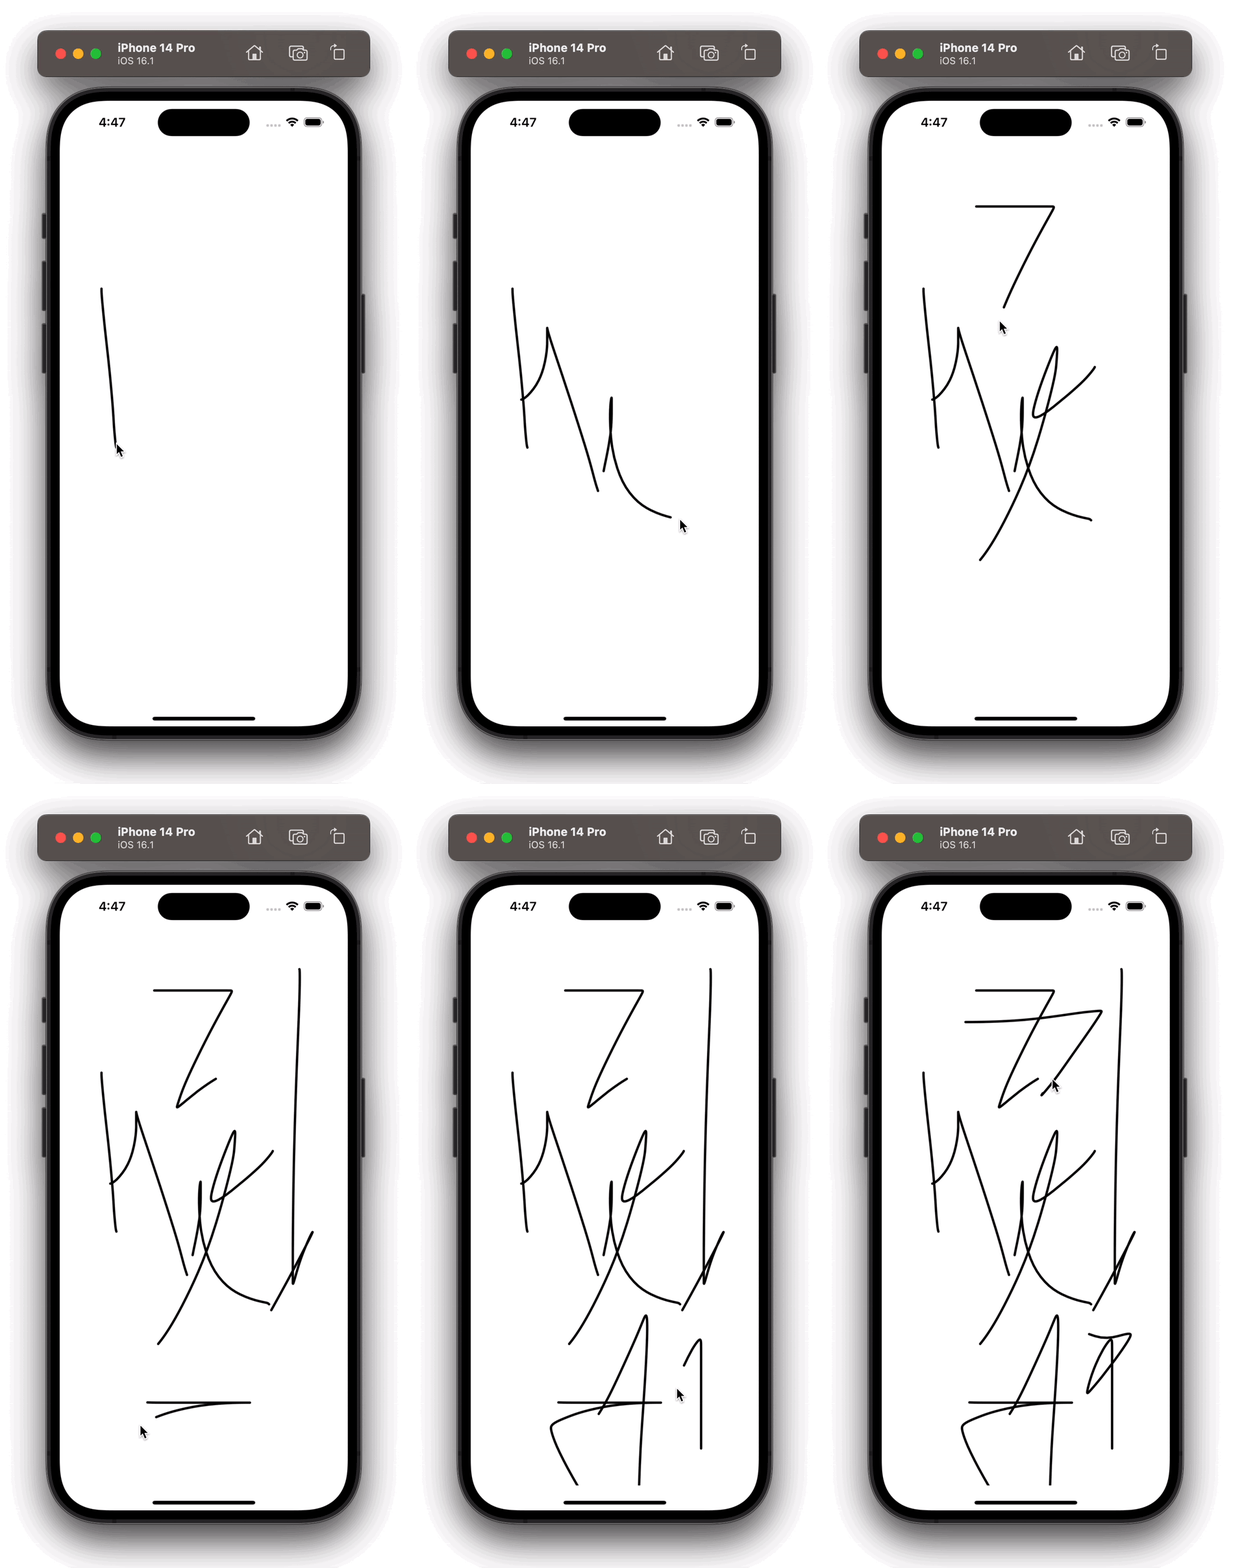
In the code above, we’ve added a platform check for non-iOS devices. If the device isn’t iOS, then we’ll display text stating that the app is only supported for iOS. Then, we import our PencilKitView component and give it some styles. The output of the code above will look like the following:
Now that we have a working drawing canvas in our application, let’s add some helper functions to it. For example, what if the user wants to clear the canvas, or they want to save the drawing on their device?
To do this, first, we need to create methods in our PencilKitViewManager class and export them to the JavaScript layer. For this, we’ll use the RCT_EXPORT_METHOD macro, which exports a given native iOS method to the JavaScript layer. Add the code below to the PencilKitViewManager.m file:
//
//  PencilKitViewManager.m
//  RNPencilKit
//
//  Created by Rupesh Chaudhari on 22/04/23.
//
#import <React/RCTViewManager.h>
#import <React/RCTUIManager.h>
#import <PencilKit/PencilKit.h>
// Added for Storing the image in Photos
#import <Photos/Photos.h>

@interface PencilKitViewManager : RCTViewManager
@property PKCanvasView* canvasView;
// Added these two below to store the drawing and create an Image
@property PKDrawing* drawing;
@property UIImage* drawingImage;
@end

@implementation PencilKitViewManager

RCT_EXPORT_MODULE(PencilKit)

- (UIView *)view
{
  _canvasView = [[PKCanvasView alloc] init];
  _canvasView.drawing = _drawing; // Added this to store the user's drawing
  _canvasView.drawingPolicy = PKCanvasViewDrawingPolicyAnyInput;
  _canvasView.overrideUserInterfaceStyle = UIUserInterfaceStyleLight;
  _canvasView.multipleTouchEnabled = true;
  return _canvasView;
}

// Added below methods
RCT_EXPORT_METHOD(clearDrawing: (nonnull NSNumber *)viewTag)
{
  NSLog(@"Clearing Drawing");
  [self clearDrawing];
}

-(void) clearDrawing{
  _canvasView.drawing = [[PKDrawing alloc] init];
}

RCT_EXPORT_METHOD(captureDrawing: (nonnull NSNumber *)viewTag)
{
  NSLog(@"Capturing Drawn Image");
  [self captureDrawing];
}

-(void) captureDrawing{
  dispatch_async(dispatch_get_main_queue(), ^{
    self->_drawingImage = [self->_canvasView.drawing imageFromRect:self->_canvasView.bounds scale:1.0];
    [[PHPhotoLibrary sharedPhotoLibrary] performChanges:^{[
      PHAssetChangeRequest creationRequestForAssetFromImage:self->_drawingImage];
    } completionHandler:^(BOOL success, NSError *error) {
      if (success) {
        NSString *path = [NSString stringWithFormat:@"photos-redirect://"];
        NSURL *imagePathUrl = [NSURL URLWithString:path];
        [[UIApplication sharedApplication] openURL:imagePathUrl options:@{} completionHandler:nil];
        [self clearDrawing];
      } else {
        NSLog(@"Error creating asset: %@", error);
      }
    }];
  });
}

@end
In the code above, we created two methods:
clearDrawing: Resets the drawing of the canvas, making the canvas blankcaptureDrawing: Runs on the main thread, creates a UIImage from the canvas’s drawing, and then uses the PHPhotoLibrary to store it on the user’s Photos app. After storing the image, the user is navigated to the Photos app, where they can view the saved imageNow that we’ve created the native methods and exported them to the JavaScript layer, let’s use them in our JavaScript code. For this, we’ll use some icons that you can download from GitHub and paste into a folder structure like below:
![]()
Paste the code below into assets/icons/index.tsx:
import Clear from './clear.png';
import Save from './save.png';

export {Clear, Save};
Now, we’ll use these icons in App.tsx. Paste the following code into your App.tsx:
import React, {useCallback, useEffect, useRef} from 'react';
import {
  findNodeHandle,
  Image,
  Platform,
  Pressable,
  SafeAreaView,
  StyleSheet,
  Text,
  UIManager,
} from 'react-native';
import {Clear, Save} from './assets/icons';
import PencilKitView from './PencilkitView';

const App: React.FC = () => {
  const drawingRef = useRef(null);
  const handleClearDrawing = useCallback(() => {
    UIManager.dispatchViewManagerCommand(
      findNodeHandle(drawingRef?.current),
      UIManager.getViewManagerConfig('PencilKit').Commands.clearDrawing,
      undefined,
    );
  }, [drawingRef?.current]);
  const handleCaptureDrawing = useCallback(() => {
    UIManager.dispatchViewManagerCommand(
      findNodeHandle(drawingRef?.current),
      UIManager.getViewManagerConfig('PencilKit').Commands.captureDrawing,
      undefined,
    );
  }, [drawingRef?.current]);
  if (Platform.OS !== 'ios') {
    return (
      <SafeAreaView
        style={[
          styles.container,
          {
            justifyContent: 'center',
            alignItems: 'center',
          },
        ]}>
        <Text style={styles.text}>{'We only support iOS For Now 😔'}</Text>
      </SafeAreaView>
    );
  }
  return (
    <SafeAreaView style={styles.container}>
      <PencilKitView ref={drawingRef} style={styles.container} />
      <Pressable onPress={handleClearDrawing} style={styles.clearBtn}>
        <Image source={Clear} resizeMode={'contain'} style={styles.icon} />
      </Pressable>
      <Pressable onPress={handleCaptureDrawing} style={styles.saveBtn}>
        <Image source={Save} resizeMode={'contain'} style={styles.icon} />
      </Pressable>
    </SafeAreaView>
  );
};

const styles = StyleSheet.create({
  container: {
    flex: 1,
    backgroundColor: '#fff',
  },
  icon: {
    height: 50,
    width: 50,
  },
  clearBtn: {
    position: 'absolute',
    top: 100,
    right: 24,
  },
  saveBtn: {
    position: 'absolute',
    top: 200,
    right: 24,
  },
  text: {
    fontSize: 24,
    fontWeight: '600',
    color: '#222',
  },
});
export default App;
In the code above, we’ve created a drawingRef variable, which stores the reference to PencilKitView. Using that and React Native’s dispatchViewManagerCommand method, we’re calling the native clearDrawing and captureDrawing methods. After implementing the code above, our application will look like the following:
![]()
PKToolPicker to the canvasThePKToolPicker class provides a customizable UI for selecting and configuring drawing tools when using the Apple Pencil or another stylus with an iOS or iPadOS app. It provides a range of options for customizing the look and behavior of the tool picker, like setting the available drawing tools, configuring the appearance of the color picker, and defining custom actions to be triggered when the user selects a tool or color.
The PKToolPicker is designed to work seamlessly with the Apple Pencil, providing an intuitive and convenient way for users to interact with drawing tools within the app. With the PKToolPicker, app developers can provide a rich and engaging drawing experience for their users while also maintaining full control over the look and functionality of the tool picker.
To add the PKToolPicker to your drawing canvas, add the code below to the PencilKitViewManager.m file:
//
//  PencilKitViewManager.m
//  RNPencilKit
//
//  Created by Rupesh Chaudhari on 22/04/23.
//

#import <React/RCTViewManager.h>
#import <React/RCTUIManager.h>
#import <PencilKit/PencilKit.h>
#import <Photos/Photos.h>

@interface PencilKitViewManager : RCTViewManager<PKToolPickerObserver>
@property PKCanvasView* canvasView;
@property PKDrawing* drawing;
@property UIImage* drawingImage;
// Add the below line to create an instance on PKToolPicker
@property PKToolPicker* toolPicker;
@end

@implementation PencilKitViewManager

RCT_EXPORT_MODULE(PencilKit)

... existing code here ...

RCT_EXPORT_METHOD(setupToolPicker: (nonnull NSNumber *)viewTag)
{
  [self setupToolPicker];
}

-(void) setupToolPicker{
  dispatch_async(dispatch_get_main_queue(), ^{
    self->_toolPicker = [[PKToolPicker alloc] init];
    [self->_toolPicker setVisible:true forFirstResponder:self->_canvasView];
    [self->_toolPicker addObserver:self->_canvasView];
    [self->_toolPicker addObserver:self];
    [self->_canvasView becomeFirstResponder];
    NSLog(@"Set Toolpicker");
  });
}
@end
In the code above, we’ve linked the canvasView with the toolPicker. Notice that we’ve written this in a method that will be called from the JavaScript code. We want to call the toolPicker initialization code after some time once the canvasView is correctly mounted. Finally, we’ll write the code to call the setupToolPicker from the JavaScript side. Now, paste the code below into your App.tsx file:
// Imports here
const App: React.FC = () => {
  const drawingRef = useRef(null);
  // Add the below code to call the native method
  // `setupToolPicker` after 200ms the component is mounted
  useEffect(() => {
    setTimeout(() => {
      UIManager.dispatchViewManagerCommand(
        findNodeHandle(drawingRef?.current),
        UIManager.getViewManagerConfig('PencilKit').Commands.setupToolPicker,
        undefined,
      );
    }, 200);
  }, []);
  // Existing code here
};
// Existing stylesheet code here
export default App;
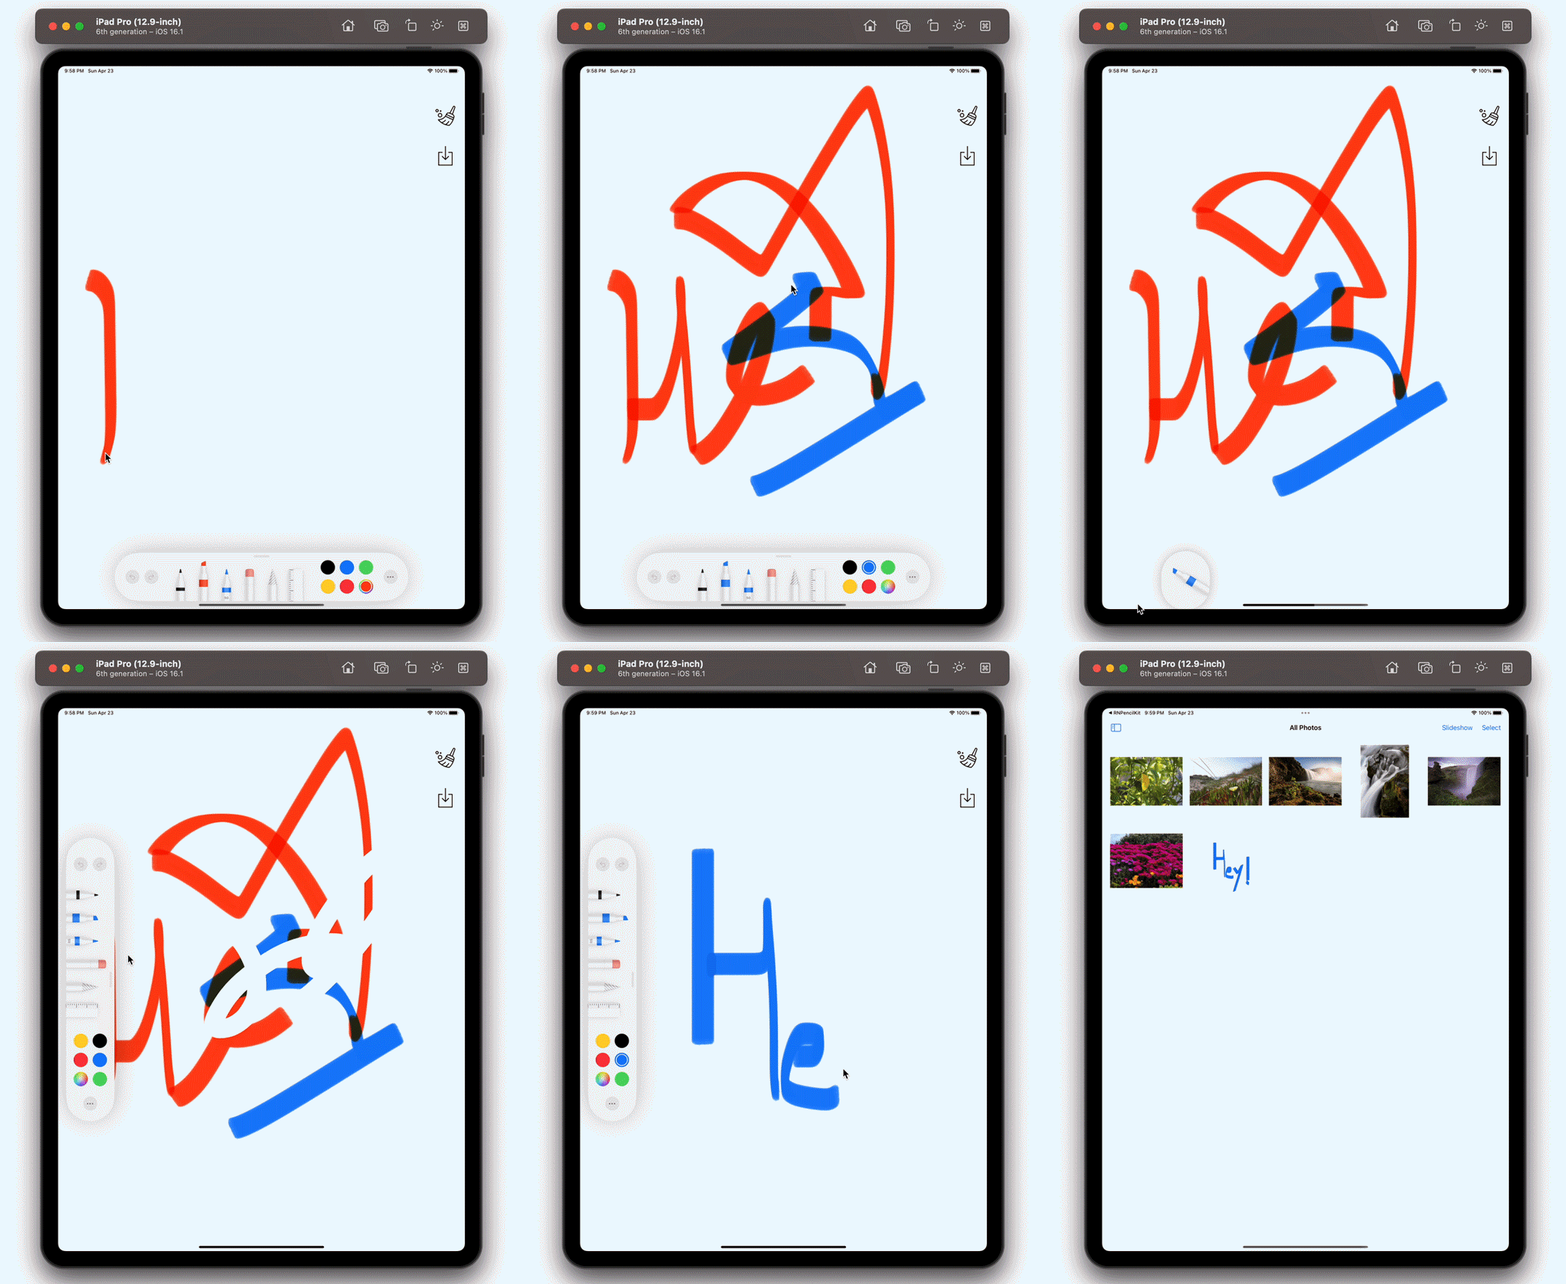
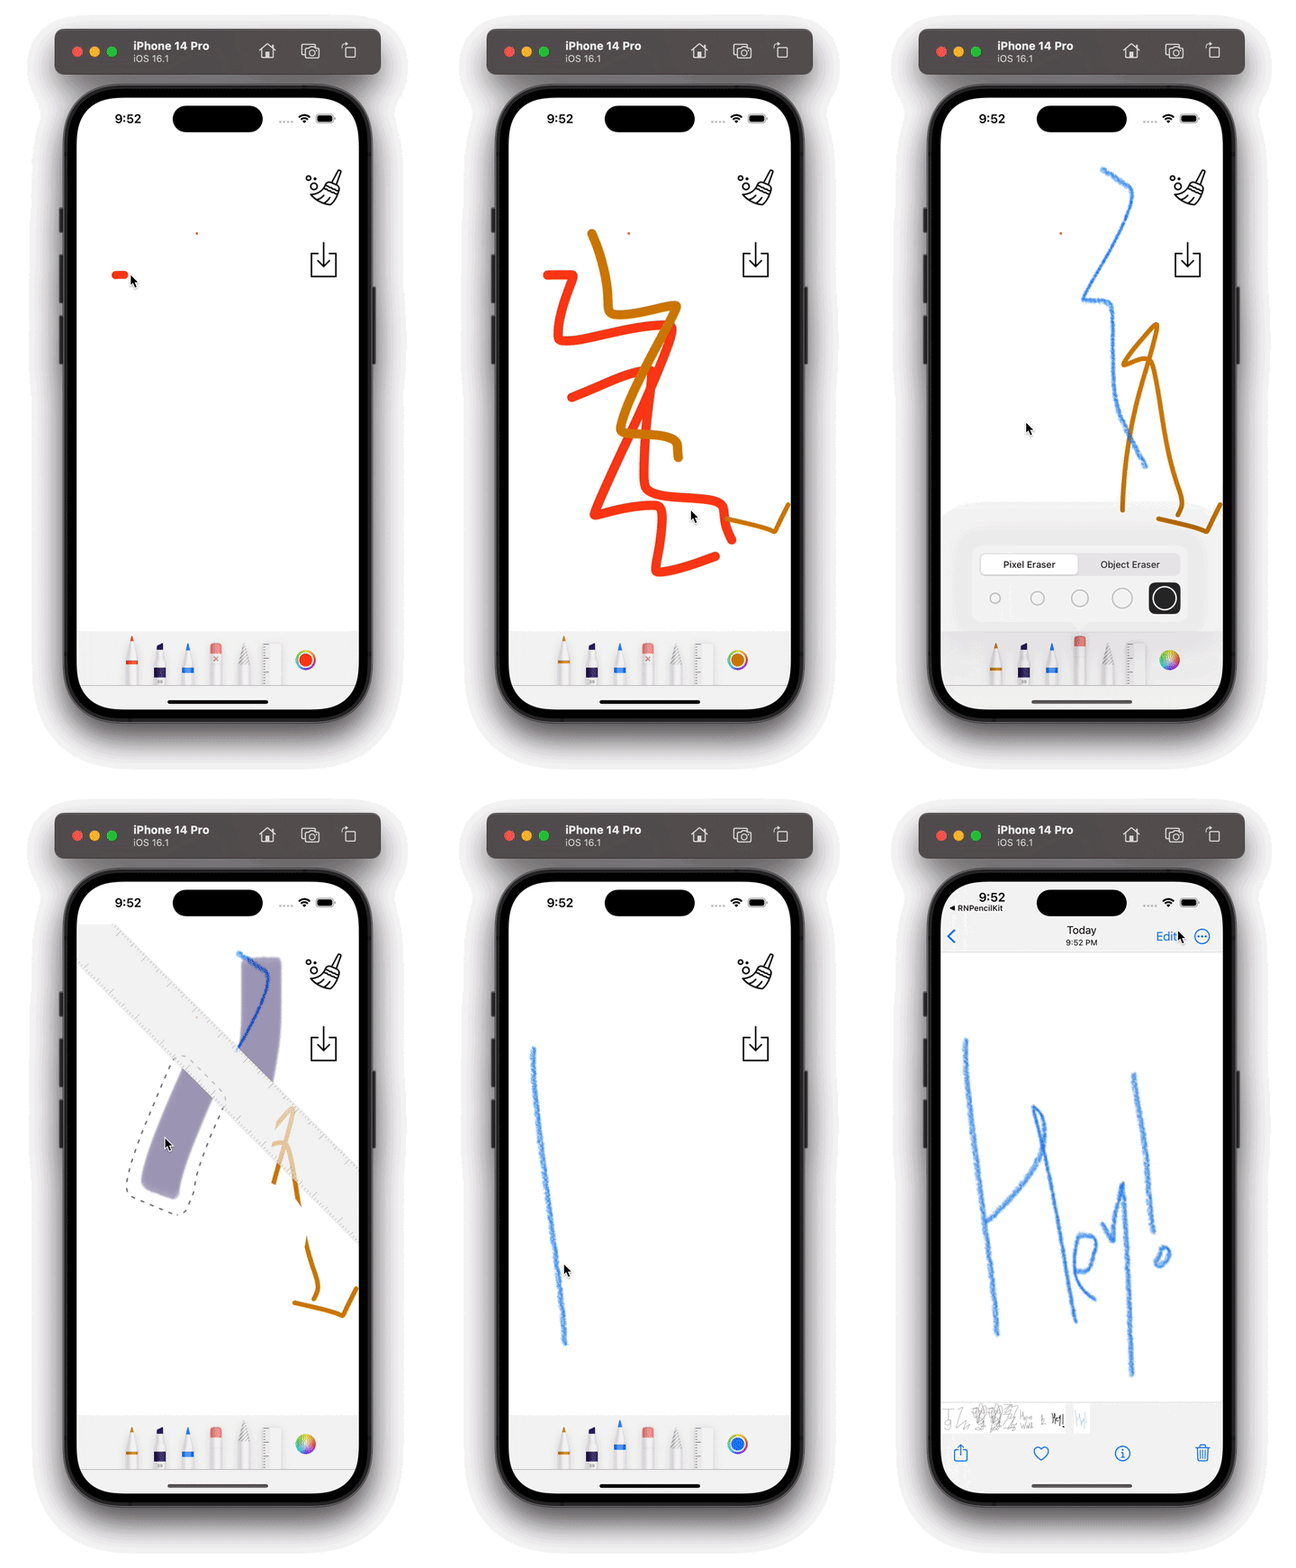
After writing the final code above, our application will look like the images below on iPad and iPhone devices, respectively:
While PencilKit is a powerful and versatile tool for iOS and iPadOS app development, it’s not directly available for use in React Native. But, we saw how easily we can integrate PencilKit into a React Native application using React Native’s native UI components.
Although using PencilKit in React Native may require some additional effort, it can offer a valuable and engaging experience for users of mobile apps. Thanks for reading, and be sure to leave a comment if you have any questions.

LogRocket's Galileo AI watches sessions for you and and surfaces the technical and usability issues holding back your React Native apps.
LogRocket also helps you increase conversion rates and product usage by showing you exactly how users are interacting with your app. LogRocket's product analytics features surface the reasons why users don't complete a particular flow or don't adopt a new feature.
Start proactively monitoring your React Native apps — try LogRocket for free.

Explore how the Universal Commerce Protocol (UCP) allows AI agents to connect with merchants, handle checkout sessions, and securely process payments in real-world e-commerce flows.

React Server Components and the Next.js App Router enable streaming and smaller client bundles, but only when used correctly. This article explores six common mistakes that block streaming, bloat hydration, and create stale UI in production.

Gil Fink (SparXis CEO) joins PodRocket to break down today’s most common web rendering patterns: SSR, CSR, static rednering, and islands/resumability.

@container scroll-state: Replace JS scroll listeners nowCSS @container scroll-state lets you build sticky headers, snapping carousels, and scroll indicators without JavaScript. Here’s how to replace scroll listeners with clean, declarative state queries.
Would you be interested in joining LogRocket's developer community?
Join LogRocket’s Content Advisory Board. You’ll help inform the type of content we create and get access to exclusive meetups, social accreditation, and swag.
Sign up now
One Reply to "Build a React Native drawing app with PencilKit"
Awesome articles, I followed it to implement a drawing component in my app. It was working flawlessly with iOS16, but with iOS17, there is this weird lag… I can’t figure out why! If you could have a look and give us maybe a clue : )