
If you spend some time in the technology space, you’ll probably come across the terms “web scraping” and “web scrapers”. But do you know what they are, how they work, or how to build one for yourself?

If your answer to any of those questions is no, read on as we’ll be covering everything about web scraping in this article. You will also get a chance to build one using Python and the Beautiful Soup library.
The Replay is a weekly newsletter for dev and engineering leaders.
Delivered once a week, it's your curated guide to the most important conversations around frontend dev, emerging AI tools, and the state of modern software.
Web scraping refers to extracting and harvesting data from websites via the Hypertext Transfer Protocol (HTTP) in an automated fashion by using a script or program considered a web scraper.
A web scraper is a software application capable of accessing resources on the internet and extracting required information. Often, web scrapers can structure and organize the collected data and store it locally for future use.
Some standard web scraping tools include:
You might be wondering why anybody might be interested in using a web scraper. Here are some common use cases:
Web scraping sounds like it’d be a go-to solution when you need data, but it’s not always easy to set up for multiple reasons. Let’s look at some of them.
People build websites using different teams, tools, designs, and sections, making everything about one given website different from another one. This implies that if you create a web scraper for a website, you’d have to build a separate version to be fully compatible with another website — except for when they share very similar content or your web scraper uses clever heuristics.
The durability of a web scraper is a significant problem. You can have a web scraper that works perfectly today, but it will seemingly suddenly break because the website you’re extracting data from updated its design and structure. Thus, you’ll also have to frequently make changes to your scraper logic to keep it running.
Over the years, people started abusing their power with web scrapers to perform malicious activities. Web developers retaliated against this move by implementing measures that prevent their data from being scraped. Some of these measures include:
For short, rate limiting is a technique that controls how much traffic is processed by a system by setting usage caps for its operations. In this context, the operation allows visitors to access content hosted on the website.
Rate limiting becomes troublesome when you are trying to scrape a lot of data from multiple website pages.
A dynamic website uses scripts to generate its content on the website. Often, it fetches data from an external source and prefills the page with it.
If your web scraper makes a GET request to the webpage and scrapes the returned data, it will not function as expected because it is not running the scripts on the website. The solution here is to use tools like Selenium that spin up a browser instance and execute the required scripts.
Before we get into our in-depth example, let’s make sure we’ve set up properly and understand a few basic concepts about web scraping in practice.
To follow and understand this tutorial, you will need the following:
First, install Beautiful Soup, a Python library that provides simple methods for you to extract data from HTML and XML documents.
In your terminal, type the following:
pip install beautifulsoup4
Let’s explore a block of Python code that uses Beautiful Soup to parse and navigate an HTML document:
from bs4 import BeautifulSoup

# define a HTML document
html = "<!DOCTYPE html><html><head><title>This is the title of a website</title></head><body><h1 id='heading-1'>This is the main heading</h1><h2 id='heading-2'>This is a subheading</h2><p>Lorem ipsum dolor sit amet, consectetur adipisicing elit, sed do eiusmod tempor incididunt ut labore et dolore magna aliqua.</p><ul><li class='list-item'>First</li><li class='list-item'>Second</li><li class='list-item'>Third</li></ul></body></html>"

# parse the HTML content with Beautiful Soup
soup = BeautifulSoup(html, "html.parser")

# print the HTML in a beautiful form
print(soup.prettify())
We imported the Beautiful Soup library into a script and created a BeautifulSoup object from our HTML document in the code above. Then, we used the prettify() method to display the HTML content in an adequately indented form. Below is the output:
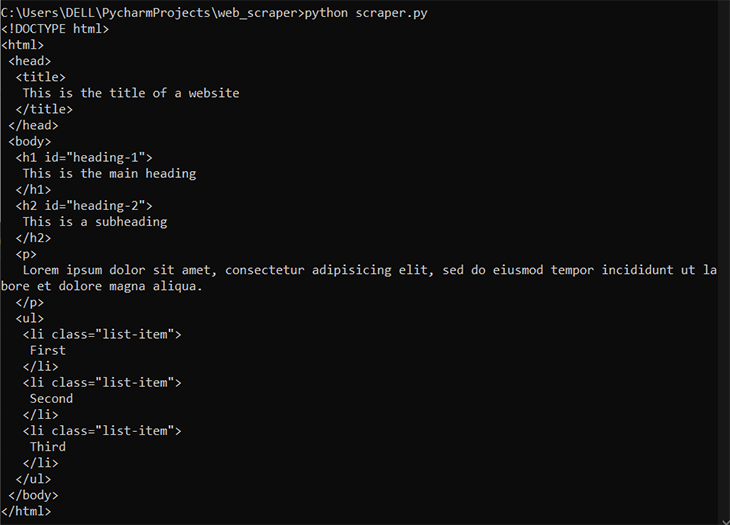
Next, let’s extract some of the HTML tags in our document. Beautiful Soup provides a couple of methods that allow you to extract elements.
Let’s look at an example:
# getting the title element of the HTML
print(soup.title)

# getting the first h1 element in the HTML
print(soup.h1)
And its output:

Beautiful Soup provides a find() method that allows you to extract elements with specific criteria. Let’s see how to use it:
# getting the first h2 element in the HTML
print(soup.find("h2"))

# getting the first p element in the HTML
print(soup.find("p"))
And what the output looks like:

Beautiful Soup also provides a find_all() method to extract every element with a specific tag as a list, instead of getting only the first occurrence. Let’s see its usage:
# getting all the li elements in the HTML
print(soup.find_all("li"))

You might want to extract HTML elements that have a specific ID attached to them. The find() method allows you to supply an ID to filter its search results.
Let’s see how to use it:
# getting the h1 element with the heading-1 id
print(soup.find("h1", id="heading-1"))

# getting the h2 element with the heading-2 id
print(soup.find("h2", {"id": "heading-2"}))
And below is the output:

Beautiful Soup also lets you extract HTML elements with a specific class by supplying the find() and find_all() methods with appropriate parameters to filter their search results. Let’s see its usage:
# getting the first li element with the list-item class
print(soup.find("li", {"class": "list-item"}))

# getting all the li elements with the list-item class
print(soup.find_all("li", {"class": "list-item"}))

You might want to retrieve the values of the attributes and content of the elements you extract.
Luckily, Beautiful Soup provides functionalities for achieving this. Let’s see some examples:
# define a HTML document
html = "<a id='homepage' class='hyperlink' href='https://google.com'>Google</a>"

# parse the HTML content with Beautiful Soup
soup = BeautifulSoup(html, "html.parser")

# extract the a element in the HTML
element = soup.find("a")

# extract the element id
print("ID:", element["id"])

# extract the element class
print("class:", element["class"])

# extract the element href
print("href:", element["href"])

# extract the text contained in the element
print("text:", element.text)
print("text:", element.get_text())

Now that we have covered the basics of web scraping with Python and Beautiful Soup, let’s build a script that scrapes and displays cryptocurrency information from CoinGecko.
You need to install the Requests library for Python to extend the functionalities of your scripts to send HTTP/1.1 requests extremely easily.
In your terminal, type the following:
pip install requests
Now, we’ll retrieve CoinGecko’s HTML content to parse and extract the required information with Beautiful Soup. Create a file named scraper.py and save the code below in it:
import requests


def fetch_coingecko_html():
    # make a request to the target website
    r = requests.get("https://www.coingecko.com")
    if r.status_code == 200:
        # if the request is successful return the HTML content
        return r.text
    else:
        # throw an exception if an error occurred
        raise Exception("an error occurred while fetching coingecko html")
Remember: we highlighted that every website has a different structure, so we need to study how CoinGecko is structured and built before building a web scraper.
Open https://coingecko.com in your browser so we have a view of the website we are scraping (the below screenshot is from my Firefox browser):
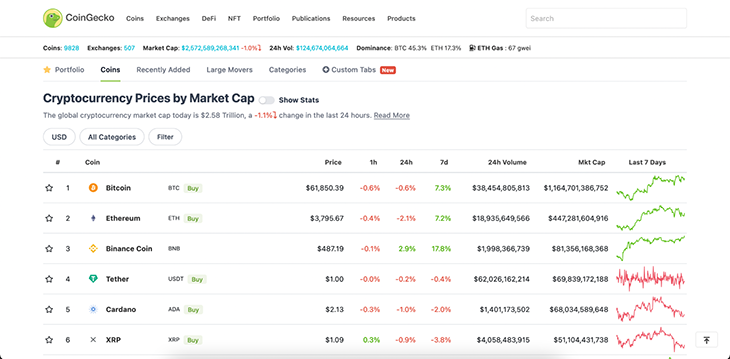
Since we want to scrape cryptocurrency information, open the Inspector tab in the Web Developer Toolbox and view the source code of any cryptocurrency element from the information table:


From the source code above, we can notice the following things about the HTML tags we’re inspecting:
tr tag contained in a div tag with coin-table classtd tag with coin-name classtd tag with td-price and price classestd tag with td-change1h, td-change24h, and td-change7d classestd tag with td-liquidity_score and td-market_cap classesNow that we have studied the structure of CoinGecko’s website, let’s use Beautiful Soup to extract the data we need.
Add a new function to the scraper.py file:
from bs4 import BeautifulSoup

def extract_crypto_info(html):
    # parse the HTML content with Beautiful Soup
    soup = BeautifulSoup(html, "html.parser")

    # find all the cryptocurrency elements
    coin_table = soup.find("div", {"class": "coin-table"})
    crypto_elements = coin_table.find_all("tr")[1:]

    # iterate through our cryptocurrency elements
    cryptos = []
    for crypto in crypto_elements:
        # extract the information needed using our observations
        cryptos.append({
            "name": crypto.find("td", {"class": "coin-name"})["data-sort"],
            "price": crypto.find("td", {"class": "td-price"}).text.strip(),
            "change_1h": crypto.find("td", {"class": "td-change1h"}).text.strip(),
            "change_24h": crypto.find("td", {"class": "td-change24h"}).text.strip(),
            "change_7d": crypto.find("td", {"class": "td-change7d"}).text.strip(),
            "volume": crypto.find("td", {"class": "td-liquidity_score"}).text.strip(),
            "market_cap": crypto.find("td", {"class": "td-market_cap"}).text.strip()
        })

    return cryptos
Here, we created an extract_crypto_info() function that extracts all the cryptocurrency information from CoinGecko’s HTML content. We used the find(), find_all(), and .text methods from Beautiful Soup to navigate CoinGecko’s data and extract what we needed.
Let’s use the function we created above to complete our scraper and display cryptocurrency information in the terminal. Add the following code to the scraper.py file:
# fetch CoinGecko's HTML content
html = fetch_coingecko_html()

# extract our data from the HTML document
cryptos = extract_crypto_info(html)

# display the scraper results
for crypto in cryptos:
    print(crypto, "\n")
Once you run that, you’ll see the following:
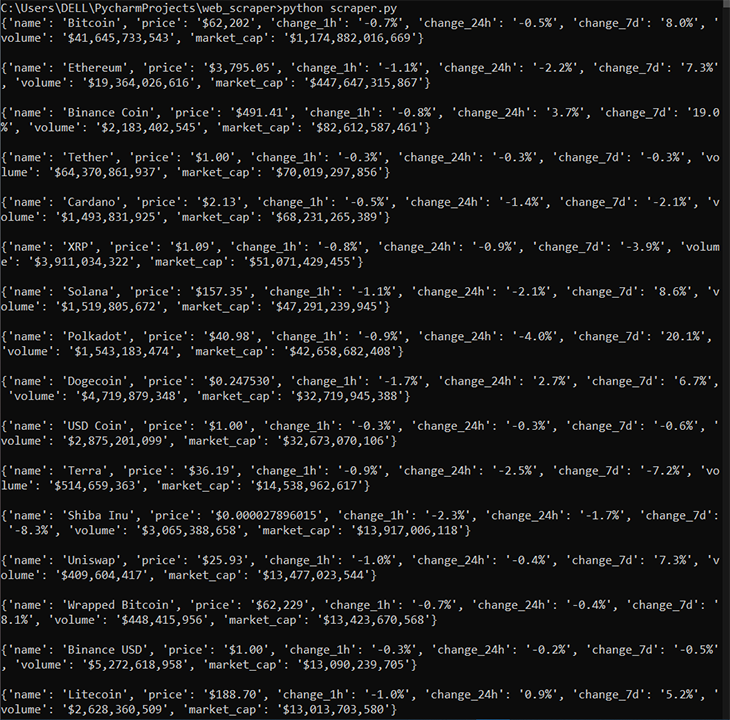
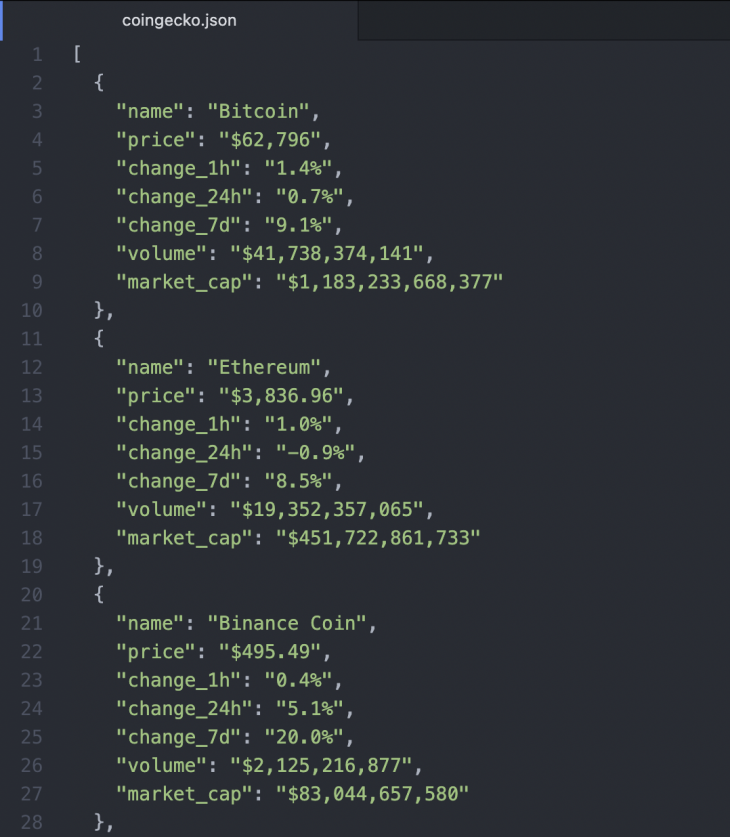
You can also decide to save the results in a JSON file locally:
import json

# save the results locally in JSON
with open("coingecko.json", "w") as f:
    f.write(json.dumps(cryptos, indent=2))
In this article, you learned about web scraping and web scrapers, their uses, the challenges associated with web scraping, and how to use the Beautiful Soup library. We also explored multiple implementation code snippets and built a web scraper to retrieve cryptocurrency information from CoinGecko with Python and Beautiful Soup.
The source code of the cryptocurrency web scraper is available as a GitHub Gist. You can head over to the official Beautiful Soup documentation to explore more functionalities it provides and build amazing things with the knowledge acquired from this tutorial.
Install LogRocket via npm or script tag. LogRocket.init() must be called client-side, not
server-side
$ npm i --save logrocket

// Code:

import LogRocket from 'logrocket';
LogRocket.init('app/id');
// Add to your HTML:

<script src="https://cdn.lr-ingest.com/LogRocket.min.js"></script>
<script>window.LogRocket && window.LogRocket.init('app/id');</script>

Compare the top AI development tools and models of February 2026. View updated rankings, feature breakdowns, and find the best fit for you.

Broken npm packages often fail due to small packaging mistakes. This guide shows how to use Publint to validate exports, entry points, and module formats before publishing.

Discover what’s new in The Replay, LogRocket’s newsletter for dev and engineering leaders, in the February 11th issue.

Cut React LCP from 28s to ~1s with a four-phase framework covering bundle analysis, React optimizations, SSR, and asset/image tuning.
Would you be interested in joining LogRocket's developer community?
Join LogRocket’s Content Advisory Board. You’ll help inform the type of content we create and get access to exclusive meetups, social accreditation, and swag.
Sign up now