
Static sites have become a powerful alternative to dynamic sites, especially with the number of static site generators (SSGs) available. Developers can easily spin up a full-blown static website without much effort thanks to SSGs.

In this post, we will cover Hugo, a powerful SSG known for its speed. We’ll learn what benefits Hugo provides, why it’s one of the best SSGs to use, and how to build a simple blog application quickly and efficiently.
The Replay is a weekly newsletter for dev and engineering leaders.
Delivered once a week, it's your curated guide to the most important conversations around frontend dev, emerging AI tools, and the state of modern software.
When creating static websites, content is not dynamically generated, meaning it is hardcoded. This can seem like a lot of work, but it comes in handy.
Dynamic sites take away the needless repetition of individual HTML files across all pages and posts, but they are often slow and not suitable for small and most medium-sized projects.
This is where SSGs and Hugo come in.
SSGs provide static HTML pages based on raw data — usually in Markdown — and a template structure. They usually create fast and SEO-friendly pages, and are good alternatives to content management systems (CMSes), which use dynamic websites.
SSGs also help automate writing individual HTML pages. By simply providing the data, the SSG generates HTML pages to serve on a webpage using the predefined template.
Hugo is one of many static site generators available. However, Hugo is the fastest static site generator out there. It is written in Go and has built-in concurrency.
With Hugo, users can define content in Markdown, like many SSGs, and automatically generate HTML files from the Markdown.
By default, static sites are faster than dynamic sites; static sites generate during build time, and the HTTPS handles the rest, unlike dynamic sites where every request is served from a server every time a request is made to a resource.
Hugo remains the fastest SSG because of its built-in multi-threading; it currently takes less than 8ms to make and serve a change, which we will review later in this post.
Hugo is also incredibly simple to use and does not require extensive technical knowledge, especially after installing and setting it up, which we will cover later in this post.
And, with the ability to use Dropbox Paper or readme.so, developers can visually create their desired content and export it to a Hugo project, eliminating the need for an in-depth understanding of Markdown and styling.
There’s no need to configure servers and infrastructures, letting developers get any small project up and running without using technologies and stacks that are simply overkill.
Backend infrastructures are not needed when deploying Hugo, providing a cheap way to manage a blog or website.
Because all HTML files generate during build time, there’s no need to configure servers or databases, eliminating the financial setback these often pose.
Simply use one of the many free services, such as GitHub pages, Netlify, or Vercel, to deploy a blog or website.
Hugo sites and apps are virtually unhackable. Since there is no database attached to a Hugo site, everything is statically available.
Developers don’t need to worry about SQL injections that might come to a database through form fields or a security breach. Not only does Hugo provide speed, but it’s also secure.
While Hugo is easy to learn and use with benefits that range from its speed to low cost, it does have some trade-offs.
Get ready to trade-off dynamic for static. Hugo offers speed but doing things manually in an SSG can be cumbersome, such as working with functions, variables, and scope.
Another trade-off to consider before using Hugo is the lack of a graphical user interface for managing content in a more visually appealing manner. However, this can be solved by using third-party CMSes like Netlify CMS or Dato CMS as data sources.
Let’s now see Hugo in action by setting up and building a blog application.
To begin, we must install Hugo; choose the corresponding operating system to install the package.
While I used Linux for this project, any operating system that can run the Go compiler tool can install Hugo onto a local machine.
Confirm the installation completed by checking that the version of Hugo is the most recent. Run the following from the terminal:
hugo version

Next, run the following to see a list of available commands and flags:
hugo help
Because of Hugo’s short list of commands and flags, the development experience is much easier.
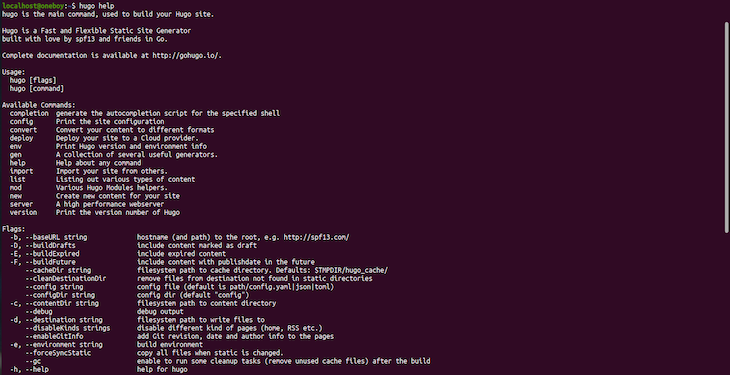
Now that we confirmed Hugo’s installation was a success, let’s create a Hugo website. Start by navigating to a desired location and run the following command:
hugo new site mysite

This creates a mysite folder that has the Hugo project template. We can now open the mysite folder in a text editor, such as Visual Studio Code, to see its structure.
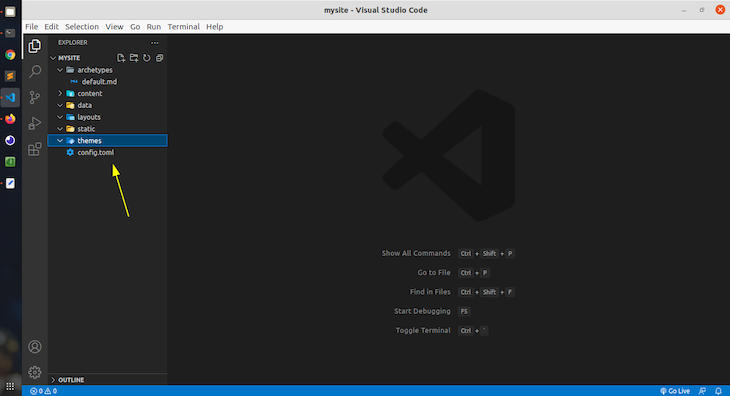
The next thing to do is to add a theme. We can even build our own theme, however, for the sake of this guide, let’s use the themes available at https://themes.gohugo.io/.
I decided to use Ananke for this tutorial; download this theme as a zip file from GitHub.
Extract the gohugo-theme-ananke-master folder into the themes folder in the Hugo project. Rename the extracted folder to ananke for simplicity’s sake.
Open the config.toml in the root directory of the Hugo project and add the following line:
theme = 'ananke'
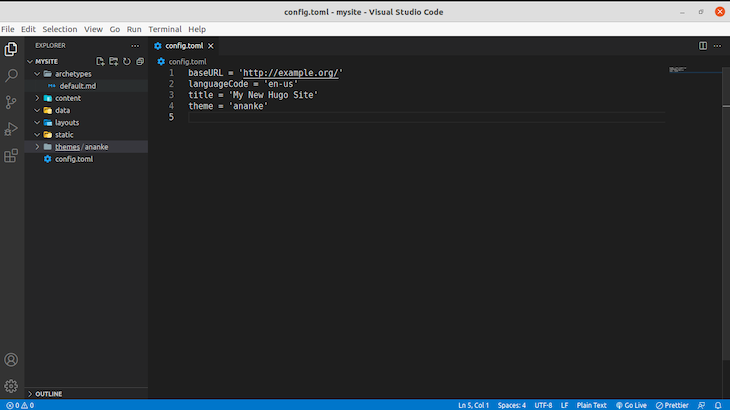
To check whether everything is configured correctly, let’s build the app and test it on the web. Begin by running the following:
hugo server -D
The -D flag is added if you intend to show content in draft mode. This command is used in development only.
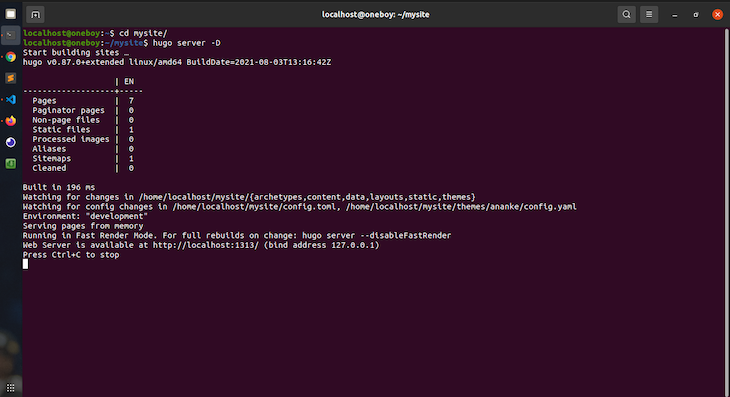
If everything goes well, we should see the application built and served at http://localhost:1313/.
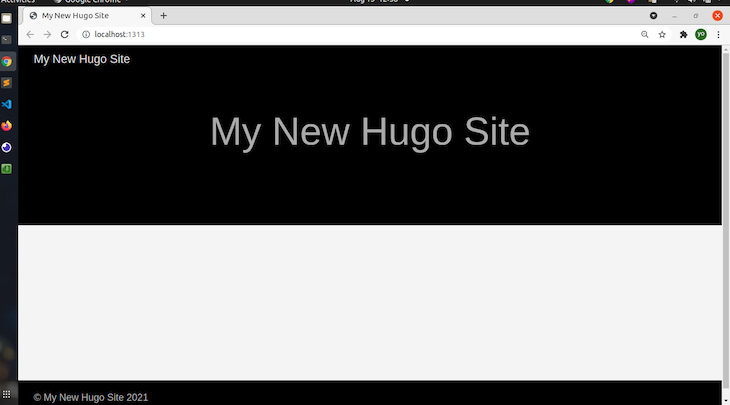
This is just the default look of the theme without adding content.
To add content to our blog, we can either add it manually or through the command line by using the following:
hugo new posts/my-first-post.md
The benefit of adding content through the command line is it provides a boilerplate in Markdown, like the following:
---
title: "My First Post"
date: 2021-08-13T13:06:28+01:00
draft: true
---
This then creates the following inside the content folder:
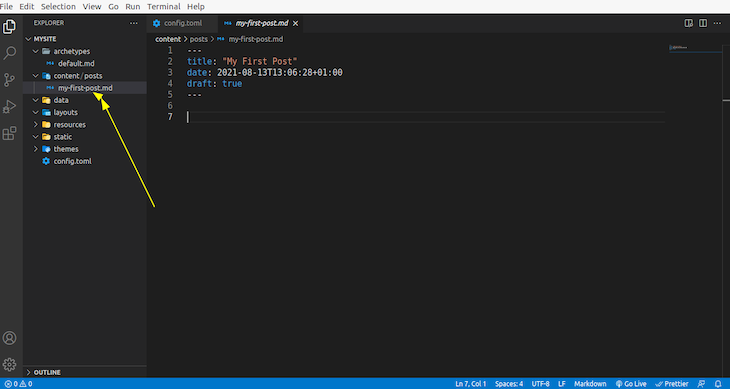
For the sake of this tutorial, let’s add some random data and images:
---
title: "J Cole Story"
featured_image: "/jcole.jpg"
date: 2021-08-13T13:06:28+01:00
draft: false
---
Jermaine Lamarr Cole (born January 28, 1985) known professionally as J. Cole, is an American rapper, singer, songwriter, and record producer. Cole is regarded as one of the most influential rappers of his generation.[5] Born on a military base in Germany and raised in Fayetteville, North Carolina,[6] Cole initially gained recognition as a rapper following the release of his debut mixtape, The Come Up, in early 2007. Intent on further pursuing a musical career, he went on to release two additional mixtapes, The Warm Up (2009) and Friday Night Lights (2010) both to critical acclaim, after signing to Jay-Z's Roc Nation imprint in 2009.
Cole released his debut studio album, Cole World: The Sideline Story, in 2011. It debuted at number one on the US Billboard 200.[7] His next album, Born Sinner (2013), also topped the Billboard 200. Moving into more conscious themes, 2014 Forest Hills Drive (2014) topped the Billboard 200 and earned Cole a Best Rap Album nomination at the 2015 Grammy Awards.[8] His jazz influenced fourth album, 4 Your Eyez Only (2016), debuted at number one on the Billboard 200.[9] Cole's fifth album, KOD (2018), became his fifth number-one album on the Billboard 200 and featured a then-record six simultaneous top 20 hits on the Billboard Hot 100, tying The Beatles.[10] His sixth studio album, The Off-Season, was released on May 14, 2021.
 !\[Jcole\](/jcole.jpg)
Self-taught on piano, Cole also acts as a producer alongside his rap career, producing singles for artists such as Kendrick Lamar and Janet Jackson, as well as handling the majority of the production in his own projects.[11] He has also developed other ventures, including Dreamville Records, as well as a non-profit organization called the Dreamville Foundation.[12] Dreamville's compilation album Revenge of the Dreamers III (2019) debuted at number one on the Billboard 200 and was nominated for Best Rap Album at the 2020 Grammy Awards. In January 2015, Cole decided to house single mothers rent-free at his childhood home in Fayetteville, North Carolina.[13]
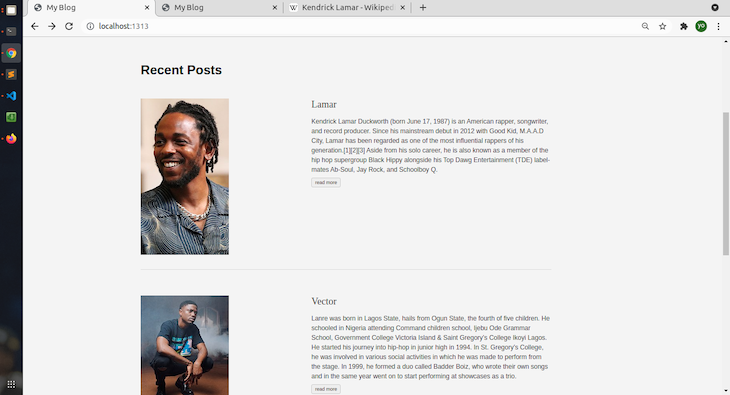
The Markdown then produces the following:

Notice that when adding an image to a post, it’s accessed through the static folder. Any asset put into the static folder is available globally or at the root level, regardless of what project directory we’re in.
It is important to note that the name of the Markdown file is a route in the application, meaning the first post is located at http://localhost:1313/posts/my-first-post/.
Also, always name the Markdown files descriptively for SEO purposes.
I went ahead and created two additional Markdown files for the blog, including basic information about some rappers I like, to add more content.
Our blog is now taking better shape.
Remember when we initially talked about speed as one of the main reasons to pick Hugo over other static site generators?
Benchmarking happens whenever the Hugo server detects a change; it takes less than 8 milliseconds to rebuild and serve the change immediately to our browser.

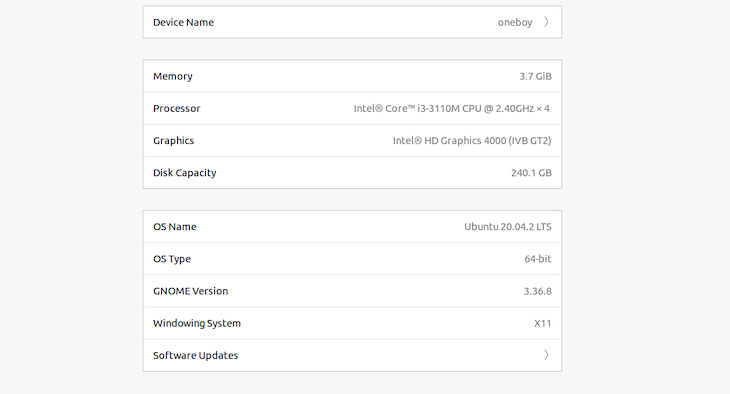
This is incredibly fast, regardless of the machine building the app. Here is the system this project is served from:
Let’s add eight more posts, including a featured_image and image. Now, let’s see how long it will take to build.

This specific build to approximately 397 milliseconds; not even up to a second! Now, imagine if we needed to add 100 or 1000 posts; it would take significantly less time using Hugo than using another SSG or dynamic webpages.
Let’s see how long it takes these 11 posts to build when deploying on Vercel.
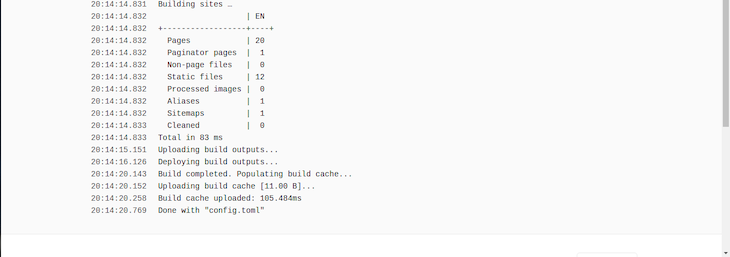
It took 83 milliseconds; this really is blazing fast!
Before deploying, we want to ensure the base URL in the config.toml file is configured to the URL we want to deploy to.
I have already deployed this to Vercel, which you can access here.
This is the base URL, and while it won’t really affect the local development, it does generate a public folder while building the project where all statically generated HTML files are put and updated. This can cause image links to break if the base URL is not correct.
Now, we want to first push our code to a GitHub private or public repository. There are many ways to do this, but we will simply build the project in the local development environment by running the following:
hugo server
Then, run the following:
hugo
These generate a public folder, which can be deployed anywhere, such as Vercel, Netlify, or regular shared hosting. The problem with that is it becomes very hard to keep up with changes.
That is why we will deploy to GitHub, then connect the GitHub account to Vercel.
To do this, create a new repository on GitHub. Then, run the following commands one after the other in the root of the project:
git init
git commit -m "first commit"
git branch -M main
git remote add origin https://github.com/USERNAME/repository_name.git
git push -u origin main
This uploads the project to GitHub. A refresh gives the following:
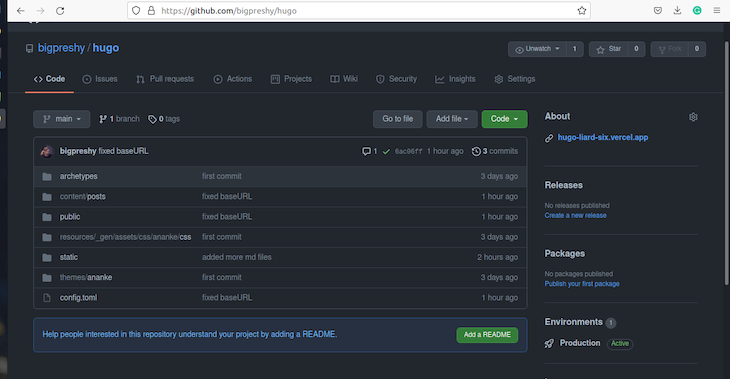
Now, connect the GitHub account to Vercel. If you are signing up to Vercel, you have the option to use GitHub as a provider. Otherwise, use your existing GitHub account.

Then, we should see the following; click on New Project.
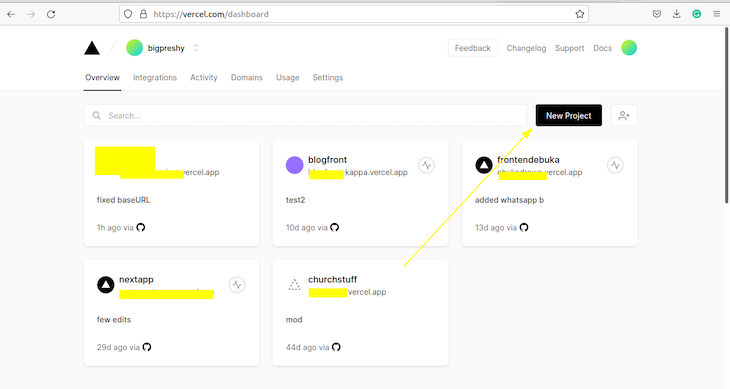
Under Import Git Repository, you should see all available repositories in ascending order, determined by your last commit.
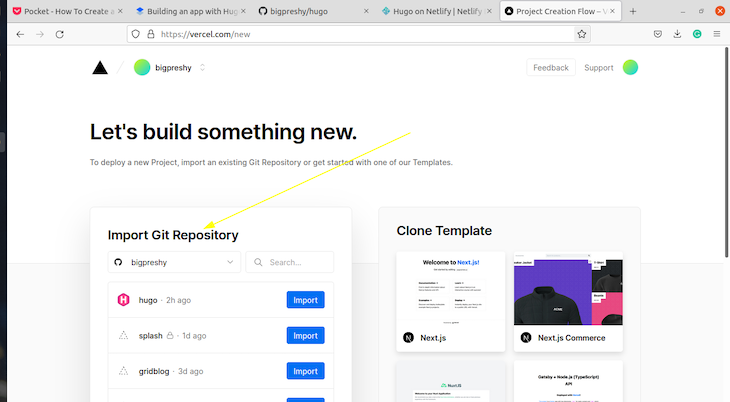
Select the repository that has the Hugo project.
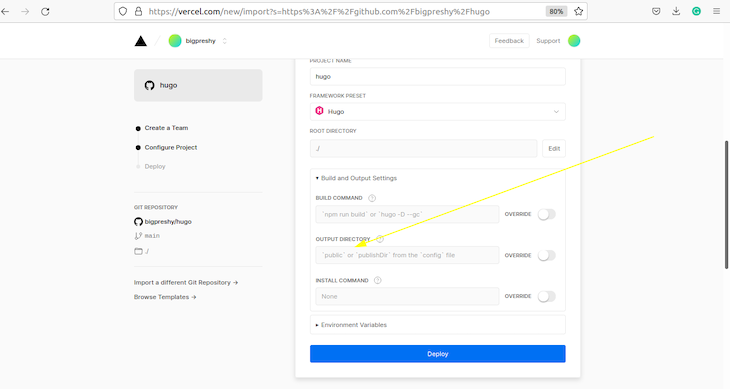
When the Hugo project builds for the first time, it creates a public directory where all the generated HTML and other assets that will be served to the webpage reside.
If we had not built our project in a local development environment, Vercel would automatically create that folder for us. But, since there is the public folder, Vercel and other popular hosting services know to build and serve the public folder.
Congratulations! You made it to the end. With Hugo’s speed, simplicity, and static nature, it provides developers both new and experienced a seamless development experience when creating and deploying applications.
Install LogRocket via npm or script tag. LogRocket.init() must be called client-side, not
server-side
$ npm i --save logrocket

// Code:

import LogRocket from 'logrocket';
LogRocket.init('app/id');
// Add to your HTML:

<script src="https://cdn.lr-ingest.com/LogRocket.min.js"></script>
<script>window.LogRocket && window.LogRocket.init('app/id');</script>

Compare the top AI development tools and models of February 2026. View updated rankings, feature breakdowns, and find the best fit for you.

Broken npm packages often fail due to small packaging mistakes. This guide shows how to use Publint to validate exports, entry points, and module formats before publishing.

Discover what’s new in The Replay, LogRocket’s newsletter for dev and engineering leaders, in the February 11th issue.

Cut React LCP from 28s to ~1s with a four-phase framework covering bundle analysis, React optimizations, SSR, and asset/image tuning.
Hey there, want to help make our blog better?
Join LogRocket’s Content Advisory Board. You’ll help inform the type of content we create and get access to exclusive meetups, social accreditation, and swag.
Sign up now