Editor’s note: This post was updated on 21 July 2023 to include information about customizing your React Native app’s authentication UI, as well as best practices for securing authentication in your app.

Authentication helps control user access to critical parts of an application. As such, it is a critical part of virtually all types of software. In this tutorial, we’ll explore how to set up authentication in a mobile application using React Native and AWS Amplify.
We’ll cover the following:
To follow along with this tutorial, you should have:
The Replay is a weekly newsletter for dev and engineering leaders.
Delivered once a week, it's your curated guide to the most important conversations around frontend dev, emerging AI tools, and the state of modern software.
AWS Amplify is a set of products and tools by Amazon that helps mobile and frontend web developers build and deploy full-stack applications on Amazon Web Services. Notable features of AWS Amplify include:
In order to use Amplify, you first need to create an AWS Account and install the Amplify CLI. Open a terminal and paste the code below to install the Amplify CLI. Note that the following settings are not project-specific settings. That’s why we install the Amplify CLI globally on our machine:
npm install -g @aws-amplify/cli
After a successful installation of the Amplify CLI, run the following code to configure the CLI:
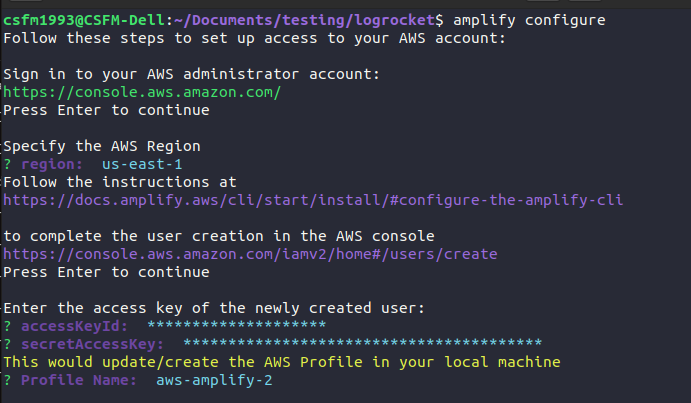
amplify configure
This interactive CLI command requires your input in two steps before it successfully completes:
When creating a user, be sure to create a user with AdministratorAccess to AWS services, such as Amplify, Cognito, and Cloudfront. This is necessary for specifying an AWS region, adding the accessKeyId and the secretAccessKey of the user created, and adding an AWS profile.
Follow the instructions on this page to create the accessKeyId and the secretAccessKey of the user created. Make sure you specify that you want to use these credentials in the CLI when you create them.
The screenshot below shows a summary of the aforementioned steps:
We use Expo to bootstrap our React Native application. Expo is a framework that helps you develop, build, and, deploy projects that run natively on all your users’ devices.
To get started with Expo, launch a terminal and paste the following code:
npx create-expo-app aws-amplify-authentication-tutorial --no-install
After successful installation, a React Native project called aws-amplify-authentication-tutorial will appear in the directory where the command was executed. To change into the newly created directory, use the following command:
cd aws-amplify-authentication-tutorial
Then, use the following command to install the dependencies declared on the package.json file:
npm install
Now that we have a React Native application and the Amplify framework set up, we need to connect Amplify to our React Native application. To do so, run the following command inside your React Native application directory:
amplify init
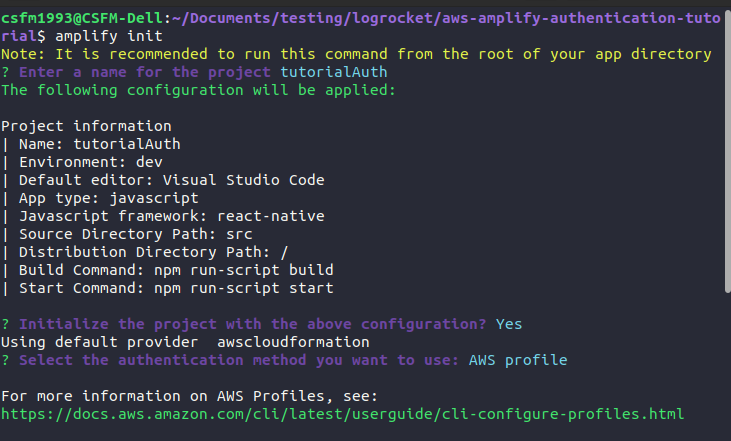
You’ll be prompted to specify the following:
dev because we are in a development environment (to choose the default option, press enter)./src )./dist)AWS Profile, then select the profile you created earlierUpon completion of this form, a folder called amplify is created in your applications root directory to store the backend configuration of your application, such as authentication. Additionally, a file called aws-exports.js is created in the source directory path we specified when initializing Amplify. This file contains the information for the services you create with Amplify. Then, the .gitignore file is modified to include files and folders generated by Amplify that shouldn’t be added to your Git repository. Finally, a cloud project is generated in the AWS Amplify Console. You can access it anytime by running amplify console.
Next, we have to install Amplify dependencies, as well as a few Expo-compatible React Native dependencies required to add Amplify to your application. To do this, run the following commands in your terminal:
npm install @aws-amplify/ui-react-native aws-amplify amazon-cognito-identity-js react-native-url-polyfill

// expo compatible dependencies
npx expo install @react-native-async-storage/async-storage @react-native-community/netinfo react-native-get-random-values react-native-safe-area-context
Then, open the App.js file in your code editor and add the following lines of code after the last import statement:
import { Amplify } from 'aws-amplify';
import awsExports from './src/aws-exports';
Amplify.configure(awsExports);
We’ve successfully added Amplify to our React Native project. Run the command npm start to launch the project in your emulator of choice.
Amazon Amplify uses Amazon Cognito under the hood to power the authentication process. Amazon Cognito is a service that simplifies the process of adding authentication, including sign up, sign in, sign out, OAuth, multifactor authentication, etc.
To get started, go back to your terminal, and run the following command inside your project root directory:
amplify add auth
On the interactive prompt that shows up after entering the command, choose the default configuration, then choose email as the method with which you want your users to be able to log in:
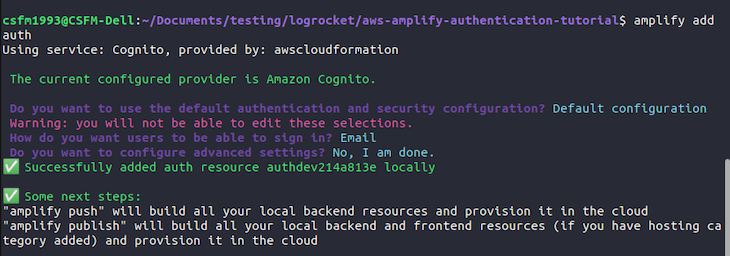
After initializing the authentication service, run the command below to deploy it:
amplify push
At this point, we can integrate the authentication service into our application. The Amplify framework provides built-in, customizable UI components that are easy to integrate, which helps streamline the process.
Go to your App.js and add the following line below the import statements:
import { withAuthenticator } from '@aws-amplify/ui-react-native';
withAuthenticator is a higher-order component that automatically detects the authentication state of the application and updates the UI. Remove the export default before the App function definition, place it at the bottom of the App.js file, and then wrap the App component with the withAuthenticator component:
export default withAuthenticator(App)
Your App.js file should look similar to this:
import { StatusBar } from 'expo-status-bar';
import { StyleSheet, Text, View } from 'react-native';
import { Amplify } from 'aws-amplify';
import awsExports from './src/aws-exports';
Amplify.configure(awsExports);
import { withAuthenticator } from '@aws-amplify/ui-react-native';

function App() {
  return (
    <View style={styles.container}>
      <Text>Open up App.js to start working on your app!</Text>
      <StatusBar style="auto" />
    </View>
  );
}
const styles = StyleSheet.create({
  container: {
    flex: 1,
    backgroundColor: '#fff',
    alignItems: 'center',
    justifyContent: 'center',
  },
});
export default withAuthenticator(App);
Save and run the app in your simulator:
npm start
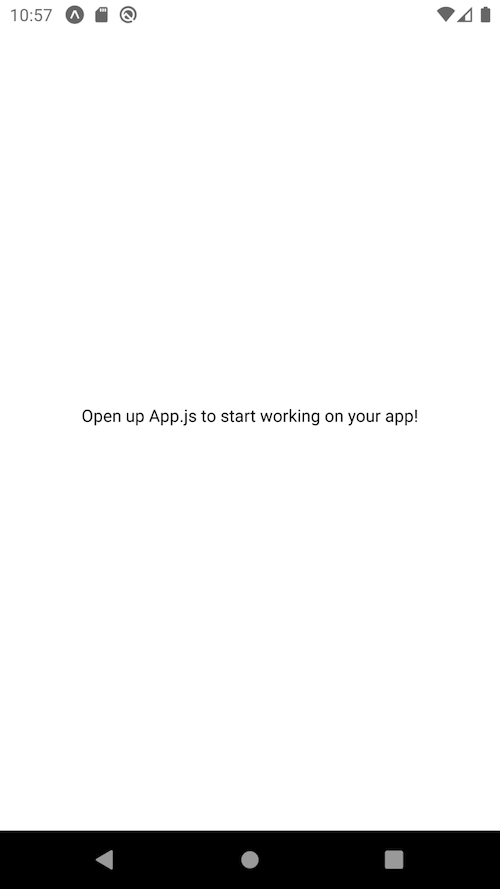
You should see something like this:
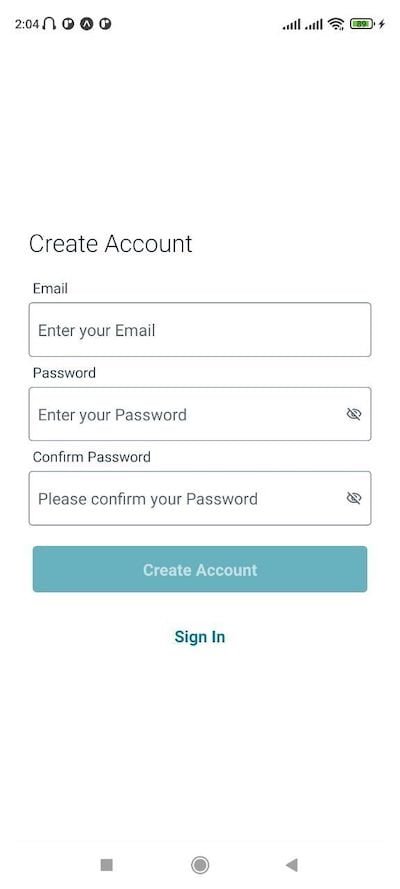
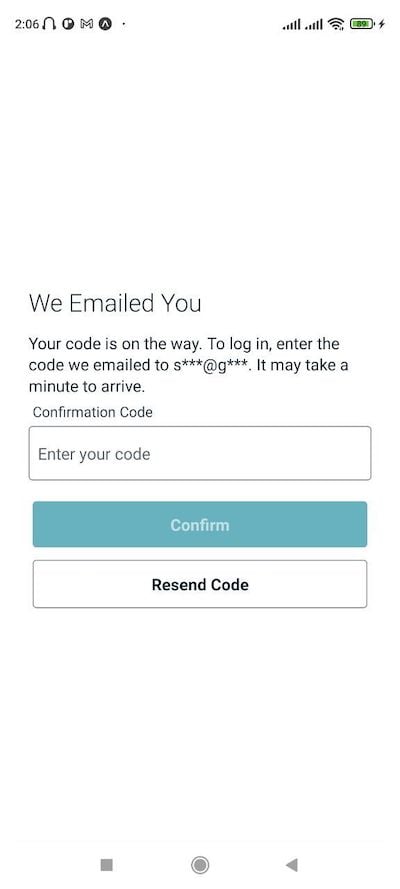
After the user creates an account, AWS Amplify will automatically send a code to the user’s email to verify their account:
After successful authentication, the user is taken to the app screen and has no way of logging out:
To add a sign out button, navigate to the src directory, and create a subdirectory named screens. Inside the screens subdirectory, create a file named Home.js and add the following code to it:
import React from 'react';
import { StyleSheet, Text, View, Pressable, Dimensions } from 'react-native';
import { Auth } from 'aws-amplify';
const { width } = Dimensions.get('window');
const Home = () => {
  const signOut = async () => {
    try {
      await Auth.signOut({ global: true });
    } catch (error) {
      console.log('error signing out: ', error);
    }
  };
  return (
    <View style={styles.container}>
      <View style={styles.header}>
        <Text style={styles.headerText}>Welcome!</Text>
        <Pressable style={styles.button} onPress={() => signOut()}>
          <Text style={styles.buttonText}>Sign out</Text>
        </Pressable>
      </View>
    </View>
  );
};
const styles = StyleSheet.create({
  container: {
    backgroundColor: '#fff',
    alignItems: 'center',
    justifyContent: 'center',
    width: width,
    paddingVertical: 20,
  },
  header: {
    display: 'flex',
    padding: 20,
    width: width,
    alignItems: 'center',
  },
  headerText: {
    fontSize: 28,
    fontWeight: 'bold',
  },
  button: {
    marginTop: 50,
    backgroundColor: '#B00020',
    padding: 10,
    borderRadius: 6,
  },
  buttonText: {
    color: '#fff',
    fontSize: 18,
  },
});
export default Home;
This creates a Home component that renders a welcome message and a sign out button. When the user clicks the sign out button, it calls the Auth.signOut() method, which is one of the many methods provided by the Auth class of aws-amplify. This method signs the user out.
Open your App.js file and refactor it to include the Home component:
import { StatusBar } from 'expo-status-bar';
import { StyleSheet, Text, View } from 'react-native';
import { Amplify } from 'aws-amplify';
import awsExports from './src/aws-exports';
Amplify.configure(awsExports);
import { withAuthenticator } from '@aws-amplify/ui-react-native';
import Home from './src/screens/Home';
function App() {
  return (
    <View style={styles.container}>
      <Home />
      <StatusBar style="auto" />
    </View>
  );
}
const styles = StyleSheet.create({
  container: {
    flex: 1,
    backgroundColor: '#fff',
    alignItems: 'center',
    justifyContent: 'center',
  },
});
export default withAuthenticator(App);
Your screen should look like this after saving:

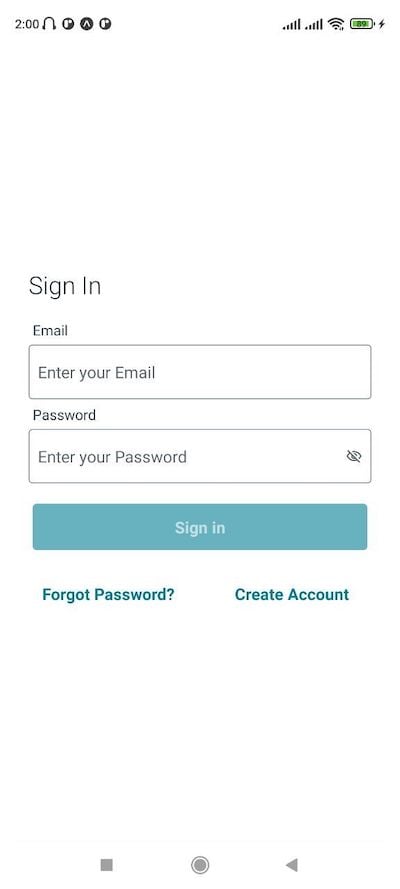
Click on the Sign out button to sign out and you will be redirected to the sign in page.
In this section, we will customize the Authenticator component provided by Amazon Amplify so the authentication UI suits your application’s needs.
First, return to your App.js file and import the Authenticator component in the line where you imported the withAuthenticator component:
import { withAuthenticator, Authenticator } from '@aws-amplify/ui-react-native';
From now on, you will be using the Authenticator component instead of withAuthenticator to add the authentication functionality to your application. Replace the code inside the App function with the following:
function App() {
  return (
    <Authenticator.Provider>
      <Authenticator
      >
        <View style={styles.container}>
          <Home />
          <StatusBar style="auto" />
        </View>
      </Authenticator>
    </Authenticator.Provider>
  );
}
Now, remove the withAuthenticator component in the line where you are exporting the App component:
export default App;
Reload your application and the sign in page will still show. According to the official Amplify UI docs, the Authenticator component has the following optional slots, which are rendered on each subcomponent:
Header: Renders above subcomponent content, no default providedFooter: Renders below subcomponent content, no default providedContainer: Wraps the Authenticator. Can be overridden by extending AuthenticatorNavigate to the src directory and create a new a subdirectory named layout. Inside the layout subdirectory, create a file named MyAppHeader.js and add the following code to it:
import { Text, View } from 'react-native';
import {
  useTheme,
} from '@aws-amplify/ui-react-native';

const MyAppHeader = () => {
  const {
    tokens: { space, fontSizes },
  } = useTheme();
  return (
    <View>
      <Text
        style={{
          fontSize: fontSizes.xxl,
          paddingBottom: space.xxl,
          textAlign: 'center'
        }}
      >
        My Custom Header
      </Text>
    </View>
  );
};
export default MyAppHeader
The code above creates a custom header that will be shown at the top of your application. Then, go to the App.js file, import the MyAppHeader component and add it to the Header slot located in the Authenticator component:
import MyAppHeader from './src/layout/MyAppHeader';

function App() {
  return (
    <Authenticator.Provider>
      <Authenticator
        Header={MyAppHeader}
      >
        <View style={styles.container}>
          <Home />
          <StatusBar style="auto" />
        </View>
      </Authenticator>
    </Authenticator.Provider>
  );
}
Your application should now look like this:
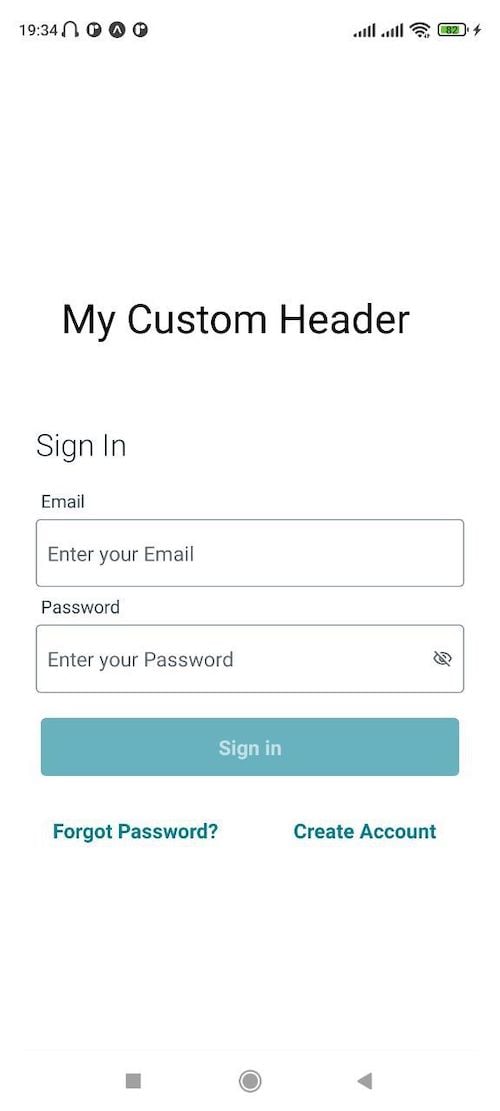
Whenever you don’t see changes in your app, go to the terminal and press the R key to reload your application.
To create a footer, simply create a file named MyAppFooter.js inside the layout subdirectory and add the following code to it:
import { Text, View } from 'react-native';
import {
  useTheme,
} from '@aws-amplify/ui-react-native';

const MyAppFooter = () => {
  const {
    tokens: { space, fontSizes },
  } = useTheme();
  return (
    <View>
      <Text
        style={{
          fontSize: fontSizes.xxl,
          paddingTop: space.xxl,
          textAlign: 'center'
        }}
      >
        My Custom Footer
      </Text>
    </View>
  );
};
export default MyAppFooter
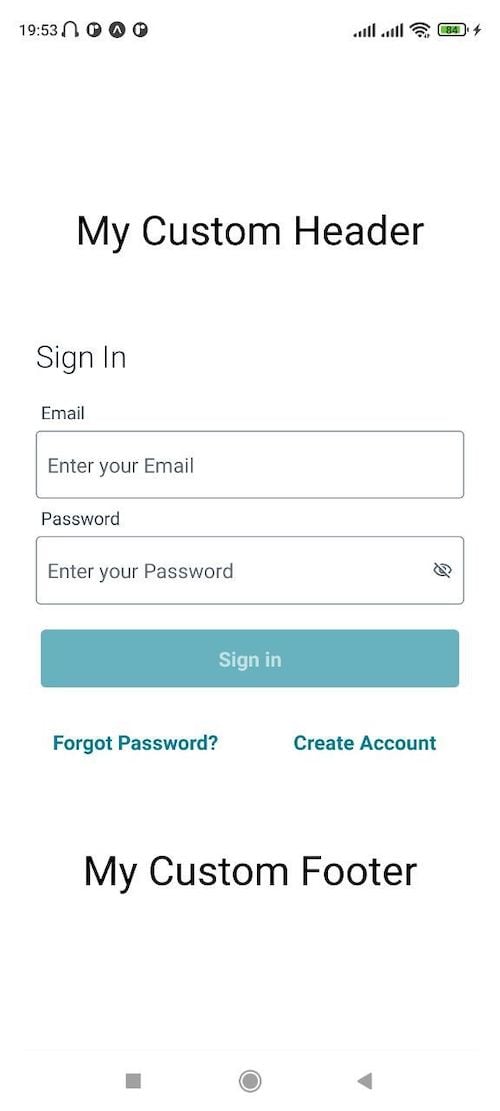
The code above creates a custom footer that will be shown at the bottom of your application. Then, go to the App.js file, import the MyAppFooter component, and add it to the Footer slot located in Authenticator component:
import MyAppFooter from './src/layout/MyAppFooter';
function App() {
  return (
    <Authenticator.Provider>
      <Authenticator
        Header={MyAppHeader}
        Footer={MyAppFooter}
      >
        <View style={styles.container}>
          <Home />
          <StatusBar style="auto" />
        </View>
      </Authenticator>
    </Authenticator.Provider>
  );
}
Your application should now look like this:
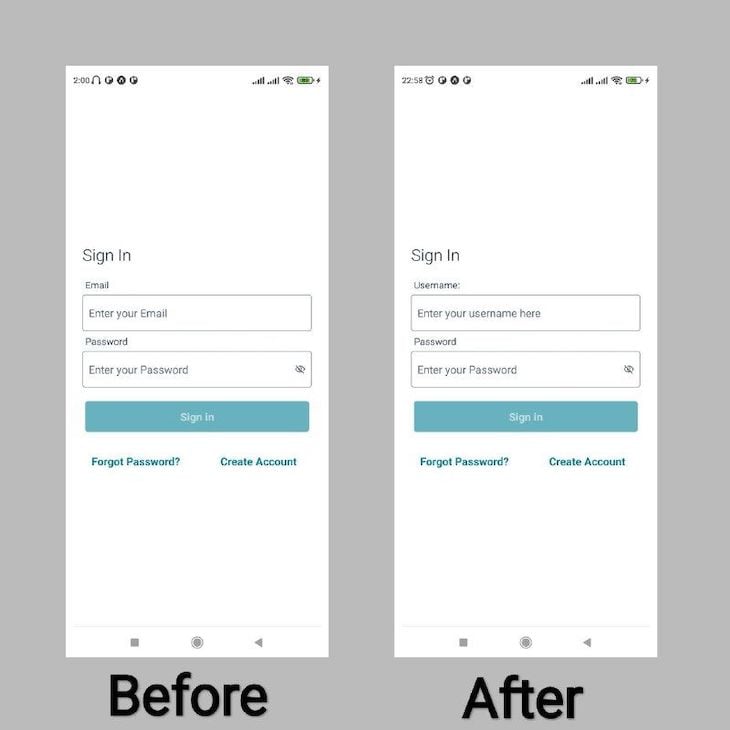
AWS Amplify allows you to customize the form fields’ contents, labels, and placeholders by simply adding a new formFields prop to your Authenticator component.
Add the following code to your App.js file to edit the signIn page’s username form field:
const formFields = {
  signIn: {
    username: {
      labelHidden: false,
      placeholder: 'Enter your username here',
      isRequired: true,
      label: 'Username:'
    },
  },
}

function App() {
  return (
    <Authenticator.Provider>
      <Authenticator
        formFields={formFields}
      >
        <View style={styles.container}>
          <Home />
          <StatusBar style="auto" />
        </View>
      </Authenticator>
    </Authenticator.Provider >
  );
}
The code above creates a new object named formFields, which stores the form fields customizations. The customization replaces the username field’s default label and placeholder. Now instead of asking for the email, it will ask for the username.
Finally, the code removes the Header and Footer slots in the Authenticator component, and adds the formFields object as a prop:
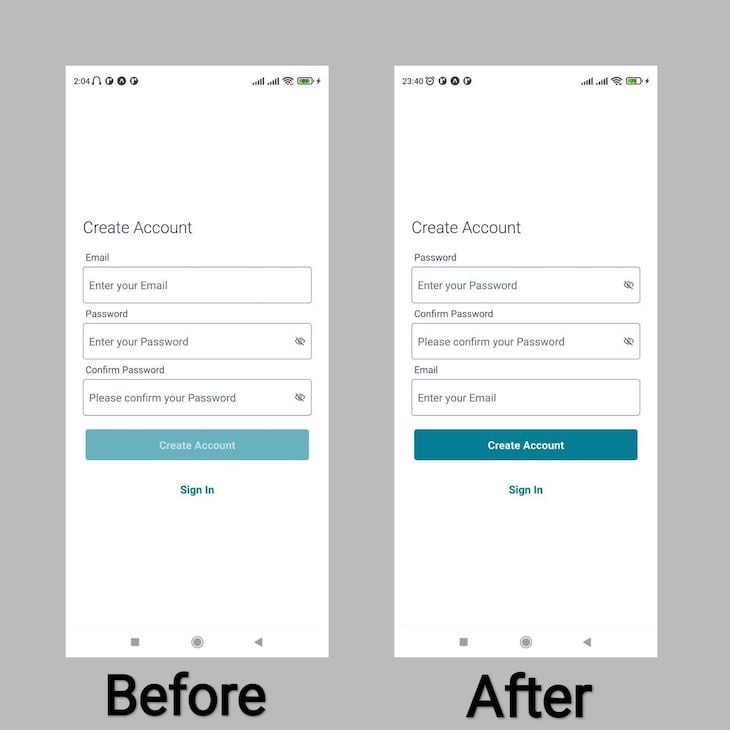
AWS Amplify also allows you to rearrange the order in which the form fields appear. For the sake of this tutorial, let’s assume that you want customize the signUp page and you want the email field to appear at the bottom instead of the top.
To do so, add the following code to the formFields object to reorder the fields in the signUp page:
const formFields = {
  signIn: {
    username: {
      labelHidden: false,
      placeholder: 'Enter your username here',
      isRequired: true,
      label: 'Username:'
    },
  },
  signUp: {
    email: {
      order: 3
    },
    password: {
      order: 1
    },
    confirm_password: {
      order: 2
    },
  }
}
When it comes to styling the Auth pages provided by AWS Amplify, there are two widely used ways to do it. The first is applying a custom style to the Authenticator component container, and the second is by using a ThemeProvider component.
1. Applying a custom style to the Authenticator component container
To apply a custom style to the container, first import the useTheme Hook to expose the colors constant:
import { withAuthenticator, Authenticator, useTheme } from '@aws-amplify/ui-react-native';
Next, set the container background color to yellow:
function App() {
  const {
    tokens: { colors },
  } = useTheme();
  return (
    <Authenticator.Provider>
      <Authenticator
        Header={MyAppHeader}
        Footer={MyAppFooter}
        Container={(props) => (
          <Authenticator.Container
            {...props}
            style={{
              backgroundColor: colors.yellow[60],
            }}
          />
        )}
      >
        <View style={styles.container}>
          <Home />
          <StatusBar style="auto" />
        </View>
      </Authenticator>
    </Authenticator.Provider>
  );
}
Your application should now look like the following:

2. Using a ThemeProvider component
Using a ThemeProvider component allows you to have more control in how the AWS Amplify Auth pages look.
Let’s assume that your application brand color is green and purple and create a custom theme. Create a file named myTheme.js in your project root’s directory and add the following code to it:
import { useTheme } from '@aws-amplify/ui-react-native';
function getTheme() {
  const {
    tokens: { colors },
  } = useTheme();
  const theme = {
    name: 'Custom Theme',
    tokens: {
      colors: {
        background: {
          primary: {
            value: colors.green['100'],
          },
          secondary: {
            value: colors.red['100'],
          },
        },
        font: {
          primary: colors.white,
          secondary: colors.orange['10'],
          interactive: {
            value: colors.orange['80'],
          },
        },
        brand: {
          primary: {
            '10': colors.purple['10'],
            '80': colors.purple['80'],
            '90': colors.purple['90'],
            '100': colors.purple['100'],
          },
        },
      },
    },
  };
  return theme
}

export default getTheme
The code above creates a function named getTheme. Inside this function, it creates a custom theme that changes the background color to green, the primary color to purple, and the font primary and secondary to white and orange, respectively.
Go to the App.js and add the following code to it:
import {
  withAuthenticator, Authenticator,
  useTheme, ThemeProvider
} from '@aws-amplify/ui-react-native';

import getTheme from './myTheme';

function App() {
  const {
    tokens: { colors },
  } = useTheme();
  const myTheme = getTheme()
  return (
    <ThemeProvider theme={myTheme}>
      <Authenticator.Provider>
        <Authenticator
          formFields={formFields}
        >
          <View style={styles.container}>
            <Home />
            <StatusBar style="auto" />
          </View>
        </Authenticator>
      </Authenticator.Provider>
    </ThemeProvider>
  );
}
Here, the code first imports the ThemeProvider component and the getTheme() function. Next, the code calls the getTheme() function and stores the value returned in a constant named myTheme.
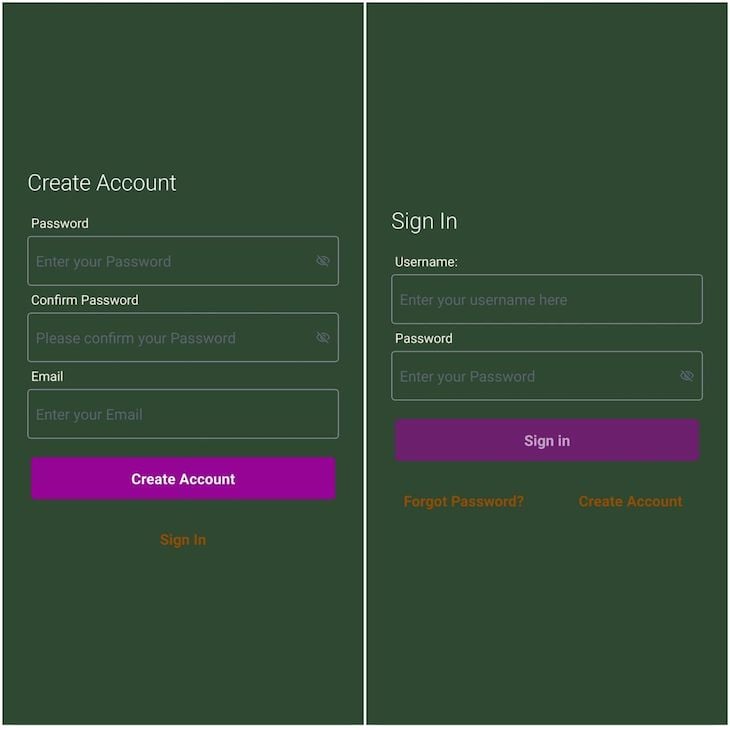
Finally, it wraps ThemeProvider around the Authenticator.Provider, and sets the theme to the custom theme stored in the myTheme constant. Your application should now look like the following:
When developing a mobile app using AWS Amplify with React Native, you can take advantage of several built-in security measures to enhance the authentication process. Here are some best practices and an overview of these security measures.
AWS Amplify provides multiple authentication options, like username and password, social identity providers (such as Google and Facebook), and federated authentication with services like Amazon Cognito. Choose the most appropriate method based on your app’s requirements. To add an extra layer of security for user logins, implement multi-factor authentication (MFA).
You can also manage permissions for authentication users by using fine-grained access controls and AWS Identity and Access Management (IAM) roles, which will ensure that users can only access resources they are authorized to use.
Never store sensitive data like API keys, tokens, or passwords directly in your code. Use secure storage mechanisms, such as AWS Secrets Manager, Key Management Service (KMS), or SecureKeychain in React Native, to store sensitive information.
Ensure that all communication between the mobile app and backend services occurs over HTTPS. AWS Amplify handles the secure communication by default when interacting with AWS services.
Implement input validation and sanitization on both the client and server sides to prevent common security vulnerabilities like cross-site scripting (XSS) and SQL injection.
Protect your backend APIs with AWS API Gateway and implement authorization mechanisms, such as API keys or OAuth tokens, to control access to your API resources.
Regularly update dependencies to ensure that your mobile app uses the latest secure libraries and frameworks. Additionally, apply best practices for React Native development to minimize the risk of introducing vulnerabilities into your app.
Implement robust logging in your mobile app and backend services to monitor for suspicious activities and potential security breaches. Use AWS CloudWatch or similar services to monitor your infrastructure and applications for security-related events. Use LogRocket to capture logs and session recordings to detect bugs and better understand user behavior.
In this tutorial, we walked through how to use the AWS Amplify framework to authenticate users in a React Native application. The Amplify framework offers many more features that we didn’t get a chance to cover.
The repository of the application built in this tutorial is available on GitHub. If you have any questions, feel free to drop them in the comments.

LogRocket's Galileo AI watches sessions for you and and surfaces the technical and usability issues holding back your React Native apps.
LogRocket also helps you increase conversion rates and product usage by showing you exactly how users are interacting with your app. LogRocket's product analytics features surface the reasons why users don't complete a particular flow or don't adopt a new feature.
Start proactively monitoring your React Native apps — try LogRocket for free.

When should you move API logic out of Next.js? Learn when Route Handlers stop scaling and how ElysiaJS helps.

Explore how Dokploy streamlines app deployment with Docker, automated builds, and simpler infrastructure compared to traditional CI/CD workflows.

A side-by-side look at Astro and Next.js for content-heavy sites, breaking down performance, JavaScript payload, and when each framework actually makes sense.

AI-generated tests can speed up React testing, but they also create hidden risks. Here’s what broke in a real app.re
Would you be interested in joining LogRocket's developer community?
Join LogRocket’s Content Advisory Board. You’ll help inform the type of content we create and get access to exclusive meetups, social accreditation, and swag.
Sign up now

