The Replay is a weekly newsletter for dev and engineering leaders.
Delivered once a week, it's your curated guide to the most important conversations around frontend dev, emerging AI tools, and the state of modern software.
Animations have evolved to very complicated UI element manipulations. They are used to increase interactivity on web pages and to give users an engaging experience while using websites. Developers are constantly looking to find better ways to implement animations without causing a major performance bottleneck.

Animation effects are applied on the UI thread which is usually called frequently, as a result, adding certain animations/animation libraries could have negative impacts on your site. This is why we have chosen to discuss React Spring as a tool you should consider using to animate your React apps. Find out more with examples in the video below.
React Spring is a spring-physics based animation library that powers most UI related animation in React. It is a bridge on the two existing React animation libraries; React Motion and Animated. Given the performance considerations of animation libraries, React Spring is the best of both worlds. It inherits animated powerful interpolations and performance while maintaining react-motion’s ease of use.
Having understood what React Spring is, and what it offers, let’s take a look at how we can use it to build seamless animations in React applications. We’ll explore its features to better understand its strengths.
Before we go any further, this article assumes the following:
The best way to add React Spring to your application will be via the package managers. Simply open a terminal window on your project’s root directory and run the installation command below:
npm install react-spring
#OR
yarn add react-spring
This makes React Spring widely available in your application for later use.
With the introduction of hooks in React, you can add state to functional components. React Spring takes this up a notch by providing a hook based API which allows you to define and convert data that you would generally pass as props to animated data.
To better demonstrate some of the features of React Spring, let’s take a closer look at the available hooks in the React-spring module. There are five major hooks available in React Spring at the moment:
useSpring — A single spring, moves data from a to buseSprings — Multiple springs mainly for lists, where each spring moves data from a -> buseTrail — Multiple springs with a single data set, one spring follows or trails behind the otheruseTransition — For mount/unmount transitions (lists where items are added/removed/updated)useChain — To queue or chain multiple animations togetherFor each of these hooks, there are several animation effects you can implement, it’s limitless and goes as far as your imagination will take you. We’ll look at some use cases for useSpring , useSprings and useTrail to demonstrate how you can implement them in your React applications.
useSpring in ReactuseSpring is one of the simplest React Spring hooks. It turns defined values into animated values. It does this in two ways, either by overwriting the existing props with a different set of props on component re-render or by passing an updater function that returns a different set of props that is then used to update the props using set.
Import it into the needed component like so, since we’ll be using the hooks API in this explanation:
import {useSpring, animated} from 'react-spring'
Here are the two methods for using the useSpring hooks:
1) Overwriting existing props
const props = useSpring({opacity: toggle ? 1 : 0})
Here, if you re-render the component with changed props, the animation will update automatically.
2) Passing an updater function
In this case, there is no re-rendering. This method is mostly applied for fast occurring updates. It also has an optional argument (stop) to stop animation.
const [props, set, stop] = useSpring(() => ({opacity: 1}))
    // Update spring with new props
    set({opacity: toggle ? 1 : 0})
    // Stop animation
    stop()
Since we are animating, we would be moving data from one state to another. Spring naturally comes with two props: from and to to show the initial position and the end position of the animation.
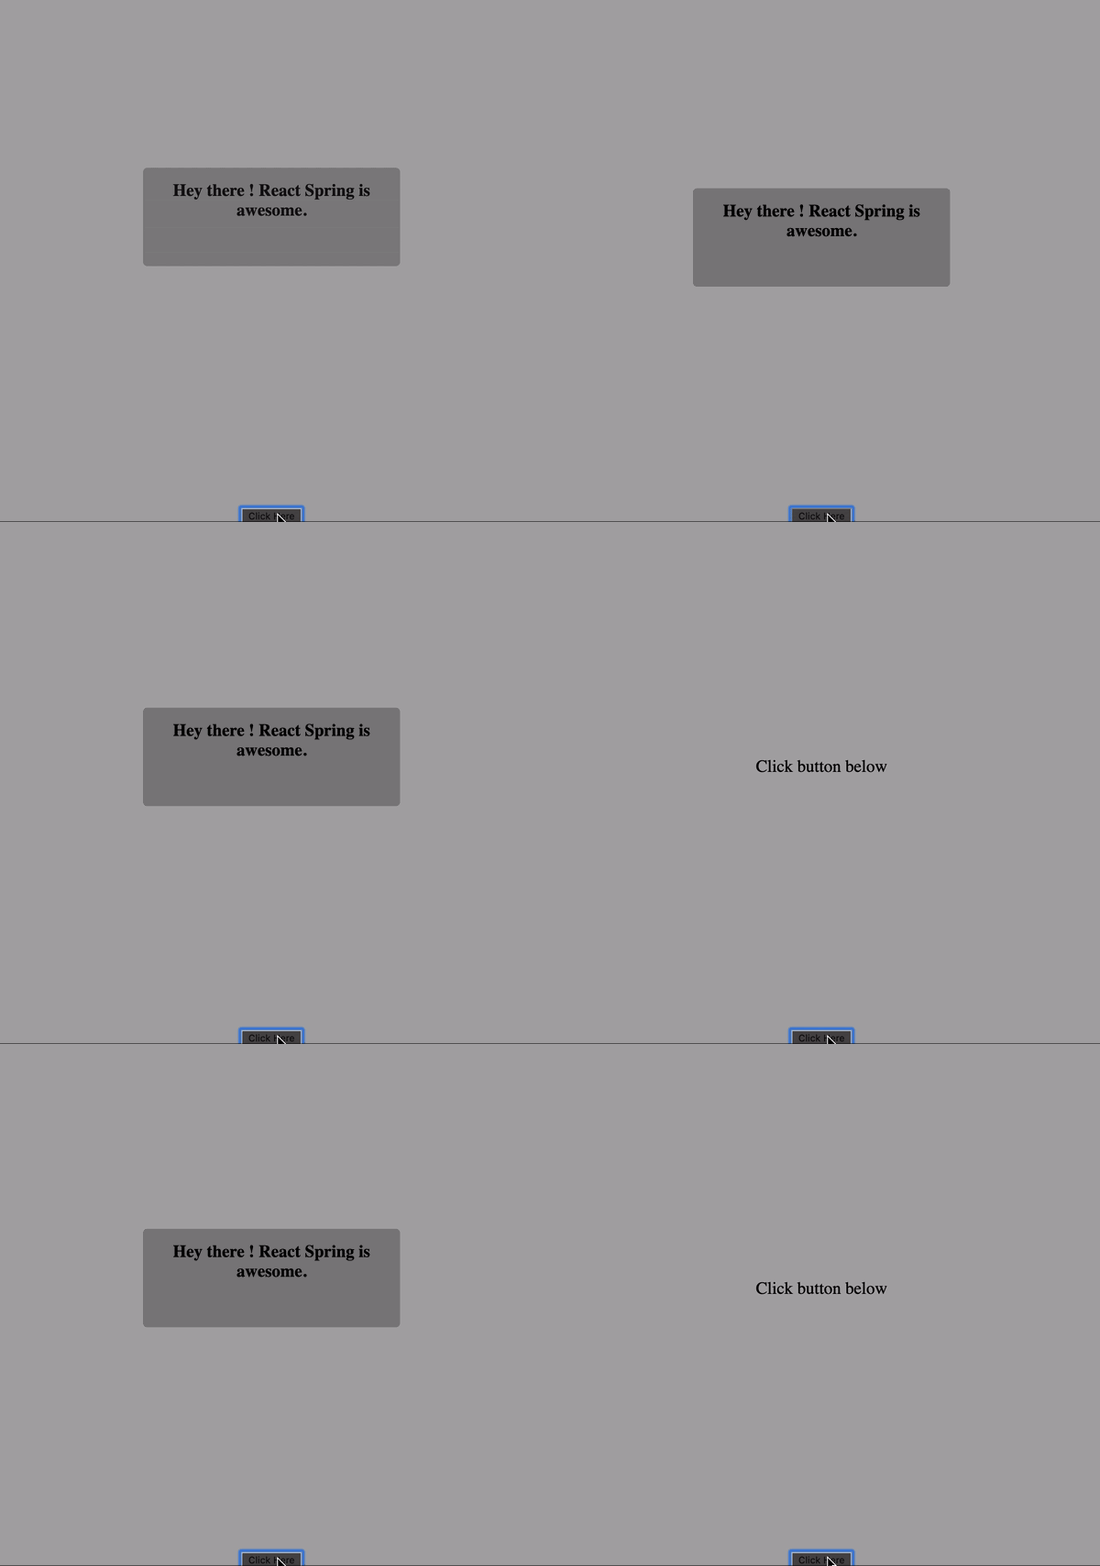
We will discuss this further when explaining the render-in-props API. Now, to get a feel of how the useSpring hook API works, here’s a small demo that shows a simple animated greeting card for a landing page:

On CodeSandbox:
From the demo above we can see that the first few lines of code express the initial state and the final position of the box we are trying to animate:
const contentProps = useSpring({
opacity: greetingStatus ? 1 : 0,
marginTop: greetingStatus ? 0 : -500
});
In this example, the content slides in from the top of the page down to the center. The value of -500 marginTop is to set the position off-screen, then define an opacity of 0 as our values for the from prop. We do this to achieve a certain appearance of the box. These values are assigned to contentProps which we then pass as props to animated.div like so:
<a.div className="box" style={contentProps}>
<h1>Hey there ! React Spring is awesome.</h1>
</a.div>
useSpringsuseSprings is just like useSpring; the only difference is that it is used to create multiple springs, each with its own config. It is mostly used for lists, where each spring moves data from an initial state to a final state. This also provides us with two options on how to implement. Since we are working with multiple values, this method works in two forms.
Here, the animation is updated to each element by triggering a props change. It is simply achieved like this:
const springs = useSprings(number, items.map(item => ({ opacity: item.opacity }))
From the snippet above, we can see that the list items are mapped to have the useSpring method act on each element. That way, we can trigger the animation to happen on each element.
You will get an updater function back. It will not cause the component to render like an overwrite would (still the animation will execute, of course). Handling updates like this is most useful for fast-occurring updates.
const [springs, set, stop] = useSprings(number, index => ({opacity: 1}))
// Update springs with new props
set(index => ({opacity: 0}))
// Stop all springs
stop()
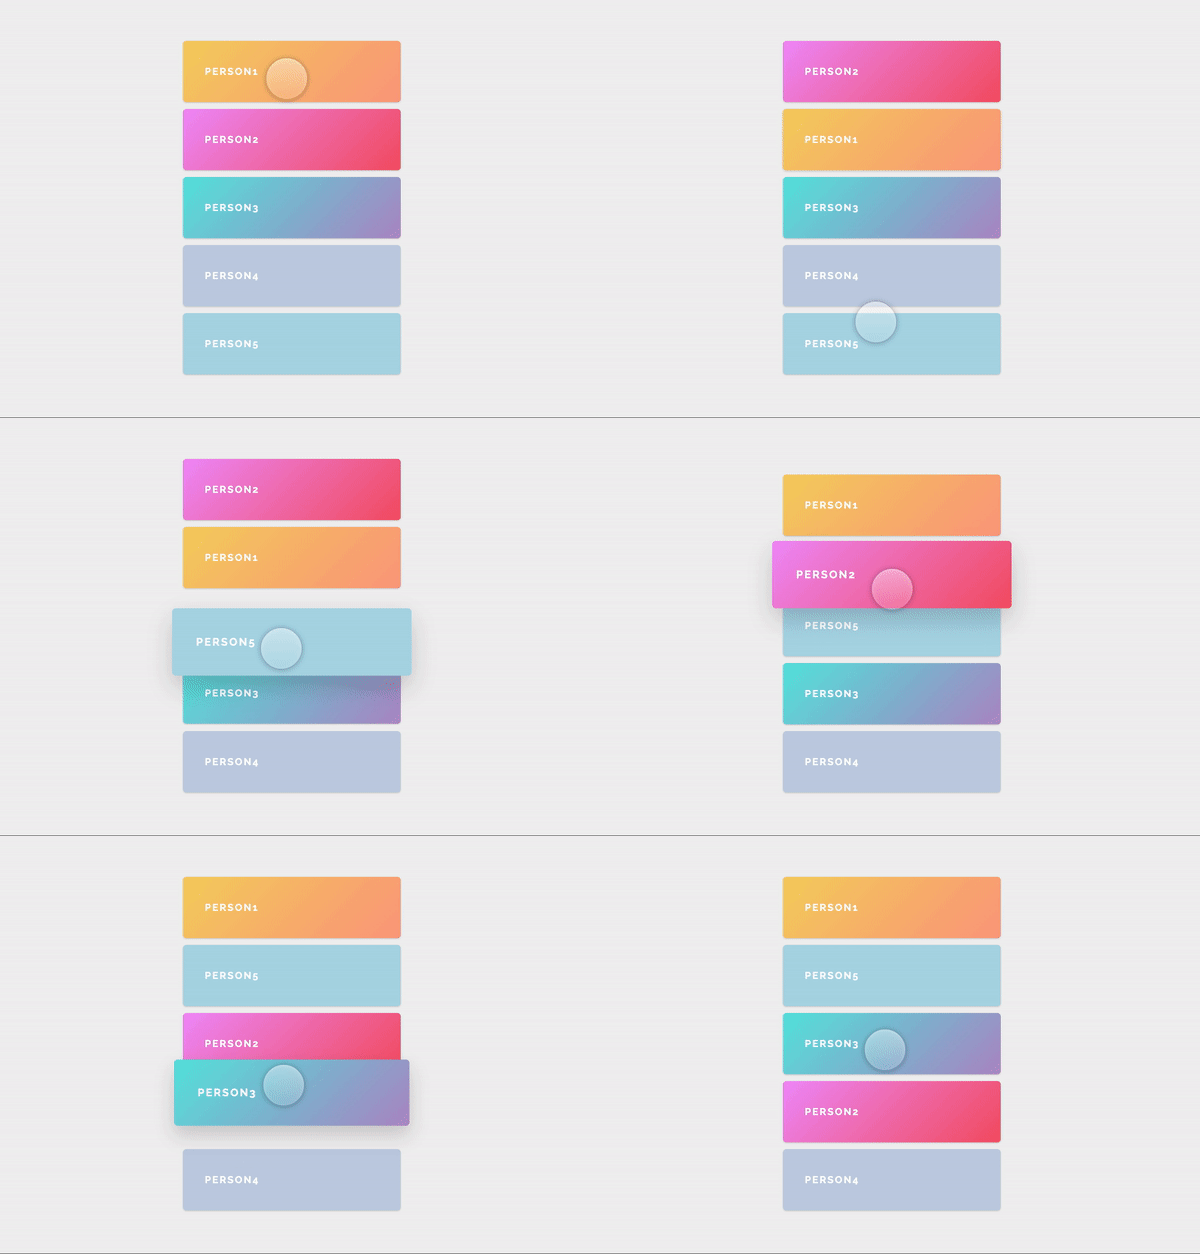
How do we use this? Imagine we have a list of people and we wanted a user to know exactly which person is being selected, a cool way to bring more life to this would be to explore this demonstration by Paul Henschel.

On CodeSandbox:
useTrailuseTrial enables us to create multiple springs with a single configuration. It has almost the same configuration as useSpring with a variation in the implementation. It animates the first item of a list of elements while the rest of the elements form a natural trail and follow their previous sibling:
return trail.map(props => <animated.div style={props} />)
It takes a list of items of any type and their keys. The latter defaults to item => item, however, if your items are self-sufficient as a key, it’ll often be good enough.

On CodeSandbox:
const config = { mass: 5, tension: 2000, friction: 200 };
The above line in the demo configures the common API of spring to set the default values of the parameters.
const trail = useTrail(items.length, {
config,
opacity: toggle ? 1 : 0,
x: toggle ? 0 : 20,
height: toggle ? 80 : 0,
from: { opacity: 0, x: 20, height: 0 }
});
The above snippet uses the listed props to set the initial and final conditions of the elements using the ternary operators to indicate the switch.
This method of implementing React Spring in projects was used in class components which was the default mode before React Hooks were introduced in React v16.8. For the sake of inclusiveness, let’s also explore it to accommodate developers on the older version of React. With this method, the importation into projects is a bit different.
Spring class component exampleThe class component implementation of animating a single element using React Spring would use spring as opposed to useSpring. As a result, we would import it into projects like so:
import {Spring} from 'react-spring/renderprops'
As we mentioned earlier, Spring/useSpring makes use of two props from and to to show the initial position and the end position of the animation like so:
<Spring
  from={{ opacity: 0 }}
  to={{ opacity: 1 }}>
  {props => <div style={props}>hello</div>}
</Spring>
Trail class component exampleIn this case, we are dealing with the class component equivalent of useTrail and it is imported as:
import {Trail} from 'react-spring/renderprops'
The working principle remains the same however, the mode of transformation becomes:
<Trail items={items} keys={item => item.key} from={{transform: 'translate3d(0,-40px,0)'}} to={{transform: 'translate3d(0,0px,0)'}}>
  {item => props => <span style={props}>{item.text}</span>}
</Trail>
We can notice new props being used in the example above. They behave like keys that are being used to specify what item the animation is being carried out on. You can find more examples of props being accepted by trial in the docs examples.
The main advantage of React Spring over other animation libraries is its ability to apply animations without relying on React to render updates frame by frame. This advantage is usually noticed when dealing with nested routes or charts. For more information on the implementation of specific performance boosts, check out the official documentation.
In this article, we have analyzed some use cases using React Spring’s Hooks API and also explored the class component equivalents. Seeing the performance advantage and simple syntax of React Spring, I would strongly recommend using this in your projects as smooth animations help in ensuring awesome user experiences.
Install LogRocket via npm or script tag. LogRocket.init() must be called client-side, not
server-side
$ npm i --save logrocket

// Code:

import LogRocket from 'logrocket';
LogRocket.init('app/id');
// Add to your HTML:

<script src="https://cdn.lr-ingest.com/LogRocket.min.js"></script>
<script>window.LogRocket && window.LogRocket.init('app/id');</script>

React Server Components and the Next.js App Router enable streaming and smaller client bundles, but only when used correctly. This article explores six common mistakes that block streaming, bloat hydration, and create stale UI in production.

Gil Fink (SparXis CEO) joins PodRocket to break down today’s most common web rendering patterns: SSR, CSR, static rednering, and islands/resumability.

@container scroll-state: Replace JS scroll listeners nowCSS @container scroll-state lets you build sticky headers, snapping carousels, and scroll indicators without JavaScript. Here’s how to replace scroll listeners with clean, declarative state queries.

Explore 10 Web APIs that replace common JavaScript libraries and reduce npm dependencies, bundle size, and performance overhead.
Would you be interested in joining LogRocket's developer community?
Join LogRocket’s Content Advisory Board. You’ll help inform the type of content we create and get access to exclusive meetups, social accreditation, and swag.
Sign up now
5 Replies to "Using React Spring for animation: Context and examples"
Thanks for the tutorial. There is an issue with the first sandbox:
Warning: Can’t perform a React state update on an unmounted component. This is a no-op, but it indicates a memory leak in your application. To fix, cancel all subscriptions and asynchronous tasks in a useEffect cleanup function.
in ForwardRef (at src/index.js:23)
So you’re writing this article when you use imports via “import react-spring from ‘react-spring'”. Are you sure it works?
https://stackoverflow.com/questions/61882182/react-spring-cant-perform-a-react-state-update-on-an-unmounted-component/61882635#61882635
In response to last message
Great feedback Antuan, will recommend an update for this!
How can I use Springs in Render-props API?