
Having difficulty keeping shared CSS and JavaScript values updated and in sync? Are you faced with seemingly random bugs when updating shared values? In this article you’ll find out how you can use the upcoming CSS env() feature and a PostCSS plugin to share the same variables between CSS and JS, AND store them in a single file.
Here’s a common scenario you might’ve already faced:
You’re now faced with a choice, do you manage the variables in JavaScript alone and use inline styles to apply the styling?
Or do you manage the variable(s) in two places, both CSS and JS files?
You’re stuck between a rock and a hard place. Neither solution is satisfactory.
On the one hand, by applying inline styles you forego the opportunity of being able to override the styles by any other method. You now always have to use inline styles to override the particular declarations you apply.
In the example below MyComponent will always be ‘red’ with a font-size of 2rem, because the inline styles take priority over the class name that’s applied to the component:
.my-component {
  font-size: 1rem;
  color: blue;
}On the other hand, managing the variables in two different files exposes you to maintenance risk. If there’s a need to change the value, there’s a risk that the value only gets updated in one of the files, causing your app will break in strange ways.
But there’s another way!
You can share variables between CSS and JS by using CSS environment variables. No need to worry about updating variables in multiple places or using inline styles.
Built with #Carbon, by @dawn_labs pic.twitter.com/OHyY3nRYLa#webdevelopment #CSS— Harry Nicholls (@HarryNicholls) March 10, 2019
Some pseudo-code showing it’s possible to share variables between CSS and JS. source: Harry Nicholls’ Twitter
Allow me to introduce CSS environment variables, and show you how you can share variables between CSS and JS, while storing the values in a single place.

Here’s a more specific problem I encountered recently.
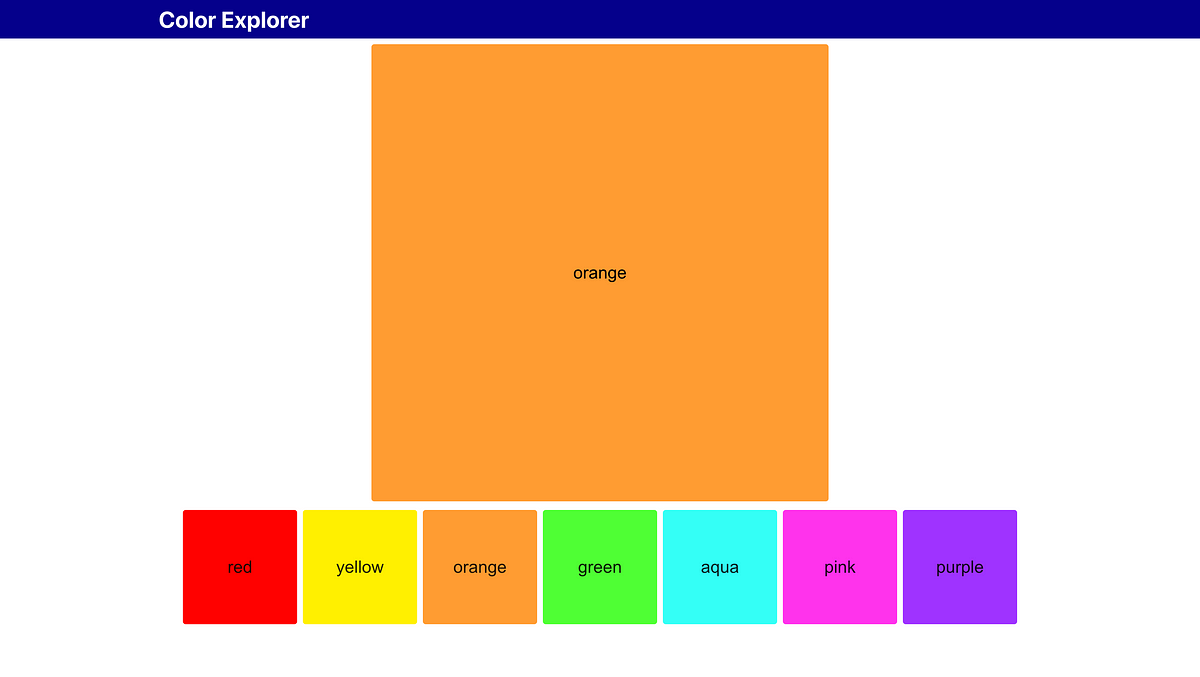
Say I’m building an app, called Color Explorer, that allows users to look at a list of colors and select one to be enlarged.
Here’s the initial version:

It looks okay, there’s a list of colors, and you can click the small swatches to change which color displays in the large swatch.

The Replay is a weekly newsletter for dev and engineering leaders.
Delivered once a week, it's your curated guide to the most important conversations around frontend dev, emerging AI tools, and the state of modern software.
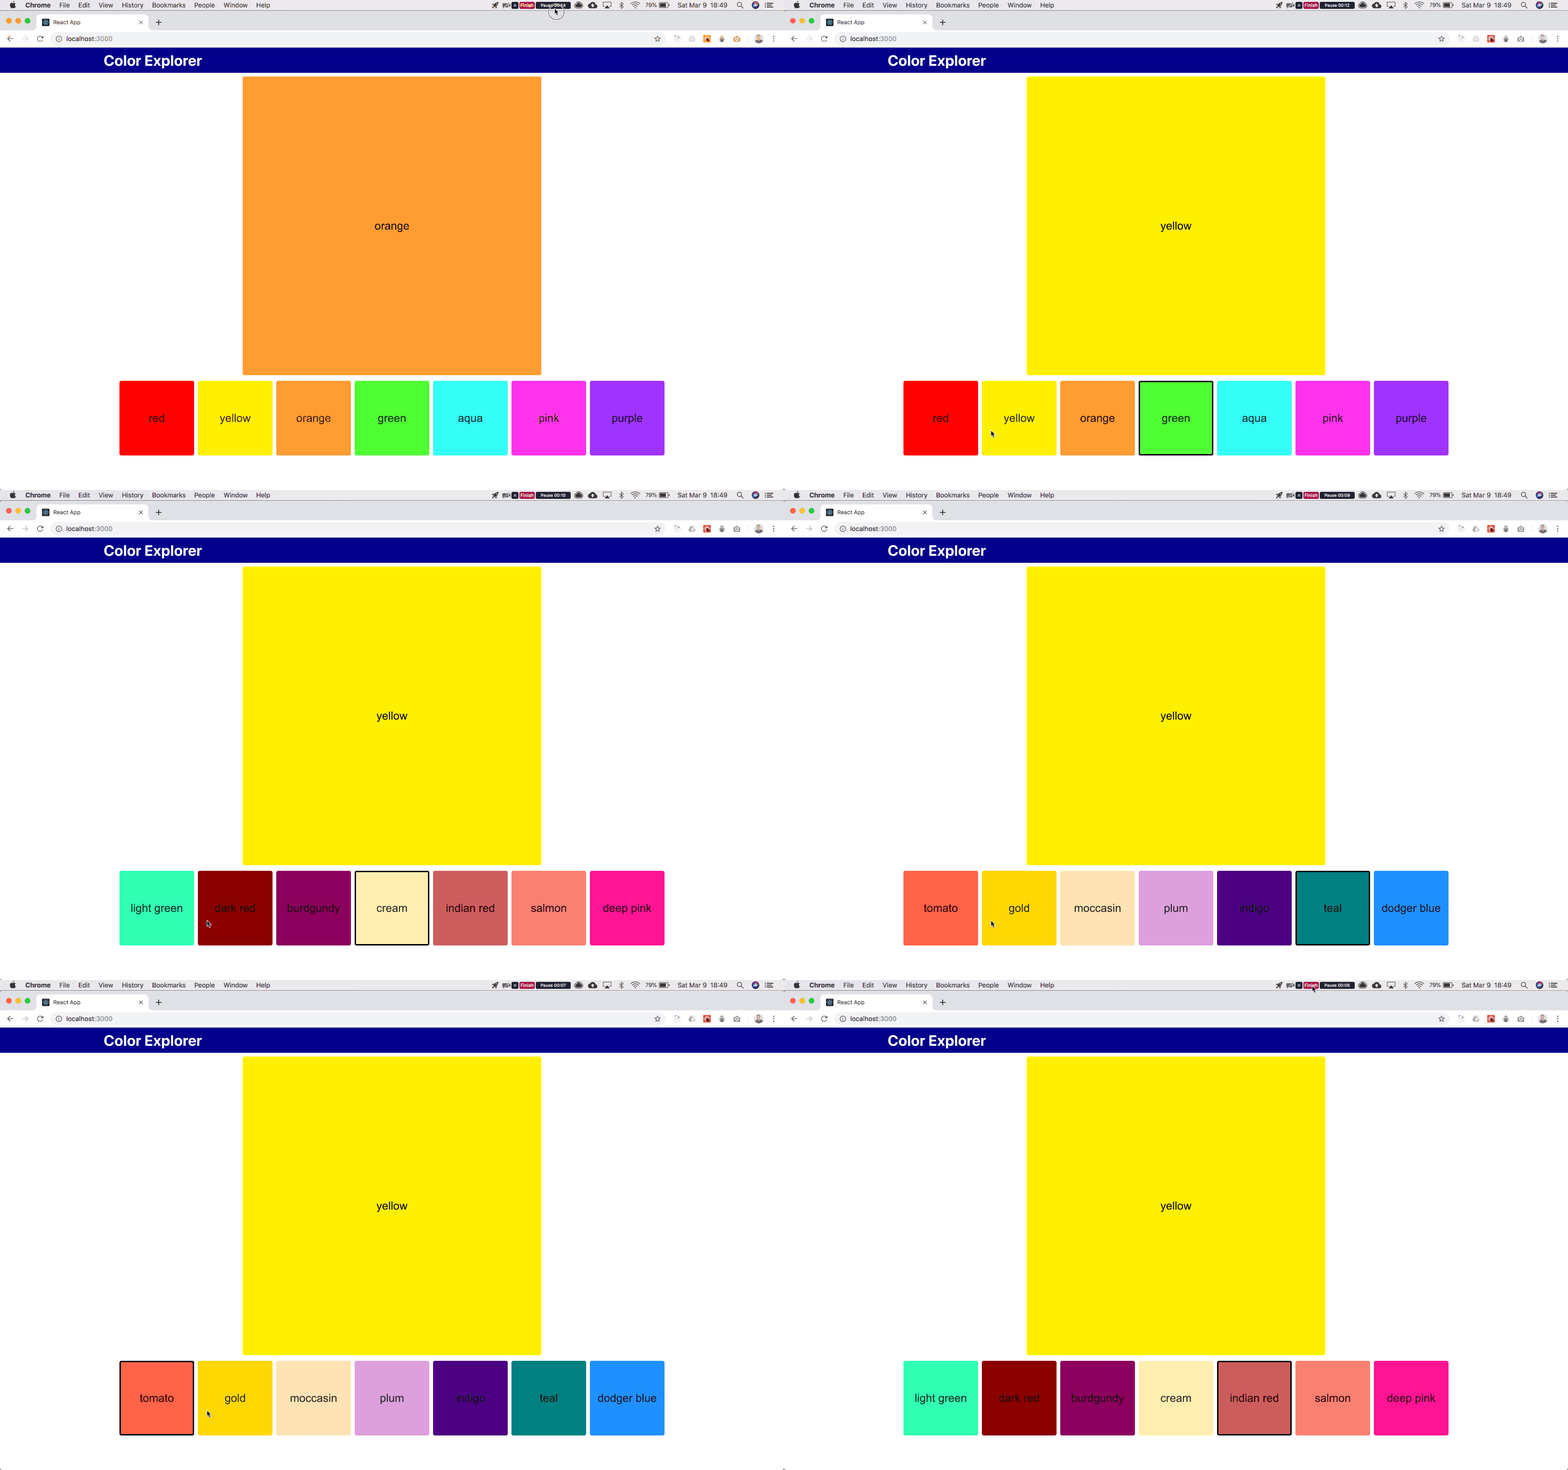
But I don’t like how you have to scroll down to see all of the colors, I’d like them to be restricted to a single line.
The simplest solution is to apply overflow: hidden to the color list:

It looks good, but there’s a problem.
Even though the overflowing swatches are visually hidden, I can still access them using the keyboard:

That’s an issue.
I’m going to need a little help from our friend JavaScript to fix this issue.
What I’m going to do is measure the color list container, calculate how many color swatches can fit on a single line, and hide and disable all of the other color swatches.
To do this I need to know how wide the color list container is, how wide each color swatch is (including margin), and how many color swatches can fit next to each other on a single line in the color list container.
I can’t do this from CSS because the color list container is responsive:

The color swatches are a fixed width, and right now their width is set via CSS, so how do we access that information from JS?
The easiest solution to implement is to store the ColorSwatch width variable in JS.
Just copy and paste the value into the JS file, like this:
See the Pen
CSS ENV by Luke Tubinis (@lukelogrocket)
on CodePen.
Initial version of ColorSwatchSelector
(Note: Measure is taken from a library called react-measure, and the onResize event gives you access to the dimensions of the referenced HTML element, in this case <ul>.)
Cool! That works!
It’s a simple solution, but a fragile one.
What happens when you, or someone else on your team who’s never worked on the component, has to update the ColorSwatch width? There’s a big risk that the width value will only be updated in a single place, most likely the CSS file and the app will break. It’ll take the developer a while to understand why the app is broken, and how to fix it.
You can avoid this risk by using CSS environment variables.
Enter, CSS env().
This is how MDN describes it:
“The env() CSS function can be used to insert the value of a user agent-defined environment variable into your CSS, in a similar fashion to the var() function and custom properties.”
Essentially, you can define global variables that can be used anywhere a property value can, including media queries.
CSS env() is not part of the official CSS spec yet, but the env() spec is in“Editor’s Draft”, and there’s significant browser support for it, so will become part of the CSS spec once all of the details have been finalized.
You can check out the draft spec, but TL;DR: there’s agreement on how to access environment variables in CSS, but there’s currently no way to define or load them.
However, you can use CSS env() today with a neat little PostCSS plugin!
To start, you’ll need to add PostCSS and postcss-env-function plugin to your project.
(If you’re using create-react-appthen PostCSS is already installed, and there are special config instructions on the postcss-env-function GitHub page.)
You’ll also need to create a file called css-env-variables.js, which will look like this:
module.exports = {
  environmentVariables: {
    '--color-swatch-size': '10rem'
  }
};And that’s your basic setup! You can now start using CSS env() like this:
.color-swatch {
  height: env(--color-swatch-size);
  width: env(--color-swatch-size);
}Pretty simple, eh?
You can add any variables you need, and the only thing you’ll see in the inspector is the actual value.
Even though your CSS variables are now being managed in a JavaScript file, they’re not very helpful because each value includes the units. So you still have to maintain the JS and CSS variables in two separate files. Technically, you CAN import the CSS env variables into your components. Try it!
To use them you’d have to figure out how to strip the units from the value, but do you really think that’s something your app should have to worry about?
Nope.
We’ll get into a solution in the next section.
A pattern my team and I started using on our current project is to define numerical values in a separate JS file, and import them into css-env-variables.js to construct the CSS variables.
That way we can import the JS values directly into any other JS files that need them, and use the same values for constructing CSS environment variables.
module.exports = {
  colorSwatchSize: 160; // px
};We only have numerical values here, the units are always pixels because they’re easier to work within JS files, and we can import these directly into any JS file.
import { colorSwatchSize } from 'path/to/your/js-env-variables';Now we’re getting there!
You might’ve noticed that js-env-variables.js is a CommonJS module, and some-other-file.js is an ES6 module. Why the difference?
Because js-env-variables.js isn’t transpiled. This file is used by the PostCSS plugin at build-time only, so we need to write it as a CommonJS module in order for it to be usable.
Then you can consume these values in your CSS environment variables file like this:
const { colorSwatchSize } = require('path/to/your/js-env-variables');

module.exports = {
  environmentVariables: {
    '--color-swatch-size': `${colorSwatchSize}px`
  }
};Awesome! Now you only need to maintain the values in a single place, the source of truth.
This effectively eliminates the risk of forgetting to update any instances of this variable, because it’s defined once and only once.
I’ll do you one better.
The above setup uses pixels, but I was originally using ‘rem’ in CSS and I’d like to use it again.
There are a couple of extra steps required if you want to set up this system to provide pixel values to your JS files and rem values to your CSS:
You can define the root font-size in the same way as described above:
const {
  colorSwatchSize,
  rootFontSize
} = require('path/to/your/js-env-variables');

module.exports = {
  environmentVariables: {
    '--color-swatch-size': `${colorSwatchSize}px`,
    '--root-font-size': `${rootFontSize}px`
  }
};Just make sure to apply it in your main CSS file:
html {
  font-size: env(--root-font-size);
}Now you can go ahead and create a px-to-rem conversion function, and use it in your CSS env variables file:
const {
  colorSwatchSize,
  rootFontSize
} = require('path/to/your/js-env-variables');
const { getPxToRem } = require('path/to/your/px-to-rem');

const pxToRem = getPxToRem(rootFontSize);

module.exports = {
  environmentVariables: {
    '--color-swatch-size': pxToRem(colorSwatchSize),
    '--root-font-size': `${rootFontSize}px`
  }
};You should be able to see that your--color-swatch-size variable is now in rem, and changing the root font-size value affects it.
It’s a neat little setup that could save future-you many hours of debugging.
If you’re using TypeScript, there are a couple of gotchas.
You might have difficulty importing your JS environment variables and px-to-rem util into the CSS env variables file.
You can solve this issue by setting up those files as separate modules within their own directories, along with type definitions.
Your directory structure should look something like this:
src|-css-env-variables.js|-js-env-variables| |-index.d.ts| |-index.js|-px-to-rem|-index.d.ts|-index.js
You don’t need to change the contents of the JS files, just add these files to /js-env-variables:
export const colorSwatchSize: number;
export const rootFontSize: number;And add these to /px-to-rem:
export const getPxToRem: (rootFontSize: number) => (pxValue: number) => string;Make sure to change the names of js-env-variables.js and px-to-rem.js to index.js and put them in their respective directories. The TypeScript compiler should be happy with that.
Doing this lets the compiler know that these modules exist, and gives it some information about their types.
Play around with the final version of Color Explorer on Netlify.
What we’ve done here is take a fragile, un-DRY system, and make it DRYer and more robust.
We identified a need for sharing variables between CSS and JS and found that the simplest solution (storing the same variable in two different files) is likely to break when the variables need to change.
You now have the tools to share any variable between CSS and JS, with a single place to update values as needed. This solution provides a more robust way of sharing variables and is much less likely to break when the variable values change.
I showed a simple solution here, with a single shared variable. And it took quite a lot of effort to set up for a simple app, but this is just an example. Try it out on a larger, more complex project, and I think you’ll find it’s worth it.
No more find-and-replace hunts. No more nagging feeling that you forgot to update an instance of an element’s height somewhere. And no more random bugs, at least not related to the CSS/JS variables you store like this.
If you can’t tell already, I highly recommend using this setup to share CSS and JS variables where needed. Future-you will be grateful you did.

LogRocket lets you replay user sessions, eliminating guesswork by showing exactly what users experienced. It captures console logs, errors, network requests, and pixel-perfect DOM recordings — compatible with all frameworks, and with plugins to log additional context from Redux, Vuex, and @ngrx/store.
With Galileo AI, you can instantly identify and explain user struggles with automated monitoring of your entire product experience.
Modernize how you understand your web and mobile apps — start monitoring for free.
As web frontends get increasingly complex, resource-greedy features demand more and more from the browser. If you’re interested in monitoring and tracking client-side CPU usage, memory usage, and more for all of your users in production, try LogRocket.

LogRocket lets you replay user sessions, eliminating guesswork around why bugs happen by showing exactly what users experienced. It captures console logs, errors, network requests, and pixel-perfect DOM recordings — compatible with all frameworks.
LogRocket's Galileo AI watches sessions for you, instantly identifying and explaining user struggles with automated monitoring of your entire product experience.
Modernize how you debug web and mobile apps — start monitoring for free.

React Server Components and the Next.js App Router enable streaming and smaller client bundles, but only when used correctly. This article explores six common mistakes that block streaming, bloat hydration, and create stale UI in production.

Gil Fink (SparXis CEO) joins PodRocket to break down today’s most common web rendering patterns: SSR, CSR, static rednering, and islands/resumability.

@container scroll-state: Replace JS scroll listeners nowCSS @container scroll-state lets you build sticky headers, snapping carousels, and scroll indicators without JavaScript. Here’s how to replace scroll listeners with clean, declarative state queries.

Explore 10 Web APIs that replace common JavaScript libraries and reduce npm dependencies, bundle size, and performance overhead.
Hey there, want to help make our blog better?
Join LogRocket’s Content Advisory Board. You’ll help inform the type of content we create and get access to exclusive meetups, social accreditation, and swag.
Sign up now