For a long time, I wanted to be able to build small, specific apps for personal use. But I’m a designer, not a developer. One option was to learn how to code, but honestly, I was never interested in doing that. Another path was using no-code tools like Glide or Bubble. I built a few things that way, but still felt pretty limited. Then AI tools arrived, and everything changed.

The line between “designer” and “developer” has become thinner than ever, and in some cases, it has even disappeared. Now, anyone can vibe code real, functional applications. You don’t need to “speak” Python or JavaScript. You just need to describe what you want in plain language. Then the LLM translates your words into working code.
That means you can build an app that does exactly what you need. And if it’s a tool you usually pay for, you can build it yourself and stop paying for that SaaS every month. You know, saving money is always helpful.
In this article, I’ll show you a few real examples of apps I built for myself using this technique. I’ll also share some tips to help you do it easily, and some tools you can use to start building, too. Let’s dive in.
Vibe coding is a way of writing code using natural language. The term was first used by Andrej Karpathy (who was one of the key people at OpenAI) in February 2025 on X (Twitter). He explained that he now uses plain text in a prompt to guide AI tools in building software for him.
Instead of writing the code himself, because of the AI capabilities, he focuses on clearly explaining what he wants the app to do using prompts. He then tests and improves the code. He can do this by changing the code himself or by telling the AI what the problem is so it can fix it.
For example, if there’s a bug in the app, he can just describe the issue in plain text, and the LLM fixes it.
Vibe coding gives designers more possibilities to create while saving time and effort.
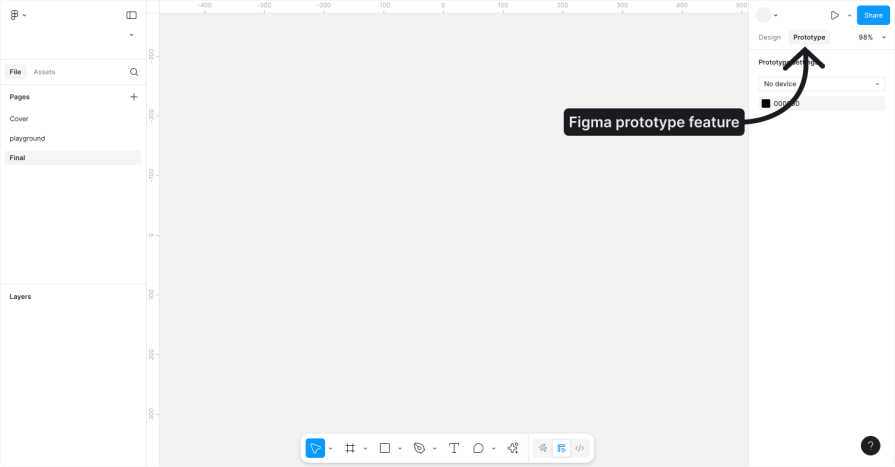
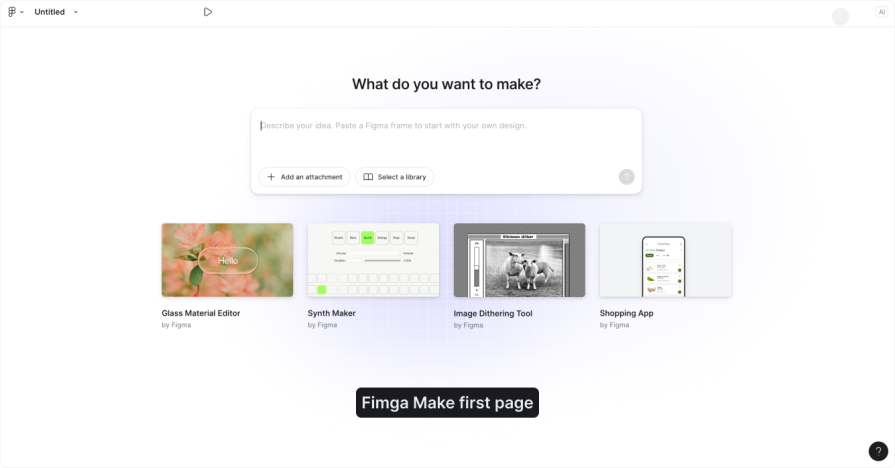
In the past, a designer needed a developer to build an app or had to create a simple prototype in Figma to show their idea. Now you can design the app in Figma, and with AI tools like Figma Make, Cursor, or Lovable (and many others), you can turn it into a real app.
You do not need a developer anymore for every little thing. You can just type something like “create a calculator” into the AI tool, press enter, and the tool will build it for you. You can also attach a Figma screen or an image, and the LLM model will turn your visual design and instructions into a working app:
Keep in mind that vibe coding isn’t a perfect solution and shouldn’t replace a product’s development team. It works for small, simple apps, especially ones for personal use, but dev experts have already begun pointing out its flaws when it comes to things like backend security, finite context, and more. We’ll talk more about its limitations later.
There are two big ways vibe coding makes life easier:
If you’ve got an idea, just build it. Let others use it. You can keep it free or charge for it and add a new income stream.
Among all the projects I built with vibe coding, there are a few I really like because they save me a lot of time with my daily tasks.
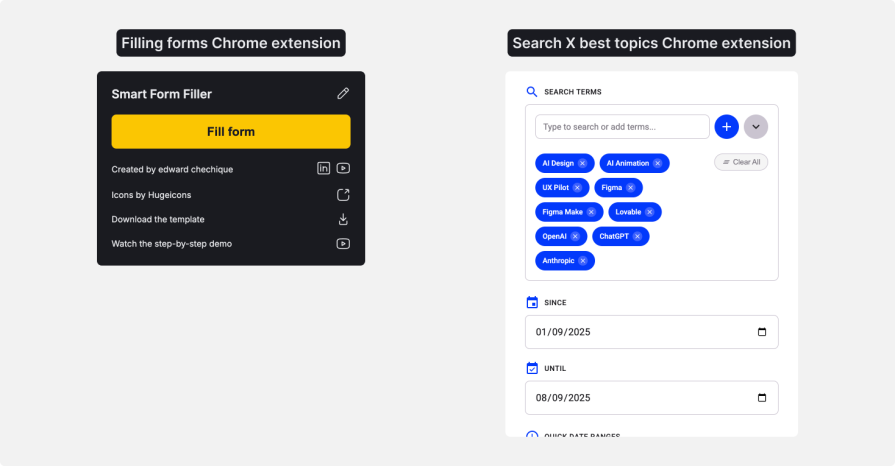
One is a Google Chrome extension I built to help me fill out forms faster. The other is a Chrome extension that helps me find interesting topics on X, based on certain terms:
Before I explain them, just a quick note. With vibe coding, you can create any app you want. But when you build a plugin for an existing tool, it’s easier, because it’s based on a platform that already has some structure in place. For example, things like the file structure are already defined by the platform that you’re building on. And since it’s a platform, you can often upload your files directly from there. You don’t need to worry about deployment if you’re using it locally for personal use. If you want to publish it, it must pass through a review process.
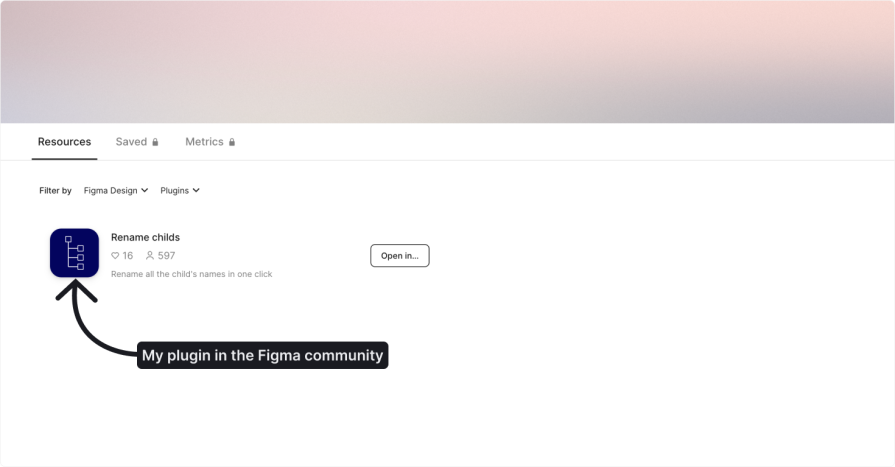
This makes things simpler. That’s true for Chrome extensions, but also for Figma plugins.
When I searched for a job, I had to fill out many forms. Every time I applied, I had to retype my name, surname, LinkedIn link, and other details. Doing this repeatedly became tedious.
How might I make this faster? I wanted to create a way to apply all the information with one click. I know that some apps do it, but I wanted to challenge myself and build it with vibe coding and give it to people for free so they can use it.
My idea was to build an easy process:
I also wanted to avoid using a database:
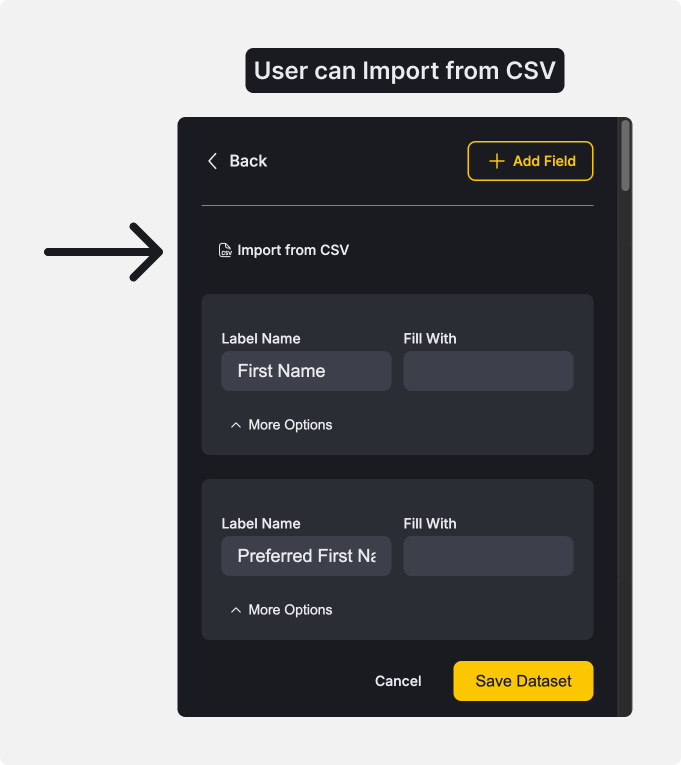
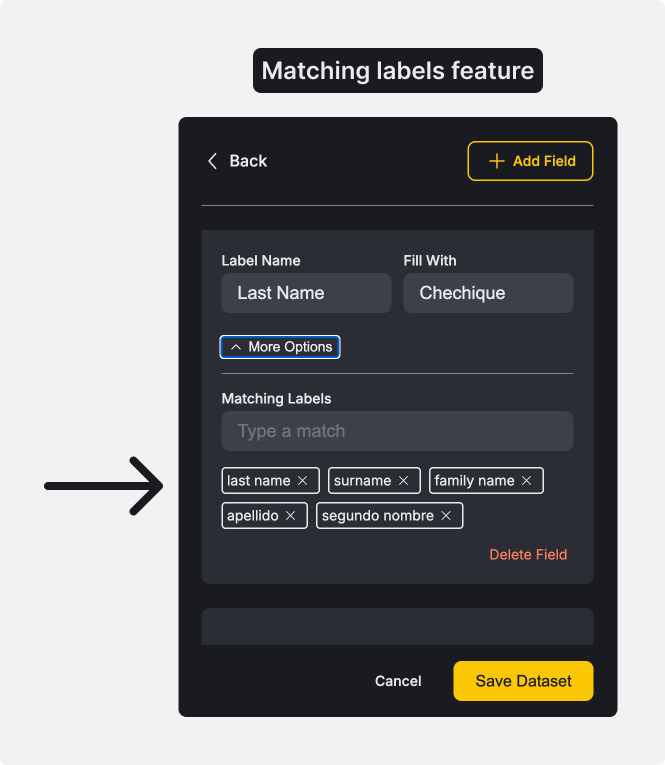
I started with basic wireframes in Figma, then moved on to high-fidelity designs. The goal was to let the user define each label, specify how it should be filled, and set up matching labels (alternative names that could appear for the same input field).
Since it’s a Chrome extension, the layout had to be short and simple. That defined the app’s visual direction. Once the visual design was complete, I focused on how to avoid complex security and database needs.
To keep things simple, I created a CSV-based system. Users can download a CSV template directly from the extension:
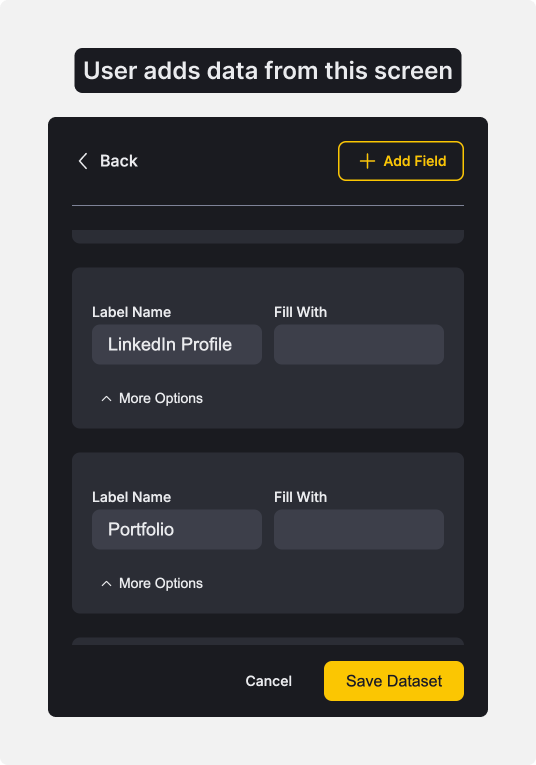
The file includes the label name, the related value to fill in, and any matching labels. Users can complete the file and upload it back into the extension to populate forms automatically.
Furthermore, it acts as a backup on the computer, so even if something goes wrong, their data can still be restored.
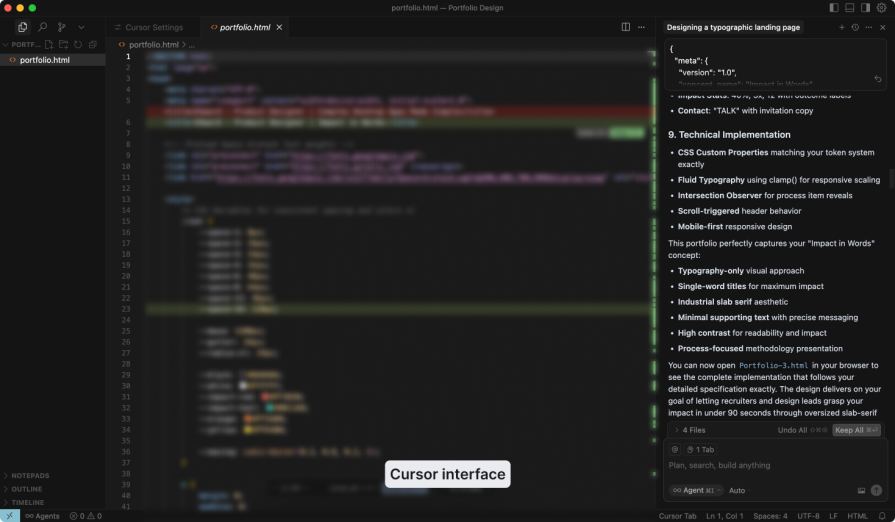
Once the design was ready in Figma, I moved everything into Cursor to build the extension. I separated the process into two parts: first, the visual design, and then the technical setup.
I started by asking Cursor to create the visual design by uploading an image and describing the app.
Today, you can use MCP to speed up that process by importing directly from Figma with one click. However, when I built it, MCP wasn’t available yet. Once that was done, I ran into some CSS issues. Since I know CSS, I fixed it manually by editing the code. If you don’t know how to do that, you can also ask Cursor to help with simple changes like adjusting layout spacing or shifting colors. But in my case, I fixed it myself:
After fixing the styles, I focused on the logic. Here’s something that I learned during the process: build your logic step by step. Don’t try to generate everything at once. AI works better when it handles small, focused tasks.
My process was:
Once the logic was ready, I tested. I loaded the extension locally on Chrome and tried it on different types of forms. Some worked right away, but others didn’t. When something didn’t work, I copied the page, pasted it into Cursor, and asked the LLM to fix the issue. I repeated this process step-by-step. In total, I tested more than 30 different forms until the extension worked smoothly on them all.
Once everything seemed stable, I shared the extension with a friend. He tested it and found one issue. The CSV file wasn’t matching the fields correctly. I took his file, debugged the problem in Cursor, and fixed it. After that, it worked perfectly for him:
Once everything worked well, I felt ready to share the extension more widely. Publishing a Chrome extension is a straightforward process. You upload your files to the Chrome Web Store, pay a small fee, and submit your extension for review.
I chose to make the extension completely free. I wasn’t interested in monetizing it.
I first shared the plugin with a few friends who support designers in their job search. They passed it along to their communities, and slowly, more people used it.
But if you’re planning to turn a project like this into a paid product, you’ll need to think about marketing. There are so many tools available, and people need a clear reason to try yours.
Today, about 50 people have installed it in their browsers. It’s not a huge number, but that was never the goal. I just wanted to build something useful, and I’m glad it’s helping others.
The second Chrome extension I built helps me search for trending topics and high-engagement content on X. I frequently seek out the latest industry trends. However, searching on X can be noisy. To cut through the noise, I used to search for terms by hand, open advanced search, set filters for time, likes, and reposts, and repeat this routine each time.
Repeating the same steps again and again quickly got tedious. That’s why I built a tool to make things easier.
What the extension does:
Now, instead of clicking through a bunch of settings, I can run a full advanced search with just one click:
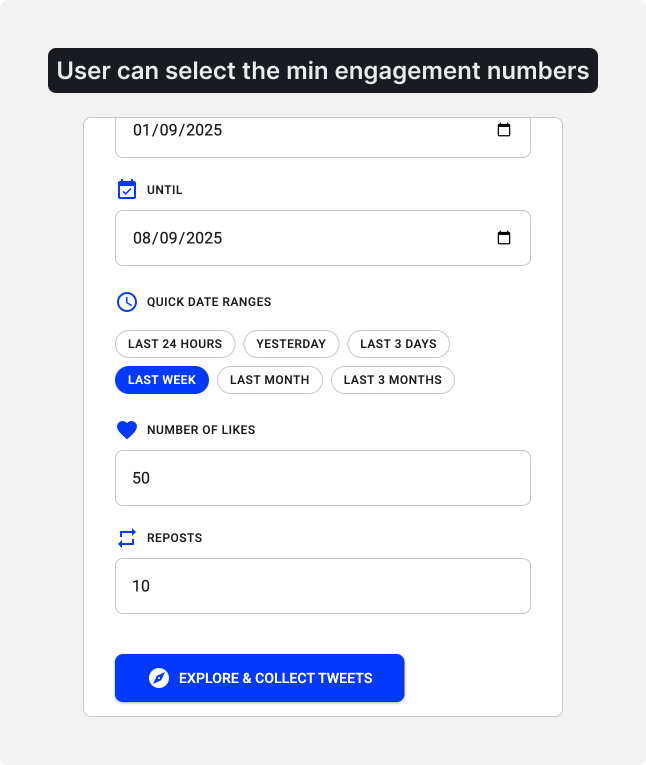
To speed things up, I added some extra features:
Since I already had experience from building my first extension, I followed a similar process:
But this time, I went further and used my own design system. I added tokens and reusable components to the code files, which made building the extension easier and more scalable. For example, the “likes” and “reposts” inputs use the same component. So if I want to update one, both get updated automatically.
This level of structure made the app easier to maintain and evolve, especially compared to quick one-off tools where things are often built without much planning.
I built this extension purely for myself, so I didn’t publish it to the Chrome Web Store.
To be honest, I didn’t want to maintain it, and it was built too specifically for my own workflow.
But that’s exactly the point. Not every tool needs to be public. I installed it locally, and it does exactly what I need. Sometimes the most valuable tools are the ones you build for yourself. If it works for you, that’s enough.
You don’t always need to launch or scale your ideas. A personal tool that helps you move faster, stay focused, and skip repetitive tasks is already a win.
There are three main types of Vibe Coding tools you can use to build applications quickly and easily.
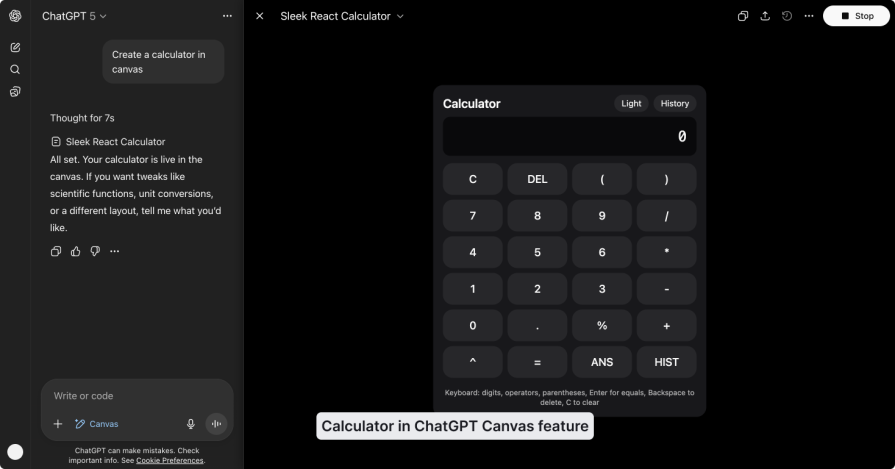
The first type is AI tools with canvas features like ChatGPT, Claude, or Gemini. These let you ask the AI to build a simple app, and it generates and runs it right on the tool canvas. This works well for basic apps like a calculator. You just write one prompt, and the app shows up instantly on the screen:
The second type is browser-based tools, which are probably the most common today. Think of tools like Figma Make, Lovable, Bolt, V0, and Based44. These tools work like chatbots. You tell them what you want, and they build and deploy the app for you.
What makes them different from the Canvas feature is that they have a more structured setup for building applications. You can edit specific files and access code. Some even let you click on a specific area of the screen to change visuals.
If you’re just getting started, I recommend trying one of them. They’re easy to use, and you can build your first app easily.
The third type is AI-powered IDEs, like Windsurf or Cursor. These tools are more advanced and are mainly used by developers, but not only by them. For example, I’m not a developer, but I like using them because they give me more control and flexibility.
They connect to large language models, and you can pick the model you want or let the tool choose it for you. Then you can ask the model to write or update your code, and it does it directly in your project.
Even though these tools are more developer-focused, you can still use them if you’re comfortable reading code:
So to sum it up:
Vibe coding is great, but it’s not the right solution for every situation.
Vibe coding works well for small projects, such as building a simple Figma plugin with a few actions, or when you’re creating something for personal use. It can save you time and help you get results quickly. But when building larger products, things get more complex. For example, if you’re working on an app that will be used by thousands of people or handles sensitive user data, there are more layers to consider.
Security becomes a big concern. If you don’t know how to read or write code, you might not understand what’s happening behind the scenes. This could lead to bugs or security issues you’re not even aware of.
Keep in mind, AI can generate the code for you, but if you’re unable to review or modify it, that can be risky. It’s important to understand what your app is doing, especially if it’s intended for other people to use.
So, vibe coding is a great option for small apps or personal projects. But for big, complex applications, especially ones that deal with user data or need high security, it might not be the best choice.
Use it carefully, based on the size and type of the project you’re working on.

LogRocket's Galileo AI watches sessions and understands user feedback for you, automating the most time-intensive parts of your job and giving you more time to focus on great design.
See how design choices, interactions, and issues affect your users — get a demo of LogRocket today.

Traditional A/B testing splits traffic evenly, but multi-armed bandits dynamically send more users to the better-performing version. Here’s how the method works, where it helps, and when UX teams should use it over classic A/B testing.

AI agent simulations promise faster, lower-risk UX testing by replacing real users with AI-simulated personas. Here’s how the method works, where it falls short, and when designers should rely on simulated users versus real user testing.
A/B testing is great for comparing two versions of a design, but multivariate testing helps teams evaluate multiple design element combinations at once. Here’s how both methods work, how they differ, and when UX teams should use each one.

Design engineering has always lived between design and code. But with AI tools turning prompts into interfaces and code into editable canvases, that bridge is becoming a new way of building.


