The Replay is a weekly newsletter for dev and engineering leaders.
Delivered once a week, it's your curated guide to the most important conversations around frontend dev, emerging AI tools, and the state of modern software.
You’re on your favorite app, scrolling through the contents, you’ve spent a couple of minutes enjoying the content, which I might add, is captivating. Suddenly, while reading a particular piece of content, the page pops back. Surprising as it is, you discover that your finger brushed over the back button.

This may not be much of an issue, if you can just go forward to the page and continue from where you stopped, but if the app has refreshed the screen or is set to bring up newer content any time you enter the page — well, then, you’ve lost the position on screen or the place you were while scrolling through that particular content.
These and many more crucial things (well … that particular tweet was important to me) have an impact on the overall user experience. Taking measures to prevent these occurrences should definitely be on your list of things to do when building an application.
In this article, we’ll be looking at one of such measures in this article: The WillPopScope widget. Specifically, we’ll cover:
Shall we?
WillPopScope widget? WillPopScope WillPopScope({
required Widget child,
required Future<bool> Function()? onWillPop,
})
The WillPopScope widget comes with the Flutter framework. It gives us control over the back button action, allowing the current page to go back to the previous one if it meets certain requirements. This is achieved using a callback, which the widget takes in as one of its parameters.
As described in the Flutter official documentation, the widget:
Registers a callback to veto attempts by the user to dismiss the enclosing
ModalRoute
With the WillPopScope widget, you can effectively prevent situations similar to the one described in the Introduction: by providing an extra means of verification, users can choose to cancel/prevent their current page from popping off, i.e., going back.
The WillPopScope widget requires two parameters:
onWillPop callback: handles the action and determines if the page should be popped or not using a boolean; when it’s true, the page pops back, and if not, it remains on the same pagechild widget: the widget for the viewIn the next section, we’ll use these in an actual application. Let’s get to it.
WillPopScope in a Flutter appWe are going to build a sample app to demonstrate the WillPopScope widget in action. The sample app contains two pages, the homeView and the contentView.
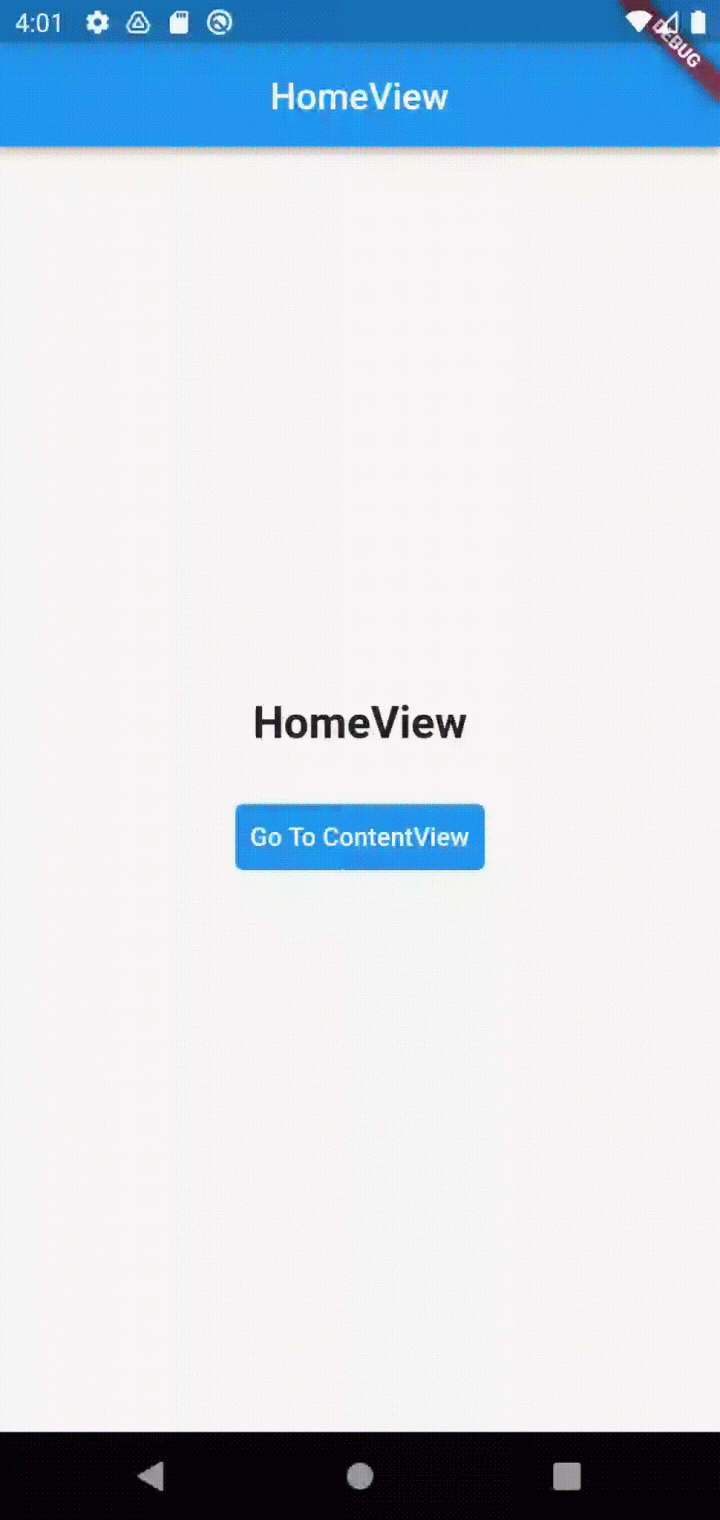
The homeView has some text and a button. We’ll use the button to navigate to the next page, which is the contentView and contains the WillPopScope widget.
WillPopScope will capture the back button and perform an action any time the back button is clicked while on this view. We’ll show two different methods of handling the back button, which you might have seen in some other apps you’ve used. They are:
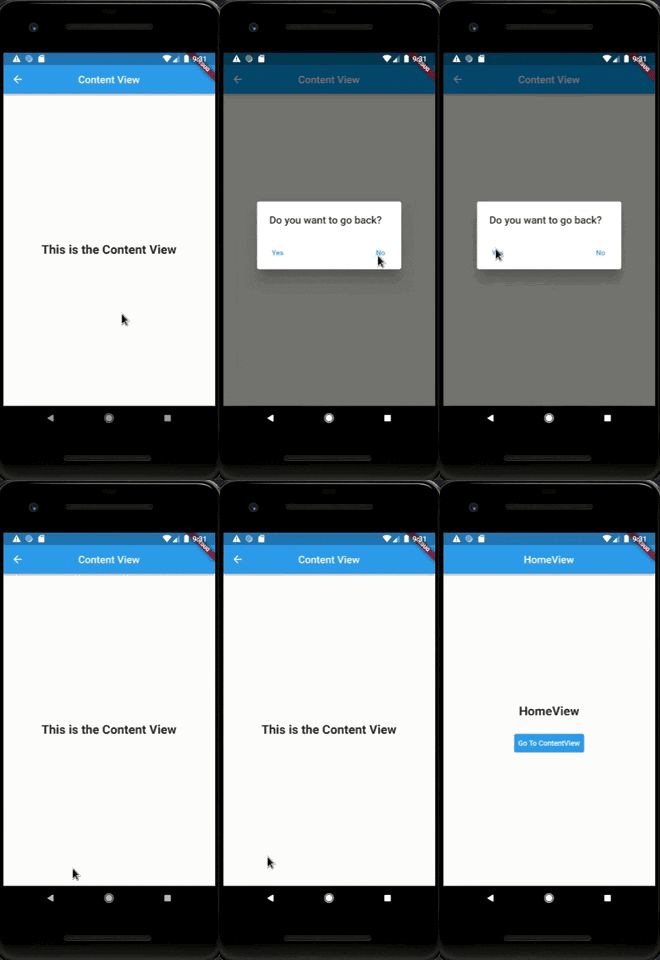
AlertDialog method: The AlertDialog method shows the user a pop-up and asks them to confirm if they want to be routed to the previous screen. The user can then select Yes or No(any other word that indicates true or false can be used).SnackBar method: The snackbar method asks the user to “Press the back button again to go back.”As mentioned earlier, the WillPopScope widget has a callback, inside of which we’ll display either an alert dialog with a question (“Do you want to go back?”) and two action options (a Yes button and a No button) or a snackbar asking the user to press the back button again to go back.
With that cleared up, let’s get coding.
First create a new project and generate the necessary files and folders using the command below:
flutter create willpopscope_tutorial
Once that’s done, go into the main.dart file in the lib folder. This is the entry point to your application. Delete the home widget and return HomeView.
We’ll create HomeView widget in the next step. You can also adjust the title for the MaterialApp to display what you want.
import 'package:flutter/material.dart';

void main() => runApp(const MyApp());

class MyApp extends StatelessWidget {
  const MyApp({Key? key}) : super(key: key);
  @override
  Widget build(BuildContext context) {
    return const MaterialApp(
     title: "WillPopScope Article",
     home: HomeView(),
   );
  }
}
HomeViewNext, create a Stateless widget named HomeView. This is the initial view for our sample application. It should contain a Text and a TextButton. The TextButton will be used to navigate to the next view, which is the ContentView.
class HomeView extends StatelessWidget {
  const HomeView({Key? key}) : super(key: key);
  @override
  Widget build(BuildContext context) {
    return Scaffold(
      appBar: AppBar(
        centerTitle: true,
        title: const Text('HomeView'),
      ),
      body: Center(
        child: Column(
          mainAxisAlignment: MainAxisAlignment.center,
          crossAxisAlignment: CrossAxisAlignment.center,
          children: [
            const Text(
              'HomeView',
              style: TextStyle(
                fontSize: 24,
                fontWeight: FontWeight.bold,
              ),
            ),
            const SizedBox(
              height: 24,
            ),
            TextButton(
              style: ButtonStyle(
                backgroundColor: MaterialStateProperty.all<Color>(Colors.blue),
              ),
              onPressed: () {
                Navigator.push(
                  context,
                  MaterialPageRoute(
                    builder: (context) {
                      return const ContentView();
                    },
                  ),
                );
              },
              child: const Text(
                'Go To ContentView',
                style: TextStyle(
                  color: Colors.white,
                ),
              ),
            ),
          ],
        ),
      ),
    );
  }
}
ContentView widgetNext, create another Stateless widget, and name it ContentView. This is the widget on which we’ll use the WillPopScope.
class ContentView extends StatelessWidget {
  const ContentView({Key? key}) : super(key: key);
  @override
  Widget build(BuildContext context) {
    return Scaffold(
      body: Column(
        children: [],
      ),
    );
  }
}
WillPopScope widget on: The AlertDialog methodHere we’ll show how to make use of an alert dialog to determine if a user should be routed back or not.
Wrap the Scaffold widget with the WillPopScope widget. It takes in the onWillPop callback, captures the back button action, and performs an action when the user clicks the back button.
return WillPopScope(
  onWillPop: (){},
  child: Scaffold(
    body: Column(
      children: [],
    ),
  ),
);
In the onWillPop callback, we’ll do two things:
ContentViewIn order to get the user’s selection, we assign the result from the dialog to a boolean variable. In the ActionButtons, we pass in the data (true for Yes and false for No) into Navigator.pop(context, true/false). The value is then passed to the shouldPop variable.
Next, we return the shouldPop variable, which should be either true or false and will be used to determine if the ContentView should pop (when shouldPop is true) or not (when shouldPop is false).
  onWillPop: () async {
        final shouldPop = await showDialog<bool>(
          context: context,
          builder: (context) {
            return AlertDialog(
              title: const Text('Do you want to go back?'),
              actionsAlignment: MainAxisAlignment.spaceBetween,
              actions: [
                TextButton(
                  onPressed: () {
                    Navigator.pop(context, true);
                  },
                  child: const Text('Yes'),
                ),
                TextButton(
                  onPressed: () {
                    Navigator.pop(context, false);
                  },
                  child: const Text('No'),
                ),
              ],
            );
          },
        );
        return shouldPop!;
      },
With this, we’re done with the ContentView widget. The code for the full widget should look like this:
class ContentView extends StatelessWidget {
  const ContentView({Key? key}) : super(key: key);
  @override
  Widget build(BuildContext context) {
    return WillPopScope(
      onWillPop: () async {
        final shouldPop = await showDialog<bool>(
          context: context,
          builder: (context) {
            return AlertDialog(
              title: const Text('Do you want to go back?'),
              actionsAlignment: MainAxisAlignment.spaceBetween,
              actions: [
                TextButton(
                  onPressed: () {
                    Navigator.pop(context, true);
                  },
                  child: const Text('Yes'),
                ),
                TextButton(
                  onPressed: () {
                    Navigator.pop(context, false);
                  },
                  child: const Text('No'),
                ),
              ],
            );
          },
        );
        return shouldPop!;
      },
      child: Scaffold(
        appBar: AppBar(
          centerTitle: true,
          title: const Text('Content View'),
        ),
        body: Center(
          child: Column(
            mainAxisAlignment: MainAxisAlignment.center,
            crossAxisAlignment: CrossAxisAlignment.center,
            children: const [
              Text(
                'This is the Content View',
                style: TextStyle(
                  fontSize: 24,
                  fontWeight: FontWeight.bold,
                ),
              ),
            ],
          ),
        ),
      ),
    );
  }
}
With this done, we’ve fully setup the WillPopScope widget and can prevent unintentional popping off of a particular view using an alert dialog!
Let’s test out our sample app. Run the command below to run the application.
flutter run

WillPopScope widget: The SnackBar methodHere we’ll show how to make use of a SnackBar to show if the page should go back or not. We’ll make use of the same sample app from the previous alert dialog method. We’ll only make adjustments to the logic in the onWillPop callback to display a SnackBar and determine if the user would be routed or not.
In the onWillPop callback, when the user clicks the back button, we’ll do two things:
SnackBar to the user asking them to “Press the back button again to go back.”ContentView.Let’s get to it:
  DateTime lastTimeBackbuttonWasClicked = DateTime.now();
  onWillPop: () async {
        if (DateTime.now().difference(lastTimeBackbuttonWasClicked) >= Duration(seconds: 2)) {
          ScaffoldMessenger.of(context).showSnackBar(
            const SnackBar(
              content: Text("Press the back button again to go back"),
              duration: Duration(seconds: 2),
            ),
          );
          lastTimeBackbuttonWasClicked = DateTime.now();
          return false;
        } else {
          return true;
        }
      },
With this, we’re done with the ContentView widget. The code for the full widget with the SnackBar method should look like this:
class ContentView extends StatelessWidget {
  const ContentView({Key? key}) : super(key: key);
  @override
  Widget build(BuildContext context) {
    DateTime lastTimeBackbuttonWasClicked = DateTime.now();
    return WillPopScope(
      onWillPop: () async {
        if (DateTime.now().difference(lastTimeBackbuttonWasClicked) >= Duration(seconds: 2)) {
          ScaffoldMessenger.of(context).showSnackBar(
            const SnackBar(
              content: Text("Press the back button again to go back"),
              duration: Duration(seconds: 2),
            ),
          );

          lastTimeBackbuttonWasClicked = DateTime.now();
          return false;
        } else {
          return true;
        }
      },
      child: Scaffold(
        appBar: AppBar(
          centerTitle: true,
          title: const Text('Content View'),
        ),
        body: Center(
          child: Column(
            mainAxisAlignment: MainAxisAlignment.center,
            crossAxisAlignment: CrossAxisAlignment.center,
            children: const [
              Text(
                'This is the Content View',
                style: TextStyle(
                  fontSize: 24,
                  fontWeight: FontWeight.bold,
                ),
              ),
            ],
          ),
        ),
      ),
    );
  }
}
With this done, using the snackbar, we ensure more accuracy and prevent our views from routing back unintentionally.
Let’s test out our sample app. Run the command below to run the application:
flutter run

Yay! You’ve now seen how we can practically solve navigation issues and fine-tune the user’s browsing experience using the WillPopScope widget. From displaying dialog confirmations to performing custom actions to disposing streams, and more, there is a wide range of things you can do with this widget, such as display a snackbar or toast message. Explore your options as much as you can and use them in building your next Flutter app.
Check out the complete source code for the sample app. If you have any questions or inquiries, feel free to reach out to me on Twitter: @Blazebrain01 or LinkedIn: Blazebrain.
Install LogRocket via npm or script tag. LogRocket.init() must be called client-side, not
server-side
$ npm i --save logrocket

// Code:

import LogRocket from 'logrocket';
LogRocket.init('app/id');
// Add to your HTML:

<script src="https://cdn.lr-ingest.com/LogRocket.min.js"></script>
<script>window.LogRocket && window.LogRocket.init('app/id');</script>

React Server Components and the Next.js App Router enable streaming and smaller client bundles, but only when used correctly. This article explores six common mistakes that block streaming, bloat hydration, and create stale UI in production.

Gil Fink (SparXis CEO) joins PodRocket to break down today’s most common web rendering patterns: SSR, CSR, static rednering, and islands/resumability.

@container scroll-state: Replace JS scroll listeners nowCSS @container scroll-state lets you build sticky headers, snapping carousels, and scroll indicators without JavaScript. Here’s how to replace scroll listeners with clean, declarative state queries.

Explore 10 Web APIs that replace common JavaScript libraries and reduce npm dependencies, bundle size, and performance overhead.
Hey there, want to help make our blog better?
Join LogRocket’s Content Advisory Board. You’ll help inform the type of content we create and get access to exclusive meetups, social accreditation, and swag.
Sign up now
One Reply to "Using WillPopScope in Flutter for Android navigation"
Heads up that WillPopScope has just been deprecated. You probably want either PopScope or NavigatorPopHandler now. See the migration guide here: https://github.com/flutter/website/blob/main/src/release/breaking-changes/android-predictive-back.md