Nowadays, many applications need real-time data to provide instant feedback to users, be it a chat application that shows a person typing in real-time or a remote application that plots data directly from a hardware sensor.
We try to solve these problems with REST but face a complex problem: to have near-instant feedback, we must ping the server several times per minute, which can be architecturally difficult to achieve and it overloads the server.
However, if using solutions like Firebase Realtime Database, you can notice that as soon as a new record adds to the database, the Flutter application receives it as a Stream and you show the data to the user.
But how does Firebase achieve this? The reality is, frameworks such as Firebase and others rely on a very important piece of technology: WebSockets.
In this article, we’re going to explore how we can use our own WebSockets to create applications that display real-time data to our users.
According to Mozilla, the WebSocket API is “an advanced technology that makes it possible to open a two-way interactive communication session between the user’s browser and a server… you can send messages to a server and receive event-driven responses without having to poll the server for a reply.”
In a nutshell, WebSockets are composed of:
client in the application that is ready to receive the new stream of datachannel to communicate between the client and the serverMessages sent between the client and the serverAs opposed to REST, with WebSockets, we don’t await a response from the server after we send a message to it. We can send one message and receive dozens of incoming messages from the server.
In a way, you can think of it as subscribing to notifications; we subscribe to a specific topic, for example, the exchange value of USD-EUR, and then we receive a new message from the server each time that the USD-EUR exchange value changed.
This real-time communication stream makes WebSockets the ideal technology to use for stock-exchange apps, chat applications, IoT apps, and every other app that must receive an incoming stream of data.
The question is, how can we use them in Flutter?
Fortunately, Flutter’s language, Dart, provides us with an out-of-box solution for dealing with WebSockets: the WebSocket class.
If we develop apps for only one target (either desktop or web or mobile), then we can use WebSocket safely.
However, the moment we opt to use our app across platforms, we must stay aware that the WebSocket class relies on dart:io and dart:html, which means that we cannot compile for both mobile and web at the same time.
Thankfully, the Dart team created the web_socket_channel, an official library that abstracts the dart:io and dart:html logic and allows us to use one class to create a multiplatform application.
To use web_spclet_channel, we must follow three simple steps:
WebSocketChannel and connect to a channel via the connect functionstream gettersink getter to send messages to the serverFor this current article, we will use an example from the CoinBase Pro API to get the real-time value of cryptocurrencies via WebSockets.
Let’s start by creating a brand new Dart project by using the following on the command line:
dart create websocket_example
This creates a new Dart-only project in the websocket_example folder.
Next, open the project in your favorite IDE and add the web_socket_channel dependency:
dependencies:
  web_socket_channel: ^2.1.0
With the project created, let’s look at the CoinBase Pro API.
Our WebSocket client must connect to the URI, wss://ws-feed.pro.coinbase.com, to receive updates. To listen to those updates, we must listen for any incoming messages:
import 'package:web_socket_channel/web_socket_channel.dart';

void main(List<String> arguments) {
  /// Create the WebSocket channel
  final channel = WebSocketChannel.connect(
    Uri.parse('wss://ws-feed.pro.coinbase.com'),
  );

  /// Listen for all incoming data
  channel.stream.listen(
    (data) {
      print(data);
    },
    onError: (error) => print(error),
  );

}
Since we want to receive updates from the server with the current value of BTC-EUR, we must use the subscribe message from the API. To send a message to the server, we can use sink from our newly created WebSocketChannel to send a JSON message to the server:
import 'dart:convert';

import 'package:web_socket_channel/web_socket_channel.dart';

void main(List<String> arguments) async {
  /// Create the WebSocket channel
  final channel = WebSocketChannel.connect(
    Uri.parse('wss://ws-feed.pro.coinbase.com'),
  );

  channel.sink.add(
    jsonEncode(
      {
        "type": "subscribe",
        "channels": [
          {
            "name": "ticker",
            "product_ids": [
              "BTC-EUR",
            ]
          }
        ]
      },
    ),
  );

  /// Listen for all incoming data
  channel.stream.listen(
    (data) {
      print(data);
    },
    onError: (error) => print(error),
  );
}
To see it in action, we can use the dart run bin/web_socket_example.dart command. Hopefully, we can see new logs printed with incoming messages from the CoinBase Pro API:
{"type":"subscriptions","channels":[{"name":"ticker","product_ids":["BTC-EUR"]}]}
{"type":"ticker","sequence":12764748963,"product_id":"BTC-EUR","price":"36941.64","open_24h":"38285.55","volume_24h":"4722.06983151","low_24h":"34300","high_24h":"38674.98","volume_30d":"43802.53509763","best_bid":"36934.04","best_ask":"36941.64","side":"buy","time":"2021-09-21T08:00:20.424250Z","trade_id":50228771,"last_size":"0.08072577"}
{"type":"ticker","sequence":12764749180,"product_id":"BTC-EUR","price":"36941.55","open_24h":"38285.55","volume_24h":"4722.08309939","low_24h":"34300","high_24h":"38674.98","volume_30d":"43802.54836551","best_bid":"36933.09","best_ask":"36941.55","side":"buy","time":"2021-09-21T08:00:21.167335Z","trade_id":50228772,"last_size":"0.01326788"}
One question remains: we can open a channel, but how can we close it?
The same way we access the underlying sink to send new data to the server, we can also use it to close the connection after a period of time:
void main(List<String> arguments) async {
  // ...

  /// Wait for 5 seconds
  await Future.delayed(Duration(seconds: 5));

  /// Close the channel
  channel.sink.close();
}
If we rerun the app, we see that after five seconds, it closes the channel and the application.
Now that we created a simple Dart application that uses WebSockets, we can create a Flutter app to showcase how we can use WebSockets. Thankfully, all the code we’ve done previously can be reused in our Flutter application. This app will:
For this purpose, we’ll use two different socket channels: one that receives the ETH-EUR messages and another that receives the BTC-EUR messages.
However, keep in mind that the CoinBase Pro API lets us use one single channel to receive multiple values, which can use and map the incoming messages to display in different widgets.
Instead of using plain Maps to receive and send messages to the server, we must create the appropriate CoinbaseRequest and CoinbaseResponse classes and use json_serializable to easily serialize and deserialize them:
import 'package:json_annotation/json_annotation.dart';

part 'coinbase_request.g.dart';

@JsonSerializable()
class CoinbaseRequest {
  final String type;
  final List<Map<String, dynamic>> channels;

  CoinbaseRequest(this.type, this.channels);

  factory CoinbaseRequest.fromJson(Map<String, dynamic> json) =>
      _$CoinbaseRequestFromJson(json);

  Map<String, dynamic> toJson() => _$CoinbaseRequestToJson(this);
}
import 'package:json_annotation/json_annotation.dart';

part 'coinbase_response.g.dart';

@JsonSerializable()
class CoinbaseResponse {
  final String price;
  @JsonKey(name: 'product_id')
  final String productId;

  CoinbaseResponse(this.price, this.productId);

  factory CoinbaseResponse.fromJson(Map<String, dynamic> json) =>
      _$CoinbaseResponseFromJson(json);

  Map<String, dynamic> toJson() => _$CoinbaseResponseToJson(this);
}
To isolate our WebSocket logic, let’s create CoinbaseProvider that is responsible for:
openBitcoin methodStream of data using bitcoinStreamcloseBitcoin methodThe same applies to Ethereum, but to make the example more readable, we’ll present only the code for BTC-EUR:
/// Manages opening and closing the sockets for the
/// two different sockets: ETH socker and BTC socket
class CoinbaseProvider {
  late final WebSocketChannel _btcWebsocket;

  static const _btcProduct = "BTC-EUR";

  CoinbaseProvider()
      : _btcWebsocket = WebSocketChannel.connect(
          Uri.parse('wss://ws-feed.pro.coinbase.com'),
        );

  Stream<CoinbaseResponse> get bitcoinStream => _btcWebsocket.stream
      .map<CoinbaseResponse>(
          (value) => CoinbaseResponse.fromJson(jsonDecode(value)))
      .skipWhile((element) => element.productId != _btcProduct);

  void openBitcoin() {
    _btcWebsocket.sink.add(
      jsonEncode(
        CoinbaseRequest(
          'subscribe',
          [
            {
              "name": "ticker",
              "product_ids": [_btcProduct]
            }
          ],
        ).toJson(),
      ),
    );
  }

  void closeBitcoin() {
    _btcWebsocket.sink.close();
  }
StreamBuilder widgetFrom our previous experience, we discovered that WebSockets in Dart expose a Stream to receive incoming messages from the server, which means that we need a widget that can receive a Stream and react to it.
For that, we can use the StreamBuilder widget, which tells us if:
done eventUsing our provider, we can create a widget that displays these states visually, such as a spinner to indicate we are waiting for data.

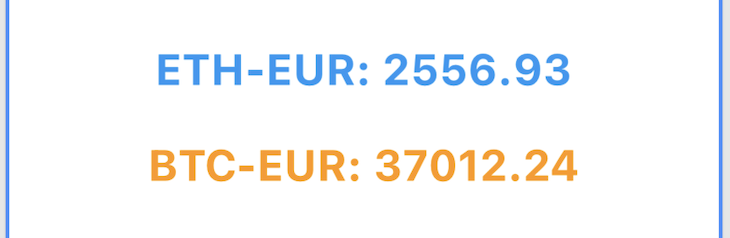
We can show our received data by displaying the current price for both ETH-EUR and BTC-EUR.
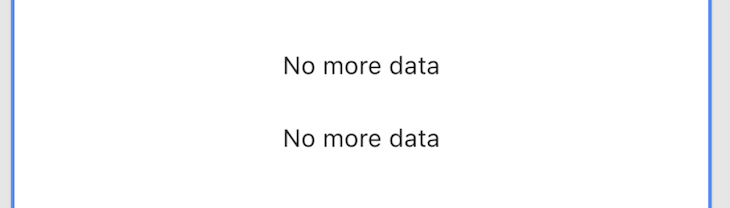
And, we can close the WebSockets and display, “No more data.”
With the StreamBuilder connectionState and data to get information regarding each state, we can replicate all the three states we want to show to our user:
class CoinPrice extends StatelessWidget {
  final Stream stream;
  final Color color;

  const CoinPrice({
    required this.stream,
    required this.color,
    Key? key,
  }) : super(key: key);

  @override
  Widget build(BuildContext context) {
    return Padding(
      padding: const EdgeInsets.all(12.0),
      child: StreamBuilder(
        stream: stream,
        builder: (context, snapshot) {
          /// We are waiting for incoming data data
          if (snapshot.connectionState == ConnectionState.waiting) {
            return const Center(
              child: CircularProgressIndicator(),
            );
          }

          /// We have an active connection and we have received data
          if (snapshot.connectionState == ConnectionState.active &&
              snapshot.hasData) {
            return Center(
              child: Text(
                '${snapshot.data!.productId}: ${snapshot.data!.price}',
                style: TextStyle(
                  color: color,
                  fontSize: 24.0,
                  fontWeight: FontWeight.bold,
                ),
              ),
            );
          }

          /// When we have closed the connection
          if (snapshot.connectionState == ConnectionState.done) {
            return const Center(
              child: Text(
                'No more data',
                style: TextStyle(
                  color: Colors.red,
                ),
              ),
            );
          }

          /// For all other situations, we display a simple "No data"
          /// message
          return const Center(
            child: Text('No data'),
          );
        },
      ),
    );
  }
}
With our widget that receives the stream of completed data, we can proceed to create a button widget that sends a message to the CoinBase server to receive information about the current price of BTC-EUR and another button that closes all socket connections.
The first button will be the CoinButton, which can send a message via the WebSocket to start receiving data about a specific coin.
Instead of creating two different widgets, one for each cryptocurrency, we’ll create a generic widget that accepts title, backgroundColor, and isOpen to know if we’re already receiving information for that coin.
And finally, it will accept onTap that allows us to call the CoinbaseProvider with the appropriate function:
/// Send WebSocket message to receive information
/// regarding a certain coin
///
/// Usage:
/// ```dart
/// CoinButton(
///  isSocketOpen: _showBitcoin,
///  title: "BTC",
///  backgroundColor: Colors.orange,
///  onTap: (isSocketOpen) {
///    if (!isSocketOpen) {
///      widget.provider.openBitcoin();
///      setState(() => _showBitcoin = true);
///    }
///  },
///)
/// ```
class CoinButton extends StatelessWidget {
  final bool isSocketOpen;
  final String title;
  final Function(bool) onTap;
  final Color backgroundColor;

  const CoinButton({
    required this.isSocketOpen,
    required this.title,
    required this.onTap,
    required this.backgroundColor,
    Key? key,
  }) : super(key: key);

  @override
  Widget build(BuildContext context) {
    return MaterialButton(
      onPressed: () => !isSocketOpen ? onTap(isSocketOpen) : null,
      color: backgroundColor,
      child: Row(
        children: [
          if (!isSocketOpen)
            const Icon(
              Icons.close,
              color: Colors.red,
            ),
          if (isSocketOpen)
            const Icon(
              Icons.check,
              color: Colors.green,
            ),
          Text(title),
        ],
      ),
    );
  }
}
Secondly, we’ll create a CloseWebSocketsWidget that accepts the CoinbaseProvider as an argument so we can access the closeBitcoin and closeEthereum functions:
/// Button to close the WebSocket connection
class CloseSocketsWidget extends StatelessWidget {
  const CloseSocketsWidget({
    Key? key,
    required this.provider,

  }) : super(key: key);

  final CoinbaseProvider provider;

  @override
  Widget build(BuildContext context) {
    return MaterialButton(
      color: Colors.red,
      child: Row(
        mainAxisAlignment: MainAxisAlignment.center,
        children: const <Widget>[
          Icon(
            Icons.warning,
            color: Colors.white,
          ),
          SizedBox(
            width: 12.0,
          ),
          Text(
            "CLOSE SOCKETS",
            style: TextStyle(
              color: Colors.white,
            ),
          )
        ],
      ),
      onPressed: () {
        provider.closeBitcoin();
        provider.closeEthereum();
      },
    );
  }
}
Putting it all together, we can create a simple app that shows different cryptocurrency prices in real-time:

There will be times when we must display real-time data to a user, and as we have seen, WebSockets can make the process easy for us in Flutter applications with just four simple steps:
This allows us to create reactive applications that our StreamBuilders widget can change according to the current state. Are we waiting for new data? Did we receive an error or new data?
These questions can be translated into UI components, such as the animation indicating that someone is typing in a chat or updating the value of a graph on a page.
So now, a question for you! Have you ever needed to display real-time data to users in your applications? If so, what did you use? Firebase? WebSockets? gRPC server-side Stream?
I’m very curious to hear back from you! 😁
To see the full code you can check out this repository.
Install LogRocket via npm or script tag. LogRocket.init() must be called client-side, not
server-side
$ npm i --save logrocket

// Code:

import LogRocket from 'logrocket';
LogRocket.init('app/id');
// Add to your HTML:

<script src="https://cdn.lr-ingest.com/LogRocket.min.js"></script>
<script>window.LogRocket && window.LogRocket.init('app/id');</script>
Would you be interested in joining LogRocket's developer community?
Join LogRocket’s Content Advisory Board. You’ll help inform the type of content we create and get access to exclusive meetups, social accreditation, and swag.
Sign up now
This guide explores how to use Anthropic’s Claude 4 models, including Opus 4 and Sonnet 4, to build AI-powered applications.

Which AI frontend dev tool reigns supreme in July 2025? Check out our power rankings and use our interactive comparison tool to find out.

Learn how OpenAPI can automate API client generation to save time, reduce bugs, and streamline how your frontend app talks to backend APIs.

Discover how the Interface Segregation Principle (ISP) keeps your code lean, modular, and maintainable using real-world analogies and practical examples.


4 Replies to "Using WebSockets in Flutter"
Very much helpful
Very intuitive. Would love to see an implementation with State management packages such as Flutter Bloc or Riverpod.
thanks for this, can you please how this can be handle on the backend side
many thanks
i am getting error my url start from https:// but getting error
XCEPTION CAUGHT BY WIDGETS LIBRARY
I/flutter ( 7839): The following WebSocketException was thrown building MyApp(dirty):
I/flutter ( 7839): Unsupported URL scheme ‘https’
why my api giving me data on every 5 second
this is my code
final channel = WebSocketChannel.connect(Uri.parse(BASE_URL));
print(channel.closeReason);
channel.stream.listen((message) {
final questionData = message;
print(‘question message–> $questionData’);
// Handle the received question as needed
// For example, you can add it to a list of questions or display it in the UI
}, onError: (error) {
// Handle WebSocket error
print(error.toString());
});