react-native-ble-manager in a mobile applicationEditor’s note: This article was updated on 8 August 2023 to address issues with not seeing any BLE devices after clicking the scan button and add information about utilizing event listeners.

Every smartphone we use today has Bluetooth built into it. As a result, mobile app developers often build applications that require Bluetooth to work.
In this article, we will learn how to integrate the Bluetooth connection feature — specifically, Bluetooth Low Energy — in our React Native application. We will also learn how to handle Bluetooth permissions and how to set up BLE on the target device.
Jump ahead:
react-native-ble-managerenableBluetooth() methodstart() methodstartScan() methodgetConnectedPeripherals() methodgetBondedPeripherals() methodBleManagerYou can check out the full project code on GitHub or in the code blocks at the end of this tutorial. Otherwise, let’s start with an overview of what BLE is.
Bluetooth has been a useful technology standard for file sharing, as well as an upgrade from the days of infrared. This technology allows us to connect seamlessly to these devices without using unnecessary cables. It is also cost-effective as it is relatively cheap to implement.
Many devices today have Bluetooth built-in, including mobile devices, laptops, headsets, cars, speakers, heart rate monitors, and so on. These devices can use Bluetooth for things like file sharing, music sharing, or connecting to external speakers, cars, and other Bluetooth-compatible devices.
However, one of the many demerits of Bluetooth is that it drains the battery life of your device, particularly if it remains turned on. Bluetooth Low Energy (BLE) is a version of Bluetooth that was designed to fix this problem.
BLE is based on Bluetooth and offers many of the same features, but uses less energy or power. While it’s not ideal for transferring large files and isn’t as fast as Bluetooth Classic, it is particularly useful for devices that depend on long battery life rather than being connected to power continuously.
BLE is designed specifically for short-range connections and communications, and it helps preserve device battery life. This type of connection is common in the health, fitness, and security industries.
Before we begin, you should have these installed on your local computer:
No matter which version of npm or Node you use, everything we do should still work fine in your project.
react-native-ble-managerFor this tutorial, we will be using the react-native-ble-manager and a smartwatch. To install, use either of the code commands below:
/* npm */
npm i --save react-native-ble-manager

/* yarn */
yarn add react-native-ble-manager
Next, go into your AndroidManifest.xml file and add the following configuration. This is to allow some permissions that we will be looking at shortly:
/* android/app/src/main/AndroidManifest.xml */

<manifest xmlns:android="http://schemas.android.com/apk/res/android"
  package="com.blemanager"> // replace package name with yours

/* add the permissions below before the aplication tag */
  <uses-permission android:name="android.permission.INTERNET" />
  <uses-permission android:name="android.permission.BLUETOOTH" />
  <uses-permission android:name="android.permission.BLUETOOTH_CONNECT" />
  <uses-permission android:name="android.permission.BLUETOOTH_ADMIN" />
  <uses-permission android:name="android.permission.ACCESS_COARSE_LOCATION" />

<application>
      ......
</application>
</manifest>
The permissions we added above allow our application to connect to our phone’s location, scan for nearby BLE devices, and connect to them. Location and Bluetooth permissions are runtime permissions, so we request these permissions at runtime along with declaring them in our manifest.
Note that you should replace the package name with the name of the React Native package you’re using where the code comment indicates above.
Next, run and build your application to sync your app with the newly added permissions:
/* To start or run your app */
npm start

/* Concurrently, open a new terminal and build your app */
npx react-native run-android
To use the react-native-ble-manager package, we will be importing the following modules:
import {
  Platform,
  NativeModules,
  useColorScheme,
  NativeEventEmitter,
  PermissionsAndroid,
} from 'react-native';
import BleManager from 'react-native-ble-manager';
import {Colors} from 'react-native/Libraries/NewAppScreen';
Let us go over what the modules above do.
The native Platform allows us to check the OS version of our device or devices and perform relevant operations dependent on the OS.
With NativeModules, we can access a native platform API — either for Android or iOS — that is not available to us by default. We can then perform functions based on that platform.
The useColorScheme Hook allows us to check the current theme the user prefers — either dark or light mode — and then style the application based on the returned value.
The NativeEventEmitter module allows us to receive or listen to events. It works like the web addEventListener where you invoke a function based on a particular event.
The PermissionsAndroid API allows us access to Android’s permission model. As long as the permission is added in the AndroidManifest.xml file, this API can grant such permissions. However, certain permissions that can be seen as harmful and dangerous will prompt the user to accept them before they can be granted.
The Colors API lets us style our application by giving us access to colors. We can use this together with the useColorScheme Hook for a better styling guide.
Now that we have seen and understood the modules and native APIs we will be using, let us now go ahead with building the BLE manager for our React Native application.
Copy the code below into your App.js file:
/* App.js */

import React, {useState, useEffect} from 'react';
import {
  Text,
  View,
  Platform,
  StatusBar,
  ScrollView,
  StyleSheet,
  Dimensions,
  SafeAreaView,
  NativeModules,
  useColorScheme,
  TouchableOpacity,
  NativeEventEmitter,
  PermissionsAndroid,
} from 'react-native';
import BleManager from 'react-native-ble-manager';
import {Colors} from 'react-native/Libraries/NewAppScreen';

const App = () => {
  const isDarkMode = useColorScheme() === 'dark';
  const backgroundStyle = {
    backgroundColor: isDarkMode ? Colors.darker : Colors.lighter,
  };
  return (
    <SafeAreaView style={[backgroundStyle, styles.mainBody]}>
      <StatusBar
        barStyle={isDarkMode ? 'light-content' : 'dark-content'}
        backgroundColor={backgroundStyle.backgroundColor}
      />
      <ScrollView
        style={backgroundStyle}
        contentContainerStyle={styles.mainBody}
        contentInsetAdjustmentBehavior="automatic">
        <View
          style={{
            backgroundColor: isDarkMode ? Colors.darker : Colors.lighter,
            marginBottom: 40,
          }}>
          <View>
            <Text
              style={{
                fontSize: 30,
                textAlign: 'center',
                color: isDarkMode ? Colors.white : Colors.black,
              }}>
              React Native BLE Manager Tutorial
            </Text>
          </View>
          <TouchableOpacity activeOpacity={0.5} style={styles.buttonStyle}>
            <Text style={styles.buttonTextStyle}>Scan Bluetooth Devices </Text>
          </TouchableOpacity>
        </View>
      </ScrollView>
    </SafeAreaView>
  );
};
const windowHeight = Dimensions.get('window').height;
const styles = StyleSheet.create({
  mainBody: {
    flex: 1,
    justifyContent: 'center',
    height: windowHeight,
  },
  buttonStyle: {
    backgroundColor: '#307ecc',
    borderWidth: 0,
    color: '#FFFFFF',
    borderColor: '#307ecc',
    height: 40,
    alignItems: 'center',
    borderRadius: 30,
    marginLeft: 35,
    marginRight: 35,
    marginTop: 15,
  },
  buttonTextStyle: {
    color: '#FFFFFF',
    paddingVertical: 10,
    fontSize: 16,
  },
});
export default App;
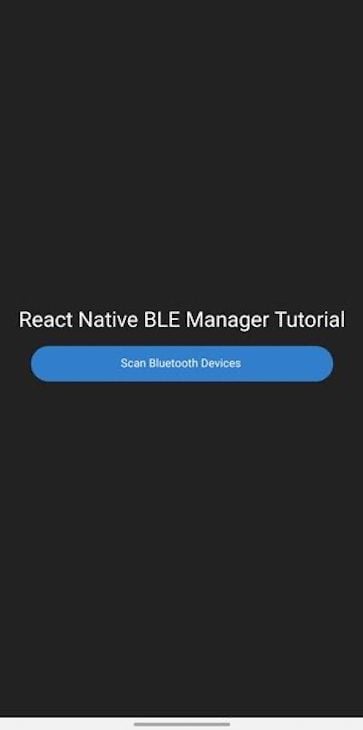
In the above code, we have configured the relevant modules and added some text and a button. When we click the button, we want to scan for nearby Bluetooth devices.
We are using the useColorScheme Hook to check for the current theme and then assign the color we want for our text and button using the Colors API:
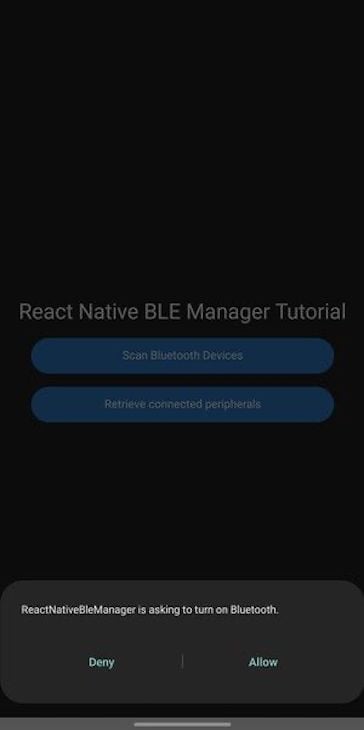
enableBluetooth() methodBefore using react-native-ble-manager, you first have to make sure your Bluetooth is turned on, and then initialize the BleManager. You can either turn on your Bluetooth from your device menu or through the application.
react-native-ble-manager has a method called enableBluetooth() that gives you access to the device’s Bluetooth and returns a promise.
Note that all the methods in react-native-ble-manager return a promise.
If your phone’s Bluetooth is not turned on, the application will prompt you to grant it access to turn your Bluetooth on:
Also, we have to grant our application access to the phone’s location to enable us to perform our scan:
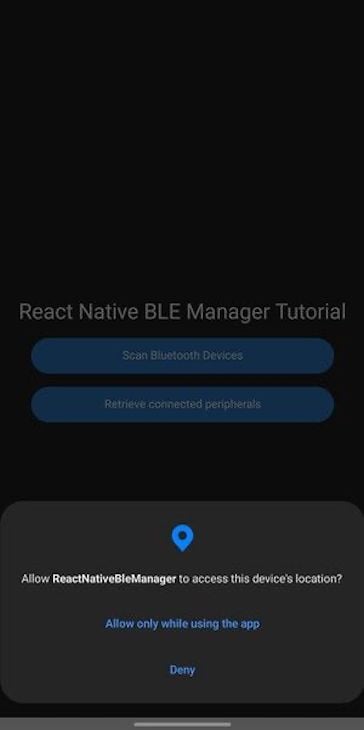
Also, make sure your location is turned on. Most times, your location will not be turned on with just the permission granted, so you have to turn it on yourself. This is because when the location is not turned on, we won’t be able to locate any Bluetooth devices.
Take a look at the code we used to grant these permissions below:
/* App.js */

useEffect(() => {
    // turn on bluetooth if it is not on
    BleManager.enableBluetooth().then(() => {
      console.log('Bluetooth is turned on!');
    });

      if (Platform.OS === 'android' && Platform.Version >= 23) {
      PermissionsAndroid.check(
        PermissionsAndroid.PERMISSIONS.ACCESS_FINE_LOCATION,
      ).then(result => {
        if (result) {
          console.log('Permission is OK');
        } else {
          PermissionsAndroid.request(
            PermissionsAndroid.PERMISSIONS.ACCESS_FINE_LOCATION,
          ).then(result => {
            if (result) {
              console.log('User accept');
            } else {
              console.log('User refuse');
            }
          });
        }
      });
    }

  }, []);
start() methodBefore we can begin scanning for nearby BLE devices, we will have to first start our react-native-ble-manager package. BleManager provides us with a start() method that allows us to turn our package on.
Inside your useEffect Hook, add the following code block so that when our application loads, the package will be turned on:
/* App.js */

  useEffect(() => {
    // start bluetooth manager
    BleManager.start({showAlert: false}).then(() => {
      console.log('BleManager initialized');
    });
  }, []);
If react-native-ble-manager starts successfully, it logs a message in your console telling you that BleManager is initialized.
startScan() methodNext, we will begin scanning for BLE devices. Make sure your smartwatch or any BLE device is on and nearby. Create a startScan function and add it to your onPress button:
/* App.js */

const BleManagerModule = NativeModules.BleManager;
const BleManagerEmitter = new NativeEventEmitter(BleManagerModule);

const App = () => {
  const [isScanning, setIsScanning] = useState(false);

  useEffect(() => {
       let stopListener = BleManagerEmitter.addListener(
      'BleManagerStopScan',
      () => {
        setIsScanning(false);
        console.log('Scan is stopped');
      },
    );
  }, []);

  const startScan = () => {
    if (!isScanning) {
      BleManager.scan([], 5, true)
        .then(() => {
          console.log('Scanning...');
          setIsScanning(true);
        })
        .catch(error => {
          console.error(error);
        });
    }
  };

return (
<SafeAreaView>
     ......
     <TouchableOpacity
            activeOpacity={0.5}
            style={styles.buttonStyle}
            onPress={startScan}>
            <Text style={styles.buttonTextStyle}>
              {isScanning ? 'Scanning...' : 'Scan Bluetooth Devices'}
            </Text>
          </TouchableOpacity>
</SafeAreaView>
    )
}
We used the NativeEventEmitter to listen to react-native-ble-manager events like stopping scans, disconnecting, and so on. We have a state to check if scanning has started or not.
Next, in our startScan function, we are scanning for devices only if the isScanning state is false. This is because when it is true, it simply means that our BleManager is still scanning.
BleManager.scan takes three parameters:
serviceUUIDs is an array. It includes the UUID of the service to look for. We are leaving it empty because we are searching for all nearby devices, not a particular deviceseconds is the time limit we want our search to run forallowDuplicates lets us allow the scanner to find duplicates. It only works for iOS devicesgetConnectedPeripherals() methodgetConnectedPeripherals() is a react-native-ble-manager method that allows us to get already-connected devices.
If you open up your Bluetooth section on your mobile devices, you would observe that already-connected devices are shown even before you search for new devices. We can achieve that using the getConnectedPeripherals method.
After we start our BleManager package, we want to get the list of these connected devices before making any new searches.
Let’s see how to do that below:
/* App.js */

 const peripherals = new Map()
 const [connectedDevices, setConnectedDevices] = useState([]);

  const handleGetConnectedDevices = () => {
    BleManager.getConnectedPeripherals([]).then(results => {
      if (results.length === 0) {
        console.log('No connected bluetooth devices');
      } else {
        for (let i = 0; i < results.length; i++) {
          let peripheral = results[i];
          peripheral.connected = true;
          peripherals.set(peripheral.id, peripheral);
          setConnectedDevices(Array.from(peripherals.values()));
        }
      }
    });
  };

  useEffect(() => {
    BleManager.start({showAlert: false}).then(() => {
      console.log('BleManager initialized');
      handleGetConnectedDevices();
    });
  }, []);
We are creating an empty object using the new Map() method and assigning it to a variable called peripherals. The object remembers the original insertion order of the keys and allows us to set our scanned BLE devices.
After we have scanned and retrieved both connected devices, we will then map through the array of peripherals and display them:
/* App.js */

  /* render list of bluetooth devices */
    const RenderItem = ({peripheral}) => {
    const {name, rssi, connected} = peripheral;
    return (
      <>
        {name && (
          <View
            style={{
              flexDirection: 'row',
              justifyContent: 'space-between',
              marginBottom: 10,
            }}>
            <View style={styles.deviceItem}>
              <Text style={styles.deviceName}>{name}</Text>
              <Text style={styles.deviceInfo}>RSSI: {rssi}</Text>
            </View>
            <TouchableOpacity
              onPress={() =>
                connected
                  ? disconnectFromPeripheral(peripheral)
                  : connectToPeripheral(peripheral)
              }
              style={styles.deviceButton}>
              <Text
                style={[
                  styles.scanButtonText,
                  {fontWeight: 'bold', fontSize: 16},
                ]}>
                {connected ? 'Disconnect' : 'Connect'}
              </Text>
            </TouchableOpacity>
          </View>
        )}
      </>
    );
  };

return (
<SafeAreaView>
...
      {/* list of scanned bluetooth devices */}
          {connectedDevices.length > 0 ? (
          <FlatList
            data={connectedDevices}
            renderItem={({item}) => <RenderItem peripheral={item} />}
            keyExtractor={item => item.id}
          />
        ) : (
          <Text style={styles.noDevicesText}>No connected devices</Text>
        )}
</SafeAreaView>
)
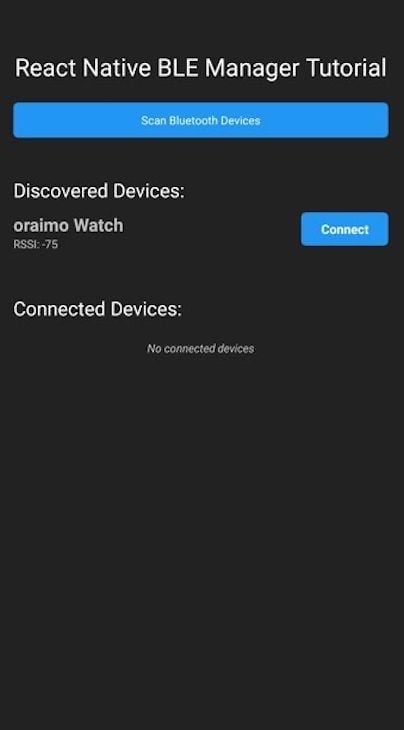
Below is an example of a newly discovered nearby BLE device, or peripheral, being displayed:
getBondedPeripherals() methodThe getBondedPeripherals() method works exactly like the getConnectedPeripherals method. The difference is that it gets devices that have been bonded — or paired — with your device. When this method is called, it only returns paired devices:
/* App.js */

const peripherals = new Map()
 const [connectedDevices, setConnectedDevices] = useState([]);

  const handleGetConnectedDevices = () => {
    BleManager.getBondedPeripherals([]).then(results => {
      if (results.length === 0) {
        console.log('No connected bluetooth devices');
      } else {
        for (let i = 0; i < results.length; i++) {
          let peripheral = results[i];
          peripheral.connected = true;
          peripherals.set(peripheral.id, peripheral);
          setConnectedDevices(Array.from(peripherals.values()));
        }
      }
    });
  };

  useEffect(() => {
    BleManager.start({showAlert: false}).then(() => {
      console.log('BleManager initialized');
      handleGetConnectedDevices();
    });
  }, []);
It then asks for pairing permission from your phone to be connected:

When we click on the peripheral, we want to connect to it. To communicate with a peripheral, react-native-ble-manager has two methods:
connect() method allows us to connect with peripherals via their id without bonding with itcreateBond() method pairs with peripherals first before connecting with them via their id. Our device will ask for pairing permissions. If we accept, then we can connect with the peripheralFor this article, we will be using the second method because we want to pair or bond with the peripheral first before connecting.
We can achieve this as shown below:
/* App.js */

  // pair with device first before connecting to it
  const connectToPeripheral = peripheral => {
    BleManager.createBond(peripheral.id)
      .then(() => {
        peripheral.connected = true;
        peripherals.set(peripheral.id, peripheral);
        setConnectedDevices(Array.from(peripherals.values()));
        setDiscoveredDevices(Array.from(peripherals.values()));
        console.log('BLE device paired successfully');
      })
      .catch(() => {
        console.log('failed to bond');
      });
  };
To disconnect from the peripheral, react-native-ble-manager has two methods:
removeBond() method allows us to remove the pair bond we have established with the peripheral via their iddisconnect() method allows us to disconnect from peripherals via their idWe will use the removeBond() method as shown below:
/* App.js */
// disconnect from device
const disconnectFromPeripheral = peripheral => {
BleManager.removeBond(peripheral.id)
.then(() => {
peripheral.connected = false;
peripherals.set(peripheral.id, peripheral);
setConnectedDevices(Array.from(peripherals.values()));
setDiscoveredDevices(Array.from(peripherals.values()));
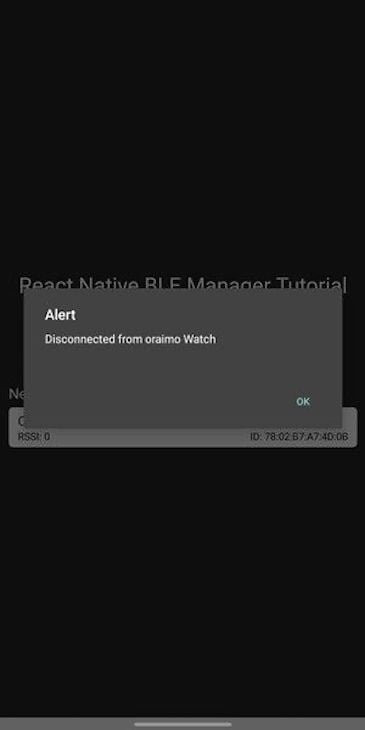
Alert.alert(`Disconnected from ${peripheral.name}`);
})
.catch(() => {
console.log('fail to remove the bond');
});
};
We will also add a pop-up alert that will inform us when we have disconnected from a device:
BleManagerBleManager event listeners listen to certain events and then let us perform or call functions for that event, similar to native event listeners on the web — like mouse events, key events, load events, and so on.
react-native-ble-manager has three events that it can listen to. These events include:
BleManagerStopScan: When our device’s scanning stops, this event is triggered. Inside the callback function, we can hence set our scanning state to falseBleManagerDiscoverPeripheral: When a nearby device is discovered, this event is triggered and it returns an object in its callback function containing the discovered Bluetooth devices. We can then add that object to our array of discovered devicesBleManagerConnectPeripheral: This event listener is triggered when we connect to a device. It also returns an object in its callback function. The object shows the details of the device we connected to, such as its id, name, uuid, etc.Finally, we don’t want to listen to these events when we move out of our page. Therefore, we remove the event listeners in our useEffect return function:
useEffect(() => {
 let stopDiscoverListener = BleManagerEmitter.addListener(
      'BleManagerDiscoverPeripheral',
      peripheral => {
        peripherals.set(peripheral.id, peripheral);
        setDiscoveredDevices(Array.from(peripherals.values()));
      },
    );

    let stopConnectListener = BleManagerEmitter.addListener(
      'BleManagerConnectPeripheral',
      peripheral => {
        console.log('BleManagerConnectPeripheral:', peripheral);
      },
    );

    let stopScanListener = BleManagerEmitter.addListener(
      'BleManagerStopScan',
      () => {
        setIsScanning(false);
        console.log('scan stopped');
      },
    );

    return () => {
      stopDiscoverListener.remove();
      stopConnectListener.remove();
      stopScanListener.remove();
    };
}, []);
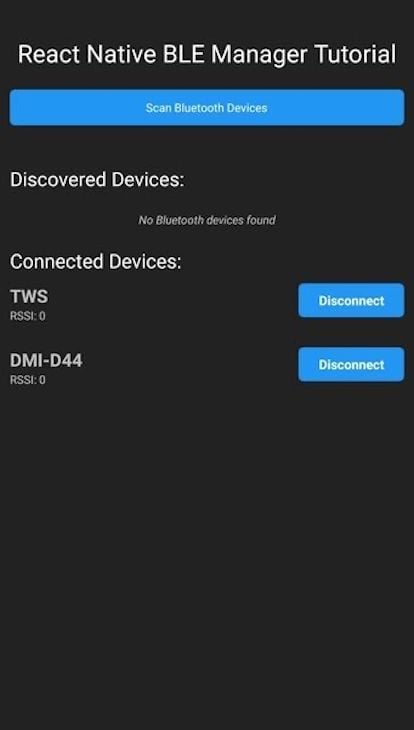
With the addition of the code above, your app should look like so:
You have now learned how to integrate BLE in a React Native application using react-native-ble-manager. Our full project code can be found on GitHub and is also available in the code blocks below. I have divided the code into three files to reduce ambiguity.
First is the App.js file:
/* App.js */

import React, {useState, useEffect} from 'react';
import {
  Text,
  Alert,
  View,
  FlatList,
  Platform,
  StatusBar,
  SafeAreaView,
  NativeModules,
  useColorScheme,
  TouchableOpacity,
  NativeEventEmitter,
  PermissionsAndroid,
} from 'react-native';
import BleManager from 'react-native-ble-manager';
import {Colors} from 'react-native/Libraries/NewAppScreen';
import {DeviceList} from './src/DeviceList';
import {styles} from './src/styles/styles';

const BleManagerModule = NativeModules.BleManager;
const BleManagerEmitter = new NativeEventEmitter(BleManagerModule);

const App = () => {
  const peripherals = new Map();
  const [isScanning, setIsScanning] = useState(false);
  const [connectedDevices, setConnectedDevices] = useState([]);
  const [discoveredDevices, setDiscoveredDevices] = useState([]);
  const handleGetConnectedDevices = () => {
    BleManager.getBondedPeripherals([]).then(results => {
      for (let i = 0; i < results.length; i++) {
        let peripheral = results[i];
        peripheral.connected = true;
        peripherals.set(peripheral.id, peripheral);
        setConnectedDevices(Array.from(peripherals.values()));
      }
    });
  };
  useEffect(() => {
    BleManager.enableBluetooth().then(() => {
      console.log('Bluetooth is turned on!');
    });
    BleManager.start({showAlert: false}).then(() => {
      console.log('BleManager initialized');
      handleGetConnectedDevices();
    });
    let stopDiscoverListener = BleManagerEmitter.addListener(
      'BleManagerDiscoverPeripheral',
      peripheral => {
        peripherals.set(peripheral.id, peripheral);
        setDiscoveredDevices(Array.from(peripherals.values()));
      },
    );
    let stopConnectListener = BleManagerEmitter.addListener(
      'BleManagerConnectPeripheral',
      peripheral => {
        console.log('BleManagerConnectPeripheral:', peripheral);
      },
    );
    let stopScanListener = BleManagerEmitter.addListener(
      'BleManagerStopScan',
      () => {
        setIsScanning(false);
        console.log('scan stopped');
      },
    );
    if (Platform.OS === 'android' && Platform.Version >= 23) {
      PermissionsAndroid.check(
        PermissionsAndroid.PERMISSIONS.ACCESS_FINE_LOCATION,
      ).then(result => {
        if (result) {
          console.log('Permission is OK');
        } else {
          PermissionsAndroid.request(
            PermissionsAndroid.PERMISSIONS.ACCESS_FINE_LOCATION,
          ).then(result => {
            if (result) {
              console.log('User accepted');
            } else {
              console.log('User refused');
            }
          });
        }
      });
    }
    return () => {
      stopDiscoverListener.remove();
      stopConnectListener.remove();
      stopScanListener.remove();
    };
  }, []);
  const startScan = () => {
    if (!isScanning) {
      BleManager.scan([], 5, true)
        .then(() => {
          console.log('Scanning...');
          setIsScanning(true);
        })
        .catch(error => {
          console.error(error);
        });
    }
  };
  // pair with device first before connecting to it
  const connectToPeripheral = peripheral => {
    BleManager.createBond(peripheral.id)
      .then(() => {
        peripheral.connected = true;
        peripherals.set(peripheral.id, peripheral);
        setConnectedDevices(Array.from(peripherals.values()));
        setDiscoveredDevices(Array.from(peripherals.values()));
        console.log('BLE device paired successfully');
      })
      .catch(() => {
        console.log('failed to bond');
      });
  };
  // disconnect from device
  const disconnectFromPeripheral = peripheral => {
    BleManager.removeBond(peripheral.id)
      .then(() => {
        peripheral.connected = false;
        peripherals.set(peripheral.id, peripheral);
        setConnectedDevices(Array.from(peripherals.values()));
        setDiscoveredDevices(Array.from(peripherals.values()));
        Alert.alert(`Disconnected from ${peripheral.name}`);
      })
      .catch(() => {
        console.log('fail to remove the bond');
      });
  };
  const isDarkMode = useColorScheme() === 'dark';
  const backgroundStyle = {
    backgroundColor: isDarkMode ? Colors.darker : Colors.lighter,
  };
  // render list of bluetooth devices
  return (
    <SafeAreaView style={[backgroundStyle, styles.container]}>
      <StatusBar
        barStyle={isDarkMode ? 'light-content' : 'dark-content'}
        backgroundColor={backgroundStyle.backgroundColor}
      />
      <View style={{pdadingHorizontal: 20}}>
        <Text
          style={[
            styles.title,
            {color: isDarkMode ? Colors.white : Colors.black},
          ]}>
          React Native BLE Manager Tutorial
        </Text>
        <TouchableOpacity
          activeOpacity={0.5}
          style={styles.scanButton}
          onPress={startScan}>
          <Text style={styles.scanButtonText}>
            {isScanning ? 'Scanning...' : 'Scan Bluetooth Devices'}
          </Text>
        </TouchableOpacity>
        <Text
          style={[
            styles.subtitle,
            {color: isDarkMode ? Colors.white : Colors.black},
          ]}>
          Discovered Devices:
        </Text>
        {discoveredDevices.length > 0 ? (
          <FlatList
            data={discoveredDevices}
            renderItem={({item}) => (
              <DeviceList
                peripheral={item}
                connect={connectToPeripheral}
                disconnect={disconnectFromPeripheral}
              />
            )}
            keyExtractor={item => item.id}
          />
        ) : (
          <Text style={styles.noDevicesText}>No Bluetooth devices found</Text>
        )}
        <Text
          style={[
            styles.subtitle,
            {color: isDarkMode ? Colors.white : Colors.black},
          ]}>
          Connected Devices:
        </Text>
        {connectedDevices.length > 0 ? (
          <FlatList
            data={connectedDevices}
            renderItem={({item}) => (
              <DeviceList
                peripheral={item}
                connect={connectToPeripheral}
                disconnect={disconnectFromPeripheral}
              />
            )}
            keyExtractor={item => item.id}
          />
        ) : (
          <Text style={styles.noDevicesText}>No connected devices</Text>
        )}
      </View>
    </SafeAreaView>
  );
};
export default App;
Next is the src/DeviceList.jsx file:
/* src/DeviceList.jsx */

import {View, Text, TouchableOpacity} from 'react-native';
import React from 'react';
import {styles} from './styles/styles';

 const DeviceList = ({peripheral, connect, disconnect}) => {
  const {name, rssi, connected} = peripheral;
  return (
    <>
      {name && (
        <View style={styles.deviceContainer}>
          <View style={styles.deviceItem}>
            <Text style={styles.deviceName}>{name}</Text>
            <Text style={styles.deviceInfo}>RSSI: {rssi}</Text>
          </View>
          <TouchableOpacity
            onPress={() =>
              connected ? disconnect(peripheral) : connect(peripheral)
            }
            style={styles.deviceButton}>
            <Text
              style={[
                styles.scanButtonText,
                {fontWeight: 'bold', fontSize: 16},
              ]}>
              {connected ? 'Disconnect' : 'Connect'}
            </Text>
          </TouchableOpacity>
        </View>
      )}
    </>
  );
};
Finally, the third file is named src/styles/styles.jsx and should contain the following code:
/* src/styles/styles.jsx */

import {StyleSheet, Dimensions} from 'react-native';

const windowHeight = Dimensions.get('window').height;
export const styles = StyleSheet.create({
  container: {
    flex: 1,
    height: windowHeight,
    paddingHorizontal: 10,
  },
  scrollContainer: {
    padding: 16,
  },
  title: {
    fontSize: 30,
    textAlign: 'center',
    marginBottom: 20,
    marginTop: 40,
  },
  subtitle: {
    fontSize: 24,
    marginBottom: 10,
    marginTop: 20,
  },
  scanButton: {
    backgroundColor: '#2196F3',
    padding: 10,
    borderRadius: 5,
    marginBottom: 20,
  },
  scanButtonText: {
    color: 'white',
    textAlign: 'center',
  },
  noDevicesText: {
    textAlign: 'center',
    marginTop: 10,
    fontStyle: 'italic',
  },
  deviceContainer: {
    flexDirection: 'row',
    justifyContent: 'space-between',
    marginBottom: 10,
  },
  deviceItem: {
    marginBottom: 10,
  },
  deviceName: {
    fontSize: 22,
    fontWeight: 'bold',
  },
  deviceInfo: {
    fontSize: 14,
  },
  deviceButton: {
    backgroundColor: '#2196F3',
    padding: 8,
    borderRadius: 5,
    marginBottom: 20,
    paddingHorizontal: 20,
  },
});
And that’s a wrap!
In this tutorial, we learned how to enable and scan for Bluetooth Low Energy devices within our React Native application. We also saw how to connect to the devices after we have discovered them. We have seen how to pair with devices using createBond() method.
react-native-ble-manager also has other methods you can explore that we didn’t cover in this tutorial. For example, isPeripheralConnected() allows us to check if our device is connected. If you followed the tutorial, you shouldn’t find it difficult to use other methods.
Be sure to comment below if you have any questions or run into any problems.

LogRocket is a React Native monitoring solution that helps you reproduce issues instantly, prioritize bugs, and understand performance in your React Native apps.
LogRocket also helps you increase conversion rates and product usage by showing you exactly how users are interacting with your app. LogRocket's product analytics features surface the reasons why users don't complete a particular flow or don't adopt a new feature.
Start proactively monitoring your React Native apps — try LogRocket for free.
Hey there, want to help make our blog better?
Join LogRocket’s Content Advisory Board. You’ll help inform the type of content we create and get access to exclusive meetups, social accreditation, and swag.
Sign up now
Explore how to effectively break down a monolithic application into microservices using feature flags and Flagsmith.

Native dialog and popover elements have their own well-defined roles in modern-day frontend web development. Dialog elements are known to […]

LlamaIndex provides tools for ingesting, processing, and implementing complex query workflows that combine data access with LLM prompting.

Learn four groups of DOM methods and their uses to create responsive and dynamic webpages. A helpful DOM reference table is also included.


19 Replies to "Using <code>react-native-ble-manager</code> in a mobile application"
I get the error:
null is not an object (evaluating ‘bleManager.scan’)
when I tap on “Scan Bluetooth Devices” button.
I’m running it in Expo Go in an Android simulator. Is it supposed to be run in Expo Go, either in a simulator or real device?
Hey Alan,
The issue is with Expo. Expo does not support the ble-manager package. You need to use a native project for it
When I press scan bluetooth devices, and it said, need android.permission.BLUETOOTH_SCAN permission for AttributionSource {uid= 10162, packageName = com.yourprojectname, attributionTag= null, token = android.os.BinderProxy@df42937, next= null}: GattServiceregisterScanner
any answer yet?
Yeah, I have answered the question.
Also, the article has been updated(will be published shortly after review) and should address any more of your questions. Thank you.
This error message means you don’t have android.permission.BLUETOOTH_SCAN permission that is required to scan for devices.
To resolve this issue, check if the permission is included in your AndroidManifest.xml file. By permission, I’m referring to the last line in the code below but make sure the others are included too:
using react native cli,getting .BLUETOOTH_SCAN permission error on android 12 ad for android 10, 11 no any bluetooth device found
Android 12 requires extra permissions like the ACCESS_FINE_LOCATION. Add this line to your AndroidManifest.xml file.
Follow the rest of the article and it should resolved
I am on android 13. I click the scan button and nothing returns. I know there are ble devices by using nRF Connect. Any idea why no devices would display after scanning?
Did you get any reply or solution yet?
This article has been updated and will be published asap.
Has the article been published yet? I am having issues with android 13 not looking like its scanning for devices. I am also having issues with android 12 (Yes, I added all bluetooth related uses permissions to the manifest file), where it returns a android.permissions.bluetooth_scan exception.
it not showing in discovered devices
With the introduction of Android 13, they have added yet another layer of permission you must get first before any of your Bluetooth permissions will work. you must add the NEARBY_WIFI_DEVICES as well now.
there are some function for turn off the bluetooth of the devices
I have another concern. I need to listen for notifications from the BLE device all the time and show an alert in the UI
How can I connect with rfid reader
Was having issues with this. Want to note that “ACCESS_FINE_LOCATION” permission is checked twice. If you change one of these to:
PermissionsAndroid.check(
PermissionsAndroid.PERMISSIONS.BLUETOOTH_SCAN,
)
It seems to work
iOS don’t have device after scan