
Firebase is one of the most popular authentication providers available today. Meanwhile, .NET stands out as a good choice for API development.

Combining these two technologies can result in a secure and high-performing web application. But to achieve this, we want complete implementation. That includes securing our APIs, enabling interactive login functionality, and being able to automatically retrieve access and refresh tokens whenever needed.
While many articles address parts of this process, few offer an end-to-end solution, which is what this guide aims to provide. We’ll explore how to integrate Firebase with an ASP.NET application, covering all the essential steps.
The Replay is a weekly newsletter for dev and engineering leaders.
Delivered once a week, it's your curated guide to the most important conversations around frontend dev, emerging AI tools, and the state of modern software.
Here’s what we need for this project to be a success:
When I began this project, my initial goal was to create authentication that relied solely on people logging in from their devices with genuine accounts. Most of the articles I came across focused on username/password logins, which initially seemed superfluous to me. However, here’s the thing — you need to use username/password logins in the early days of testing your app because there’s no other practical way to test logins. We’ll explore this in more detail later.
Configuring a system like this involves several moving parts. I’ll do my best to cover them in chronological order. This approach may require jumping back and forth between Firebase and the app configuration, but it ensures that we only implement components as they’re needed.
First things first, we need to set up a Firebase application. Head over to the Firebase console to create the new application. In my case, I’ll use the very uninspired project name “authtest.”
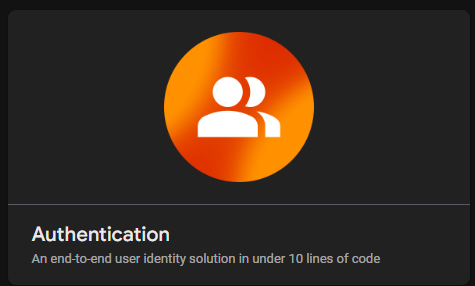
In the list, find the Authentication tile:
Then, set up a sign-in method:
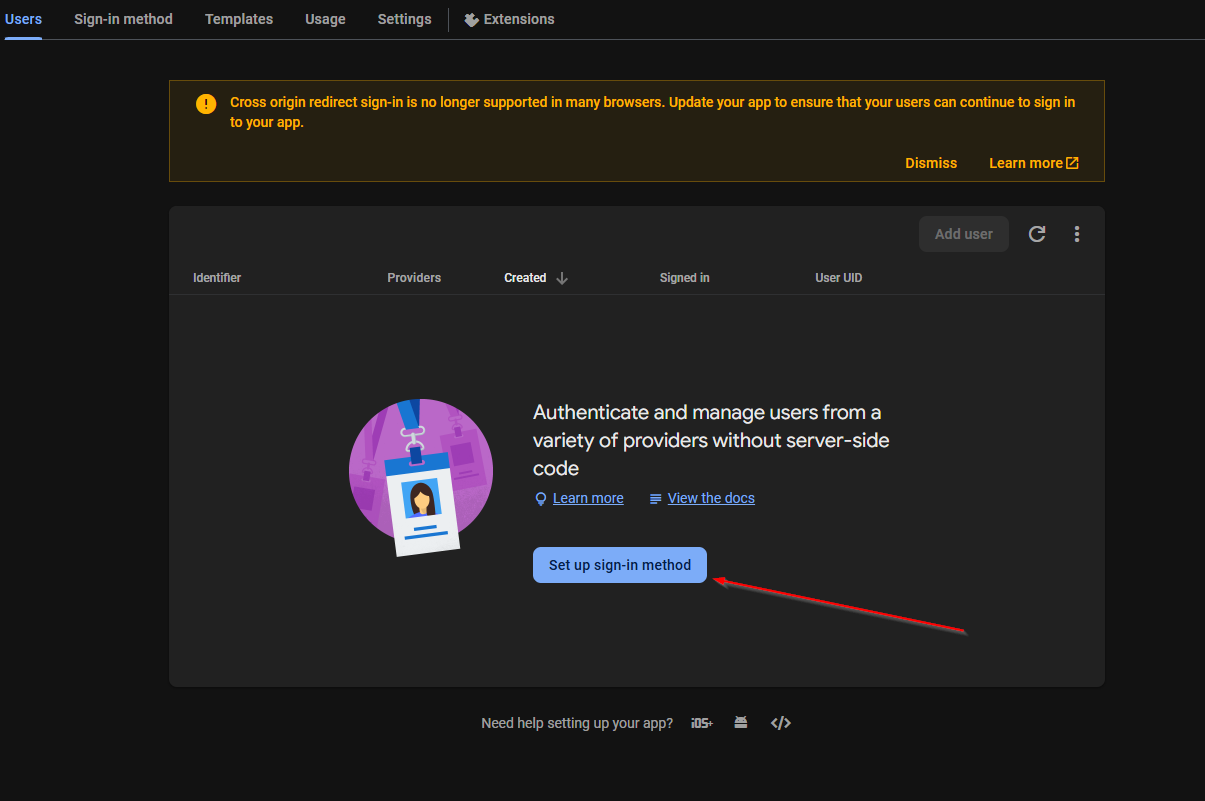
In this case, we’ll configure email/password and Google authentication. Unsurprisingly, Google authentication is one of the easiest authentication methods to set up, so it makes sense to use it out of the gate. However, you may use other authentication providers as you see fit.
Before diving into the code, it’s helpful to understand what we’re aiming to achieve with this implementation. Firebase authentication, identity management, and OAuth2 are complex topics in and of themselves. Unfortunately, this complexity lends itself to authentication failures or unexpected behavior.
Firebase provides an authentication service so people can prove they are who they say they are. However, it’s important to note that this service does not include data storage or persistence for authentication actions. Firebase can store data, such as in the real-time database that it offers, but to me, it’s not a great choice for this kind of operation.
ASP.NET ships with its own identity offering. Typically, this is configured in an application to allow people to create new accounts and set passwords on the app they are currently using. In our case, we want our users to have a user account on our website (so we can receive their email, name, and other details), but we don’t want to carry out the authentication for them. Instead, we want Firebase to authenticate them, and then create an account for them on our website, essentially linking the two together.
In summary, Firebase will prove that our user owns the account they are logging in to, and then our app will make the appropriate decisions as to whether they can access parts of the app.
Create a standard Web API project without any authentication or any other bits. We’ll have to add a lot of this manually.
Then we’ll install the following NuGet packages, which provide the functionality required for Firebase authentication to work:
dotnet add package FirebaseAdmin
dotnet add package Microsoft.AspNetCore.Authentication.Cookies
dotnet add package Microsoft.AspNetCore.Authentication.JwtBearer
dotnet add package Microsoft.AspNetCore.Authentication.OAuth
dotnet add package Microsoft.AspNetCore.Identity.EntityFrameworkCore
dotnet add package Microsoft.AspNetCore.Identity.UI
dotnet add package Microsoft.AspNetCore.Identity
dotnet add package Microsoft.EntityFrameworkCore.Design
dotnet add package Swashbuckle.AspNetCore
dotnet add package System.IdentityModel.Tokens.Jwt
As cited at the outset, we want each user in our program to receive an IdentityUser entry in our app’s database. To achieve this, we can tell the identity system to create a modified entity that contains our relevant Firebase details.
Within Models/Authentication/ApplicationUser.cs, add the following:
public class ApplicationUser : IdentityUser
{
    public string FirebaseUserId { get; set; }
    public string Name { get; set; }
}
Program.csWhile I won’t paste the entire Program.cs here (it’s hundreds of lines long!), I’m going to cover the most relevant parts, and you can check out the GitHub repository if you want to see the whole thing.
To begin, we’d like to configure the database for our application. For ease of use, I’m going to use SQLite, but you can use whichever provider suits you:
builder.Services.AddDbContext<ApplicationDbContext>(options => options.UseSqlite("Data Source=testauth.db"));

builder.Services.AddDefaultIdentity<ApplicationUser>().AddEntityFrameworkStores<ApplicationDbContext>();
As you’re probably already aware, authentication exchanges usually involve the client receiving a JWT from the server. JWTs aren’t very exciting, they’re just an agreed-upon standard in JSON that contains data relating to the users’ authentication and identity.
The JWTs are trustworthy because they can be issued to a user and then trusted as authentic. The reason for this is that the JWTs are signed. If the contents don’t match the signature, the JWT has been tampered with, and the server should reject it.
So, on application startup, we need to fetch Google’s signing keys and trust them when the JWT check is taking place:
var client = new HttpClient();
var keys = client
    .GetStringAsync(
        "https://www.googleapis.com/robot/v1/metadata/x509/[email protected]")
    .Result;
var originalKeys = new JsonWebKeySet(keys).GetSigningKeys();
var additionalkeys = client
    .GetStringAsync(
        "https://www.googleapis.com/service_accounts/v1/jwk/[email protected]")
    .Result;
var morekeys = new JsonWebKeySet(additionalkeys).GetSigningKeys();
var totalkeys = originalKeys.Concat(morekeys);
There are two separate key sources that Google uses for its tokens. In my case, I retrieved the keys from both sources and stuck them together so that when the JWT token is validated, it passes certificate validation.
Next up, we need to configure our application to receive JWTs from Google and trust them as authentic. This occurs within our AddAuthentication call.
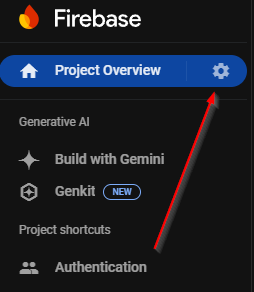
We’ll need our Project ID for this one. To retrieve this, hop back into our Firebase console, and click on the cog next to Project Overview:
Our Project ID should be listed here:
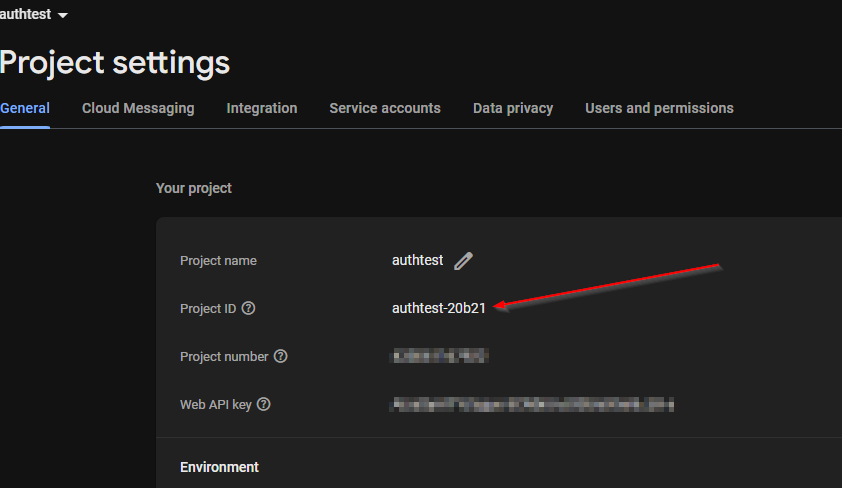
While you’re there, copy down the Web API key because we will need it later.
N.B., if you hover over the question mark next to Project ID, it will say that the ID is a convenience alias, or downplay the importance of it. This is a bit of a documentation bug because, without this project ID, nothing would work in your project.
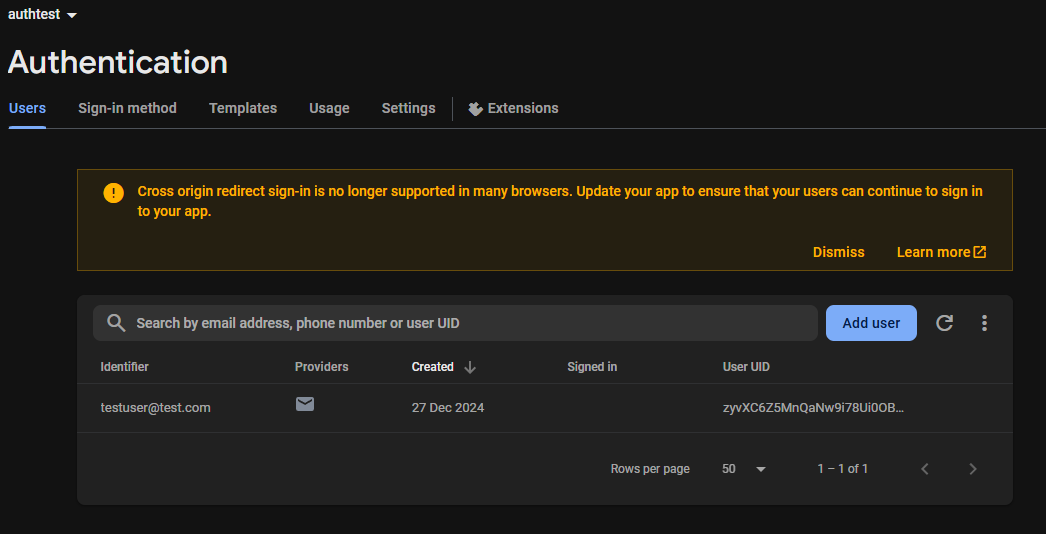
Also while we’re here, set up a new user for your app. It’s okay to use a nonexistent email, this is just to test username/password authentication:
Within our Program.cs, let’s configure our Project ID and accept tokens from Firebase:
var projectId = "{YOUR-PROJECT-ID-HERE}";

builder.Services.AddAuthentication(JwtBearerDefaults.AuthenticationScheme)
    .AddJwtBearer(options =>
    {
        options.IncludeErrorDetails = true;
        options.Authority = $"https://securetoken.google.com/{projectId}";
        options.TokenValidationParameters = new TokenValidationParameters
        {
            ValidateIssuer = true,
            ValidIssuer = $"https://securetoken.google.com/{projectId}",
            ValidateAudience = true,
            ValidAudience = projectId,
            ValidateLifetime = true,
            ValidateIssuerSigningKey = true,
            IssuerSigningKeys = totalkeys
        };
Now our authentication system will be able to validate JWTs that are issued by Firebase. But, when a user is validated, we also want to reference a built-in user account within our app. That way, users can store details or preferences in the app, and this will be correlated to a user identity in our app.
Each time a JWT is validated, we want to check if an entity exists in our database that correlates to the user who has authenticated. Bear in mind that if your app scales and becomes gigantic, incurring a database hit every time a token is validated will likely introduce some performance concerns. But for our small sample app, it’s an acceptable trade-off.
Above, where we referenced our options object, we want to do so again, to register against the OnTokenValidated event:
options.Events = new JwtBearerEvents
{
    OnTokenValidated = async context =>
    {
        // Receive the JWT token that firebase has provided
        var firebaseToken = context.SecurityToken as Microsoft.IdentityModel.JsonWebTokens.JsonWebToken;
        // Get the Firebase UID of this user
        var firebaseUid = firebaseToken?.Claims.FirstOrDefault(c => c.Type == "user_id")?.Value;
        if (!string.IsNullOrEmpty(firebaseUid))
        {
            // Use the Firebase UID to find or create the user in your Identity system
            var userManager = context.HttpContext.RequestServices
                .GetRequiredService<UserManager<ApplicationUser>>();

            var user = await userManager.FindByNameAsync(firebaseUid);

            if (user == null)
            {
                // Create a new ApplicationUser in your database if the user doesn't exist
                user = new ApplicationUser
                {
                    UserName = firebaseUid,
                    Email = firebaseToken.Claims.FirstOrDefault(c => c.Type == "email")?.Value,
                    FirebaseUserId = firebaseUid,
                    Name = firebaseToken.Claims.FirstOrDefault(c => c.Type == "name")?.Value ??
                           $"Planner {firebaseUid}",
                };
                await userManager.CreateAsync(user);
            }
        }
    }
};
Because this occurs each time the JWT is validated, we can be sure that the users’ accounts will be there after they have logged in.
We can set up authentication to our heart’s desire, but without an easy way to test it, what are we here for? You’re not going to manually craft login requests in cURL to see if the login function works, are you?
Fortunately, Swagger provides a configurable way to set up authentication schemes for our apps. We can tell Swagger to send our details to a specific endpoint and receive a token for use in authentication:
builder.Services.AddSwaggerGen(options =>
{
    options.AddSecurityDefinition(JwtBearerDefaults.AuthenticationScheme, new OpenApiSecurityScheme
    {
        Type = SecuritySchemeType.OAuth2,

        Flows = new OpenApiOAuthFlows
        {
            Password = new OpenApiOAuthFlow
            {
                TokenUrl = new Uri("/v1/auth", UriKind.Relative),
                Extensions = new Dictionary<string, IOpenApiExtension>
                {
                    { "returnSecureToken", new OpenApiBoolean(true) },
                },
            }
        }
    });

    options.AddSecurityRequirement(new OpenApiSecurityRequirement
    {
        {
            new OpenApiSecurityScheme
            {
                Reference = new OpenApiReference
                {
                    Type = ReferenceType.SecurityScheme,
                    Id = JwtBearerDefaults.AuthenticationScheme
                },
                Scheme = "oauth2",
                Name = JwtBearerDefaults.AuthenticationScheme,
                In = ParameterLocation.Header,
            },
            new List<string> { "openid", "email", "profile" }
        }
    });
});
Note that we reference a /v1/auth controller action here. This is the controller action that sends our credentials to Firebase and brings back the appropriate token for our user.
Swagger will submit details to this controller action, which will send our users’ details to Firebase, which will return the user’s token. We’ll need to use our Web API Key, which we noted earlier.
Essentially, we are exchanging the username and password for a JWT token:
[ApiController]
[Route("v1/[controller]")]
public class AuthController : Controller
{
    [HttpPost]
    public async Task<ActionResult> GetToken([FromForm] LoginInfo loginInfo)
    {
        string uri =
            "https://www.googleapis.com/identitytoolkit/v3/relyingparty/verifyPassword?key={WEB-API-KEY"};
        using (HttpClient client = new HttpClient())
        {
            FireBaseLoginInfo fireBaseLoginInfo = new FireBaseLoginInfo
            {
                Email = loginInfo.Username,
                Password = loginInfo.Password
            };
            var result = await client.PostAsJsonAsync(uri, fireBaseLoginInfo,
                new JsonSerializerOptions()
                    { WriteIndented = true, PropertyNamingPolicy = JsonNamingPolicy.CamelCase });

            var encoded = await result.Content.ReadFromJsonAsync<GoogleToken>();
            Token token = new Token
            {
                token_type = "Bearer",
                access_token = encoded.idToken,
                id_token = encoded.idToken,
                expires_in = int.Parse(encoded.expiresIn),
                refresh_token = encoded.refreshToken
            };
            return Ok(token);
        }
    }
}
We should also add a UserController to test our authentication:
[ApiController]
[Authorize]
[Route("[controller]/[action]")]
public class UserController
{
    private readonly IHttpContextAccessor _httpContextAccessor;
    private readonly UserManager<ApplicationUser> _userManager;

    public UserController(IHttpContextAccessor httpContextAccessor, UserManager<ApplicationUser> userManager)
    {
        _httpContextAccessor = httpContextAccessor;
        _userManager = userManager;
    }

    [HttpGet]
    public async Task<LoginDetail> GetAuthenticatedUserDetail()
    {
        var claimsPrincipal = _httpContextAccessor.HttpContext.User;
        var firebaseId = claimsPrincipal.Claims.First(x => x.Type == "user_id").Value;
        var email = claimsPrincipal.Claims.First(x => x.Type == ClaimTypes.Email).Value;

        return new()
        {
            FirebaseId = firebaseId,
            Email = claimsPrincipal.Claims.First(x => x.Type == ClaimTypes.Email).Value,
            AspNetIdentityId = _userManager.FindByEmailAsync(email).Result.Id,
            RespondedAt = DateTime.Now
        };
    }
}
Because we’ve configured our identity context, now would be a good time to create our first migration and set up our database so it’s available when the new user account is added.
Within the context of our project, run the following commands:
dotnet ef migrations add initial
dotnet ef database update
After this, our testauth.db should be created in the application root.
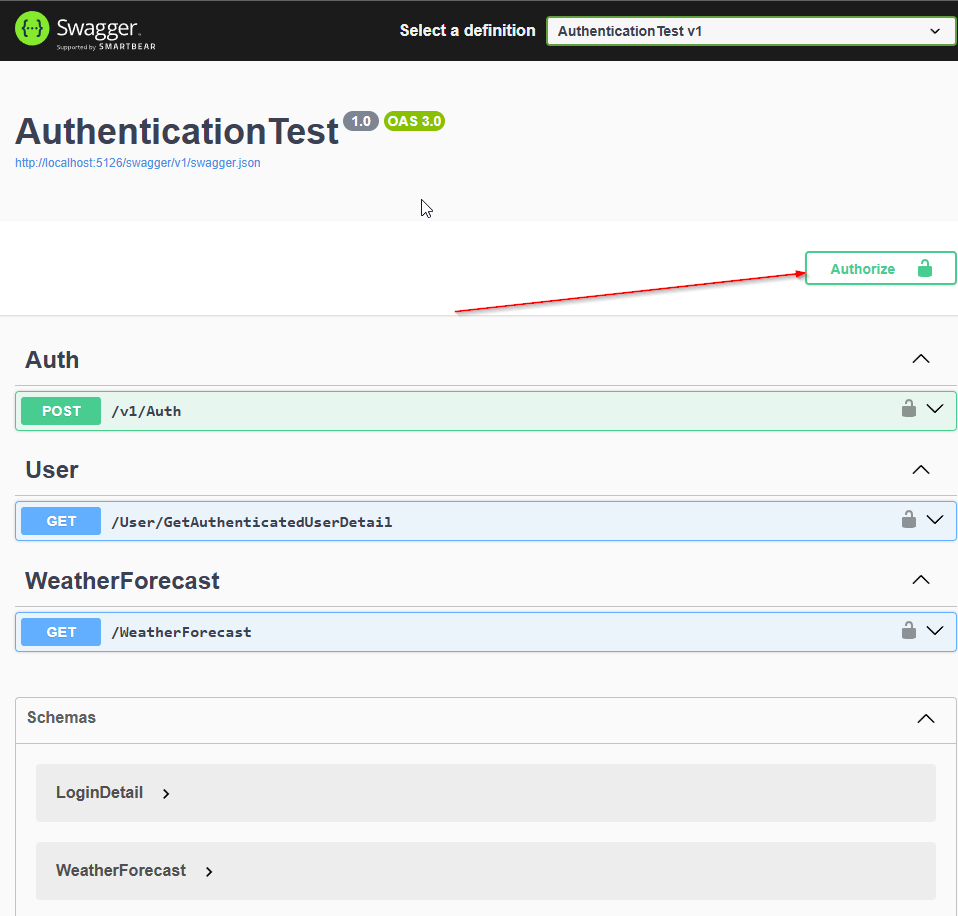
Now, it’s time to fire up our app! Go ahead and start the application. A browser should open and you should see the Swagger UI. Click Authorize:
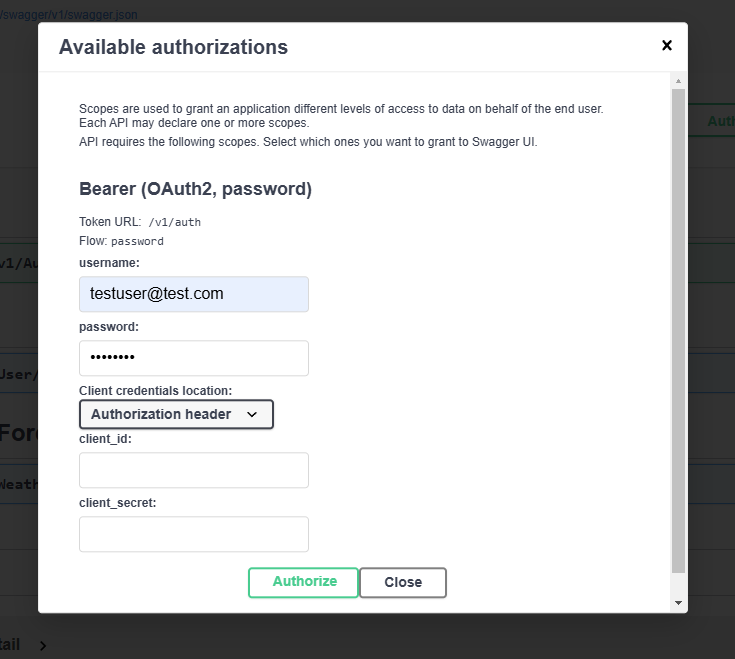
Then, log in with the details you have set up:
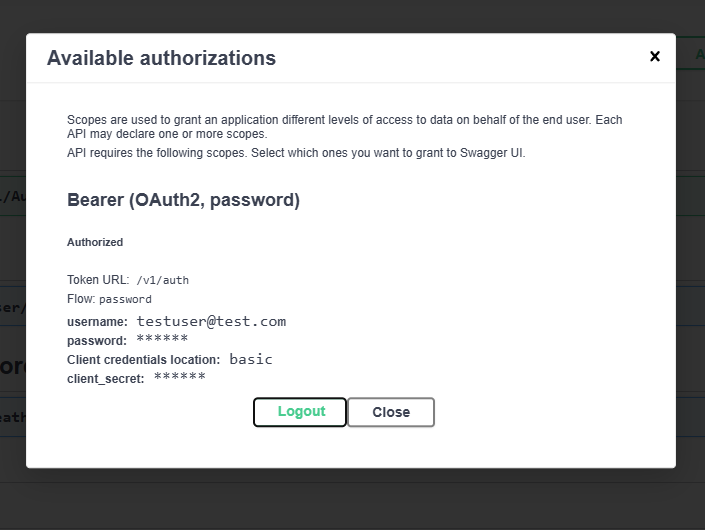
Afterward, you should be told that you are now authorized with OAuth2 🎉
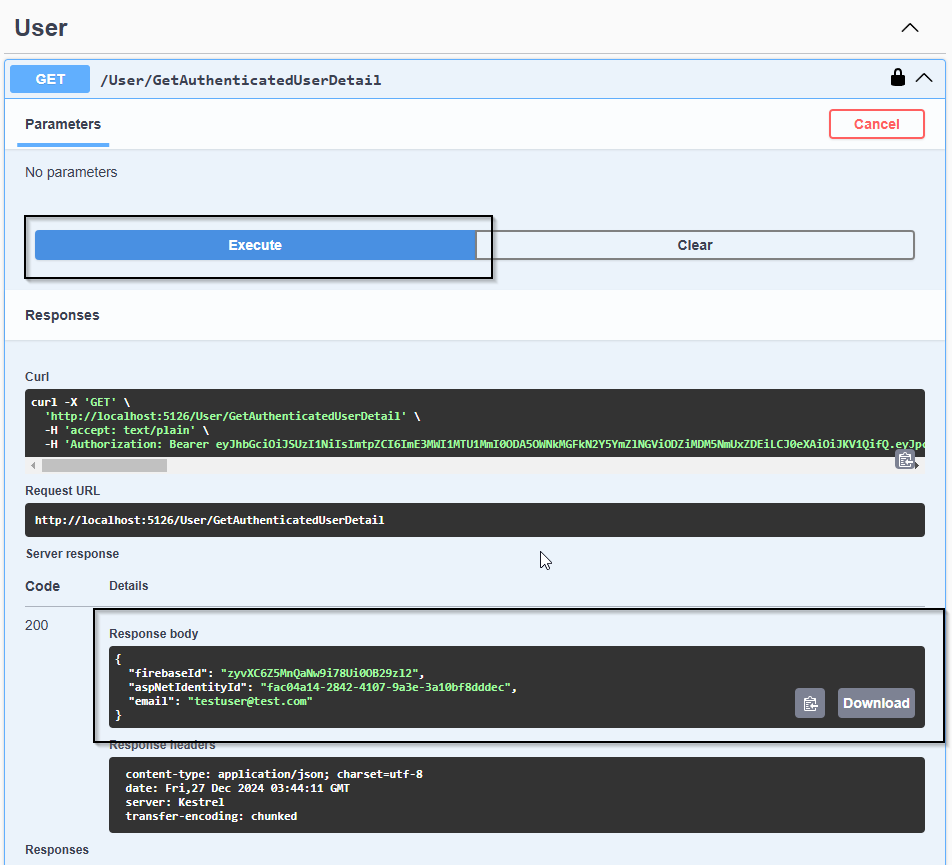
Now, if you execute the “GetAuthenticatedUserDetail” method, your authenticated API action should run successfully:
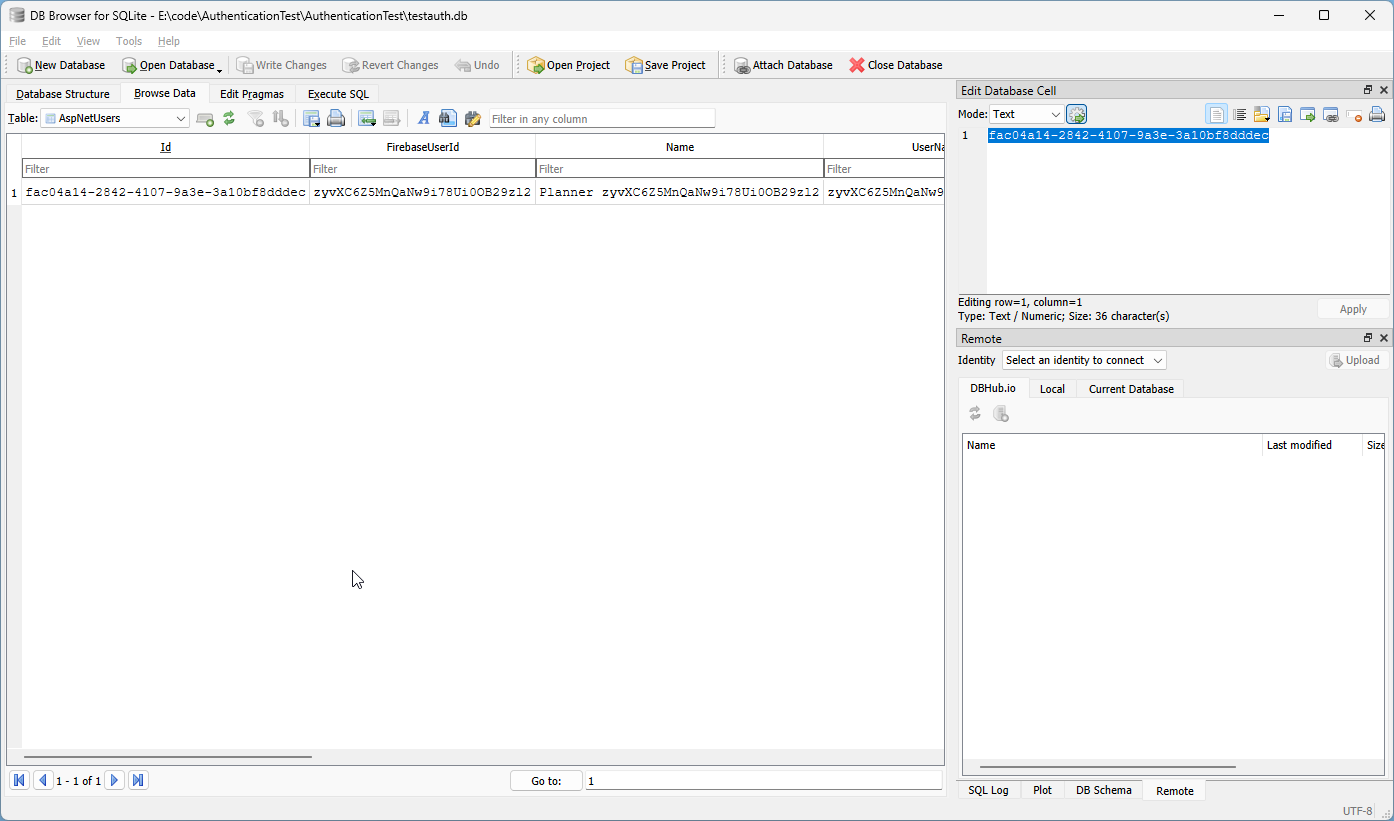
If you open the SQLite database that our app has created, you should be able to see the created user in the Users table:
Up to this point, we’ve been running our project in the Swagger documentation. Now it’s time to actually use it in a real app. In order to see how this would work in a client app, let’s set up an Angular app that uses this authentication. You can use any web frontend tool of your choice.
Start by setting up a new Angular app and installing the firebaseui-angular package. Keep in mind that this package requires some configuration, so be sure to follow the setup instructions carefully.
In the main.ts file where we register our app with Firebase, we’ll configure the package to connect to Firebase as follows:
import {ApplicationConfig, importProvidersFrom, provideZoneChangeDetection} from '@angular/core';
import {provideRouter} from '@angular/router';

import {routes} from './app.routes';
// import firebaseui from "firebaseui";
import {BrowserModule} from "@angular/platform-browser";
import {FormsModule} from "@angular/forms";
import {AngularFireAuthModule} from "@angular/fire/compat/auth";
import {AngularFireModule} from "@angular/fire/compat";
import {firebase, firebaseui, FirebaseUIModule} from 'firebaseui-angular';
import {provideHttpClient} from "@angular/common/http";

const firebaseConfig = {
  apiKey: "{{YOUR-API-KEY}}",
  authDomain: "{{YOUR-APP-ID}}.firebaseapp.com",
  projectId: "{{YOUR-APP-ID}}",
  storageBucket: "{{YOUR-APP-ID}}.firebasestorage.app",
  messagingSenderId: "***",
  appId: "***"
};

const firebaseUiAuthConfig: firebaseui.auth.Config = {
  signInFlow: 'popup',
  signInOptions: [
    firebase.auth.GoogleAuthProvider.PROVIDER_ID
  ],
  tosUrl: 'www.tos.com',
  privacyPolicyUrl: 'www.privacy.com',
  credentialHelper: firebaseui.auth.CredentialHelper.GOOGLE_YOLO
};

export const appConfig: ApplicationConfig = {
  providers: [
    provideZoneChangeDetection({eventCoalescing: true}),
    provideRouter(routes),
    provideHttpClient(),

    importProvidersFrom(BrowserModule,
      FormsModule,
      FirebaseUIModule.forRoot(firebaseUiAuthConfig),
      AngularFireModule.initializeApp(firebaseConfig),),
    AngularFireAuthModule,
  ],
};
Now it’s time to set up our login screen, authenticate, and use our protected resource.
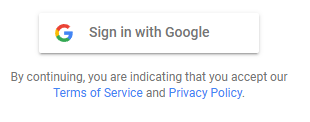
We’re going to prepare a very basic login screen for this app. Fortunately, this is easy to achieve using the firebaseui package. All we have to do is add a <firebase-ui> element on our page and our login options should appear:
Within our component initialization, we want to listen to the authentication state on the app. If a user has logged in, we want to store their ID token for use with our API:
ngOnInit(): void {
  this.user = this.firebase.authState;
  this.firebase.authState.subscribe(async x => {
    this.token = await x?.getIdToken()
  });
}
We also have a function that uses the protected resource, which stashes our token into the header and makes the call to the API. In response, it sets that data to the variable in the component:
async useProtectedResource() {
  const headers = new HttpHeaders({
    Authorization: `Bearer ${this.token}`
  });
  const response = await firstValueFrom(this.http.get<string>(this.apiUrl, {headers}));
  this.protectedResponseData = response;
}
Finally, we can update our app.component.html with the details we need to make this work. Basically, we’re just showing the value of these variables so we can see that the login has worked:
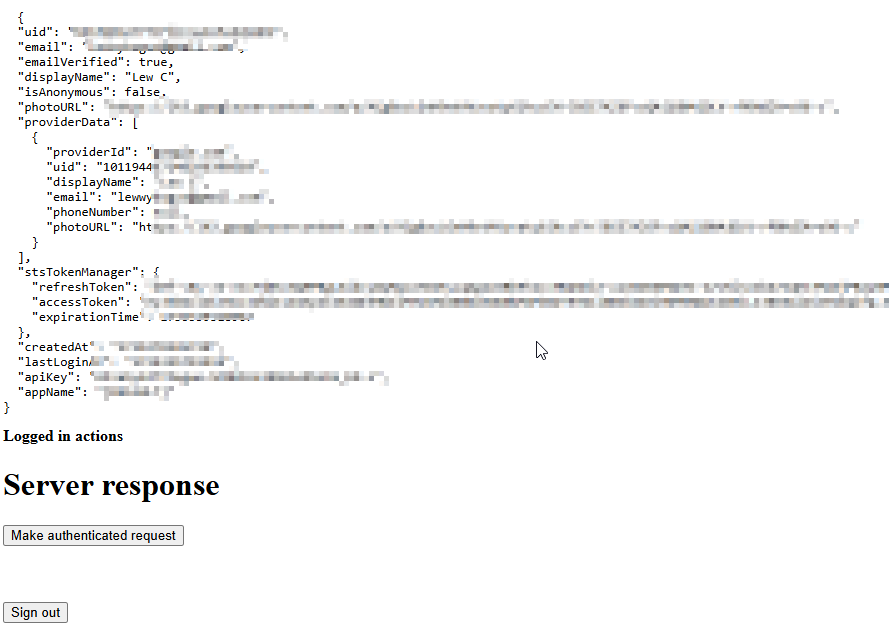
Now, if we click on Make authenticated request, our app will use the supplied bearer token to authenticate against our API:
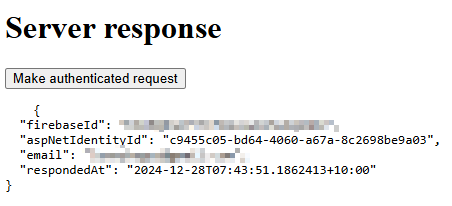
If we click the button again, the time will update. And that’s it, now our app uses our token to authenticate against the API!
For the sample code, check out the GitHub repository. And don’t forget to update the API key details in all of the relevant areas before using it!
This article provided an end-to-end guide on integrating Firebase authentication with an ASP.NET 8.0 application. We demonstrated how to secure APIs, configure JWT authentication, and set up the client side in a demo Angular frontend.
By following these steps, you should be able to create a seamless authentication system that enables secure and interactive API usage.

React Server Components and the Next.js App Router enable streaming and smaller client bundles, but only when used correctly. This article explores six common mistakes that block streaming, bloat hydration, and create stale UI in production.

Gil Fink (SparXis CEO) joins PodRocket to break down today’s most common web rendering patterns: SSR, CSR, static rednering, and islands/resumability.

@container scroll-state: Replace JS scroll listeners nowCSS @container scroll-state lets you build sticky headers, snapping carousels, and scroll indicators without JavaScript. Here’s how to replace scroll listeners with clean, declarative state queries.

Explore 10 Web APIs that replace common JavaScript libraries and reduce npm dependencies, bundle size, and performance overhead.
Hey there, want to help make our blog better?
Join LogRocket’s Content Advisory Board. You’ll help inform the type of content we create and get access to exclusive meetups, social accreditation, and swag.
Sign up now