In programming, a flag is a variable that causes a program to execute a path depending on its value.

Take a look at the example below:
if (flag === true) {
  // feature 1
} else {
  // feature 2
}
Flags are usually environment variables that are called when the server starts and used to do things like set the level of details in logs between development and production environments, establish the default language of an application, etc. To switch those variables, you’d need to make a change in a file or database and restart the server so the new settings are applied.
A feature flag is a variable that you can switch at any moment and the change will reflect in the program without the need to restart it.
Picture this: You just launched a new feature on your website — a button to change the background to a random color. You’ve tested and installed it and you can’t wait for your users to experience it.
After some time, a user interacts with the feature and finds that the text color is being changed instead of the background. Catastrophe strikes, and now you must revert the functionality until it’s fixed. This usually leads to an urgent restart to apply the code and remove the feature, followed by another one to apply the fix.
Ideally, a restart would only occur when new features or fixes are added, preferably without urgency. This is where feature flags come in handy. Feature flags enable you to disable faulty features on the fly, eliminating the step of reverting the functionality and restarting to remove it.
To show feature flags in action, we’ll use the aforementioned example: a website with a faulty button that is switching the text color instead of the background color.
src/
  |-public // folder with the content that we will feed to the browser
    |-js
      new-feature.js
    index.html
  package.json
  server.js // our Node.js server
package.json{
"name": "feature-flags-101",
"version": "1.0.0",
"description": "Setup of feature flags with unleash",
"main": "server.js",
"scripts": {
"start": "node server.js",
"server-debug": "nodemon --inspect server.js"
},
"author": "daspinola",
"license": "MIT",
"devDependencies": {
"nodemon": "2.0.4"
},
"dependencies": {
"express": "^4.17.1"
}
}
server.jsconst express = require('express')
const path = require('path')
const app = express()
app.use(express.static(path.join(__dirname, 'public')))
app.get('/', function(req, res) {
res.sendFile(path.join(__dirname, 'public/index.html'))
})
app.listen(7000, function () {
console.log(`Listening on port ${7000}!`)
})
public/index.html<html>
<head>
<title>Feature flags 101</title>
</head>
<body>
<div>
<span id="span-welcome-text">My awesome website has a new button!!!</span>
<button id="button-switch-background-color">Background Color</button>
</div>
<script src="/js/new-feature.js"></script>
</body>
</html>
public/js/new-featuredocument.addEventListener('DOMContentLoaded', init, false);
function init() {
const buttonSwitchColor = document.getElementById('button-switch-background-color')
buttonSwitchColor.addEventListener('click', () => {
const body = document.querySelector('body')
body.style.color = getRandomColor()
})
// Code from: https://stackoverflow.com/questions/1484506/random-color-generator
function getRandomColor() {
var letters = '0123456789ABCDEF'
var color = '#'
for (var i = 0; i < 6; i++) {
color += letters[Math.floor(Math.random() * 16)]
}
return color
}
}
In the package.json there is nodemon, so you can have the server perform a restart whenever you make any change and express to get a quick HTTP server setup, which we have in server.js.
index.html contains the website with the faulty button. new-feature.js is where the color-changing functionality is defined.
Now that we’ve built our faulty website, let’s see how the same buggy feature could’ve been introduced under the feature flag.
Unleash is a feature toggle system that enables you to create a UI where the flag can be switched on and off easily.
To set up Unleash, we need three things:
One way to have Postgres is to execute it with Docker.
docker run --name unleash-postgres -e POSTGRES_PASSWORD=pass -d -p 5432:5432 postgres
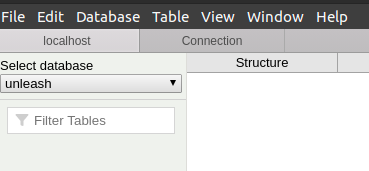
Once it’s running, you can connect it with Postbird and create the “unleash” database.
Now it’s time to install unleash-server by running npm i unleash-server and creating a new file in the project.
unleash-server.jsconst unleash = require('unleash-server');
unleash
.start({
databaseUrl: 'postgres://postgres:pass@localhost:5432/unleash',
port: 4242,
})
.then(unleash => {
console.log(
`Unleash started on http://localhost:${unleash.app.get('port')}`,
);
});
package.json{
"name": "feature-flags-101",
"version": "1.0.0",
"description": "Setup of feature flags with unleash",
"main": "server.js",
"scripts": {
"start": "node server.js",
"server-debug": "nodemon --inspect server.js",
"unleash-server": "node unleash-server.js"
},
"author": "daspinola",
"license": "MIT",
"devDependencies": {
"nodemon": "2.0.4"
},
"dependencies": {
"express": "^4.17.1",
"unleash-server": "^3.5.4"
}
}
By executing the command npm run unleash-server on the browser, on localhost:4242 there should now be a UI.
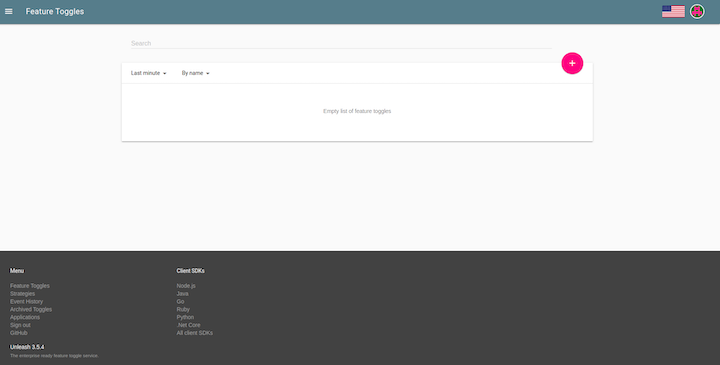
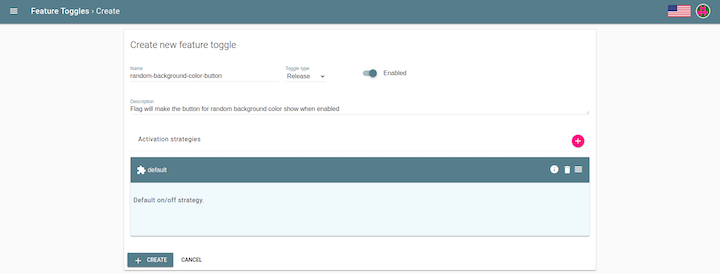
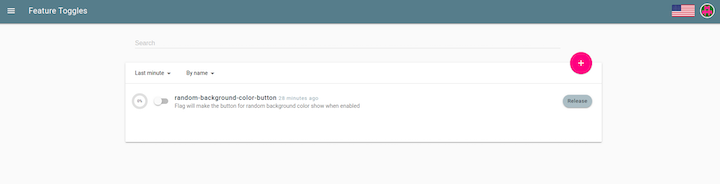
Now let’s create one for the feature we’re going to develop. For example:
With Postgres in place and unleash-server running, you can now connect to the server to check the status of the feature flag using npm install unleash-client and change the server like so:
server.jsconst express = require('express')
const path = require('path')
// The unleash client makes requests every 10 seconds or so for updates on the status of the flags so there is no need to restart the server if they change
const { initialize, isEnabled } = require('unleash-client');
const instance = initialize({
url: 'http://localhost:4242/api/',
appName: 'feature-flags',
instanceId: 'feature-flags-101',
});
const app = express()
app.use(express.static(path.join(__dirname, 'public')))
app.get('/', function(req, res) {
res.sendFile(path.join(__dirname, 'public/index.html'))
})
// This is the endpoint we're going to call in our front end to check if a flag is available or not
app.get('/feature-flag/:name?', function(req, res) {
const flagName = req.params.name
res.send({
flagName,
isEnabled: isEnabled(flagName)
})
})
// We add this way so our server only starts when the flags are available
instance.on('ready', () => {
app.listen(7000, function () {
console.log(`Listening on port ${7000}!`)
})
})
public/js/new-feature.jsdocument.addEventListener('DOMContentLoaded', init, false);
async function init() {
const body = document.querySelector('body')
const spanWelcomeText = document.getElementById('span-welcome-text')
const showNewButton = await fetch('/feature-flag/random-background-color-button')
.then(response => response.json())
if (showNewButton.isEnabled) {
const newButton = document.createElement('button')
newButton.id = 'button-switch-background-color'
newButton.innerHTML = 'Background Color'
newButton.addEventListener('click', () => {
body.style.color = getRandomColor()
})
body.appendChild(newButton)
spanWelcomeText.innerHTML = 'My awesome website has a new button!!!'
// Taken from the useful reply in: https://stackoverflow.com/questions/1484506/random-color-generator
function getRandomColor() {
var letters = '0123456789ABCDEF'
var color = '#'
for (var i = 0; i < 6; i++) {
color += letters[Math.floor(Math.random() * 16)]
}
return color
}
}
}
public/index.html<html>
<head>
<title>Feature flags 101</title>
</head>
<body>
<div>
<span id="span-welcome-text">My awesome website will have a new button!!!</span>
</div>
<script src="/js/new-feature.js"></script>
</body>
</html>
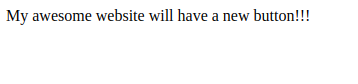
The main idea of this updated code is that the button is only built if the server replies saying that the flag is enabled. Otherwise, the UI is ready to be shown to the user instead of a broken feature.
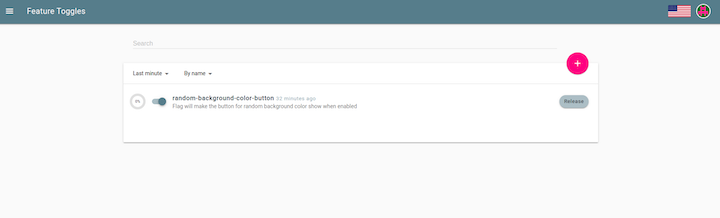
When the client reports that a new feature is broken, the Unleash UI should be opened and the feature disabled. After 10 seconds and a refresh of the page, the client will no longer see the broken button
Check the official documentation for more ways to install Unleash.
If you look at the problem with the feature flag disabled for the users, you will eventually notice that body.style.color = getRandomColor() should actually be body.style.backgroundColor = getRandomColor().
After fixing, testing, and redeploying the functionality, the feature flag can be activated.
An added bonus of having flags is that you can control how changes are propagated to your user base.
Three of the most useful modes in Unleash are:
DefaultStrategy, which is the same as saying “apply this flag to everyone”gradualRolloutSessionId, which shows the feature you want to enable to a certain percentage of users who have an active sessiongradualRolloutRandom, which randomly activates when a user accesses the page. This is especially useful if what is under the feature flag is not visible to the user — for example, a new version of an endpoint in an APIYou can check all the available options in the official docs.
Before we wrap up, let’s break down some of the pros and cons of using feature flags in Node.js.
When used appropriately, feature flags can eliminate much of the stress associated with launching a new release of your application. If a problem arises, all you need to do is click a button to restore things to how they were and give yourself time to fix the issue with minimal downtime.
Using feature flags can also lead to great insights if you use metrics to compare old features versus new features. To use our example, if choosing a custom background color keeps users on the page, you should consider retaining that feature in your app. Just don’t forget to remove it after some time has passed; nobody wants unnecessary bundles of code lying around.
You can access all the code used in this tutorial on my GitHub page.
 Monitor failed and slow network requests in production
Deploying a Node-based web app or website is the easy part. Making sure your Node instance continues to serve resources to your app is where things get tougher. If you’re interested in ensuring requests to the backend or third-party services are successful, try LogRocket.

LogRocket lets you replay user sessions, eliminating guesswork around why bugs happen by showing exactly what users experienced. It captures console logs, errors, network requests, and pixel-perfect DOM recordings — compatible with all frameworks.
LogRocket's Galileo AI watches sessions for you, instantly identifying and explaining user struggles with automated monitoring of your entire product experience.
LogRocket instruments your app to record baseline performance timings such as page load time, time to first byte, slow network requests, and also logs Redux, NgRx, and Vuex actions/state. Start monitoring for free.

Learn how to protect full-stack projects from NPM supply chain attacks with a practical security checklist.

Explore 15 essential MCP servers for web developers to enhance AI workflows with tools, data, and automation.

Learn how contrast-color() automatically picks accessible text colors using native CSS, without JavaScript.

Learn how to build a harness-style AI workflow using Claude Code with specialized Dev, QE, and Ops subagents, gated handoffs, MCP telemetry, and LEARNING.md.
Would you be interested in joining LogRocket's developer community?
Join LogRocket’s Content Advisory Board. You’ll help inform the type of content we create and get access to exclusive meetups, social accreditation, and swag.
Sign up now

