Efficient web application development has become increasingly crucial these days. This need for speed and efficiency is particularly apparent when building full-stack applications, leading developers to seek tools and frameworks that can deliver these experiences.

Enter Blitz, a full-stack framework built on Next.js. This amazing, fast, and seamless framework was designed as a complete toolkit for Next.js to expand its capabilities. In this article, we’ll explore how Blitz works and how to build a full-stack application with it. We will cover:
The project we will build in this tutorial is a mini blog that will showcase the capabilities of Blitz. You can find the full code for this project on GitHub. Let’s get started!
Often referred to as the missing toolkit for Next.js, Blitz picks off where Next.js leaves off by providing out-of-the-box features and libraries such as authentication, middleware, and Prisma OPM. These allow to enable you to use any database and ship efficient applications swiftly.
Some other notable features of Blitz include:
Now that we’ve seen what Blitz is and explored its features, let’s look at how to build a full-stack application using Blitz.
Before installing Blitz, make sure that you have Node.js v16 or newer installed on your machine. Next, you’ll install Blitz globally onto your computer by running either of the commands below:
//using npm:
npm install -g blitz

//using yarn:
yarn global add blitz
You can run the command below in your terminal to verify that Blitz is successfully installed:
blitz -v
You should see the following in your terminal:
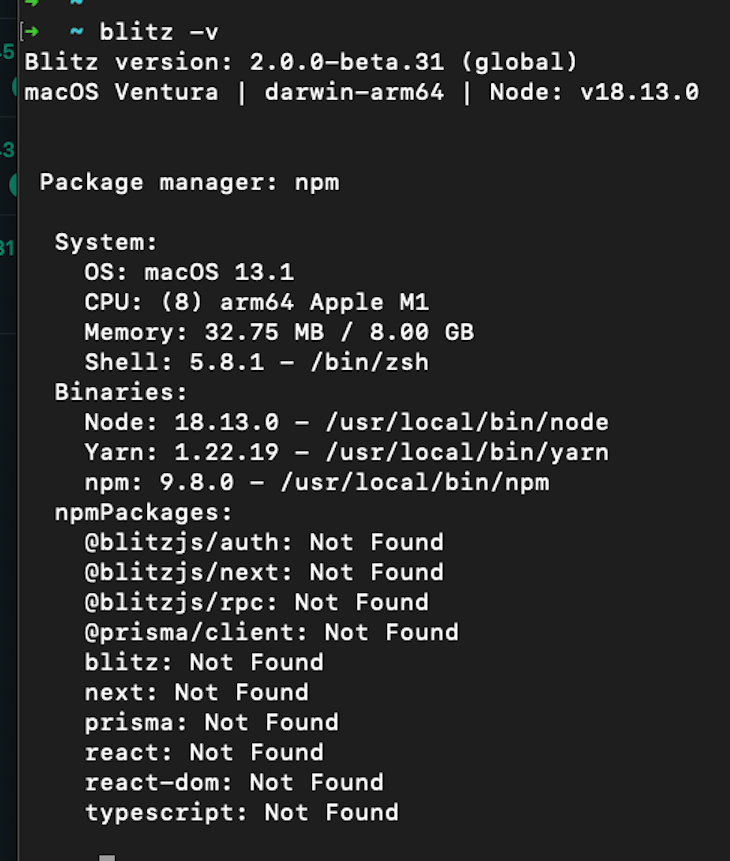
With that successfully done, we are ready to start building with Blitz.
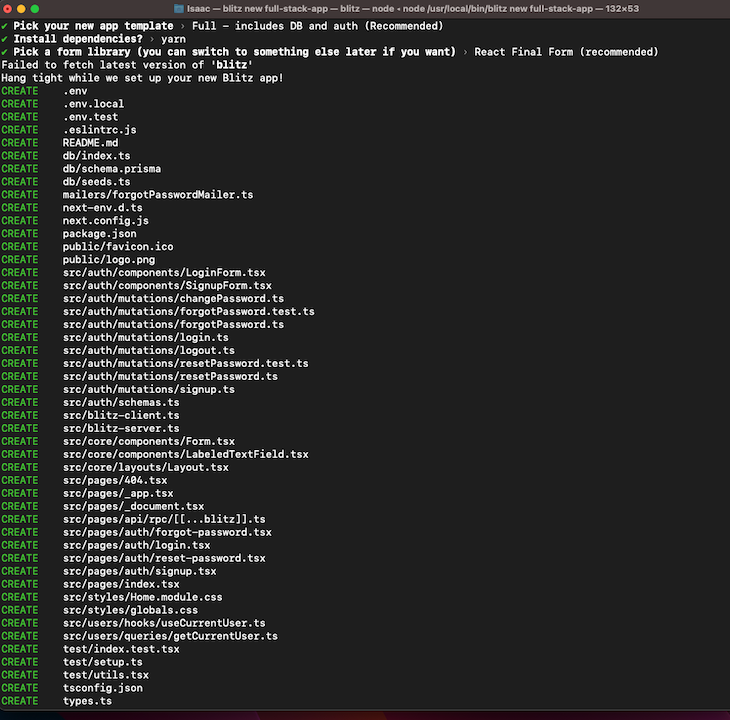
Installing Blitz globally allows us to create a new Blitz application by running the command below:
blitz new <NAME_OF_YOUR APPLICATION>
You will be prompted to choose between TypeScript or JavaScript, your preferred package manager, and the form library that suits you best. Blitz will then create a multitude of files for you depending on your selections as shown in the image below:
Next, type cd in your terminal to change directory into the newly created application. Then, run code . to open it in your code editor:
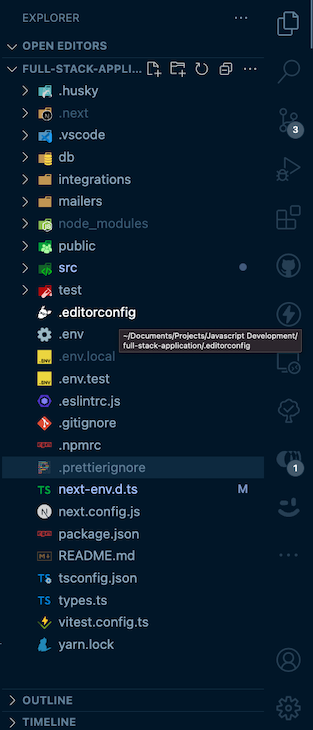
Let’s take a look at the files that Blitz provides to us:
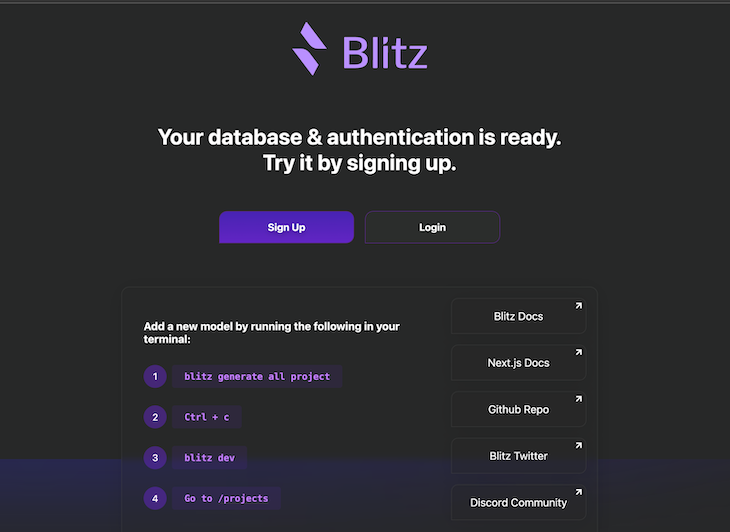
.husky folder houses Husky, a lightweight library used to run tests, lint your code, and commit messages before pushing your code.next folder is used to cache pages and other features to speed up development.vscode folder holds recommended extensions and settings to enhance efficiency while working with Blitzdb folder holds your Prisma schema, migration files, and seeds.ts fileintegrations folder is empty when created, but is meant to hold external integrations like a mailing package or other integration tools to be used in the appmailers folder contains a forgotPasswordMailer.ts file at the time of creation. This file is used to send tokens to any email when the password is forgotten. You can expand on or delete this code depending on your preferencespublic folder holds static assets like logos and faviconssrc folder houses the code for the entire application. This is where we will be working when building our applicationtest files contain test files for running end-to-end tests or unit testsWith that done, you can start up the development server by running npm run dev. When you navigate to the browser, you should see something like the below:
Let’s take a look at how Recipes work in Blitz and how to add them to the application.
As mentioned at the start of this article, Recipes are one-line commands you can use to add styling and configuration libraries into your Blitz project from an MDX recipe or a Git repository.
Let’s install the Tailwind Recipe into our project by running the command below:
blitz install tailwind
This will install Tailwind into our Blitz application and sets it up as shown in the image below:
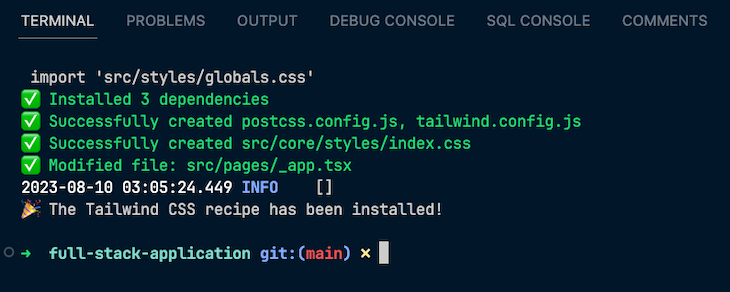
With that, you’re ready to use Tailwind to style your Next.js application.
Let’s add user roles to our mini blog application.
Since Blitz already comes with authentication and session handling out of the box, we don’t need to do much when adding new user roles. In the types.ts file, which is at the root of the application, we see the code below:
import { SimpleRolesIsAuthorized } from "@blitzjs/auth"
import { User } from "db"
export type Role = "ADMIN" | "USER"
declare module "@blitzjs/auth" {
  export interface Session {
    isAuthorized: SimpleRolesIsAuthorized<Role>
    PublicData: {
      userId: User["id"]
      role: Role
    }
  }
}
We see that Blitz exports a USER and an ADMIN role that we can use and expand on. Now, how do we go about creating users with either admin or user privileges?
First off, we know that we want a select group of people to have admin privileges, while everyone else should have user privileges. We can implement this in the src/auth/mutations/signup.ts file like so:
import { SecurePassword } from "@blitzjs/auth/secure-password"
import { resolver } from "@blitzjs/rpc"
import db from "db"
import { Role } from "types"
import { Signup } from "../schemas"
export default resolver.pipe(resolver.zod(Signup), async ({ email, password }, ctx) => {
  const hashedPassword = await SecurePassword.hash(password.trim())
  // Code added by me starts here
  let newRole: Role = "USER"
  if (email === "CHOOSE AN EMAIL OF YOUR CHOICE") {
    newRole = "ADMIN"
  }
  const user = await db.user.create({
    data: {
      email: email.toLowerCase().trim(),
      hashedPassword,
      // Pass the created role here
      role: newRole,
    },
    select: { id: true, name: true, email: true, role: true },
  })
  await ctx.session.$create({ userId: user.id, role: user.role as Role })
  return user
})
In the code above, we create a variable called newRole. Next, we use a conditional statement to check if the signed-up user has a specified email. If so, we change the role of that user to ADMIN.
Let’s see if this works! Head over to the src/pages/index.tsx file and modify it with the code below:
import Link from "next/link"
import Layout from "src/core/layouts/Layout"
import { useCurrentUser } from "src/users/hooks/useCurrentUser"
import logout from "src/auth/mutations/logout"
import { useMutation } from "@blitzjs/rpc"
import { Routes, BlitzPage } from "@blitzjs/next"
import styles from "src/styles/Home.module.css"

const UserInfo = () => {
  const currentUser = useCurrentUser()
  const [logoutMutation] = useMutation(logout)
  if (currentUser) {
    return (
      <div className="flex items-center gap-x-4">
        <h3 className="text-xl ">
          Hi {currentUser.name}, you are signed in as {currentUser.role === "ADMIN" ? "an" : "a"} {currentUser.role}{" "}
        </h3>
        <button
          className="bg-violet-500 text-white px-4 py-2 rounded"
          onClick={async () => {
            await logoutMutation()
          }}
        >
          Logout
        </button>
      </div>
    )
  } else {
    return (
      <>
        <Link href={Routes.SignupPage()} className={styles.button}>
          <strong>Sign Up</strong>
        </Link>
        <Link href={Routes.LoginPage()} className={styles.loginButton}>
          <strong>Login</strong>
        </Link>
      </>
    )
  }
}
const Home: BlitzPage = () => {
  return (
    <Layout title="Home">
      <div className="w-screen h-screen flex justify-center items-center">
        <div className="-mt-20 flex justify-center items-center flex-col px-24 gap-y-12">
          <h1 className="text-6xl text-violet-500 font-bold mb-16">
            Welcome to the Blitz Fullstack Application
          </h1>
          <UserInfo />
          <Link href={Routes.PostsPage()}>
            {" "}
            <button className="border-2 border-green-900 py-4 px-2 text-xl rounded hover:-translate-y-0.5 transition duration-500 hover:cursor-pointer">
              Click here to see all Posts
            </button>
          </Link>
        </div>
      </div>
    </Layout>
  )
}
export default Home
Before we head over to the browser, I’d like to point out that Blitz also provides us with a way to access the information of the currently signed-in user. This can be seen in line three, where we import the useCurrentUser hook, which works similarly to the useSession hook provided by Next.js.
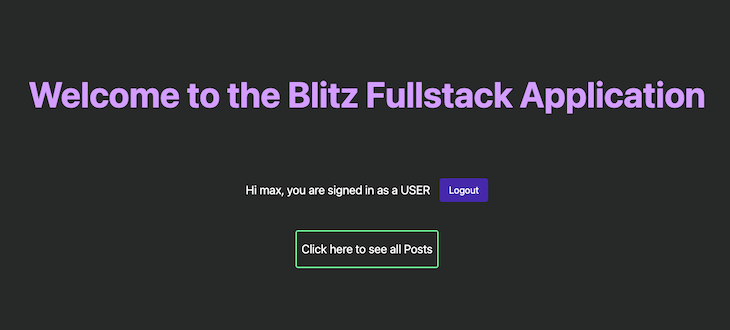
Now, head over to the browser and sign in with the email we specified in the src/auth/mutations/signup.ts file. You should see the following welcome message:

As seen in the image above, the specified account has admin privileges. However, when we sign in with another user, we see that they are signed in with the USER role as shown below:
Earlier, we mentioned that Blitz brings the power of code scaffolding to Next.js applications. Let’s see the code scaffolding capabilities of Blitz in action by running the command below:
blitz generate all posts
This command will scaffold the necessary code for viewing posts, such as dynamic routing to various posts. It also creates a form to create new posts and forms to handle post mutations, such as updating and deleting posts.
The command also creates a model for the post in your schema.prisma file, which you can modify according to your needs. For example, I’ll modify my Post model in the schema.prisma file to include title and content variables as shown in the code block below:
model Post {
  id        Int      @id @default(autoincrement())
  title     String
  content   String
  createdAt DateTime @default(now())
  updatedAt DateTime @updatedAt
}
Next, run the following command:
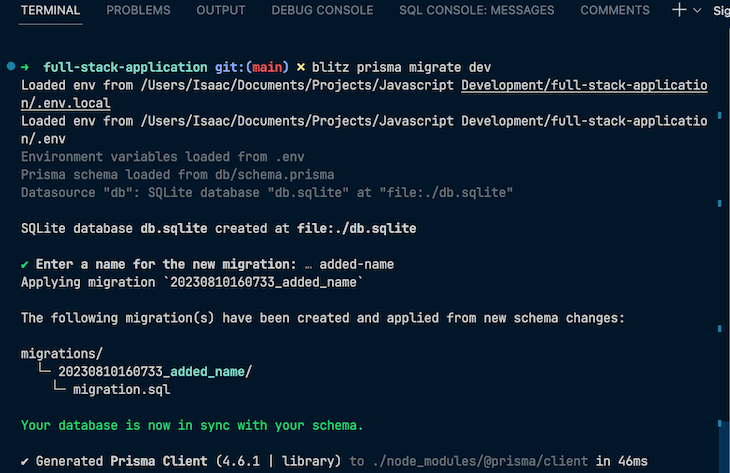
blitz prisma migrate dev
This command syncs the schema changes with our database. Once this process is complete, you should see confirmation in your terminal:
Now, a user with ADMIN privileges should be able to create, update, and delete posts in the application. However, a USER should only be able to read the various posts, not create them. Let’s see how to set that restriction up in the next section.
With the useCurrentUser hook provided by Blitz, restricting certain actions based on user roles is straightforward. We just need to import the hook into the component we want to restrict, check the logged-in user’s role, and then conditionally show or restrict certain actions based on that role.
Ler’s see this in action.
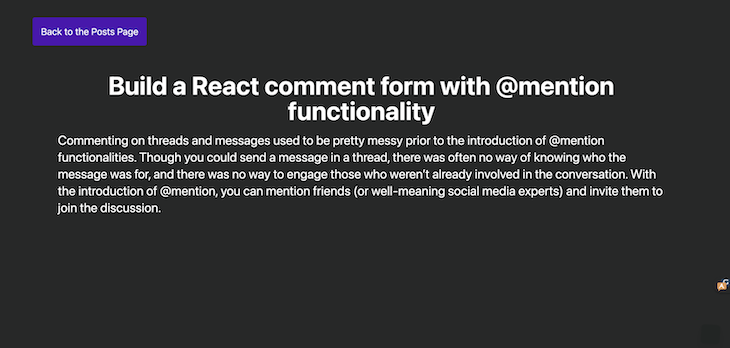
Currently, when you navigate to /post page in the browser, you’ll see a page similar to the below whether you’re logged in as an admin or user:
What you see might not exactly match the page in your browser, but the concept is the same — every user is able to create a post in our application. Likewise, when we create a post and navigate to it, we can see that every user is able to edit and delete posts as well:
Let’s see how to restrict these so that only users with ADMIN roles can have them. Modify the src/pages/posts/index.tsx file created by Blitz with the code below:
// src/pages/posts/index.tsx
import { Suspense } from "react"
import { Routes } from "@blitzjs/next"
import Link from "next/link"
import { usePaginatedQuery } from "@blitzjs/rpc"
import { useRouter } from "next/router"
import Layout from "src/core/layouts/Layout"
import getPosts from "src/posts/queries/getPosts"
// importing the currentUser hook
import { useCurrentUser } from "src/users/hooks/useCurrentUser"
const ITEMS_PER_PAGE = 100
export const PostsList = () => {
const router = useRouter()
const page = Number(router.query.page) || 0
const [{ posts, hasMore }] = usePaginatedQuery(getPosts, {
orderBy: { id: "asc" },
skip: ITEMS_PER_PAGE * page,
take: ITEMS_PER_PAGE,
})
const goToPreviousPage = () => router.push({ query: { page: page - 1 } })
const goToNextPage = () => router.push({ query: { page: page + 1 } })
return (
<div className="w-[80rem] px-12 py-4">
<h2 className="text-3xl text-center font-bold mb-5">All Posts</h2>
<ol className="mb-8 grid grid-cols-3 gap-6 ">
{posts.map((post) => (
<li key={post.id} className="border border-red-500 p-5 ">
<Link href={Routes.ShowPostPage({ postId: post.id })}>
<h3 className="text-xl mb-8">{post.title}</h3>
<p className="truncate">{post.content}</p>
</Link>
</li>
))}
</ol>
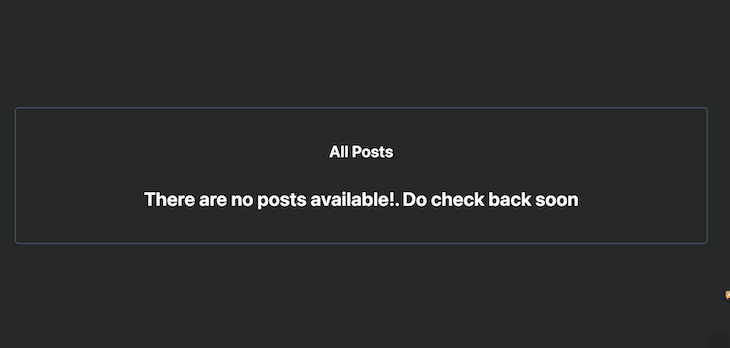
{posts.length < 1 ? (
<h1 className="text-4xl font-bold text-center">
There are no posts available!. Do check back soon
</h1>
) : (
<div className="flex justify-between">
<button
disabled={page === 0}
onClick={goToPreviousPage}
className="bg-violet-500 p-2 text-white text-lg rounded hover:-translate-y-0.5 transition-all duration-700"
>
Previous
</button>
<button
disabled={!hasMore}
onClick={goToNextPage}
className="bg-violet-500 p-2 px-3 text-white text-lg rounded hover:-translate-y-0.5 transition-all duration-700 disabled:bg-slate-500"
>
Next
</button>
</div>
)}
</div>
)
}
const PostsPage = () => {
const currentUser = useCurrentUser()
return (
<Layout title="Posts">
<div className="w-screen h-screen flex justify-center items-center">
<div className="-mt-24 flex justify-center items-center flex-col px-4 py-12 gap-y-12 border-2 border-slate-200 rounded-lg min-w-[450px] ">
<Suspense fallback={<div>Loading...</div>}>
<PostsList />
</Suspense>
{/* Checking the logged in user role and using it to render the create button */}
{currentUser && currentUser.role === "ADMIN" && (
<Link href={Routes.NewPostPage()}>
<button className="border-2 border-green-900 py-4 px-2 text-xl rounded hover:-translate-y-0.5 transition duration-500 hover:cursor-pointer">
Create Post
</button>
</Link>
)}
</div>
</div>
</Layout>
)
}
export default PostsPage
The code above renders the index page of the post route. It comes with dynamic routing functionalities via the post id as well as for pagination, all created for us by Blitz. All we have to do is import the currentUser() hook into the component we want to restrict and then use it.
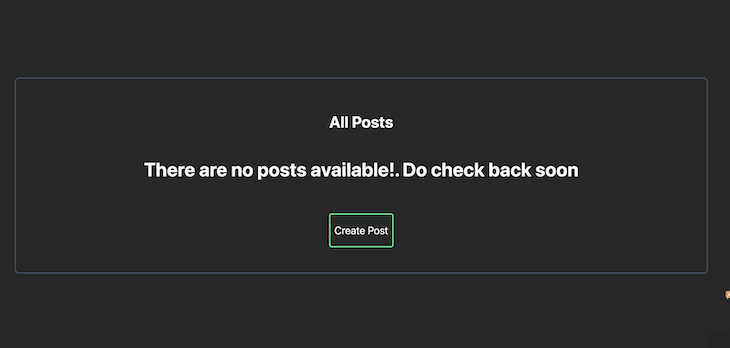
Now when we navigate to the /post page as a user with USER role, we no longer see the Create Post button:
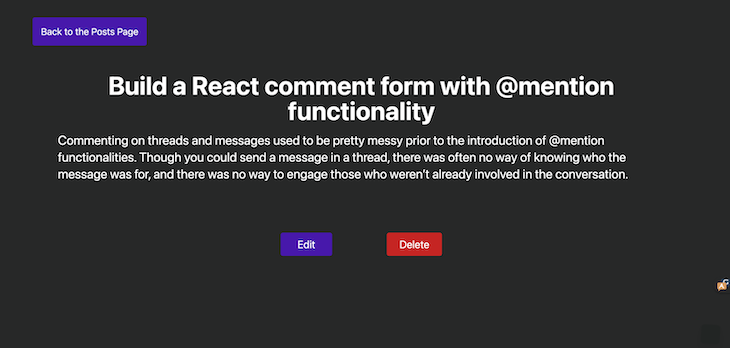
Do the same for the src/pages/posts/[postid].tsx file to restrict non-admin users from editing or deleting individual posts. You can see the modified code below:
// src/pages/posts/[postid].tsx

import { Suspense } from "react"
import { Routes } from "@blitzjs/next"
import Head from "next/head"
import Link from "next/link"
import { useRouter } from "next/router"
import { useQuery, useMutation } from "@blitzjs/rpc"
import { useParam } from "@blitzjs/next"
import Layout from "src/core/layouts/Layout"
import getPost from "src/posts/queries/getPost"
import deletePost from "src/posts/mutations/deletePost"
// importing the currentUser hook
import { useCurrentUser } from "src/users/hooks/useCurrentUser"
export const Post = () => {
  const router = useRouter()
  const postId = useParam("postId", "number")
  const [deletePostMutation] = useMutation(deletePost)
  const [post] = useQuery(getPost, { id: postId })
  const currentUser = useCurrentUser()
  return (
    <>
      <Head>
        <title>Post {post.id}</title>
      </Head>
      <div className="w-full mt-12 px-12 py-4">
        <h1 className="text-5xl font-bold text-center"> {post.title}</h1>
        <p className="text-2xl mt-4">{post.content}</p>
        {/* Checking the logged in user role and using it to render the create button */}
        {currentUser && currentUser.role === "ADMIN" && (
          <div className="mt-24 gap-24 flex justify-center">
            <button className="bg-violet-500 text-white px-8 text-xl py-2 rounded">
              <Link href={Routes.EditPostPage({ postId: post.id })}>Edit</Link>
            </button>
            <button
              type="button"
              className="bg-red-500 text-white px-6 py-2 text-xl rounded"
              onClick={async () => {
                if (window.confirm("This post will be deleted")) {
                  await deletePostMutation({ id: post.id })
                  await router.push(Routes.PostsPage())
                }
              }}
              style={{ marginLeft: "0.5rem" }}
            >
              Delete
            </button>
          </div>
        )}
      </div>
    </>
  )
}
const ShowPostPage = () => {
  return (
    <div className="mt-14 justify-center w-screen h-screen text-left px-24">
      <p className="cursor-pointer bg-violet-500 p-4 text-white text-lg rounded hover:-translate-y-0.5 transition-all duration-700 inline">
        <Link href={Routes.PostsPage()}>Back to the Posts Page</Link>
      </p>
      <Suspense fallback={<div>Loading...</div>}>
        <Post />
      </Suspense>
    </div>
  )
}
ShowPostPage.authenticate = true
ShowPostPage.getLayout = (page) => <Layout>{page}</Layout>
export default ShowPostPage
The code above renders each individual page. Like before, all we have to do is import the currentUser() hook into the component we want to restrict and then use it.
Now, we can log in as an ADMIN to create, edit, and delete posts. Once we have created at least one post, we can log in as a USER and see that we can no longer take those actions, as shown in the image below:
Our mini blog project is done! At this stage, should you choose to deploy your app, you can choose from various hosting providers like Vercel, AWS S3, or Azure Static Web Apps.
Throughout this journey, we successfully built a full-stack app with Blitz and Next.js. By doing so, we were able to see firsthand the power of combining the strengths of these two cutting-edge technologies. You can check out the full code for this project on GitHub.
In many ways, Blitz is really the missing full-stack toolkit for Next.js. With its opinionated file structure, code scaffolding, and zero API convention, Blitz provides developers with a streamlined development environment.
Adding Blitz to your app provides benefits like server-side rendering, route handling, and a comfortable React environment thanks to its interaction with Next.js.
Have fun building with Blitz!
Debugging Next applications can be difficult, especially when users experience issues that are difficult to reproduce. If you’re interested in monitoring and tracking state, automatically surfacing JavaScript errors, and tracking slow network requests and component load time, try LogRocket.
LogRocket captures console logs, errors, network requests, and pixel-perfect DOM recordings from user sessions and lets you replay them as users saw it, eliminating guesswork around why bugs happen — compatible with all frameworks.
LogRocket's Galileo AI watches sessions for you, instantly identifying and explaining user struggles with automated monitoring of your entire product experience.
The LogRocket Redux middleware package adds an extra layer of visibility into your user sessions. LogRocket logs all actions and state from your Redux stores.


Modernize how you debug your Next.js apps — start monitoring for free.

A guide for using JWT authentication to prevent basic security issues while understanding the shortcomings of JWTs.

Discover how to build, render, and automate product demo videos with Remotion, replacing traditional screen recordings with reusable React code.

Chrome’s Modern Web Guidance embeds modern web platform skills into AI coding agents, helping them choose native HTML, CSS, and browser APIs over legacy patterns.

Learn how to use Fallow to analyze AI-generated code, detect dead code, duplicate logic, and complexity issues, and integrate automated code quality checks into your AI-assisted development workflow.
Would you be interested in joining LogRocket's developer community?
Join LogRocket’s Content Advisory Board. You’ll help inform the type of content we create and get access to exclusive meetups, social accreditation, and swag.
Sign up now

