Editor’s note: This post was updated in October 2021 to improve clarity and remove outdated information.

Content management systems (CMSs) have been around for quite some time. Strapi is a headless CMS for Node.js that provides a GUI for creating different content types and bakes user management into the platform. It supports both RESTful APIs and GraphQL.
In addition, Strapi supports both NoSQL and SQL databases. Changing the database is as simple as changing the environment variables.
In this guide, we’ll cover the following steps to creating an API with Strapi:
Strapi requires Node.js installed on your system. It provides a boilerplate generator, create-strapi-app, for setting up the application. It can be installed globally using npm with the following command.
$ npm i -g create-strapi-app
Using create-strapi-app is simple; just pass the name of the project. --quickstart will create a project with a default setting.
create-strapi-app my-blog --quickstart
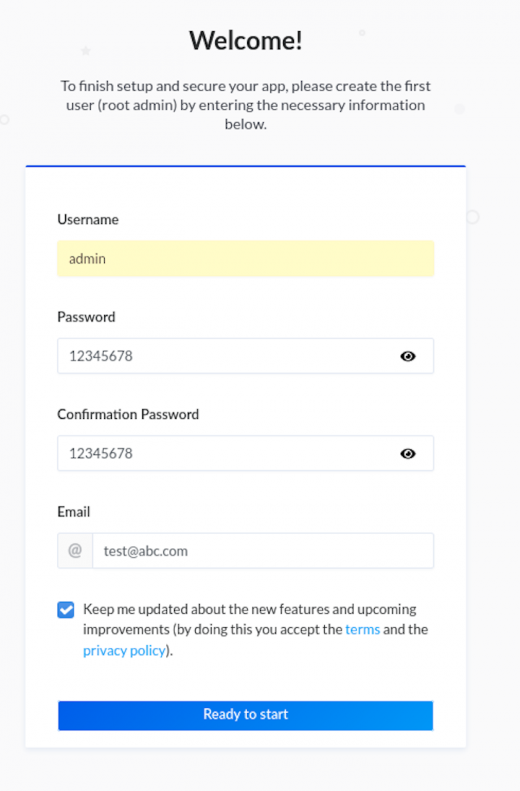
You must create an admin user before using Strapi. The command npm run develop starts the server on http://localhost:1337. The admin user is created using http://localhost:1337/admin/auth/register.
Once the boilerplate is ready, admin UI can be used to build the database schema for the API.
Strapi provides an easy UI for creating your database schema. If we want to change our configuration, we have to edit out our project files. For example, in order to change the env variable we have to edit the config/environments folder.
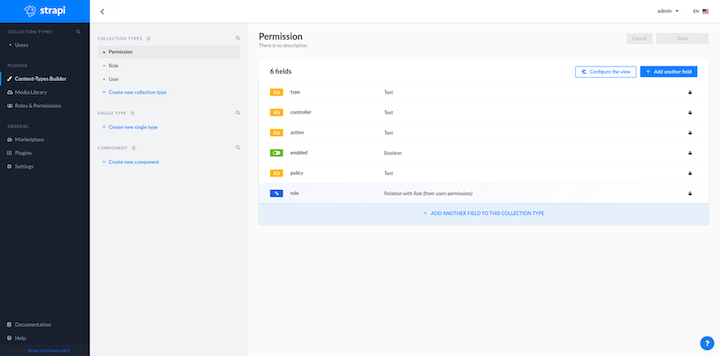
Strapi includes a content builder plugin that provides a great UI for creating the database schema. The plugin is independent of the database, and the same schema can be used in the SQL and NoSQL databases.
Our demo website will have a Blog Collection type and Comment Collection type. The blog will store most of the content and the comment collection will store user information and comments on the blog.
Start by logging into the admin at http://localhost:1337/admin. Open the Content Types Builder page on the sidebar.
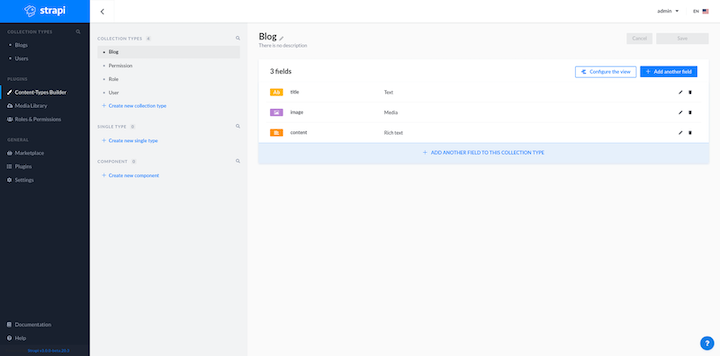
Now create a new collection named “Blog” to store blogs for the site. It will contain the title, image, and content.
Next, create a collection called “Comment”. This will store comments for the blog and include fields for the content, the user, and the blog posts. The blog field stores a link to the corresponding blog post and details about the user who created a given comment.

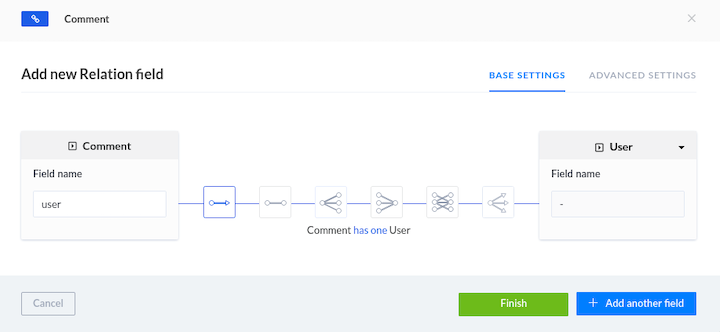
We’ve created links for comments: one to the user collection and other to the blog collection. The blog and user collections don’t have information about the link. Now our backend is all set.
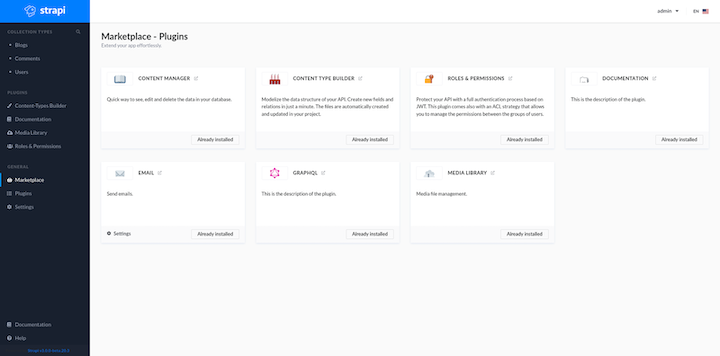
We’ll install the documentation plugin from the Marketplace section for easy access to API details. This plugin will create the swagger specification for the API.
Authentication is an important element of any application. Strapi has JWT-based authentication out of the box.
A default key is used for signing JWT. A signing key can be changed in the configuration file /extensions/users-permissions/config/jwt.json. The API for user signup and login is already baked into the platform.
{
  "jwtSecret": "f1b4e23e-480b-4e58-923e-b759a593c2e0"
}
We’ll use the local provider for authentication. This password and email/username are used to authenticate the user. If we click on “Documentation” from the sidebar, it will provide an option to see the swagger API documentation.
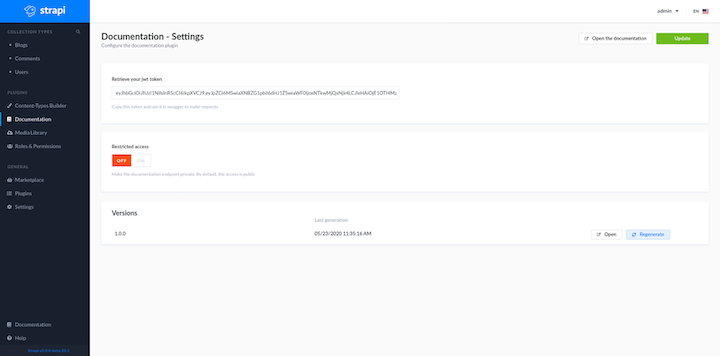
Click Open the Documentation to view the swagger API Documentation. Navigate to UsersPermissions – User to access the API to create a user and login user.
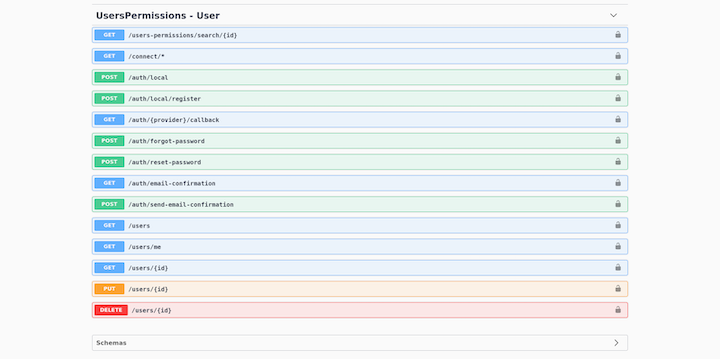
We’ll use /auth/local and /auth/local/register.
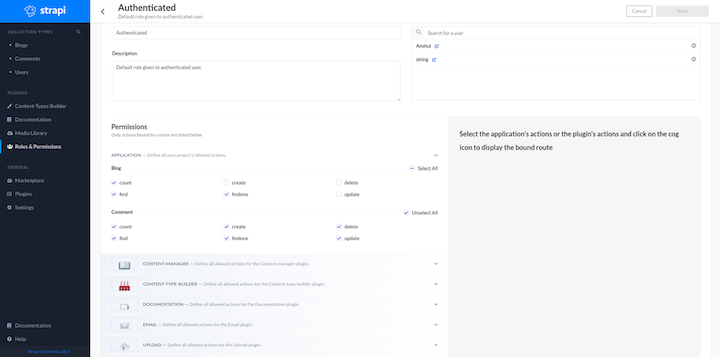
Strapi has two roles that are used to control access to content by default: public and authenticated. The public role is for an unauthenticated user, while the authenticated role is for — you guessed it — an authenticated user.
These roles are automatically assigned to a user based on their authentication status. “Public” users are allowed to read blogs and comments and “Authenticated” users can comment on the blog and edit comments. Roles can be edited in the Roles and Permissions section.
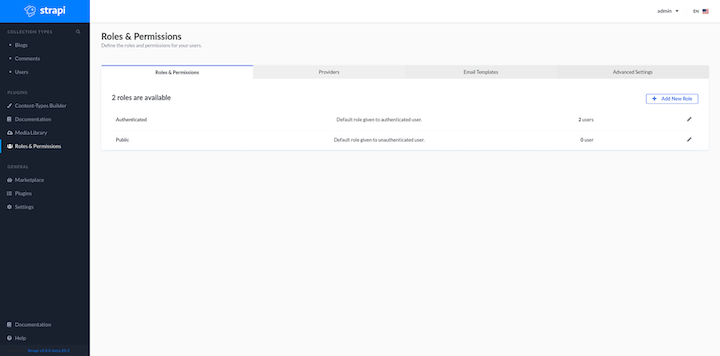
On this screen, you can edit public roles to allow access to blogs and comments.
Now let’s add comments to our demo website. To add comments, a user must be authenticated.
We need to control write access to comment collection by customizing the controller for the Comment collection. The controller for every collection is located in the api folder. To change the controller, edit api/comment/controllers/comment.js.
We need to install strapi-utils to edit our controller.
npm i strapi-utils


// file: api/comment/controllers/comment.js

const { sanitizeEntity } = require('strapi-utils');

module.exports = {
    // this method is called when api to create comment is called
    async create(ctx) {
        // add user from the request and add it to the body of request
        ctx.request.body.user = ctx.state.user.id;
        // call the function to creating comment with data
        let entity = await strapi.services.comment.create(ctx.request.body);
        // return data for api after removing field which are not exported
        return sanitizeEntity(entity, { model: strapi.models.comment });
    },
    async update(ctx) {
        // get the id of comment which is updated
        const { id } = ctx.params;
        // finding the comment for user and id
        const [comment] = await strapi.services.comment.find({
            id: ctx.params.id,
            'user.id': ctx.state.user.id,
        });
        // comment does not exist send error
        if (!comment) {
            return ctx.unauthorized(`You can't update this entry`);
        }
        // update the comment
        let entity = await strapi.services.comment.update({ id }, ctx.request.body);
         // return data for api after removing field which are not exported
        return sanitizeEntity(entity, { model: strapi.models.comment });
    },
    async delete(ctx) {
        // get the id of comment which is updated
        const { id } = ctx.params;
        // finding the comment for user and id
        const [comment] = await strapi.services.comment.find({
            id: ctx.params.id,
            'user.id': ctx.state.user.id,
        });
        // comment does not exist send error
        if (!comment) {
            return ctx.unauthorized(`You can't update this entry`);
        }
        // delete the comment
        let entity = await strapi.services.comment.delete({ id });
         // return data for api after removing field which are not exported
        return sanitizeEntity(entity, { model: strapi.models.comment });
    },
};
Here, we’re simply adding an extra layer over the function provided by Strapi so that we can add user data to the request body. Strapi handles the rest.
Now we need to change the Authenticated user role so users can create, edit, and delete comments.

For the frontend, we’ll use Gatsby. Create a new Gatsby project using gatsby new frontend. The file structure for our project is as follows.
src/
├── components
│   ├── card.js
│   └── dialog.js
├── images
└── pages
    ├── 404.js
    ├── blog.js
    └── index.js
Let’s take a look at the components we’ll use in our frontend.
card.js contains a simple card component that displays information provided to it as propsdialog.js contains a dialog for signing in and signing upblog.js is used to display blogs and commentsindex.js is the homepage, which displays a list of blogs404.js shows an error when the URL is not found
Make a GET request to API /blogs to fetch all the blog posts. This maps over a list of blog posts and displays a card component for each blog post. It also contains code for displaying a login/register dialog.
When the user clicks on a card, it navigates them to the /blog page.
import React, { useState } from 'react';
import { makeStyles } from '@material-ui/core/styles';
import Grid from '@material-ui/core/Grid';
import Typography from '@material-ui/core/Typography';
import Card from "../components/card";
import Dialog from "../components/dialog"
import { Button } from '@material-ui/core';
const useStyles = makeStyles((theme) => ({
  root: {
    flexGrow: 1,
    textAlign: "center"
  },
  paper: {
    height: 500,
    width: 400,
  },
  control: {
    padding: theme.spacing(2),
  },
}));
export default function () {
  const classes = useStyles();
  const [blogs, setBlogs] = useState([])
  const [open, setOpen] = useState(false)
  const [login, setLogin] = useState(false)
  // fetch all blogs
  React.useEffect(() => {
    fetch("http://localhost:1337/blogs").then(res => res.json()).then(val => setBlogs(val))
  }, [])
  return (
    <>
    {/*dialog for authentication */}
      <Dialog open={open} setOpen={setOpen} login={login} />
      <Grid container className={classes.root} spacing={2}>
        <Grid item xs={12}>
          <Grid container justify="center">
            <Grid item xs={10}>
              <Typography variant="h3" component="h2" gutterBottom gutterLeft>Blogs</Typography>
            </Grid>
            {/*check if token is present or not */}
            {
              !localStorage.getItem("token") ? [<Grid item xs={1}>
                <Button onClick={() => { setOpen(true); setLogin(true) }}>Login</Button>
              </Grid>,
              <Grid item xs={1}>
                <Button onClick={() => { setOpen(true); setLogin(false) }}> Register</Button>
              </Grid>] : ""
            }
          </Grid>
        </Grid>
        <Grid item xs={12}>
          <Grid container justify="center" spacing={10}>
            {/*map through list of blog and create list of cards */}
            {blogs.map((value) => (
              <Grid key={value} item>
                <Card value={value} />
              </Grid>
            ))}
          </Grid>
        </Grid>
      </Grid>
    </>
  );
}

import React from 'react';
import { makeStyles } from '@material-ui/core/styles';
import Card from '@material-ui/core/Card';
import CardHeader from '@material-ui/core/CardHeader';
import CardMedia from '@material-ui/core/CardMedia';
import CardContent from '@material-ui/core/CardContent';
import CardActions from '@material-ui/core/CardActions';
import Collapse from '@material-ui/core/Collapse';
import Typography from '@material-ui/core/Typography';
import { red } from '@material-ui/core/colors';
import { Link } from 'gatsby';
const useStyles = makeStyles((theme) => ({
  root: {
    maxWidth: 345,
  },
  media: {
    height: 0,
    paddingTop: '56.25%', // 16:9
  },
  expand: {
    transform: 'rotate(0deg)',
    marginLeft: 'auto',
    transition: theme.transitions.create('transform', {
      duration: theme.transitions.duration.shortest,
    }),
  },
  expandOpen: {
    transform: 'rotate(180deg)',
  },
  avatar: {
    backgroundColor: red[500],
  },
}));
export default function NewCard({ value }) {
  const classes = useStyles();
  return (
    <Link to={`/blog`} state={{ value }}>
      <Card className={classes.root}>
        <CardHeader
          subheader={`Published On ${new Date(value.created_at).toLocaleDateString("in")}`}
        />
        <CardMedia
          className={classes.media}
          image={"http://localhost:1337" + value.image.url}
        />
        <CardContent>
          <Typography variant="body2" color="textSecondary" component="p">
            {value.title}
          </Typography>
        </CardContent>
      </Card></Link>
  );
}
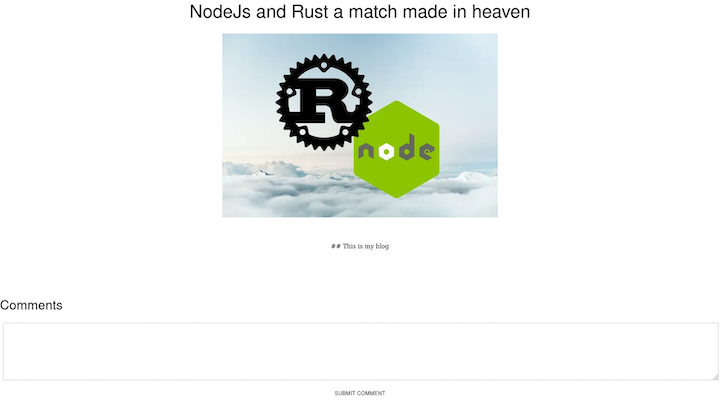
We’ll take the details of the blog from the location prop passed to the page and fetch comments for the blog using a GET request to /comments?blog={{blog-id}}. blog-id is the ID of the current blog.
We’ll then make a POST request to /comments with JWT token in the header. This token is saved in the local storage.
import React, { useState, useEffect } from 'react';
import { makeStyles } from '@material-ui/core/styles';
import Grid from '@material-ui/core/Grid';
import Typography from '@material-ui/core/Typography';
import List from '@material-ui/core/List';
import ListItem from '@material-ui/core/ListItem';
import ListItemIcon from '@material-ui/core/ListItemIcon';
import ListItemText from '@material-ui/core/ListItemText';
import Avatar from '@material-ui/core/Avatar';
import { TextareaAutosize } from '@material-ui/core';
import Button from "@material-ui/core/Button"
const useStyles = makeStyles((theme) => ({
    root: {
        flexGrow: 1,
        textAlign: "center"
    },
    paper: {
        height: 500,
        width: 400,
    },
    control: {
        padding: theme.spacing(2),
    },
    content: {
        margin: "100px"
    }
}));
export default function ({ location }) {
    const classes = useStyles();
    const [comments, setComments] = useState([])
    const [content, setContent] = useState("")
    useEffect(() => {
        fetch(`http://localhost:1337/comments?blog=${location.state.value.id}`).then(res => res.json()).then(val => setComments(val))
    }, [])
    const submitComment = () => {
        fetch("http://localhost:1337/comments", {
            method: "post",
            headers: {
                "content-type": "application/json",
                authorization: `Bearer ${localStorage.getItem("token")}`
            },
            body: JSON.stringify({
                content,
                blog: location.state.value.id
            })
        }).then(() => fetch(`http://localhost:1337/comments?blog=${location.state.value.id}`).then(res => res.json()).then(val => setComments(val)))
    }
    return (
        <>
            <Grid container className={classes.root} spacing={2}>
                <Grid item xs={12}>
                    <Grid container justify="center">
                        <Grid item xs={10}>
                            <Typography variant="h3" component="h2" gutterBottom gutterLeft>{location.state.value.title}</Typography>
                        </Grid>
                    </Grid>
                </Grid>
                <Grid container justify="center">
                    <img src={"http://localhost:1337" + location.state.value.image.url}></img>
                </Grid>
                <Grid item xs={12} className={classes.content}>
                    <Grid container justify="center" spacing={10}>
                        {location.state.value.content}
                    </Grid>
                </Grid>
                <Typography variant="h4" component="h2" gutterBottom gutterLeft>Comments</Typography>
                <Grid item xs={12}><TextareaAutosize minLength={10} rowsMin={10} style={{ width: "100%" }} value={content} onChange={(e) => setContent(e.target.value)} /></Grid>
                <Grid item xs={12}><Button onClick={submitComment}>Submit comment</Button></Grid>
                <Grid item xs={12}>
                    <Grid container justify="left">
                        <List>
                            {
                                comments.map((val) => <ListItem>
                                    <ListItemIcon><Avatar>{val.user.username[0]}</Avatar></ListItemIcon>
                                    <ListItemText primary={`${val.user.username} said  `} />
                                    <ListItemText secondary={": " + val.content} />
                                </ListItem>)
                            }
                        </List>
                    </Grid>
                </Grid>
            </Grid>
        </>
    );
}
Below is what our dialog component will look like when a user is prompted to sign in.
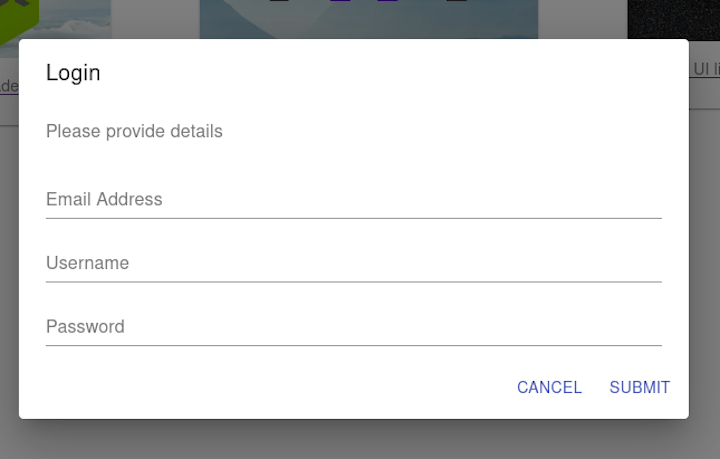
Make a POST request to /auth/local/register for user signup with a username, email, and password. When a register is successful, a JWT token is returned and is saved in local storage so it can be used later.
For login, make a POST request to /auth/local with two fields: identifier and password. identifier can be an email or username.
import React, { useState } from 'react';
import Button from '@material-ui/core/Button';
import TextField from '@material-ui/core/TextField';
import Dialog from '@material-ui/core/Dialog';
import DialogActions from '@material-ui/core/DialogActions';
import DialogContent from '@material-ui/core/DialogContent';
import DialogContentText from '@material-ui/core/DialogContentText';
import DialogTitle from '@material-ui/core/DialogTitle';
export default function FormDialog({ open, setOpen, login }) {
    const [pass, setPass] = useState("")
    const [email, setEmail] = useState("")
    const [user, setUser] = useState("")
    const handleSubmit = () => {
        if (!login)
            fetch("http://localhost:1337/auth/local/register", {
                method: "post",
                headers: {
                    "content-type": "application/json"
                },
                body: JSON.stringify({
                    password: pass,
                    email,
                    username: user
                })
            }).then((res) => res.json())
                .then(res => localStorage.setItem("token", res.jwt)).finally(() => setOpen(false))
        else
            fetch("http://localhost:1337/auth/local", {
                method: "post",
                headers: {
                    "content-type": "application/json"
                },
                body: JSON.stringify({
                    password: pass,
                    identifier: user || email
                })
            }).then((res) => res.json())
                .then(res => localStorage.setItem("token", res.jwt)).finally(() => setOpen(false))
    };
    const handleClose = () => {
        setOpen(false);
    };
    return (
        <div>
            <Dialog open={open} onClose={handleClose} aria-labelledby="form-dialog-title">
                <DialogTitle id="form-dialog-title">{login ? "Login" : "Register"}</DialogTitle>
                <DialogContent>
                    <DialogContentText>
                        Please provide details
          </DialogContentText>
                    <TextField
                        autoFocus
                        margin="dense"
                        id="email"
                        label="Email Address"
                        type="email"
                        fullWidth
                        value={email}
                        onChange={(e) => { setEmail(e.target.value) }}
                    />
                    <TextField
                        autoFocus
                        margin="dense"
                        id="username"
                        label="Username"
                        type="email"
                        fullWidth
                        value={user}
                        onChange={(e) => { setUser(e.target.value) }}
                    />
                    <TextField
                        autoFocus
                        margin="dense"
                        id="password"
                        label="Password"
                        type="password"
                        fullWidth
                        value={pass}
                        onChange={(e) => { setPass(e.target.value) }}
                    />
                </DialogContent>
                <DialogActions>
                    <Button onClick={handleClose} color="primary">
                        Cancel
          </Button>
                    <Button onClick={handleSubmit} color="primary">
                        Submit
          </Button>
                </DialogActions>
            </Dialog>
        </div>
    );
}
Strapi supports both NoSQL and SQL databases. Changing the database is as simple as changing the env variable in the configuration folder.
By default, Strapi uses SQLite, which is good for local testing, but in production you should use a production-ready database such as PostgreSQL or MySQL. We’ll use PostgreSQL here.
To change the database, edit the config/environments/production/database.json file.
{
  "defaultConnection": "default",
  "connections": {
    "default": {
      "connector": "bookshelf",
      "settings": {
        "client": "postgres",
        "host": "${process.env.DATABASE_HOST }",
        "port": "${process.env.DATABASE_PORT }",
        "database": "${process.env.DATABASE_NAME }",
        "username": "${process.env.DATABASE_USERNAME }",
        "password": "${process.env.DATABASE_PASSWORD }"
      },
      "options": {}
    }
  }
}
Now it will pick database credentials from the environment variable in production.
Now you should have a basic understanding of Strapi and a solid foundation for further exploration. We demonstrated how to create database schema with relations, implement authentication, customize controllers, and filter data.
Strapi is great for creating backend APIs. It’s highly customizable and supports a wide range of integrations. Strapi can be used with Nuxt, React, Angular — really any frontend framework.
 Monitor failed and slow network requests in production
 Deploying a Node-based web app or website is the easy part. Making sure your Node instance continues to serve resources to your app is where things get tougher. If you’re interested in ensuring requests to the backend or third party services are successful, try LogRocket.  https://logrocket.com/signup/
LogRocket is like a DVR for web and mobile apps, recording literally everything that happens while a user interacts with your app. Instead of guessing why problems happen, you can aggregate and report on problematic network requests to quickly understand the root cause.
LogRocket instruments your app to record baseline performance timings such as page load time, time to first byte, slow network requests, and also logs Redux, NgRx, and Vuex actions/state. Start monitoring for free.

Learn how to detect unused and ghost dependencies in JavaScript projects using Knip, a project-level linter that keeps your dependency graph accurate.

Learn how Storybook MCP enables AI agents to understand your component library, generate accurate UI, and validate code using documentation, stories, and automated tests.

Debug RSC hydration mismatches in production with Next.js instrumentation, Suspense isolation, HTML diffing, and CI smoke tests.

Explore why npm dependencies are a major supply chain security risk and how to protect JavaScript apps from compromised packages and transitive threats.
Hey there, want to help make our blog better?
Join LogRocket’s Content Advisory Board. You’ll help inform the type of content we create and get access to exclusive meetups, social accreditation, and swag.
Sign up now

